
You’ve never held a crochet hook before, but you want to make something warm, cozy, and handmade. Good news: you can. Crocheting a blanket as a total beginner isn’t just possible, it’s easier than you think. With the right tools, simple stitches, and clear steps, you’ll go from zero to finished blanket in no time. This guide cuts through the confusion and gives you exactly what you need: a no-jargon, step-by-step plan to crochet your first blanket even if you’ve never made a stitch.
We’ll walk you through choosing yarn, mastering basic stitches, building rows, changing colors, and finishing strong. You’ll learn from real beginner mistakes and expert tips so you don’t waste time ripping out rows. Whether you’re making a baby blanket in an afternoon or a throw for your couch, this is your only guide to start and finish confidently.
Choosing the Right Yarn and Hook for Beginners
Pick Beginner-Friendly Yarn
Start with worstest weight (#4) or bulky (#5 to #6) yarn. These are thick, easy to handle, and work up fast, perfect when you’re learning.
Best yarn options for beginners include:
- Softest choice: Bernat Baby Blanket, Lion Brand Woolies Thick and Quick
- Most durable: Lion Brand Vannas Choice, Hobbii Amigo XL
- Easiest care: Machine-washable acrylic (no special care needed)
Avoid slippery silk, fuzzy mohair, or very thin lace yarns because they make it hard to see your stitches.
Pro Tip: Buy all your yarn at once from the same dye lot (the number on the label) to avoid color differences between skeins.
Match Your Hook to Your Yarn
Use a hook size that matches your yarn. Check the yarn label because it tells you the recommended size.
| Yarn Weight | Hook Size (US) | Metric Size |
|---|---|---|
| Worsted (#4) | I to J | 5.5 to 6.5 mm |
| Bulky (#5) | L | 8 mm |
| Super Bulky (#6) | P to Q | 15 mm |
For your first blanket, try an 8 mm (L) hook with bulky yarn because it’s forgiving and works up quickly.
Try ergonomic hooks if your hand cramps. They reduce strain during long sessions.
Mastering the 4 Essential Crochet Stitches
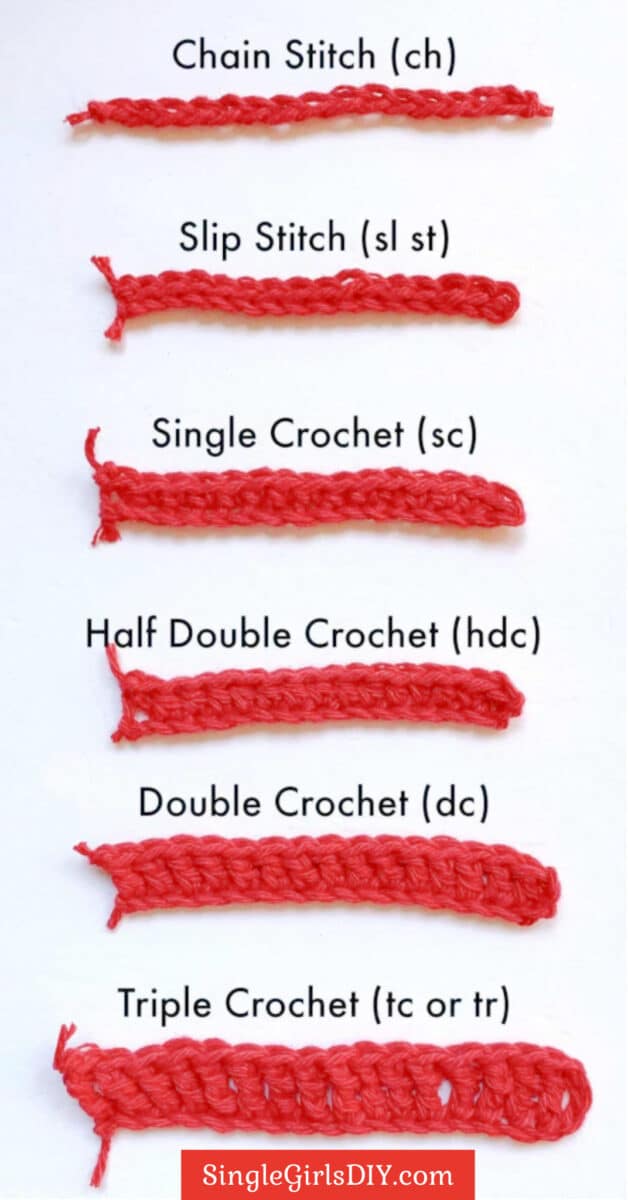
You only need four basic stitches to make almost any beginner blanket.
Creating a Slip Knot
- Loop yarn over two fingers
- Pull the back strand over the front
- Slide the loop onto your hook
- Gently tighten by pulling the ends
The knot should slide easily on the hook. Do not pull it too tight.
Chain Stitch (ch): Building the Foundation
Yarn over (wrap yarn over hook), pull through loop. Repeat for your foundation chain.
Keep chains loose. Tight chains make the first row hard to work into.
For a baby blanket: chain 55 (makes a 30 to 35 inch wide blanket).
For a throw: chain 75 to 100.
Single Crochet (sc): Dense and Warm
- Insert hook into second chain from hook
- Yarn over, pull up a loop (2 loops on hook)
- Yarn over, pull through both loops
Use this stitch for thick, cozy blankets like the Chunky Blanket pattern.
Half Double Crochet (hdc): Fast and Smooth
- Yarn over, insert hook into next stitch, yarn over and pull up a loop (3 loops on hook)
- Yarn over, pull through all 3 loops
This stitch grows quickly and has a soft drape, making it ideal for most beginner blankets.
Double Crochet (dc): Tall and Open
- Yarn over, insert hook into stitch, yarn over and pull up a loop (3 loops)
- Yarn over, pull through first 2 loops (2 loops remain)
- Yarn over, pull through last 2
Great for lacy designs or alternating row patterns.
Note: Chain 1 for sc, chain 2 for hdc, chain 3 for dc at the start of each row.
Starting Your First Blanket: Row by Row
Chain the Foundation
Decide on your width: 55 chains for a baby blanket, 75 for a throw. Use a smooth, loose motion and do not tug the yarn. Count every chain to avoid mistakes.
Check: The back of the chain has little bumps. You will work into these bumps on the first row.
Working the First Row
For half double crochet:
- Yarn over
- Insert hook into third chain from hook
- Yarn over, pull up a loop
- Yarn over, pull through all 3 loops
- Repeat across
- Chain 2, turn
You now have your first row. Keep edges even by working into the last stitch.
For single crochet:
- Insert hook into second chain from hook
- Complete sc in each chain across
- Chain 1, turn
Building Rows Without Mistakes
Turn your work after each row. Chain the correct height (1 for sc, 2 for hdc, 3 for dc). Do not skip the turning chain unless the pattern says so, because it counts as the first stitch. Always work into the first stitch after the chain and complete the last stitch.
Count stitches every 3 to 5 rows. A consistent count prevents flaring or narrowing.
Fixing Common Crochet Mistakes Fast
Edges Curling? Loosen Up
Tight tension or a too-small hook causes curling.
Fix:
- Use a larger hook for the foundation chain
- Relax your grip and let the yarn flow
- Block the blanket later with light steam (for acrylic-safe fibers)
Blanket Flaring Out? You Are Adding Stitches
Accidental increases happen when you work two stitches into one or skip the turning chain.
Fix:
- Count stitches at the end of each row
- Use stitch markers every 10 stitches to track your count
Blanket Getting Narrower? You Are Missing Stitches
Forgetting the first or last stitch shrinks your work.
Fix:
- Always work into the last stitch even if it feels tight
- Check that you are not skipping the first stitch after the turning chain
Pro Tip: Place a stitch marker in the first and last stitch of each row until you are confident.
Changing Colors Like a Pro

Creating Clean Stripes
Most beginner blankets use color blocks. To switch colors:
- Work your last stitch until the final yarn over
- Pull the new color through the last loop
- Drop the old yarn, pick up the new
- Chain the turning height with the new color
- Continue
This creates a seamless join with no knots or lumps.
Managing Yarn Tails
Do not cut too short. Leave 6-inch tails for weaving in later.
Weave in ends like this:
- Thread tail into a yarn needle
- Weave forward 1.5 inches, backward, then diagonally across different stitches
- Trim close but not too short
Optional: Crochet over the tail for a few stitches to lock it in.
Beginner Blanket Patterns to Try
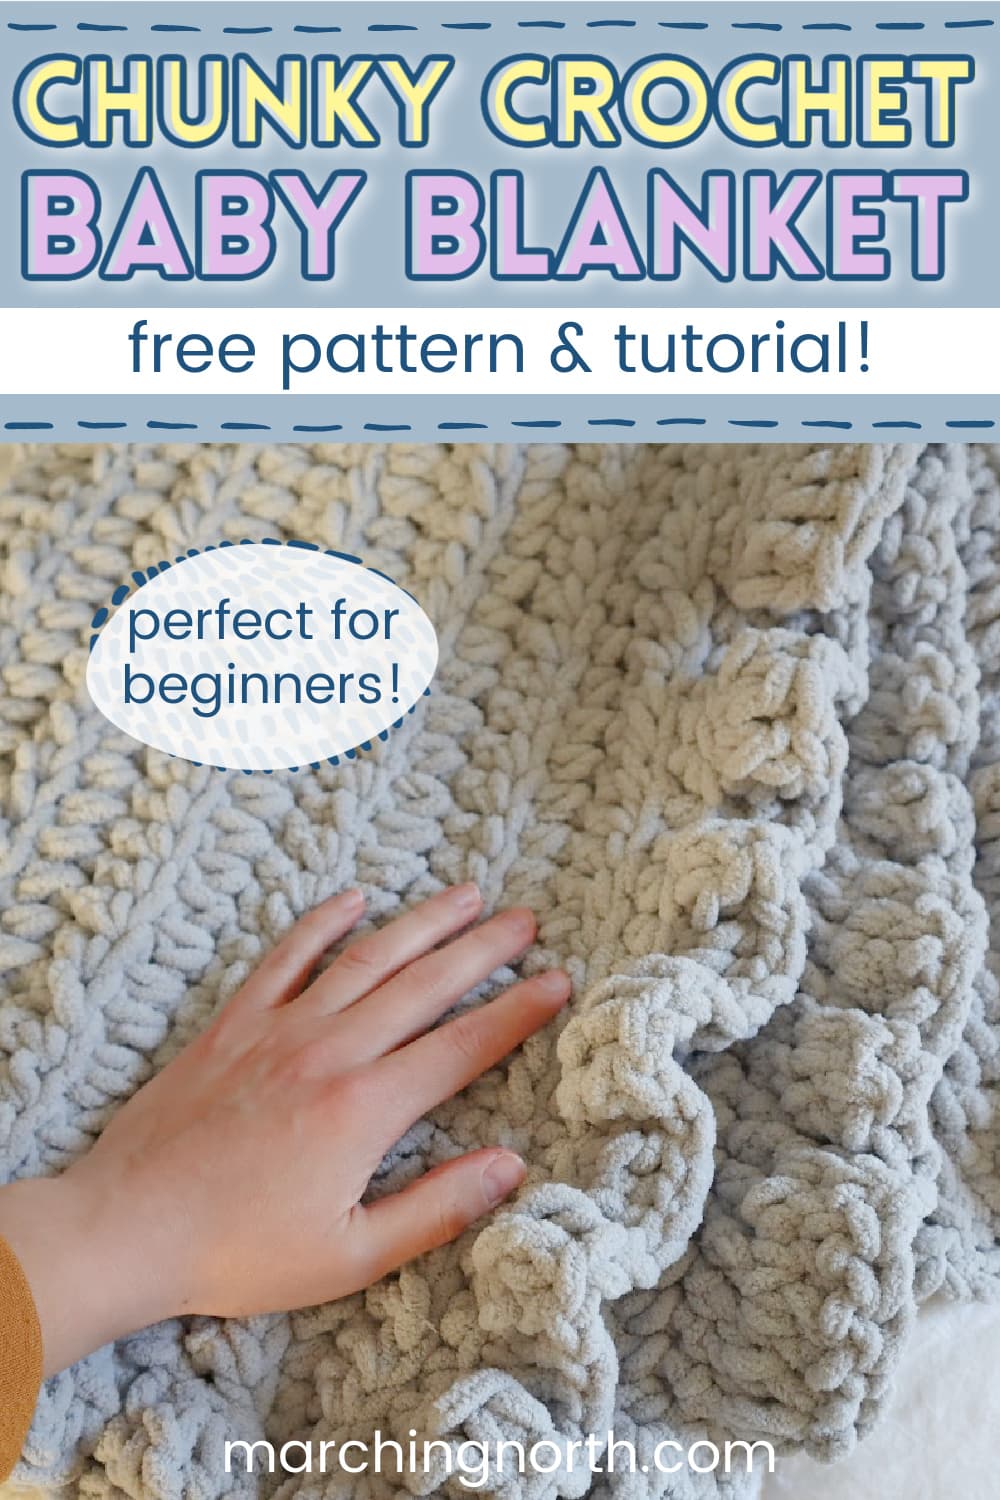
Fast 3-Hour Baby Blanket
- Yarn: Bernat Baby Blanket (bulky #6), 2 colors
- Hook: 8 mm
- Stitches: hdc only
- Foundation: Chain 55
- Rows: 12 rows per color, alternate
- Time: approximately 3 hours
- Finish: Weave in ends
This blanket uses one stitch and grows fast, making it perfect for your first try.
Quick Striped Throw (Super Bulky)
- Yarn: Lion Brand Woolies Thick and Quick
- Hook: 15 mm
- Stitch: sc only
- Foundation: Chain 75
- Rows: 13 rows per color, 9 stripes total
- Skill level: Absolute beginner
Thick yarn plus big hook equals a blanket in a weekend.
Alternating DC and SC Pattern
- Yarn: Worsted weight (e.g., Vannas Choice)
- Hook: 6.0 mm (J)
- Rows:
- Row 1: dc across
- Row 2: sc across
- Repeat
- Result: Textured, slightly bumpy fabric with visual interest
Great for practicing two stitches without added complexity.
Measuring, Counting, and Staying on Track
Counting Rows the Easy Way
Use a digital row counter (wear it on your finger, click after each row). Count stripe pairs: 2 rows equals 1 stripe. 6 stripes equals 12 rows. Check your length using a measuring tape every few rows.
For a 47 inch baby blanket, stop when you hit the length.
Tracking Stitch Count
Use stitch markers every 10 or 20 stitches. Count at the end of each row for the first 10 rows. If your count changes, check whether the turning chain was used correctly and whether you worked the first and last stitch.
Fix errors early. It is easier to undo 1 row than 10.
Finishing Strong: Secure and Neaten Your Blanket
Fasten Off Properly
- After the last stitch, yarn over and pull through the loop
- Cut yarn, leaving a 6-inch tail
- Pull tail through loop to lock
Weave in All Ends
Use a yarn needle to thread tails through the back of stitches. Weave in a zig-zag or diagonal path to prevent unraveling. Trim excess close to fabric.
Do not skip this step. Loose ends look messy and can come undone.
Adding a Border (Optional)
A border gives a polished look. Try single crochet around all edges, double crochet with a picot corner, or shell stitch for a decorative edge. Or skip it because many modern blankets look great with a clean, unfinished edge.
Pro Tips to Save Time and Frustration
Practice on a Swatch First
Make a 4 by 4 inch test piece to check your tension, test the drape, and confirm stitch count. If your swatch curls or feels stiff, go up a hook size.
Watch a Video Tutorial
Seeing stitches in motion helps. Search for how to hdc for beginners or changing colors seamlessly in crochet on YouTube. Visual learning speeds up mastery.
Take Breaks and Stay Comfortable
Rest your hands every 20 to 30 minutes. Sit with good posture. Use a lap desk or pillow to support your arms. Crocheting should feel relaxing, not painful.
Do Not Fear Mistakes
Everyone drops stitches or miscounts. If you spot an error, fix it gently by pulling yarn to undo one stitch, or frog it (rip out) if needed.
Remember: Even imperfect blankets are warm and loved.
Troubleshooting Common Problems
| Problem | Quick Fix |
|---|---|
| Curling edges | Use larger hook for foundation chain |
| Wavy sides | Count stitches and avoid extra ones |
| Narrowing | Work into first and last stitch every row |
| Uneven stripes | Use row counter and mark color changes |
| Tangled yarn | Use a yarn bowl or project bag |
| Bulky joints | Use seamless color change method |
Final Checklist: Did You Do It Right?
- Yarn and hook matched?
- Foundation chain loose and correct count?
- Stitch count consistent every row?
- Colors changed smoothly?
- All ends woven in?
- Blanket the right size?
If yes, you have made your first crochet blanket. Celebrate.
Your Next Steps After Finishing Your First Blanket
- Make another blanket. Try a different color or stitch pattern
- Gift it. New parents, friends, or shelters love handmade blankets
- Level up. Try a granny square or chevron pattern next
Crocheting is a skill that grows with you. Every stitch builds confidence. Your first blanket might not be perfect, and that is okay. It is proof you started, and that is what matters most.
Happy hooking.
Frequently Asked Questions About Crocheting a Blanket for Beginners
How long does it take a beginner to crochet a blanket?
It depends on the size and your experience. A small baby blanket using bulky yarn can take about 3 hours. A larger throw using worsted weight yarn may take several days to a week, working a few hours each day.
What is the easiest stitch for a beginner blanket?
The half double crochet (hdc) is the easiest for beginners because it is faster than single crochet but more forgiving than double crochet. It creates a nice drape and works up quickly.
How many chains do I need for a baby blanket?
For a standard baby blanket (about 30 to 35 inches wide), start with 55 chains using worsted weight yarn and an I or J hook. Adjust the number up or down depending on your desired width.
Can I crochet a blanket with just one color?
Yes, you can make a beautiful blanket with a single color. Many beginner patterns use one color throughout. You can also add interest by changing to a different color for the border.
What yarn is best for a first-time crocheter?
Bulky or super bulky yarn is best for beginners because the stitches are easy to see and the blanket works up fast. Machine-washable acrylic is also ideal because it is forgiving and easy to care for.
How do I stop my blanket from curling at the edges?
Use a larger hook for your foundation chain, keep your tension loose, and consider blocking the finished blanket with light steam. Making sure you are not accidentally adding stitches also prevents curling.

