
Adding a crochet edge to a blanket transforms a simple project into a polished, professional-looking piece. Whether you’re finishing a handmade afghan, reinforcing a fleece baby blanket, or enhancing a flannel quilt, a well-crafted border improves durability, prevents fraying, and elevates the design. This guide covers every step from preparing different fabric types to selecting stitches, managing corners, and troubleshooting common issues. You’ll learn how to crochet an edge on any blanket with confidence, regardless of skill level.
Choosing the Right Blanket for Crochet Edging
Not all blankets are the same when it comes to adding a crochet border. The method depends on whether your blanket is crocheted, knitted, or made from woven fabric.
Crocheted or Knitted Blankets
These are the easiest to border because the existing stitch structure provides natural anchor points. Common types include granny square afghans, solid single or double crochet throws, and lacy shawls with openwork patterns.
Pro Tip: Block the blanket first to ensure even edges and prevent puckering during edging.
Fleece, Flannel, and Woven Fabrics
These materials don’t have loops for a hook, so you must prepare the edge before crocheting. For fleece, use a perforating blade to punch evenly spaced holes. For flannel or cotton quilts, hemstitch or hand-sew loops along the edge using #5 Perle Cotton. Avoid direct crocheting into these fabrics since it can damage both the fabric and your hook.
Preparing Your Blanket for Crochet Edging

Skipping preparation leads to uneven borders and puckering. Follow the steps that match your blanket type.
For Crocheted Blankets: Block and Count
Weave in all ends from the main body. Block the blanket using wet blocking or steam to square the edges. Count stitches on each side to ensure even distribution. Mark corners with stitch markers.
Why It Matters: Uneven sides cause ripples. Adjust spacing gradually across rows to match counts.
For Fleece: Punch Holes Evenly
Cut fleece to your desired size. Round corners with scissors to reduce bulk. Use a rotary cutter with perforating blade to create holes every half inch, positioned about half an inch from the edge. Work in good lighting to maintain consistency.
Tool Tip: A cutting mat and ruler keep lines straight and spacing accurate.
For Flannel: Create Crochet Loops
Layer two flannel pieces with right sides facing out. Baste together with safety pins. Sew a central stabilizing square if desired. Use a hemstitch needle or sewing machine with a decorative stitch that pierces the same spot repeatedly. Trim seam allowance to one-eighth inch, but never cut the stitching thread. Crochet into the reinforced holes or loops.
Starting the Base Round for Your Crochet Edge
A solid foundation round keeps the border flat and stable throughout the blanket’s lifespan.
Beginner-Friendly Single Crochet Base
Join yarn with a slip stitch in any corner. Chain 1, which does not count as a stitch. Work 1 single crochet in each stitch along the side. Work 3 single crochets in the corner stitch to turn smoothly. Continue around all sides. Work 2 single crochets in the first single crochet, then slip stitch to join.
Visual Cue: The 3 single crochets in the corner fill the diagonal gap and maintain a square shape.
Double Round Base for Durability
For heavier blankets or looser weaves, work round 1 as single crochet in each stitch with 3 single crochets in corners. Repeat round 1, joining with slip stitch. Keep the right side facing throughout.
Pro Tip: Use a smaller hook for the base round to create a tighter, more supportive edge.
Creating Clean Corners on Crochet Blanket Edges
Corners define the blanket’s shape. Use the right technique to avoid gaps or bulges in your finished piece.
Standard 3-SC Corner Method
Work 3 single crochets into the corner stitch. The first single crochet serves as the last stitch of the current side. The second single crochet fills the turn. The third single crochet becomes the first stitch of the next side. This creates a slightly rounded but flat corner.
Exception: On the final corner of a round, only 2 single crochets may be needed to avoid overcounting.
Fleece or Fabric Corners
After rounding the corner, work 2 single crochets with chain 1 spaces into the corner hole. This results in 2 single crochets and 2 chain spaces, which adds flexibility for curved edges.
Granny Square Corners
Work single crochet, chain 2, single crochet, chain 1 into the corner. This creates a space that matches the original pattern. In multi-round borders, work shells or clusters into the chain-2 space.
Adding Width to Your Crochet Blanket Border
Want a bold, structured edge? Add multiple rounds with gradual increases to expand the border outward.
Gradual Increase Method
Each round adds one more single crochet before the final slip stitch. Round 1 uses 3 single crochets in corners with 0 extra stitches. Round 2 maintains the same pattern. Round 3 adds 1 extra stitch before joining. Round 4 adds 2 extra stitches. Round 5 adds 3 extra stitches. This maintains sharp 90-degree corners while expanding outward. Continue for 3 to 5 rounds depending on desired width.
Tip: Insert the hook into the back loop of the last slip stitch for a flatter seam.
Popular Crochet Border Patterns for Blankets
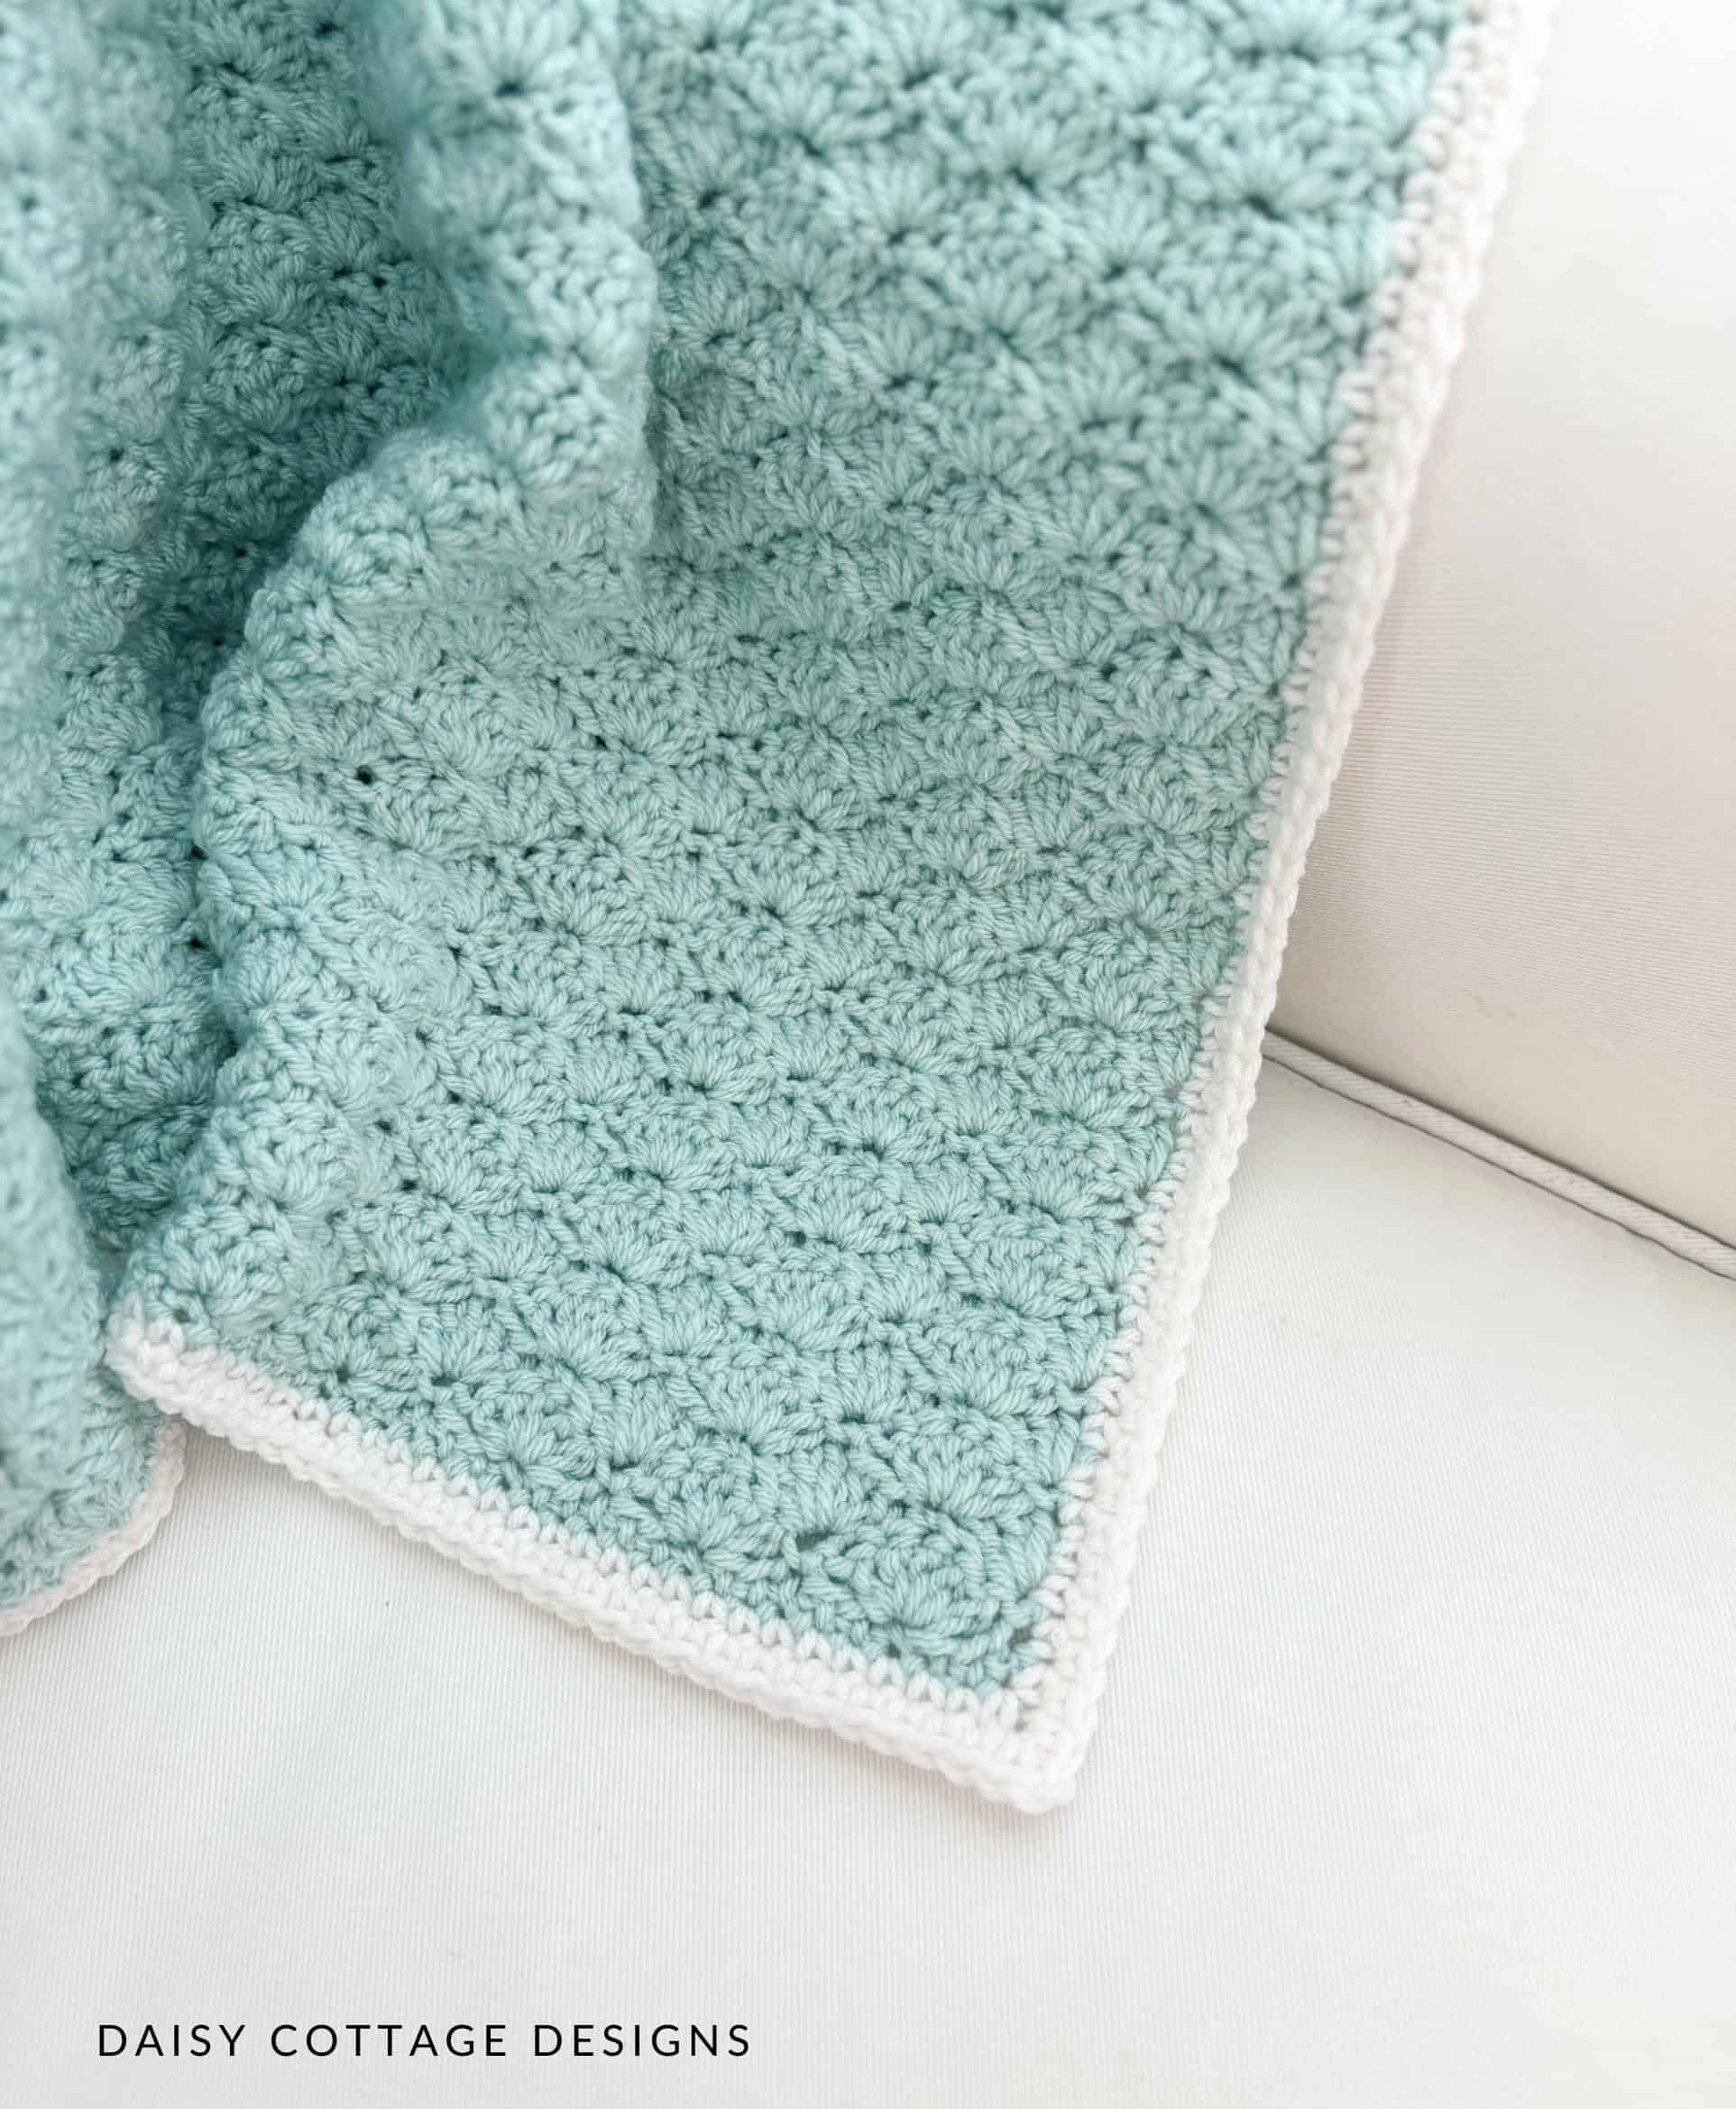
Choose a stitch that matches your blanket’s style and intended use.
Single Crochet Border
This technique works best for modern, minimalist, or utilitarian blankets. Join with slip stitch. Chain 1, then work single crochet in each stitch. Work 3 single crochets in each corner. Work 2 single crochets in the first stitch, then slip stitch to join.
Two-Color Linen Stitch Variation: Work round 1 in single crochet using Color A. In round 2, join Color B and work chain 1, skip next single crochet, single crochet in next single crochet, repeating around. In round 3, join Color A and work single crochet in chain-1 space, chain 1, skip single crochet, repeating. This creates a woven texture that hides tension flaws.
Double Crochet Border
This technique is ideal for lacy or openwork blankets. Join with slip stitch. Chain 3, which counts as the first double crochet. Work 1 double crochet in each stitch. Work 3 double crochets in each corner. Repeat for 2 to 3 rounds.
Design Tip: Use a color already in the blanket for a seamless look.
Shell Stitch Border
This pattern works best for heirloom baby blankets or vintage designs. The pattern requires multiples of 6 stitches plus 1 per side.
Foundation Row: Chain 3, then work single crochet in next space with chain 1, repeating across. At corners, work single crochet, chain 2, single crochet, chain 1.
Shell Row: Chain 2, then skip 1 chain-space and 1 single crochet, work 6 double crochets into next chain-space, skip 1 single crochet and 1 chain-space, single crochet in next single crochet, repeating. At corners, work 2 single crochets in the chain-2 space.
Crab Stitch Border
Crab stitch creates a dense, roped edge that rolls inward. Insert the hook into the stitch to the right of the current position. Yarn over and pull through, which creates the twisted look. Work 3 crab stitches in each corner. This technique works best for towels, vintage throws, and kitchen items.
Choosing the Right Yarn and Hook for Blanket Edging
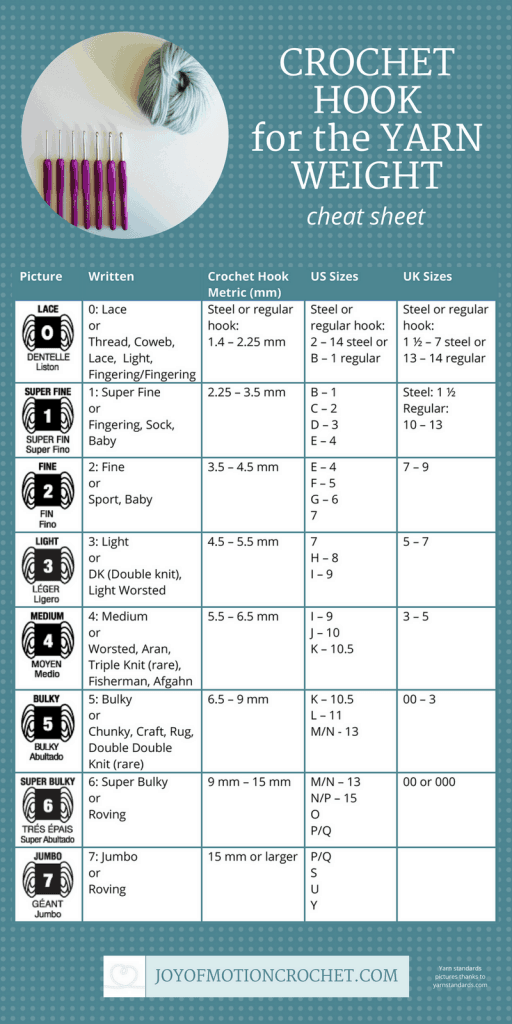
The right tools make a difference in tension, durability, and final appearance.
Yarn Choices
Acrylic worsted weight works well for baby blankets and washable items. Cotton provides crisp definition for towels and summer throws. Perle Cotton #5 is ideal for flannel, quilts, and heirloom edging. Blends offer softness combined with strength. Chunky thread creates bold, textured borders.
Color Strategy: A contrasting color draws attention to the border. A matching color looks seamless and understated.
Hook Size Guide
Hooks in sizes G (4.0 mm) to I (5.5 mm) work well for worsted weight yarn. Use one size smaller than normal for tighter edges. Sharp-tipped hooks, such as Furls Streamline, work best for fabric holes.
Troubleshooting Common Crochet Edge Issues
Even experienced crafters face problems. Here’s how to solve the most common issues quickly.
Puckered or Tight Edges
This problem occurs when there are too many stitches. Fix it by reducing the count and spacing stitches wider, especially on dense fabrics.
Wavy or Ruffled Edges
This issue results from too few stitches. Fix it by adding more stitches or using staggered placement, such as single crochet with chain 1 spaces.
Gaps at Corners
Gaps appear when there aren’t enough corner stitches. Fix it by using 3 single crochets or a chain-2 space to fill the turn properly.
Crochet Pulls the Fabric
This happens when tension is too tight or the hook is wrong. Fix it by using a larger hook or loosening your grip.
Bulky Corners on Fleece
Excess fabric causes bulk. Fix it by trimming and rounding corners before punching holes.
Creative Fix: Hide flaws with pom-poms or tassels, which are especially effective on baby blankets.
Washing and Maintaining the Finished Edge
A beautiful border should last through many washes when properly cared for.
Care Instructions
Machine wash cold on a gentle cycle using mild detergent. Tumble dry on low heat or lay flat to dry. Avoid high heat, which can melt acrylic or shrink cotton.
Long-Term Tips
Re-weave any loose ends that appear over time. Store the blanket folded rather than hanging, as hanging stretches the edges. For heirloom pieces, hand wash and air dry.
Real-World Test: Fleece blankets with pre-punched holes and acrylic yarn survive 50 or more washes with no damage.
Matching Border to Project Type
Use these recommendations based on your specific blanket.
| Blanket Type | Recommended Border |
|---|---|
| Flannel Baby Blanket | Hemstitched loops with single crochet and mini scallop |
| Crocheted Afghan | Double single crochet base with shell or granny border |
| Granny Square Blanket | Join-as-you-go or 3-double crochet clusters |
| Kitchen Towel | Crab stitch or slip stitch |
| Pillow Cover | Single crochet seam-as-you-go |
| Table Topper | Ruffled or scalloped edge |
Finishing Touches for Professional Crochet Edges
You are almost done. Finish strong with these expert insights.
Weave in Ends Securely
Use a yarn needle. Thread the tail through multiple stitches on the wrong side. Trim excess close to the fabric.
Add Embellishments
Pom-poms or tassels at corners hide mistakes and add charm. Beads or buttons provide decorative flair for special pieces.
Expert Advice
Even a basic slip stitch looks amazing on a ruffled border with contrasting yarn. One corner will never match the others perfectly, and that is okay. There is no crochet police.
Start simple by mastering single crochet before attempting shells. Use stash yarn as a great way to reduce leftovers. Experiment freely by mixing colors, textures, and stitches.
Frequently Asked Questions About Crocheting Edges on Blankets
What is the easiest crochet border for beginners?
The single crochet border is the easiest technique for beginners. It requires only one basic stitch and provides a clean, durable finish. Work single crochets around the entire edge, placing 3 in each corner to maintain shape.
Can you crochet directly onto fleece fabric?
You cannot crochet directly into fleece without preparation. The fabric is too dense and will damage your hook. Use a perforating blade to punch evenly spaced holes first, then crochet into those holes.
How do I keep my crochet border from puckering?
Puckering happens when there are too many stitches relative to the blanket edge. Reduce the number of stitches or space them wider apart. Using a larger hook and maintaining relaxed tension also helps prevent puckering.
What yarn is best for blanket borders?
Acrylic worsted weight is the most versatile choice because it is machine washable and durable. Cotton yarn works well for crisp definition and heirloom pieces. Choose a yarn that matches your blanket’s weight and intended use.
How do I fix gaps in my corners?
Gaps appear when corners lack sufficient stitches. Use 3 single crochets in each corner to fill the diagonal turn. For decorative borders, work a chain-2 space in the corner that mirrors the blanket’s original pattern.
Do I need to block my blanket before adding a border?
Blocking is essential for crocheted blankets with openwork or uneven edges. Wet block or steam the blanket first to square the edges. This prevents puckering and ensures the border lies flat.
Key Takeaways for Crocheting Edges on Blankets
Crocheting an edge on a blanket is the finishing touch that transforms a handmade project into a professional-looking piece. The key steps include preparing your blanket type properly, whether crocheted, knitted, or woven fabric. Use a stable base round with 3 single crochets in each corner to maintain shape. Choose a border pattern that matches your blanket’s style, from simple single crochet to decorative shell stitches. Select appropriate yarn and hook size for your project, and troubleshoot common issues like puckering or gaps as they arise. With practice, you’ll gain confidence in creating beautiful, durable edges on any blanket project.

