
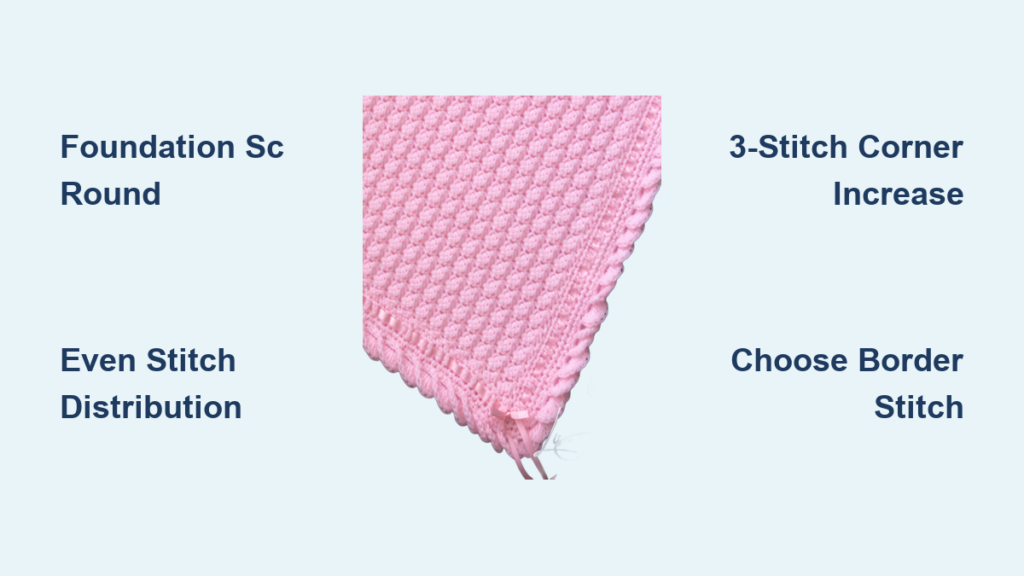
Adding a border to a crochet blanket transforms a simple project into a polished, professional piece. Whether you have a baby afghan, a granny square throw, or an intricate textured blanket, the right border cleans up uneven edges, prevents curling, and frames your work like a picture frame. Many beginners skip this step, thinking it is too complicated, but adding a border is actually one of the most rewarding parts of the craft. In this guide, you will learn exactly how to do a border on a crochet blanket, from building a stable foundation to selecting the perfect stitch pattern for your project.
Start with a Foundation Single Crochet Round
Before adding any decorative border, you need a stable base layer. A foundation round of single crochet (SC) smooths out irregularities, creates an even surface, and gives your border something solid to grip. This step is recommended by over 90% of experienced crocheters because it dramatically improves the final result.
Why Use a Base SC Round
The single crochet stitch is short and compact, making it ideal for blending into the blanket without drawing attention. It fills gaps between rows, especially on vertical sides, and prepares the edge for taller or textured stitches. This foundation round acts like a primer for your border.
Work the Foundation Round
- Attach your yarn at the top-right corner with a slip knot
- Chain 1 (this does not count as a stitch)
- Work 1 SC into each stitch across the top edge
- At the corner, place 3 SC in the same stitch
- Down vertical sides, match SCs to the number of rows
- Along the bottom edge, work 1 SC per stitch of the first row
- Complete the round by slip stitching into the first SC
Pro Tip: Repeat the foundation round once or twice if you want a thicker border base or are working with openwork patterns like C2C or filet crochet.
Distribute Stitches Evenly on Vertical Sides
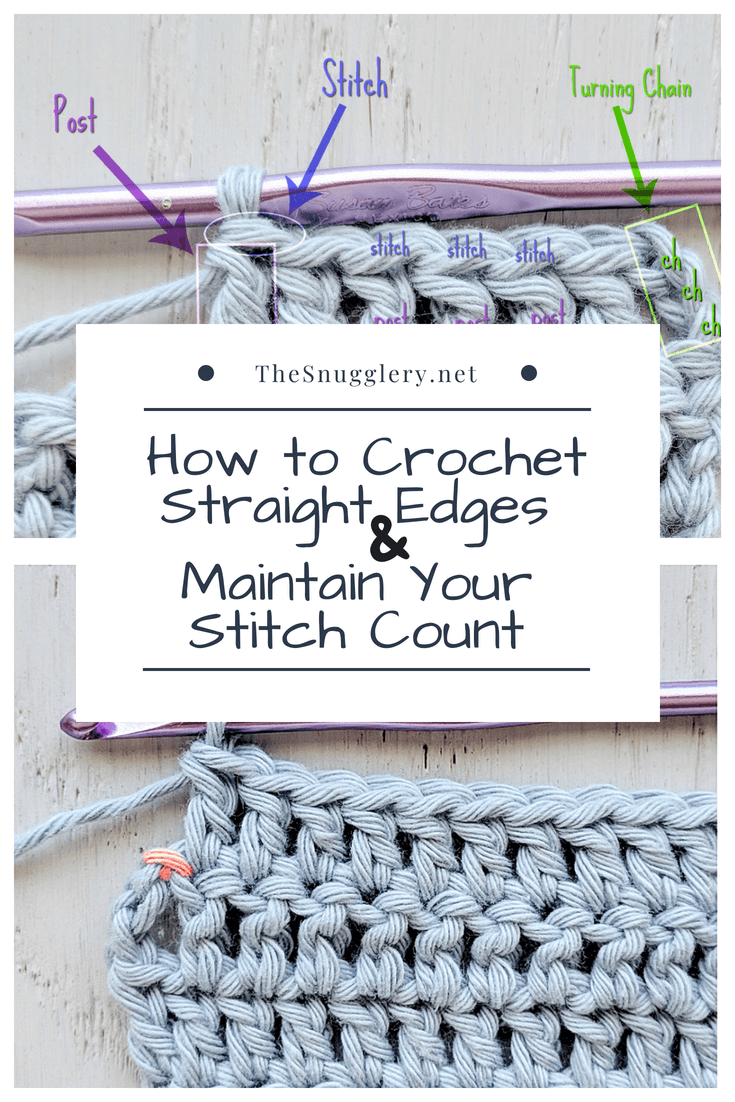
Vertical edges are trickier than top and bottom edges because they are made of row ends, not individual stitches. Getting this step right prevents bunching, gaps, and wavy edges.
Match Stitches to Your Row Type
Use this guide to determine how many SCs to place along each vertical side:
- Single crochet rows: 1 SC per horizontal bump between rows
- Half double crochet rows: 1 SC per row
- Double crochet rows: 2 SC per row (stretch gently to see ridges clearly)
- Alternating chain rows: If the row ends with CH-1, use 1 SC on the side; if it ends with CH-2 or CH-3, use 2 SC on the side
Pro Tip: Count total rows on one side and aim for the same number of SCs. Use a stitch marker every 10 to 15 stitches to track progress and maintain consistency.
Handle Corners with 3-Stitch Increases
Corners must expand outward to keep the blanket flat. Without enough stitches at each corner, edges will pucker or curl inward, ruining the final look.
Standard Corner Treatment
At each corner stitch where two edges meet, work 3 SC or 3 DC in the same stitch. This creates a soft turn and maintains structural balance. For multi-round borders, add one extra stitch per corner per round. For example, use 4 stitches in round 2 and 5 in round 3.
Visual Cue: Look for the second of the three SCs from the foundation round. This is often the true corner point. Mark it with a stitch marker.
Choose the Right Border Stitch Pattern
Once your foundation is set, pick a border that complements your blanket’s style. Below are tested options ranked by skill level and visual effect.
Double Crochet Border
This is the cleanest and most structured option, ideal for beginners and solid-color blankets.
How to Work It
- Join new yarn at a corner
- Chain 3 (counts as first DC)
- Work 1 DC in each stitch around
- At corners: 3 DC in one stitch (add a 4th if fabric pulls)
- Finish by slip stitching into the top of the initial chain-3
Hook Tip: Use the same size as your blanket, or go up 0.5 mm for better drape.
Faux Crab Stitch Border
Also called reverse single crochet, this border has a twisted, braided look perfect for heirloom pieces.
Master the Left-to-Right Motion
Right-handed crocheters work from left to right, which is the opposite of the normal direction.
- Insert hook into next stitch
- Yarn over, pull up a loop (2 loops on hook)
- Swing hook 360 degrees around before completing the stitch
- Yarn over and pull through both loops
Pro Tip: Keep tension loose. If the edge curls, block it lightly after completion. Use a slightly larger hook to prevent tightness.
Pico Border
Tiny picots give a lacy, vintage charm. This works best on baby blankets or feminine designs.
Create Each Pico
- SC into a stitch
- Chain 3
- Slip stitch into the back loop only of the first chain (this forms the pico)
- Skip 1 to 2 stitches, then SC into the next
At corners, work two picos in the same stitch for emphasis.
Bobble Border
Raised clusters resemble bubbles and add cozy, playful dimension.
Make the Bobble Cluster
- Yarn over, insert hook into stitch, pull up a loop (repeat 2 more times for 4 loops on hook)
- Yarn over and pull through all 4 loops at once
- Immediately SC into the next stitch to anchor
Repeat this pattern around the entire edge. No special corner handling is needed.
Front View: Bubbles pop forward while the back remains smooth. Use soft, bulky yarn for maximum puff.
Shell Stitch Border
Fan-shaped clusters mimic seashells and suit traditional afghans.
Basic 5-DC Shell
- SC into a stitch
- Work 5 DC in the next stitch
- Skip 1 stitch, SC into next
- Repeat around
At corners, center a shell or place two close together. Adjust spacing so shells align evenly.
Zigzag Border
A chain-1 and slip stitch repeat creates a subtle ridge, great for gender-neutral or contemporary throws.
Simple Execution
Repeat CH 1, SL ST into each stitch around. No corner adjustments are needed. Join with SL ST to first CH-1.
Use Invisible Join for Seamless Finish
Eliminate visible seams with a professional closure method, especially for slip stitch, crab stitch, or pico borders.
Invisible Join Steps
- After final stitch, cut yarn with a 6-inch tail
- Pull tail through loop on hook
- Thread onto tapestry needle
- Pass under both loops of the first chain
- Then pass through the back loop of the last chain
- Gently tighten to blend
Weave in the remaining tail on the wrong side.
Avoid Twisting: Place a stitch marker in the first stitch before starting the round.
Fix Common Border Mistakes
Even experienced crocheters face issues. Here is how to solve them fast.
Curling or Ruffling Edges
- Cause: Too many or too few stitches
- Fix: Re-count side rows; ensure vertical edge matches row count. Add or remove 1 to 2 stitches near corners if needed.
Puckered or Tight Corners
- Cause: Tension too tight or insufficient corner stitches
- Fix: Always use 3 stitches in corner, loosen grip, or go up a hook size.
Gaps at Corners
- Cause: Skipping the corner stitch or not increasing
- Fix: Reinforce with 3 SC or DC. Mark corners early.
Pattern Does Not Fit Evenly
- Cause: Total stitches not divisible by repeat
- Fix: Adjust by skipping a stitch or adding a spacer SC near one corner.
Select Yarn and Color Strategically
Color choice affects both visibility and cohesion of your finished blanket.
Base Round: Stay Neutral
Use the main blanket color or the most dominant neutral tone. This keeps the foundation invisible.
Decorative Round: Add Contrast
Choose a bold shade like pink, blue, or mint to make the border pop. Contrasting colors elevate simple patterns.
Rule of Thumb: For multicolor blankets, pick the least dominant color for subtle framing, or the brightest for drama.
Maintain Even Tension and Hook Size
Consistent pull prevents distortion. If your border ripples, your stitches are too loose; if it cups, they are too tight.
Adjust Hook Size
- For tight stitches like crab, pico, or bobbles: Use a hook 0.5 to 1.0 mm larger
- For loose stitches like DC or shell: Stick with original hook size
Test on a swatch first. Crochet a 6-inch square, add a border, block it, and check for flatness.
Block to Set the Shape
After finishing, block your blanket to smooth edges and lock in the border’s form.
Simple Blocking Steps
- Wet gently or steam (depending on fiber)
- Lay flat on a towel or blocking mat
- Pin corners and edges square
- Let dry completely
Cotton holds shape well. Acrylic benefits from steam blocking.
Care for Your Finished Blanket
Preserve your border’s integrity with proper maintenance.
Washing Tips
- Hand wash or use gentle machine cycle
- Lay flat to dry (never hang, which stretches corners)
- Avoid wringing or twisting
Repair Snags
If a stitch pulls, use a tapestry needle to reweave the yarn. Add a tiny whip stitch on the back if needed.
Frequently Asked Questions About Crochet Borders
How many stitches do I put in each corner of a crochet blanket border?
Always place 3 stitches in each corner for single crochet and double crochet borders. This creates enough fabric to turn the corner without puckering. For multi-round borders, increase by one additional stitch per corner each round.
What is the best border for beginners?
The double crochet border is the best choice for beginners. It is simple to learn, forgiving of minor tension issues, and provides a clean, polished look. Start with a foundation SC round for the best results.
Do I really need a foundation round of single crochet?
Yes, adding a foundation round of single crochet is highly recommended. Over 90% of experienced crocheters report cleaner, flatter borders when using this technique. It smooths out irregularities and creates an even surface for decorative borders.
How do I keep my border from curling?
Curling usually happens when stitches are too tight or corner stitches are insufficient. Loosen your tension, use a slightly larger hook, and ensure you have 3 stitches in each corner. Blocking can also help relax the fabric.
What yarn color should I choose for my border?
For the foundation round, use a neutral or matching color so it blends in. For the decorative border, choose a contrasting color to make the border stand out. Pick a color that appears in your blanket for a cohesive look.
Key Takeaways for Adding a Crochet Border
Adding a border to a crochet blanket is more than a final touch. It is the signature that completes your work. With a solid foundation of single crochet, even stitch distribution, and thoughtful corner treatment, you can turn any project into a polished piece. Remember the three pillars of border success: match stitches to your row type, always add 3 stitches at each corner, and maintain consistent tension throughout.
Whether you opt for a simple double crochet frame or a bold shell and bobble combination, the key is consistency and care. There is no crochet police. Imperfect corners or slight tension shifts will not ruin your blanket. They make it uniquely yours.
So grab your hook, pick a stitch pattern, and finish strong. Once you see how easy borders can be, you will start designing your own. Your blankets deserve that beautiful frame, and now you know exactly how to create it.

