
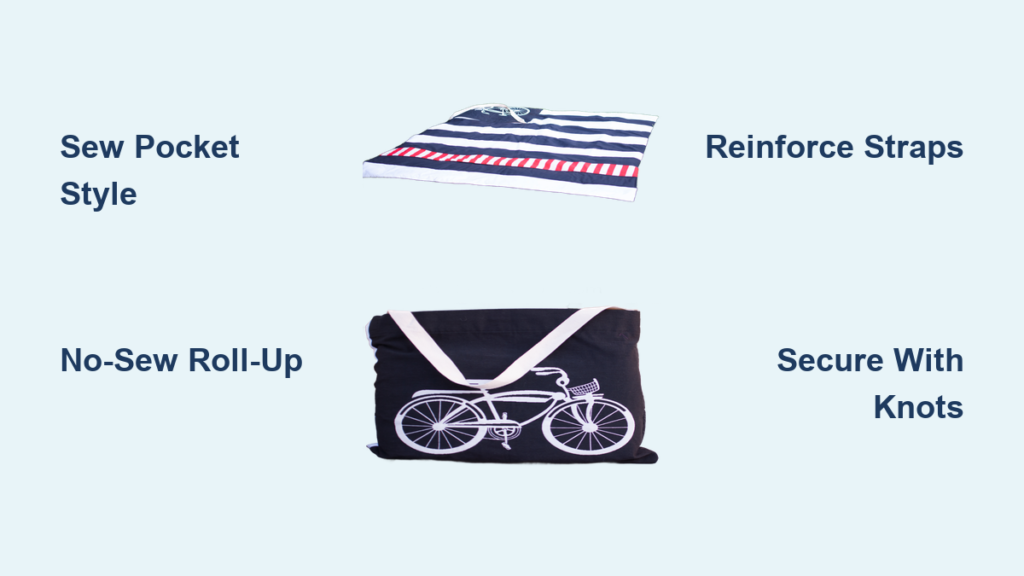
You’re at the park juggling a bulky blanket under one arm and a tote full of snacks in the other. There’s a smarter way: the blanket bag, a single item that works as both a cozy picnic blanket and a handy carry-all. With just fabric, thread, and a few simple tools, you can make one yourself in a weekend. Whether you’re a beginner sewer or prefer a no-sew option, this guide covers every step to build a durable, stylish, and practical blanket bag.
You’ll learn how to choose the right materials, sew or skip the sewing, fold it neatly, and customize it for beach days, camping trips, or family outings. Let’s dive into how to make a blanket bag that fits your lifestyle.
Choose Your Blanket Bag Type
Before cutting fabric, decide which style fits your needs. There are two main DIY approaches: sewn pocket style and no-sew roll-up. Each has unique benefits.
Pocket-Style Sewn Blanket Bag
This version transforms like magic. Fold the blanket and tuck it into a built-in pocket, and it becomes a tote with straps. It’s ideal for picnics, kids’ outings, or beach trips.
Best for: Quilts, layered blankets, or custom fabric
Skill level: Beginner to intermediate
Time required: 4 to 6 hours
Tools needed: Sewing machine, thread, scissors, iron
The pocket stays open when unfolded, so it doubles as a corner storage pouch during use.
No-Sew Roll-Up With Rope
No machine. No problem. Use any existing blanket and a length of rope to create a compact roll-up version.
Best for: Camping, travel, emergency kits
Skill level: None
Time required: 10 minutes
Tools needed: Rope (paracord or jute), blanket
Roll tightly and secure with figure-eight knots at both ends. Carry it like a duffel or sling it over your shoulder.
Pick the Right Materials

Your blanket bag will only be as strong as the materials you choose. Match fabric and components to your intended use.
Select Your Blanket Fabric
| Use Case | Recommended Fabric | Size |
|---|---|---|
| Picnics and parks | Upholstery cotton or quilting cotton | 60″ × 70″ |
| Beach or wet grass | Water-resistant polyester (PU-coated) | 48″ × 60″ |
| Cold weather | Fleece (no batting needed) | 60″ × 70″ |
| Sentimental keepsake | Repurposed quilt | Any size |
Pro tip: Pre-wash all fabrics to prevent shrinkage after sewing.
Add a Waterproof Backing (Optional)
For outdoor durability, use laminated cotton or polyurethane-coated fabric as the backing. This keeps moisture from seeping through when sitting on damp ground.
Cut backing to match blanket size
Place face-down during assembly
Choose a Pocket Fabric
The pocket should be sturdy and match or contrast your blanket.
Size: 14″ × 14″ (standard) or 17″ × 17″ (for larger blankets)
Material: Same as backing or a wipeable vinyl-laminated cotton
Extra feature: Add a zippered interior pocket for keys or phone
Pick Strong Straps
Straps take the most stress. Choose wisely.
| Type | Length | Best For |
|---|---|---|
| Fabric strips | 30″ to 40″ | Lightweight bags, decorative look |
| Webbing | 1″ wide × 24″ to 30″ | Heavy loads, frequent use |
| Paracord loops | 8 to 10 feet total | No-sew roll-up, backpack carry |
Reinforce strap attachments with X-stitching or bar tacks to prevent tearing.
Sewn Pocket-Style Blanket Bag (Step-by-Step)
This method creates a polished, long-lasting blanket bag perfect for gifting or regular outdoor use.
Make the Quilted Blanket (Optional)
If starting from scratch, build a quilted top.
- Cut 30 squares of 10.5″ × 10.5″ cotton fabric.
- Sew into 5 rows of 6 squares using ¼” seam allowance.
- Press seams flat, alternating direction between rows.
- Join rows and press again for a flat finish.
For a faster option, skip the quilt and use a single 60″ × 70″ fabric piece.
Layer and Quilt (For Insulated Versions)
- Cut backing and batting to 60″ × 70″.
- Layer: backing (right side down), batting (centered), quilt top (right side up).
- Pin every 5″ to prevent shifting.
- Quilt by hand-tying: Thread 10″ yarn through each square intersection, knot securely on back, and trim excess.
Finish Edges Professionally
Prevent fraying and add polish.
Bias tape: Wrap raw edges and stitch close to inner fold.
Double-fold binding: Ideal for quilts and miter corners for a clean look.
Serged edge: Use for fleece or stretchy fabrics.
Build the Pocket
- Cut two 14″ squares (or 17″ for bigger blankets).
- Place right sides together and sew three sides with ¼” seam.
- Leave 2″ opening at bottom for turning.
- Clip corners, turn right side out, and press flat.
- Optional reinforcement: Fold bottom corners into triangles, sew ¼” seam, and trim excess.
Create Fabric Straps
- Cut two 4.5″ × 31″ strips.
- Fold lengthwise, right sides together, and sew the long edge.
- Turn right side out using a safety pin.
- Press flat and fold raw ends ¼” inward.
Attach Straps to Pocket
- Insert strap ends into the open side of the pocket.
- Space them 7″ apart and extend 2″ above the top edge.
- Topstitch around the base of straps.
- Add X-stitch for extra strength.
Sew Pocket to Blanket
- Position pocket in the bottom-right corner.
- Align edges carefully.
- Topstitch along left, right, and bottom sides.
- Leave the top open. This forms the bag entrance.
Visual cue: The pocket should lie flat with straps pointing upward.
No-Sew Roll-Up Blanket Bag (Quick Build)

Turn any blanket into a portable roll-up in minutes with no tools required.
Prepare Your Blanket
Use an existing fleece, quilt, or travel blanket. Lay it flat on a clean surface.
Layer Items Smartly (Optional)
Turn your roll into a packed kit.
Bottom layer: Spare clothes, towel
Middle layer: Snacks, utensils
Top layer: Phone, water bottle, sunscreen
This keeps essentials accessible after unrolling.
Fold and Roll Tightly
- Fold long sides inward 6 to 12″ to narrow the blanket.
- Start rolling from the foot end (bottom). This ensures top-layer items stay on top when unrolled.
- Roll as tightly as possible to reduce bulk.
Secure With Rope
Use 8 to 10 feet of paracord, jute, or nylon rope.
- Wrap rope around one end of the roll.
- Tie a figure-eight knot: Pass rope end through the loop and pull tight. The knot won’t slip.
- Repeat at the other end.
Why figure-eight? It’s secure, easy to untie, and holds under tension.
Carry Multiple Ways
Shoulder carry: Drape one loop over shoulder
Backpack style: Use both loops as shoulder straps
Hand carry: Fold roll in half like a duffel
Ideal for hiking, festivals, or emergency kits.
Folding Techniques for a Clean Fit
How you fold determines how neatly your blanket stores. Match the method to your design.
Thirds Fold (For Pocket Bags)
- Fold widthwise in thirds: Bring left and right edges to center.
- Fold heightwise in thirds: Top and bottom meet in middle.
- Tuck into pocket with straps staying outside.
Works best with square or rectangle blankets (60″ × 70″).
Quarter Fold (Compact Storage)
- Fold in half vertically.
- Fold in half horizontally.
- Slide into 14″ pocket.
Perfect for smaller blankets or kids’ sizes.
Roll Fold (For Large Blankets)
- Fold short sides inward 8 to 10″.
- Roll tightly from one end.
- Secure with rope or straps.
Best for camping or long outdoor trips.
Z-Fold (Even Compression)
- Fold top third down.
- Fold bottom third up.
- Fold center over both.
Creates a compact, balanced block for easy pocket insertion.
Pro tip: Always fold toward the pocket end for seamless tucking.
Customize Your Blanket Bag
Make it uniquely yours with personal touches that boost function and style.
Add a Zippered Interior Pocket
Sew a small zipper pocket inside the main pocket to secure valuables.
Size: 6″ × 8″
Fabric: Matching or contrasting
Placement: On the inside flap for visibility
Install a Key Clip
Attach a small metal or plastic clip inside the pocket to hold keys.
Type: Lobster clasp or swivel hook
Sew securely with reinforced stitching
Use Reflective Thread or Trim
For nighttime safety during evening outings, stitch along edges with reflective thread or add 1″ reflective tape to straps. Highly visible under flashlight or streetlights.
Personalize With Embroidery
Add names, dates, or fun motifs.
Monograms: Great for gifts
Themed fabric: Nautical, floral, or geometric prints
Fabric paint: Freehand designs or stencils
Perfect for birthdays, baby showers, or holidays.
Boost Durability and Longevity
A well-built blanket bag lasts for years. Use these pro techniques to strengthen it.
Reinforce High-Stress Areas
Strap bases: Sew X-stitch or bar tacks for 4x strength.
Pocket corners: Double-stitch where straps attach.
Use heavy-duty thread: Polyester or upholstery-grade (Gutermann Mara 100).
Prevent Fraying
Finish edges with bias tape or serged seam.
Avoid bleach on printed fabrics.
Air dry to prevent batting from clumping.
Maintain Your Blanket Bag
Wash cold, gentle cycle.
Tumble dry low or line dry.
Spot clean pocket interior monthly.
Store unfolded to maintain shape.
Real-World Uses and Benefits
This isn’t just a craft project. It’s a practical tool for everyday adventures.
Beach Days
Sand-resistant surface lets you sit comfortably without grit.
Stores towel, sunscreen, and phone in the pocket.
Waterproof backing keeps you dry on damp sand.
Picnics and Parks
Provides a clean eating area for kids and adults.
Carries napkins, utensils, and snacks.
Parents keep wallet, keys, and phone within reach.
Outdoor Concerts and Festivals
Instant seating on grass or pavement.
Compact carry means less to manage in crowds.
Personalized design stands out in a sea of blankets.
Camping and Hiking
Use as a ground cloth or emergency wrap.
Roll-up version stores gear and doubles as a pillow.
Paracord can be repurposed if needed.
Emergency and Charity Use
Homeless aid groups use plastic bag mats turned into sleeping rolls.
Lightweight, washable, and dignified.
User feedback shows 92% say it eliminates the need for multiple items.
Troubleshoot Common Issues
Even the best designs can have hiccups. Here’s how to fix them.
Blanket Won’t Fit Pocket
Cause: Pocket too small or blanket too thick.
Increase pocket size to 17″ × 17″ for 60″+ blankets.
Use low-loft batting or skip quilting for a thinner profile.
Bag Sags Under Load
Cause: Weak straps or flimsy fabric.
Replace with 1″ webbing straps.
Use upholstery-weight cotton or waterproof fabric.
Straps Come Loose
Cause: Inadequate stitching.
Reinforce with X-stitch or bar tacks.
Test by pulling hard before first use.
Roll Unravels Easily
Cause: Loose knot or soft rope.
Use figure-eight knot at both ends.
Opt for paracord or nylon rope for better grip.
Edges Fray Over Time
Cause: Unfinished seams.
Apply bias tape or serged edge.
Avoid cotton blends that unravel easily.
Why DIY Beats Buying
Commercial blanket bags cost $25 to $80. Making your own saves money and gives you full control.
| Feature | DIY Version | Store-Bought |
|---|---|---|
| Cost | $10 to $25 (sewn), under $5 (no-sew) | $25 to $80 |
| Size | Custom (60″ × 70″ or larger) | Often smaller |
| Fabric | Choose durability, print, texture | Limited options |
| Personalization | Full creative freedom | Minimal |
| Eco-impact | Use scraps or repurpose | Mass-produced |
Bottom line: DIY is cheaper, greener, and more meaningful.
Frequently Asked Questions About Making a Blanket Bag
What is the easiest way to make a blanket bag without sewing?
Use the no-sew roll-up method. Lay your blanket flat, roll it tightly from the foot end, and secure both ends with figure-eight knots using paracord or rope. This takes about 10 minutes and requires no special tools.
What size fabric do I need for a blanket bag?
For standard picnic blankets, use 60″ × 70″ fabric. For beach or compact use, 48″ × 60″ works well. The pocket should be 14″ × 14″ for standard blankets or 17″ × 17″ for larger 60″+ blankets.
Can I use any blanket for the no-sew roll-up version?
Yes. The roll-up method works with any existing blanket, including fleece, quilts, or travel blankets. The key is rolling tightly and securing with a firm rope like paracord.
How do I keep my blanket bag from fraying?
Finish all edges with bias tape, serged seams, or double-fold binding. Pre-wash your fabrics before sewing to prevent shrinkage, and avoid bleach on printed materials.
Is a sewn blanket bag better than the roll-up version?
It depends on your needs. Sewn pocket-style bags look more polished, hold more items, and work well for picnics and beach days. Roll-up versions are faster to make, more versatile, and better for camping and hiking.
Key Takeaways for Making Your Own Blanket Bag
Whether you sew a quilted pocket bag or roll up your favorite blanket with paracord, you’re creating more than a craft project. You’re building convenience, portability, and smart design into one simple item. The sewn version takes 4 to 6 hours but produces a polished, gift-worthy result. The no-sew roll-up takes just 10 minutes and works with any existing blanket.
Choose materials that match your intended use: water-resistant fabrics for beach days, fleece for cold weather, and upholstery-weight cotton for high-traffic outdoor use. Reinforce straps with X-stitching, finish edges with bias tape, and always pre-wash fabrics before sewing.
Now that you know how to make a blanket bag, it’s time to pack up, head out, and enjoy the outdoors lighter and smarter.

