
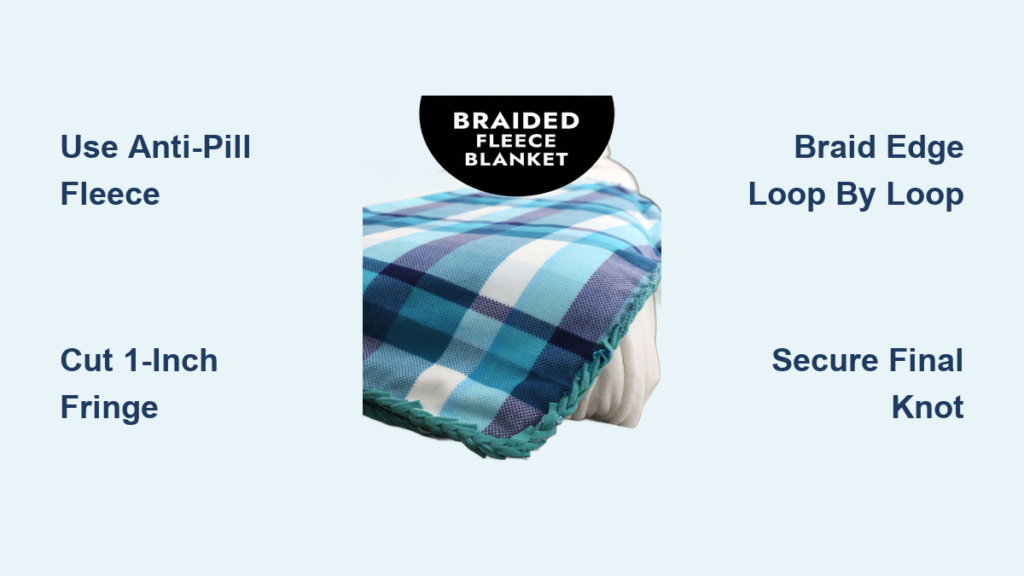
Making a braided fleece blanket is a satisfying DIY project that combines simplicity with striking results. Unlike traditional knotted fleece blankets, this version uses an interwoven braid technique to create a smooth, knot-free edge perfect for gifts, babies, or cozy home decor. You do not need to sew or crochet. With just two pieces of fleece and a pair of sharp scissors, you can craft a soft, durable, machine-washable blanket in under two hours.
This guide walks you through both the sewn perimeter method for a polished look and the no-sew method ideal for beginners. Whether you are crafting for charity, making a personalized gift, or starting your first fabric project, you will learn every step from fabric selection to finishing the final loop.
Choose the Right Fleece Fabric for Your Blanket
Selecting the correct fleece is the foundation of a successful braided blanket. The fabric you choose directly impacts how the finished blanket looks, feels, and lasts over time.
Pick Anti-Pill or Luxe Fleece
Not all fleece is created equal. For a long-lasting, soft blanket, choose anti-pill fleece because it resists fuzz balls and maintains its appearance after repeated washing. Luxe fleece offers an ultra-soft, premium feel ideal for gifts. Standard fleece works too but may pill over time.
Avoid cotton, flannel, or woven fabrics because they fray and will not hold the braid structure properly.
Pro Tip: Fleece does not shrink much. Do not pre-wash the fabric. Cut and assemble first, then wash the finished blanket to prevent distortion.
Match Fabric Layers Perfectly
Use two identical pieces of fleece for double-layer blankets. Cut them together to ensure perfect alignment. If making a single-layer blanket, one piece is enough, but double layers are warmer and more popular for gifts.
Pro Tip: Trim selvage edges (the tightly woven borders) before assembling because they can pucker and misalign the layers.
Measure and Cut Your Fleece Correctly
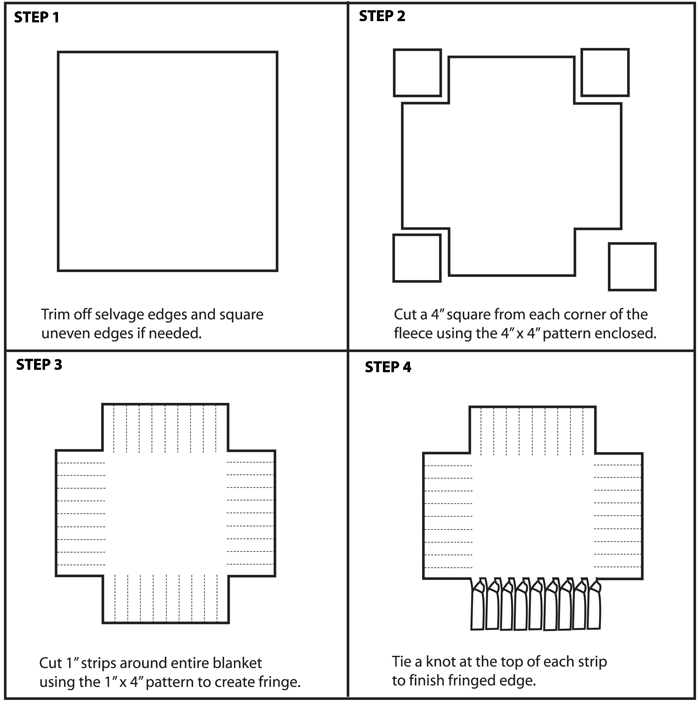
Accurate cutting ensures your blanket is the right size and the fringe braids evenly. Taking time at this stage prevents problems later.
Follow Standard Sizing Guidelines
Baby blankets typically use 1 yard per layer and finish at approximately 36 by 48 inches. Child blankets use 1.5 yards per layer for a 54 by 48 inch finished size. Lap or throw blankets use 1.5 to 2 yards, resulting in 54 by 60 to 72 by 60 inches. Adult blankets use 2 or more yards and can reach up to 80 by 60 inches.
Fleece is typically 60 inches wide, so adjust your yardage accordingly.
Cut Corners to Reduce Bulk
Remove a 2-inch by 2-inch square from each corner for the no-sew method or a 3-inch by 3-inch square for the sewn method. This step reduces bulk when braiding and helps the edge lie flat.
Pro Tip: Use painter’s tape and a quilting ruler to mark cuts because this keeps edges straight and corners square.
Prepare the Fringe for Braiding
The fringe is what creates the braid, so precise preparation is essential. Taking time to mark and cut evenly will make braiding much easier.
Mark 1-Inch Intervals with Tape
Use masking tape to mark every 1 inch along all four edges. This ensures even fringe spacing. A rotary cutter and self-healing mat make cutting faster and more precise.
Cut Fringe Strips Evenly
For the no-sew method, cut 1-inch wide by 2-inch deep strips and leave a 2-inch uncut margin between strips to keep the blanket intact. For the sewn perimeter method, cut 1-inch deep slits through only the top layer, stopping just before the seam. This creates a series of loops around the edge.
Pro Tip: Use a bent paperclip or crochet hook to widen tight slits, especially helpful with thick fleece.
Sewn Perimeter Method: Creating a Polished Edge
The sewn perimeter method produces a refined, store-bought appearance. This approach is perfect for gifts or anyone wanting a sleek finish.
Sew the Two Layers Together
Place one fleece piece wrong side up. Lay the second piece on top with right side facing out so both outer sides are visible. Pin around the edges to prevent shifting. Sew with a 1/8-inch seam allowance, backstitching at start and end. Pivot at corners by stopping 1/8 inch from the edge, backstitching, lifting the presser foot, turning the fabric 90 degrees, and continuing.
Pro Tip: Fleece rolls under when sewing, so guide it gently and use a walking foot if available.
Create Top-Layer Loops for Braiding
After sewing, lay the blanket flat. Use your taped marks to cut 1-inch slits through only the top layer from the edge to just before the seam. This forms a continuous row of fabric loops.
Pro Tip: A rotary cutter on a grid mat ensures perfectly straight, evenly spaced cuts.
Braid the Edge Loop by Loop
Start at the middle of one side. Take the leftmost loop and push it through the adjacent right loop. Pull it through so the right loop lies flat. The former left loop is now the new working loop. Repeat this process around the entire blanket. Corners require no special technique because the braid curves naturally.
Finish with a Hidden Knot
When you return to the start, thread a needle with matching thread. Tie a double or triple knot between the last right loop and the first left loop. Tuck thread ends into the final loop to hide them.
Pro Tip: This knot is the only weak point, so secure it well to prevent unraveling.
No-Sew Method: Beginner-Friendly Approach
The no-sew method requires no sewing machine and is ideal for beginners or anyone wanting a quick project. Both layers are cut separately and then braided together.
Fold and Slit Each Fringe Strip
Fold each 1-inch by 2-inch fringe strip in half toward the center. At the folded tip, cut a 1/2-inch slit through both layers. This creates a hole for threading the next strip.
Pro Tip: Use a bent paperclip to open tight slits, especially useful with thick fleece.
Start Braiding at a Corner
Begin at a corner or side center. Take the two leftmost folded strips and push them through the slit of the two rightmost strips. Pull until the right strips lie flat. The former left strips are now the new right strips. Repeat, alternating between top and bottom layers for even tension.
Pro Tip: Work clockwise for consistency because this helps maintain even braid tightness.
Secure the Final Loop
When you complete the circle, cut the last two strips in half lengthwise, creating four thin strands. Take one half and thread it through the first strip’s slit. Wrap it around and tie a double knot with the other half. Tuck the knot inside the blanket layers to hide it.
Pro Tip: Whichever method you use, ensure the final connection lies flat and is concealed between layers.
Master the Interwoven Braiding Technique
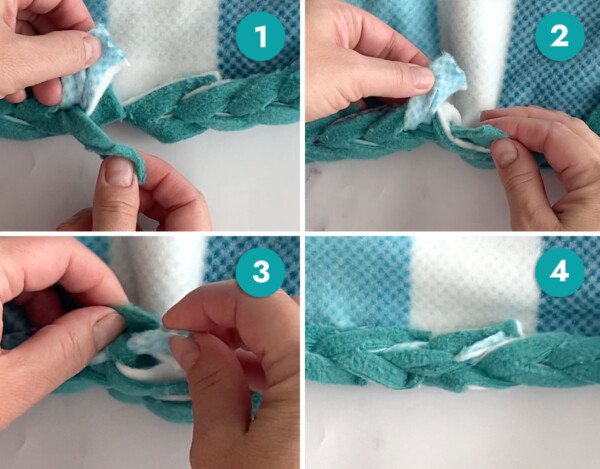
The braided edge is actually an interlocking chain, not a true braid. Understanding this technique ensures consistent results regardless of which method you choose.
Understand the Chain-Like Motion
Each strip threads through the previous one, creating a seamless, rope-like edge. This technique is often called crocheting in tutorials, but no hook or yarn is actually used.
Start the Chain Correctly
Begin at any corner. Rotate the leftmost strip sideways so its underside faces you. Take the next strip to the right and thread it through the hole in the first. Pull it through halfway. The newly threaded strip now becomes the active loop.
Continue Clockwise with Consistent Tension
Always thread the next adjacent strip through the current working loop. Gently tug each connection to tighten, but do not over-pull. Keep moving in the same direction around the blanket.
Pro Tip: If the braid puckers, stretch the edge gently after completion to even out tension.
Single Layer vs Double Layer: Which to Choose
Your choice between single and double layer affects warmth, weight, and functionality. Understanding the differences helps you select the right option for your needs.
Compare Key Features
Single-layer blankets are light and breathable, best for kids, indoor use, or warm climates. They are not reversible unless printed on both sides. Double-layer blankets are warm and insulating, ideal for outdoor use, cold nights, or gifts. They are reversible when using contrasting fabrics.
User Feedback: Double layers can be too warm for children who overheat, so single layers are often preferred for everyday use.
Design Tips for a Professional Look
The visual appeal of your blanket depends on fabric choices and combinations. Thoughtful selection elevates the finished piece from craft to treasure.
Use Contrasting Fabrics
Pair a solid color with a print, such as navy solid with red polka dot, to highlight the braid. Avoid overly busy prints that obscure the edge texture.
Choose Reversible Combinations
Use two different fabrics for a reversible blanket, especially effective in the no-sew method. Minky fabric adds softness but is slippery, so handle with care.
Pro Tip: Wash the blanket before gifting to pre-shrink and soften the fleece.
Care and Washing Instructions
Proper care extends the life of your braided fleece blanket and keeps it looking its best. Fleece is remarkably durable when treated correctly.
Machine Wash Safely
Wash in cold water on a gentle cycle. Tumble dry on low or air dry. Avoid fabric softener because it degrades fleece fibers over time. Expect no shrinkage with proper care.
Maintain Long-Term Durability
With proper care, the blanket withstands 10 or more machine washes without fraying. Anti-pill fleece resists pilling for 6 or more months. The expected lifespan is 3 to 5 years with regular use.
Pro Tip: Stretch the braid gently after washing to restore shape.
Braided vs Knotted Edge: Which Is Better
Both techniques create decorative edges, but they differ in appearance, comfort, and complexity. Choosing between them depends on your priorities.
Compare Key Differences
Braided edges offer a smooth, knot-free surface that feels soft against skin. They provide a polished, store-bought appearance. The technique requires beginner to intermediate skill and takes 30 to 90 minutes. Knotted edges are rustic and handmade in appearance. They can be scratchy at the knots. The technique is very beginner-friendly and takes 20 to 30 minutes.
Recommendation: Choose braided edge for gifts, sensitive users, or a refined look.
Pro Tips for Success
These expert recommendations help you avoid common mistakes and achieve professional results on your first attempt.
Cut both layers together to ensure perfect alignment. Work on a large, clean surface to prevent dragging and keep the blanket flat. Practice on scrap fleece first to test the threading technique. Stretch after braiding to even out tension and help the edge lie flat. Use a bent paperclip to thread thick or tight fringe strips. Double-knot the final loop to prevent slow unraveling over time.
Frequently Asked Questions About Braided Fleece Blankets
Do I need to pre-wash the fleece before making the blanket?
No. Fleece does not shrink significantly. Cut and assemble first, then wash the finished blanket afterward. Pre-washing can distort the fabric.
Can I use minky or cotton fabric instead of fleece?
Minky can work but is slippery and harder to handle. Cotton and flannel will fray and are not recommended for this project.
How long does it take to make a braided fleece blanket?
Active time ranges from 30 to 90 minutes. Total time including cutting is under 2 hours. The skill level is beginner to intermediate.
Can I adjust the fringe size from the standard measurements?
Yes, but 1-inch wide by 1.5 to 2-inch deep is optimal. Shorter strips may not hold securely, and wider spacing reduces edge strength.
Why do some tutorials refer to this technique as crocheting?
The term is metaphorical and refers to the chain-like interlocking motion. No actual crochet hook or yarn is used in the process.
Will the braid come undone over time?
Only if the final knot fails. Double or triple knot the final connection securely, and it will not loosen during normal use.
Final Thoughts on Making a Braided Fleece Blanket
A braided fleece blanket is more than a craft project. It is a functional keepsake that combines warmth, comfort, and style in one handmade piece. Whether you choose the sewn method for a sleek finish or the no-sew version for speed, both deliver durable, washable results that stand up to years of use.
The key to success lies in three simple steps. Use anti-pill fleece for long-term durability. Cut precise 1-inch fringe for consistent braiding. Secure the final knot properly to prevent unraveling.
Add contrasting fabrics for visual impact, and do not forget to wash the blanket before gifting. This project is perfect for Project Linus donations, baby showers, or winter gifts. Simple techniques truly can yield professional-quality results when you follow the steps carefully.
Start today and enjoy the satisfaction of wrapping someone in handmade warmth.

