
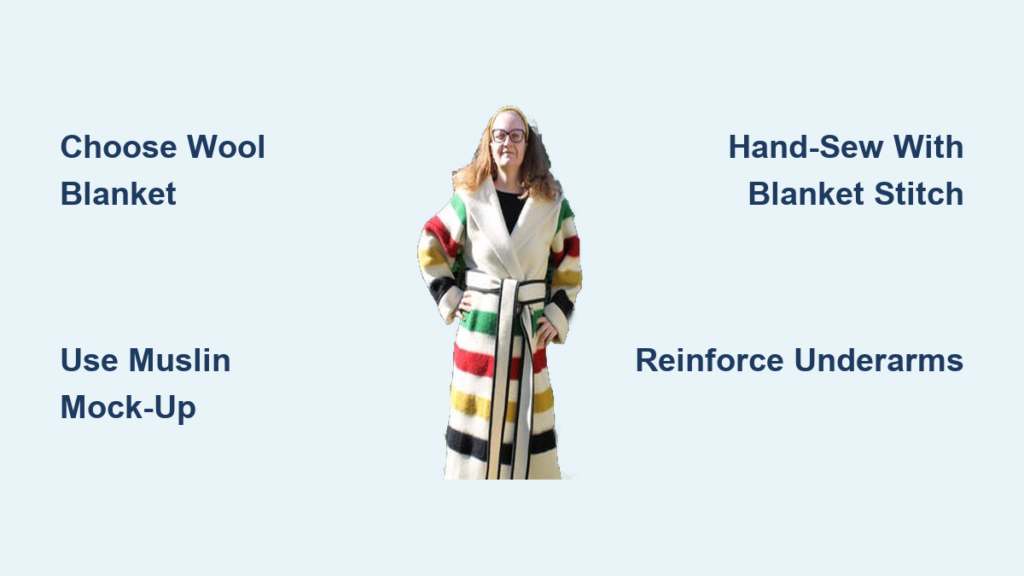
Imagine stepping outside into a blizzard and wrapping yourself in a garment that has kept travelers warm for over two centuries. The capote blanket coat is a timeless piece of North American frontier heritage, originally worn by Métis hunters, voyageurs, and Indigenous trappers during the fur trade era. This wool coat transforms a single blanket into a functional masterpiece using minimal cutting and hand-sewn strength. Whether you are drawn to historical reenactment, bushcraft survival, or cultural preservation, making your own capote connects you to centuries of resourceful craftsmanship.
This guide walks you through every step: choosing the right Hudson’s Bay point blanket, transferring a tested pattern, cutting with precision, and hand-stitching with durable thread. You will learn how to reinforce stress points, add a deep hood and long sleeves, and finish with traditional details like fringe and the spirit knot.
Select the Perfect Wool Blanket for Your Capote

Your capote starts with one critical decision: the blanket. Wool is non-negotiable because it retains warmth when wet, resists odors, and endures harsh conditions. The quality of your blanket directly impacts how warm and durable your final coat will be.
Why Hudson’s Bay Point Blankets Are the Gold Standard
The Hudson’s Bay Company point blanket, introduced in 1780, represents the most authentic choice for capote construction. These blankets feature iconic green, red, yellow, and indigo stripes on a white background, with each black point representing approximately 4 inches of length. A 6-point blanket measuring roughly 72 inches by 90 inches provides enough fabric for a full-length coat with room for a sash, hood, and accessories. Blue was traditionally favored by Métis communities, while white or cream offered snow camouflage for hunters.
New HBC blankets cost $150 to $300, but vintage versions can be found at flea markets, estate sales, or online auctions for under $50. Some makers report scoring genuine HBC wool for under $10 by shopping carefully and inspecting for moth damage before buying.
Affordable Alternatives for First-Time Makers
If budget or availability is a concern, consider military surplus wool blankets. Italian Army, U.S. military, or British wool blankets are durable, 100% wool, and cost between $15 and $60. These alternatives are readily available on eBay, surplus stores, or bushcraft forums. They lack traditional striping but work perfectly for practice builds or functional garments. Never use acrylic or synthetic-blend blankets, as they will not breathe, wick moisture, or insulate when damp.
Download and Prepare a Reliable Pattern
You do not need complex tailoring skills to make a capote. What you need is a reliable, historically inspired pattern that maximizes your blanket’s dimensions. The most trusted template was shared by EricMethven on bushcraft forums and originally sourced from Bushcraft USA. It includes full-scale diagrams for body layout, sleeve shape, hood configuration, and seam allowances.
Download the pattern early and print it at actual size, verifying the scale with a ruler. Transfer the shapes to paper or directly onto muslin for mock-up testing. Original 18th-century capot designs were narrow and short, so modern bodies benefit from adding 2 to 4 inches of ease for layering winter clothes, lengthening sleeves to wrist level, and enlarging the hood to fit over a toque or coonskin hat. Mark all pattern pieces with chalk or a washable fabric marker, and pin securely before cutting.
Build a Muslin Mock-Up Before Cutting Wool
Never cut your wool blanket without testing the fit first. A muslin mock-up, also called a toile, lets you check drape and mobility, adjust sleeve angle and hood depth, refine the construction sequence, and avoid costly mistakes. Use cheap cotton or bedsheet fabric and assemble pieces with safety pins to simulate how the coat wraps and overlaps.
Test key features by checking whether you can raise your arms freely, whether the hood covers your ears, and whether the front overlap is wide enough to block wind. Adjust the pattern as needed. This step saves time, money, and heartbreak by ensuring the final garment fits correctly.
Gather Essential Tools and Supplies
Success hinges on having the right tools before you begin cutting. You will need sharp fabric scissors for clean cuts through thick wool, small snips for trimming tassels and tight spaces, pinking shears for fringe with fray-resistant zigzag edges, a measuring tape for accurate body and fabric measurements, and chalk or a fabric marker for pattern transfer.
For hand-sewing heavy wool, gather heavy-duty needles sized 16 to 18, waxed polyester thread or buttonhole twist, synthetic sinew for traditional ultra-durable stitching, pins or clothespins to hold layers during assembly, canvas fabric scraps for reinforcing underarms, and buttons, toggles, or leather thongs for closure options. Save every scrap of fabric during cutting, as small pieces serve for tassels, patches, or future repairs.
Cut the Blanket with Precision and Care
Once your mock-up fits, it is time to cut the wool. Work slowly and precisely to avoid mistakes that cannot be undone. Lay the blanket flat on a clean floor or table and fold it in half lengthwise to align edges and maximize symmetry. Position pattern pieces to conserve fabric, especially for the belt or sash, which comes from the uncut center edge.
Cut the body panels first, avoiding a full-width cut to preserve the sash. Cut one sleeve, then refold the blanket to mirror the shape for the second sleeve. Use upper corners or leftover sections for the hood. Cut vertical fringe strips about 1 centimeter wide, starting 1 centimeter from the edge and stopping just before seam lines. Use pinking shears for durability, cutting halfway first and then finishing in a second pass for even results.
Sew the Sleeves Using the Blanket Stitch

Hand-sewing is not just traditional, it is necessary for strength and flexibility in thick wool. Identify the wide, curved edge that attaches to the body and the narrow cuff. Fold the sleeve in half, right sides together, and secure with clothespins.
Cut a strand of waxed thread or yarn about arm-length and thread the needle by pressing it through the yarn, which prevents slipping. Tie a small knot with a 1 to 2 inch tail to hide later. Start at the cuff using a blanket stitch along the wide edge, maintaining a consistent depth of approximately 1 centimeter. At corners, switch to a diagonal stitch to reduce bulk. Finish with three under-stitches, tie off, and tuck the tail under stitches before snipping. Repeat for the second sleeve.
Attach Sleeves to the Body
This step joins major components, and precision ensures mobility and durability. Turn the sleeve inside out and match the armhole to the wide edge of the sleeve. Align the sleeve seam with the armpit point for natural drape and secure with clothespins.
Begin at the armpit, stitching outward using a blanket stitch through three layers: the capote, the sleeve, and the shoulder fringe, which is a folded fabric strip. This triple-layer seam prevents tearing under stress. Use diagonal stitches at corners, then finish with three under-stitches, a knot, and a hidden tail. Repeat for the other side.
Assemble the Deep Hood
The deep, wraparound hood is key to the capote’s winter protection. Cut a triangular piece from leftover wool and fold it in half, point to base, forming a cone. Pin the cuff edges together.
Use a running stitch along the long edge, starting at the tip and finishing at the base. End with a loop-loop-knot, which involves folding the final loop over for a clean stop. This technique allows the hood to roll or fold for adjustable coverage. Optionally add an X-stitch or embroidery for decoration.
Finish the Front Edges and Hem
Now close the coat’s edges with durable, visible stitching. Work in sections, beginning at one hood cuff, stitching across the lapel, down the front hem, and up the opposite cuff. Stitch in halves to maintain tension and use fresh thread lengths, never stretching one strand across the entire front.
Hide tails by starting each section by tucking the tail under initial stitches. Finish with three under-stitches, a knot, and a snip. Leave the spirit knot visible at the end, a Métis tradition symbolizing humility and respect for the craft. This detail honors the handmade imperfection that defines authentic capotes.
Reinforce Stress Points for Long-Term Durability

Even wool can tear under strain, especially under the arms where movement creates constant friction. Cut canvas fabric squares measuring 4 inches by 4 inches and place them inside the underarm seam before final stitching. Sew through both the canvas and wool for double strength. This technique is recommended by bushcraft experts for ensuring your capote survives years of rugged use.
Consider using wool felt piping along seams, including sleeves, hood, and hem, for added structure and decorative flair. These reinforcements ensure your capote withstands decades of demanding wear.
Customize With Fringe, Tassels, and Fastenings
Make your capote uniquely yours with traditional embellishments. Cut 10 fabric strips approximately 3 inches long for each tassel, tie them together at the midpoint, wrap the center with yarn, and knot tightly. Attach to hood ties with double knots. Add fringe along the hem, cuffs, and lapels for texture and movement.
Choose traditional fastenings such as wooden, bone, or antler buttons, leather thongs, or toggle closures. Many capotes rely on tie closure or a sash instead of buttons. Cut a long strip measuring 3 inches by 72 inches or more from the blanket’s uncut edge to create a sash or belt. Tie it around the waist to cinch warmth and improve fit.
Add Lining or Fur for Extreme Cold
Boost warmth for extreme conditions by adding fur trim to cold zones. Apply coyote, beaver, rabbit, or sheepskin to the hood lining, collar, and shoulder backs. This blocks wind and adds luxury while maintaining historical authenticity.
Add an interior liner using flannel, cotton canvas, or quilted fabric as a removable layer for seasonal versatility. Plan extra seam allowance during construction if you intend to add a liner later.
Maintain and Preserve Your Capote for Generations
With proper care, your capote can last decades, becoming an heirloom passed down through generations. Spot clean with a damp cloth and mild wool detergent such as Sport Wash. Hand wash in cool water or machine wash on gentle, then air dry flat or tumble dry on cool to restore loft. Never use high heat, as it felts wool and shrinks fabric.
Store folded in a cool, dry place using cedar blocks or lavender sachets to deter moths. Avoid plastic bags and use cotton garment bags instead. Repair small tears early by darning with matching wool thread and reinforce worn seams before they split. Replace frayed tassels with saved fabric scraps and keep a repair kit with extra yarn, needles, and patches.
Frequently Asked Questions About Making a Capote Blanket Coat
What size blanket do I need to make a capote?
A 6-point blanket measuring approximately 72 inches by 90 inches is ideal for most adult-sized capotes. This provides enough fabric for a full-length coat with room for a sash, hood, and accessories.
Can I make a capote with a military surplus blanket?
Yes, military surplus blankets such as Italian Army, U.S. military, or British wool blankets work well and cost between $15 and $60. They lack traditional HBC striping but are excellent for practice builds or functional garments.
Do I need to sew the capote by hand?
Hand-sewing is traditional and necessary for strength and flexibility in thick wool. The blanket stitch provides durable, flexible seams that machine stitching cannot match on this material.
How long does it take to make a capote?
Most makers complete a capote over several evenings, totaling approximately 15 to 25 hours of work. This depends on your experience level and how elaborate the embellishments are.
What is the spirit knot tradition?
The spirit knot is a small, visible knot left at the end of stitching, representing a Métis tradition of humility and respect for the craft. It celebrates handmade imperfection rather than hiding it.
Key Takeaways for Making Your Capote Blanket Coat
Choosing the right wool blanket is the foundation of your project. A Hudson’s Bay point blanket offers authenticity and heritage, while military surplus provides an affordable starting point for beginners. Always test your pattern with a muslin mock-up before cutting into expensive wool.
Hand-stitching using the blanket stitch creates durable, flexible seams appropriate for thick wool. Reinforce underarm stress points with canvas patches and celebrate the spirit knot as a symbol of cultural respect. With proper care, your capote will provide warmth and serve as a functional heirloom for decades.

