
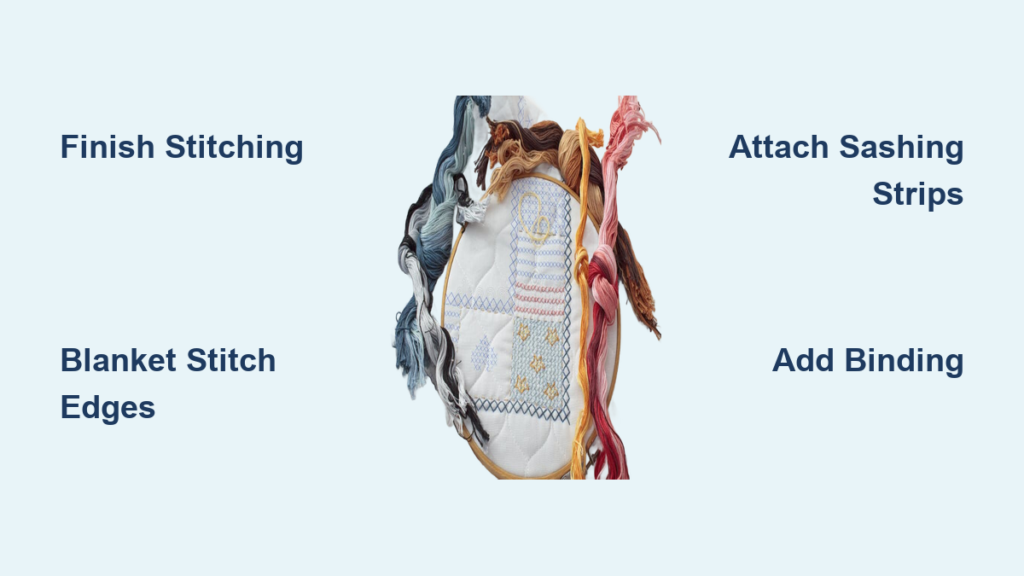
You’ve poured hours into stitching every X on your Aida cloth, creating a design full of meaning and detail. Now comes the satisfying part: turning that embroidered piece into a cozy, durable blanket you can use or gift. Whether it’s a baby blanket, a wedding keepsake, or a personal lap quilt, the assembly process is where your hard work becomes a lasting creation. This guide shows you exactly how to make a cross stitch blanket with clear, step-by-step instructions that cover edge finishing, layering, quilting, and final assembly. No guesswork, just reliable techniques that protect your stitching and produce professional results.
Let’s build your blanket from finished embroidery to finished product.
Complete All Cross Stitch Work First
Before touching a needle or thread for assembly, your embroidery must be entirely finished. Every stitch in your pattern needs to be complete, including any background areas the design calls for. This is not the time to rush.
Secure Loose Threads on the Back
Knots buried in your finished piece can work loose after washing, creating bumps that show through fabric. For a clean, durable back that holds up to years of use:
- Run your needle under 4-5 completed stitches on the back side to weave in ends
- Trim thread tails to about ¼ inch so they don’t pull out but don’t add bulk
- Avoid knots whenever possible, especially for baby items that will be washed frequently
Pro Tip: Use a laying tool or tapestry needle to smooth floss flat before weaving. This creates a flatter back and reduces visible thread bulk.
Prevent Fraying With Blanket Stitch Edges
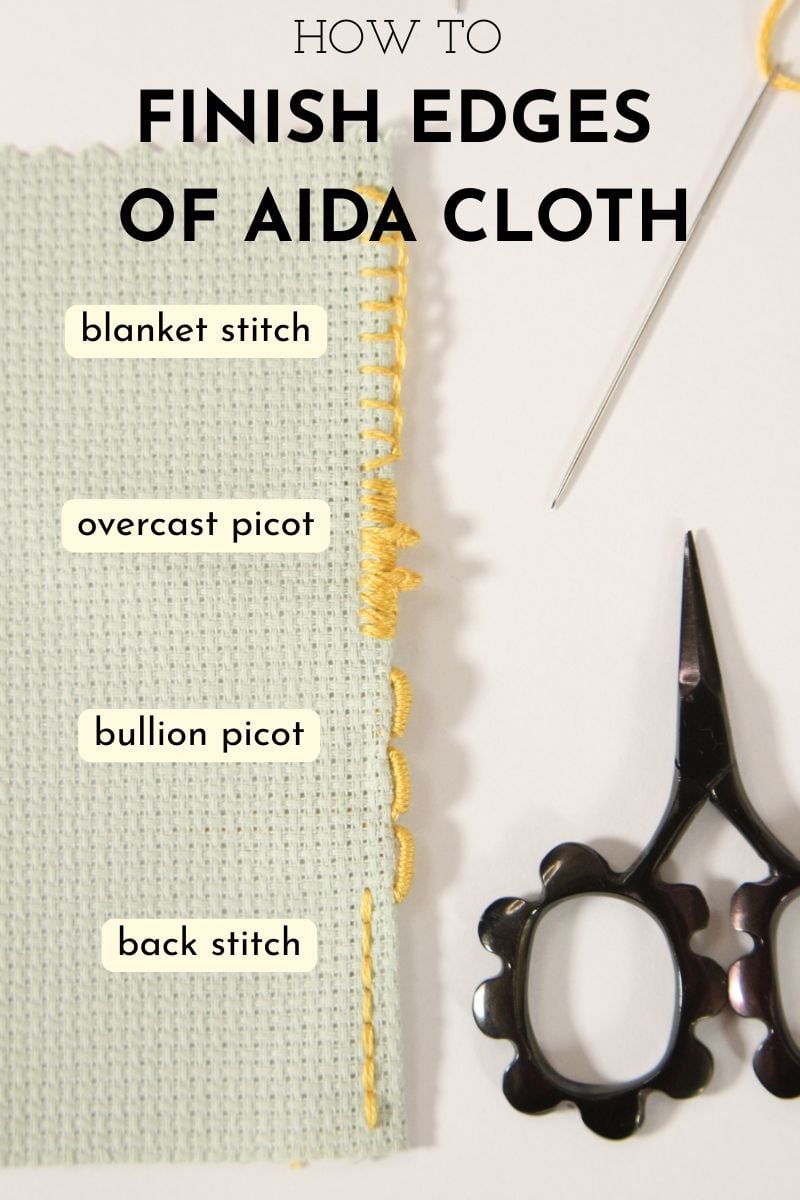
Aida fabric has an open weave that unravels quickly if left unfinished. Applying a blanket stitch to your edges before assembly stops fraying during handling and washing while adding a decorative border.
Apply Blanket Stitch to All Four Sides
This hand-sewn border locks your fabric edges in place and gives your blanket a polished, handmade look.
Step-by-Step Process
- Thread a needle with 2 strands of embroidery floss in a contrast color
- Start from the back, bringing the needle out about 3 holes in from the corner
- Anchor the knot by slipping the needle under your first small stitch
- Insert the needle front-to-back one hole in from the edge
- Bring the needle out front-to-back at the very edge, looping the thread under the needle tip to form the characteristic “L” shape
- Repeat across the entire side, keeping spacing even between stitches
Turning Corners Cleanly
- Complete your last stitch before reaching the corner
- Bring the needle to the back, then re-emerge on the next side
- Start the new side slightly overlapping the corner for seamless continuity
Why Blanket Stitch Works: The technique is stronger than zigzag machine stitching and more attractive than liquid fray check. Aida’s grid-like holes make spacing consistent, so it’s beginner-friendly.
Join Multiple Panels With Sashing Strips

If your blanket design uses two or more stitched panels, sashing creates visual breaks between panels and adds structure. This technique gives your eye a rest between designs while creating a cohesive quilt top.
Attach 5-Inch Sashing Between Panels
Sashing strips frame each stitched piece and add several inches of coordinating fabric to your finished size.
Assembly Steps
- Cut cotton fabric strips 5 inches wide, long enough to match each panel side you want to connect
- Place your first panel right side up on your work surface
- Lay a sashing strip right side down along one edge, aligning the corners precisely
- Pin in place and sew with a ½ inch seam allowance
- Attach the second panel right side down on the opposite side of the sashing strip
- Press all seams flat with a warm iron to reduce bulk and ensure even surfaces
Expert Tip: Lightly starch your Aida fabric before ironing to prevent distortion. Never iron directly over stitched areas. Use a pressing cloth instead.
Add Decorative Borders for a Finished Look
Borders frame your cross stitch design and bring visual balance to the overall blanket. They also add extra fabric for wrapping or tucking, making the blanket more functional.
Sew 8-Inch Wide Fabric Borders
Wider borders create a substantial blanket that feels luxurious and provides more coverage.
How to Measure and Attach
- Cut two lengthwise borders equal to your current top width, making each 8 inches wide
- Sew to the top and bottom edges, pressing seams toward the borders
- Measure your new width after lengthwise borders are attached
- Cut two widthwise borders to match this measurement, also 8 inches wide
- Sew to the left and right sides, optionally mitering corners for a clean finish
Design Freedom: Mix border colors, use printed fabrics, or create pieced borders from scrap fabric. There are no strict rules beyond ensuring structural stability.
Layer With Batting and Backing
This is where your flat embroidery transforms into a padded, warm blanket. The three-layer stack consists of your quilt top, batting for cushioning, and backing fabric for the underside.
Prepare the Three-Layer Sandwich
You will need cotton batting, backing fabric cut 2-3 inches larger than your top on all sides, and a large flat surface for layering.
Layering Order
- Lay your batting flat on the work surface, smoothing out any wrinkles or folds
- Place your quilt top right side down on top of the batting
- Align all edges and pin around the perimeter and across the center
- Sew top and batting together with a ½ inch seam on all four sides, keeping the batting underneath the sewing machine presser foot to prevent jamming
Critical Step: Always place batting on the bottom when sewing. This prevents the fluffy fibers from catching in the machine mechanism and ensures smooth fabric feeding.
Attach Backing and Turn Right Side Out
This envelope-style construction creates a clean, reversible blanket with hidden seams. The technique is similar to making a pillow cover and results in professional-looking results.
Sew and Flip Construction Method
- Lay your backing fabric right side up on a flat surface
- Place your quilt top and batting unit on top, with the right side of the quilt top facing down (right sides together)
- Pin thoroughly around all edges to prevent shifting during sewing
- Sew with a ½ inch seam, leaving a 6-8 inch gap on one side for turning
- Trim corners and excess backing fabric to reduce bulk at the edges
- Turn the blanket right side out through the opening, using a chopstick or similar tool to push out corners gently
- Press edges flat with an iron
- Hand-stitch the gap closed using a ladder stitch, or topstitch ¼ inch from the edge around the entire blanket to close by machine
Visual Cue: If your backing fabric is slightly larger than the top, it will shrink to match during pressing. This ensures no batting shows along the edges.
Choose Final Finishing: Binding or Edge Stitching
For maximum durability, especially on blankets that will be washed frequently, adding binding or edge stitching secures all layers and prevents separation over time.
Apply Cotton Binding for Durability
Binding encases the raw edges and gives your blanket a finished, store-bought look.
Binding Application Steps
- Cut 2.5 inch wide strips of cotton fabric, joining them diagonally to make one long piece
- Fold the strip in half lengthwise and press to create a crease
- Sew the raw edges to the blanket front using a ¼ inch seam
- Wrap the binding to the back and hand-stitch in place using a matching thread
Alternative Approach: Topstitch ⅛ inch from the edge around the entire perimeter. This secures all layers and hides the turning seam in one quick step.
Care for Longevity and Softness
Proper care extends the life of your handmade blanket significantly. Taking a few precautions during washing and storage protects both fabric and stitching.
Washing and Storage Guidelines
- Pre-wash all fabrics before starting to prevent uneven shrinkage after completion
- After finishing, hand wash in cool water with mild detergent, or use a gentle machine cycle inside a mesh bag
- Dry flat or tumble dry on low heat. High temperatures can weaken embroidery floss over time
- Store by rolling or folding with acid-free tissue paper. Avoid creasing directly over stitched areas to prevent thread stress
Storage Tip: Never fold your blanket along the stitched lines. Rolling prevents thread breakage and maintains the integrity of your embroidery.
Customize for Gifting and Themes
Cross stitch blankets become treasured gifts when tailored to the recipient. Thoughtful design choices transform a craft project into a meaningful present.
Popular Design Themes
- Baby blankets featuring names, birth dates, animals, or nursery rhymes
- Wedding keepsakes with monograms, wedding dates, or love-themed motifs
- Seasonal quilts with holiday scenes, floral patterns, or zodiac symbols
Fabric Pairing Recommendations
- Use flannel backing for baby blankets. It adds softness and warmth
- Match border colors to nursery decor or wedding palette
- Add metallic floss accents sparingly for elegant shimmer on special occasion pieces
Creative Boost: Layer in backstitch outlines or French knots within your cross stitch design to add texture and visual interest before assembling the blanket.
Troubleshoot Common Assembly Issues
Even experienced crafters encounter problems during blanket assembly. Knowing how to address these issues saves time and prevents frustration.
Batting Jamming in Your Sewing Machine
- Cause: Batting gets caught under the presser foot during sewing
- Fix: Always position batting on the bottom when sewing layers together. The fabric should feed from top to bottom through the machine
Misaligned Layers During Quilting
- Cause: Fabric shifts while pinning or sewing
- Solution: Pin every 3-4 inches and use a walking foot attachment to feed multiple fabric layers evenly through your machine
Fraying Despite Edge Finishing
- Cause: Waiting too long to apply edge treatment
- Prevention: Apply blanket stitch immediately after completing your cross stitch. Do not leave edges unfinished between stitching and assembly
Pro Tip: Test your machine settings on scrap fabric before working on your final piece. Use stitch length of 2.0-2.5 mm and needle size 70/10 or 80/12 for best results.
Frequently Asked Questions About Making a Cross Stitch Blanket
What count Aida cloth should I use for a blanket?
Aida cloth in the 14-18 count range works best for cross stitch blankets. Lower counts (14) create larger stitches and a more visible grid, while higher counts (18) produce denser stitching with smaller holes. Your choice depends on the level of detail in your design.
Can I machine wash a cross stitch blanket?
Yes, but use caution. Hand washing in cool water with mild detergent is safest. If using a machine, select a gentle cycle with cold water and place the blanket inside a mesh laundry bag. Avoid high heat when drying, as it can weaken embroidery floss over time.
How do I keep my cross stitch from fraying after finishing?
Apply a blanket stitch to all four edges before assembly. This hand-sewn border locks the fabric threads in place and prevents unraveling during handling and washing. Complete this step immediately after finishing your stitching rather than waiting.
What type of batting is best for a baby blanket?
100% cotton batting is ideal for baby blankets. It is naturally soft, breathable, and hypoallergenic. Pre-wash the batting before use to prevent shrinkage after the blanket is completed and washed.
Do I need a walking foot for quilting a cross stitch blanket?
A walking foot is highly recommended when sewing through multiple layers. It feeds the top, batting, and backing fabrics through the machine evenly, preventing shifting and puckering. If you do not have a walking foot, pin generously every 3-4 inches to minimize movement.
How do I turn corners neatly when adding borders?
Measure carefully before cutting border pieces. After attaching lengthwise borders, measure the new width and cut widthwise borders to match exactly. Sew with ½ inch seam allowance and press seams toward the borders after each addition. For mitered corners, fold and press before sewing.
Key Takeaways for Making a Cross Stitch Blanket
Creating a cross stitch blanket combines the meditative art of embroidery with practical quilting skills. The process transforms delicate stitching into a durable, usable piece that can become a family heirloom. Every step matters: securing threads properly prevents unraveling, finishing edges with blanket stitch stops fraying, and careful layering ensures your batting stays in place for years of use.
The most important considerations are pre-washing all fabrics to prevent post-completion shrinkage, using a walking foot when sewing multiple layers together, and applying edge treatments immediately rather than waiting. Whether you choose simple topstitching or formal binding, the goal is the same: protecting your hard work so it lasts.
Now that you understand the process, gather your materials and start assembling. Your finished cross stitch deserves to become a blanket you’ll treasure for years to come.

