
You’ve seen them at craft fairs and in family homes—luxurious purple and gold blankets made from Crown Royal whisky bags. These distinctive pouches, once used to package a beloved Canadian spirit, are now transformed into heirloom-quality quilts that carry deep sentimental value. Whether you’re crafting a tribute to a loved one, a gift for a whisky enthusiast, or a unique charity piece, learning how to make a Crown Royal blanket turns discarded bags into tangible warmth.
This guide walks you through every step of the process. You’ll discover how to source bags, disassemble them safely, prepare the fabric to prevent color bleeding, choose a design that showcases the iconic gold crown, and complete your project with professional results. By the end, you’ll have the knowledge to create a stunning Crown Royal blanket that honors memory and craftsmanship.
Source Enough Crown Royal Bags
The number of bags you need depends on your blanket’s final size. Each bag yields one usable logo square, two side strips, and scraps for smaller accents.
Determine Bag Count by Size
Plan your project using these guidelines:
• Mini quilt (12″ x 12″): 10 to 15 bags
• Lap blanket (48″ x 60″): 40 to 50 bags
• Wall hanging (30″ x 40″): 18 to 36 bags
• King-size quilt (110″ x 110″): 36 to 200 plus bags
If you’re combining Crown Royal squares with solid purple filler blocks or sashing, you can use fewer bags while still achieving a full, luxurious look.
Collect Bags Responsibly
Reach out to friends, family, and local bars to save empty Crown Royal bags for your project. Liquor stores often donate bags if you ask politely. Online crafting communities on Facebook and Reddit frequently have members who trade or give away bags. Holiday edition bags in red, green, or gold make striking accent pieces, but exclude them if you prefer a classic purple-and-gold aesthetic.
Disassemble Bags Without Damage
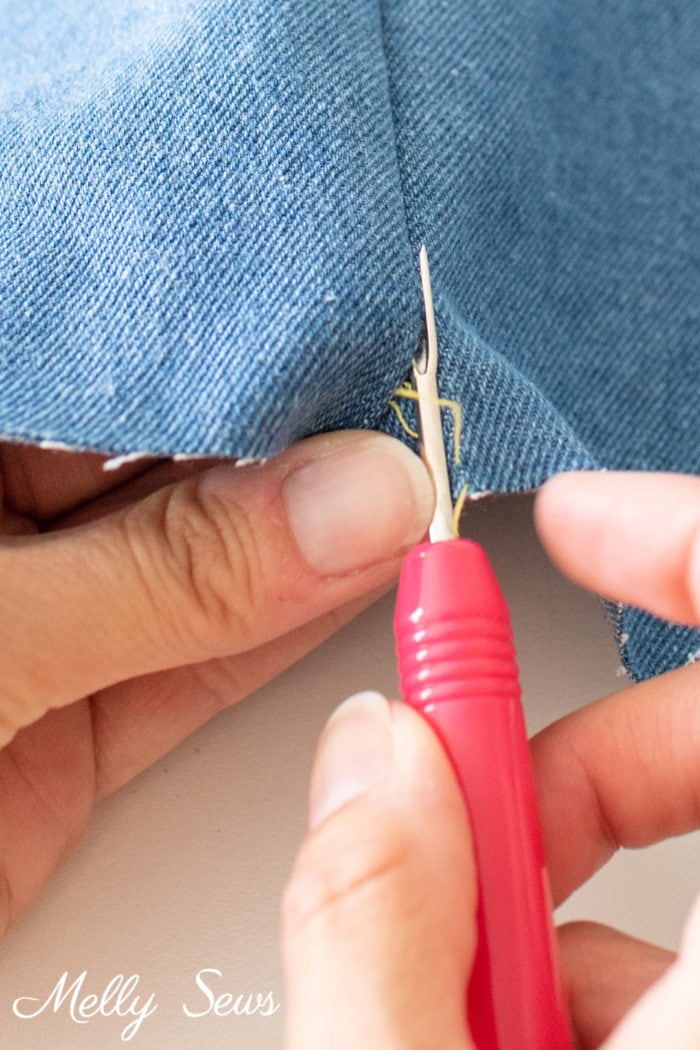
Opening Crown Royal bags requires patience and the right technique to preserve the valuable felt fabric.
Open the Side Seam Carefully
Lay the bag flat with the logo facing up. Use a seam ripper to cut the stitching along one vertical edge, working slowly to avoid tearing the delicate felt. Stop once the bag opens fully into a single panel. Avoid unpicking internal seams since they hold little extra fabric and increase the risk of unwanted rips.
Remove and Save the Gold Drawstring
Locate the knot inside the drawstring channel at the top of the bag. Pull the braided gold cord out completely and coil it for later use. These cords make elegant tassels or trim for your finished blanket.
Trim Along the Serged Edge
Cut along the stitched or serged border to free the main felt panel. Cut as close as possible to maximize usable fabric. Save narrow center strips for coasters, appliqué, or patchwork accents. One bag typically gives you one main logo square, two side strips, and scraps for small projects.
Wash Bags to Prevent Bleeding
Never skip the washing step. Crown Royal fabric often contains alcohol residue, perfume, or excess dye that can bleed onto other fabrics during construction or cleaning.
Launder Before Cutting
Wash all bags in cold water with mild detergent. Use a mesh laundry bag to protect the delicate felt. Air dry completely—never machine dry. Avoid bleach and fabric softener. One quilter reported dye bleeding into a white laundry load, so always wash these bags separately.
Why Pre-Wash Matters
Washing removes odors from alcohol or smoke and prevents color transfer during pressing or quilting. It also reveals any shrinkage or texture changes early in the process, allowing you to adjust your plans accordingly.
Press Fabric Safely
Crown Royal felt is heat-sensitive and requires careful ironing to avoid damage.
Use Low Heat and No Steam
Set your iron to low or cotton setting with no steam. Test on a scrap piece first since some stitching may melt. Use a pressing cloth between the iron and felt to protect the flocked surface. Move the iron in smooth motions and avoid lingering in one spot.
Focus on Flattening the Logo
Gently press around the embroidered crown to remove wrinkles without crushing the pile. Apply a light starch alternative like Best Press for stability. Remember that the back of the bag is solid purple cotton, making it ideal for borders, filler blocks, or backing fabric.
Cut Logo Squares Precisely
Accurate cutting ensures your crowns are centered and your blocks join together properly.
Center the Crown in Each Square
Cut 4.5″ to 5.5″ squares centered on the gold logo. For a 5″ unfinished square, align a 45-degree ruler line with the logo to center it perfectly on the bias. Use a sharp rotary cutter and self-healing mat for clean edges.
Maximize Fabric Yield
Cut two 2.5″ squares from leftover areas for filler blocks. Save 1.5″ x 5″ side strips for sashing or cornerstones. Label and organize pieces by size as you cut. Stretchy or fleece-like bags may shrink, so trim bottom tips after cutting to maintain proper dimensions.
Choose a Quilt Block Design

Several block patterns work well with Crown Royal fabric, each creating a different visual effect.
9-Patch with 4-Patch Corners
This fast and easy design works well for large quilts and beginners. Use a 12″ finished block with one Crown Royal square as the center. Add four 4-patch units in the corners using purple and gold 2.5″ squares. Four gold rectangles form the sides, with 3.5″ sashing between blocks and small cornerstones at intersections.
Friendship Star Block
This classic star pattern highlights the crown beautifully. The Crown Royal square sits at the center, surrounded by gold fabric triangles for star points and half-square triangles in purple and gold. A nine-patch frame surrounds the center, creating a radiant decorative effect perfect for wall hangings.
Chandelier Pattern
This elegant, symmetrical design is available as a free download. It uses 41 five-inch squares from bag fronts combined with 84 two-and-a-half-inch filler squares in an on-point layout with setting triangles.
Scrappy Memory Quilt Style
Ideal for tribute blankets, this style mixes Crown Royal squares with embroidered strips, donor bags, challenge coins, or encapsulated photos. Arrange pieces randomly or in a meaningful grid for high emotional value.
Plan Layout on a Design Wall
Visual planning prevents mistakes and ensures balanced design.
Arrange Blocks Visually
Lay out all blocks on a bed, floor, or design wall. Rearrange until logo placement, color balance, and symmetry feel right. For king-size quilts, use outdoor space if indoors is too small.
Keep Logos Upright
Ensure all crowns face the same direction for a cohesive look. When setting blocks on point (diamond-shaped), place colored squares on top and bottom to keep logos upright. You can alternate rotation for visual rhythm if desired.
Balance Colors and Textures
An all-purple quilt creates a cohesive, traditional look preferred by purists. A colorful quilt incorporates holiday bags as bold focal points. Distribute colorful bags evenly throughout to avoid visual clutter.
Assemble the Quilt Top
Building the quilt top requires systematic batch processing for efficiency and accuracy.
Sew Blocks in Batches
Work through each step for all blocks before moving to the next. Sew all 4-patch units first and press seams open or to one side. Chain-piece blocks around Crown Royal centers using a ¼” seam allowance throughout.
Add Sashing and Cornerstones
Cut sashing strips 3.5″ wide unfinished and sew between blocks. Insert small gold or purple squares as cornerstones at intersections. Miter sashing corners for a clean, professional finish.
Join Rows and Add Borders
Sew blocks into horizontal rows, pinning junctures to nest seams and prevent misalignment. Join rows into the full top, then add a 2″ or 4″ border using solid purple or gold fabric. A 4″ border can transform a wall-hanging top into a lap blanket.
Layer and Baste the Quilt Sandwich
Proper layering ensures your finished quilt holds together beautifully.
Build the Three Layers
Place backing fabric right side down on a flat surface. Add batting (cotton, polyester, or blend) on top. Position the quilt top right side up on top, ensuring all layers are smooth and taut.
Baste Securely
Choose one basting method to hold layers together. Curved safety pins work well. Spray baste provides light, even coverage. Thread basting offers precision for detailed projects. Basting prevents shifting during quilting.
Quilt With Care
Crown Royal fabric is dense and uneven, requiring special quilting techniques.
Avoid Quilting Over Felt
Quilt only in cotton or flannel areas (sashing, borders, filler blocks) to prevent needle damage, puckering, or thread breakage. Outline the logo with stitching to stabilize it without quilting directly over the dense felt.
Free-Motion Quilting Ideas
Use switchback stitches (zig-zag motion) in gold areas. Create spirals or swirls in purple felt sections. Add spiral sun-star motifs to corners. Stitch wishbone or piano-key lines in borders.
Walking Foot Quilting
Structured quilting with a walking foot creates a clean look. Grid quilting adds even horizontal and vertical lines. Echo quilting follows block shapes. Diagonal crosshatching adds depth and stability. Many crafters send projects to long-arm quilters for professional results.
Bind and Finish Your Blanket
The binding completes your blanket and adds the final decorative touch.
Choose Binding Fabric
Select solid dark purple or gold cotton for visual continuity. Use double-fold bias binding for durability. Pre-made binding works well, or cut your own for a custom look.
Apply Binding Smoothly
Sew binding to the front with a ¼” seam. Fold to the back and hand-stitch for an invisible finish. Miter corners for sharp, clean edges. Add piping with cording for a decorative upgrade.
Add Tassels from Drawstrings
Attach the saved gold braided cords as corner tassels. Use strong thread or fabric glue to secure them. Trim ends evenly for a polished look.
Label Your Quilt
Create a fabric label with the completion date, number of bags used, recipient or donor name, dedication, and your signature. Sew the label to the back of the quilt as a lasting keepsake.
Care for Longevity
Proper care ensures your Crown Royal blanket lasts for generations.
Clean Only When Necessary
Dry-clean your blanket for best results. Spot clean with a damp cloth if needed. Never machine wash or dry, as this causes dye bleeding, felt shrinkage, logo distortion, and fabric pilling.
Dry and Store Properly
Lay the blanket flat to dry after spot cleaning. Do not hang, which can stretch the felt. Store flat or rolled, not folded long-term. Use acid-free tissue paper if folding is necessary. Keep the blanket away from direct sunlight to prevent fading.
Frequently Asked Questions About Making a Crown Royal Blanket
How many Crown Royal bags do I need for a lap blanket?
A lap blanket sized 48″ x 60″ typically requires 40 to 50 Crown Royal bags. You can use fewer bags if you incorporate solid purple filler blocks or sashing between the logo squares.
Do I need to wash Crown Royal bags before using them?
Yes, always wash Crown Royal bags before cutting or sewing. The fabric often contains alcohol residue, perfume, or excess dye that can bleed onto other fabrics. Wash separately in cold water with mild detergent and air dry completely.
Can I machine wash a Crown Royal blanket?
No, never machine wash or dry a finished Crown Royal blanket. The dense felt fabric is prone to shrinkage, dye bleeding, and pilling. Dry-clean only or spot clean with a damp cloth and lay flat to dry.
What block design works best for beginners?
The 9-patch with 4-patch corners design works best for beginners. It uses simple shapes, requires no special cutting angles, and creates a clean, structured look. This pattern also works efficiently for covering large areas like king-size quilts.
How do I keep the crowns facing the right direction?
When arranging blocks on a design wall, ensure all crowns face the same direction. If using an on-point layout (diamond-shaped blocks), place colored squares on the top and bottom of each block to keep logos upright. Step back frequently to check alignment.
Can I include holiday edition Crown Royal bags in my blanket?
Yes, holiday edition bags in red, green, or gold make striking accent pieces. Distribute them evenly throughout the layout to avoid creating visual clutter. Exclude them if you prefer a classic uniform purple-and-gold aesthetic.
Key Takeaways for Making a Crown Royal Blanket
Creating a Crown Royal blanket is more than a craft project. It transforms discarded whisky bags into a meaningful heirloom that carries stories and memories in every stitch. The process requires patience, attention to detail, and respect for the unique properties of Crown Royal fabric.
The most critical steps are washing bags before cutting to prevent dye bleeding, pressing with low heat to protect the flocked surface, and quilting only in cotton areas to avoid damaging the dense felt. Choosing a design that balances the bold purple and gold elements ensures your finished piece looks professional and cohesive.
Your next step is to start collecting bags from friends, family, and local businesses. Aim for 40 to 50 bags for a lap-size blanket, and plan your design before cutting. With proper preparation and careful construction, you’ll create a stunning Crown Royal blanket that becomes a treasured family heirloom.

