
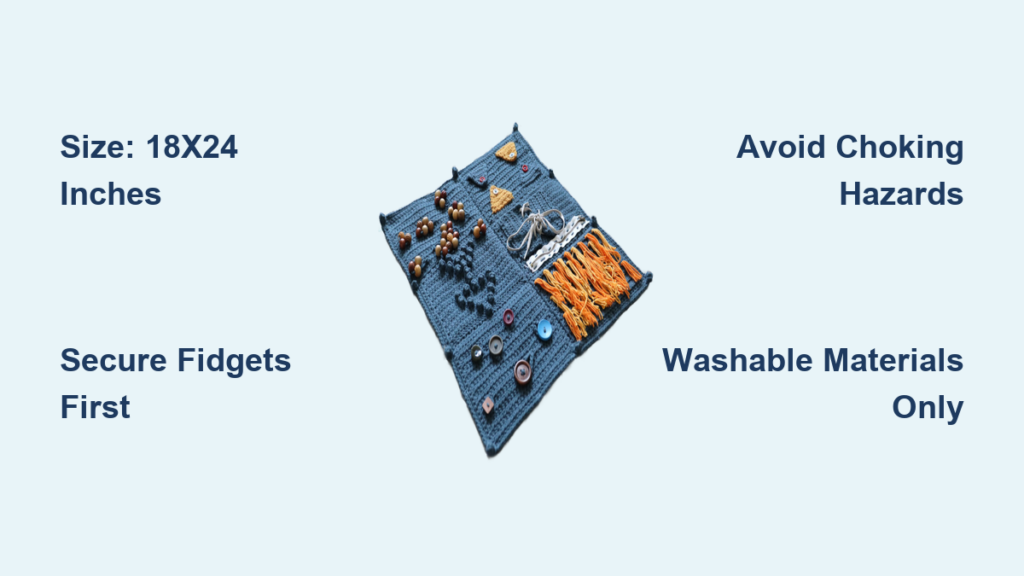
If you’ve ever wondered how to make a fidget blanket, you’re not just crafting a quilt. You are creating a therapeutic tool that soothes anxiety, calms restless hands, and supports sensory needs. Whether for someone with dementia, autism, PTSD, or ADHD, a fidget blanket offers tactile stimulation through zippers, buttons, ribbons, and textured fabrics. This hands-on sensory mat keeps fingers busy, reduces agitation, and promotes focus.
In this guide, you’ll learn every step to make a durable, engaging fidget blanket from scratch. From selecting the right materials and designing sensory zones to reinforcing attachments and ensuring safety, we will walk you through a proven process used by caregivers, therapists, and crafters worldwide. No prior quilting expertise is needed.
Choose the Right Size and Shape for Your Fidget Blanket
Pick Dimensions That Work for Intended Use
The ideal fidget blanket measures 18″ × 24″ or 24″ × 24″, fitting comfortably across a lap without slipping off. For smaller hands or travel use, consider 12″ × 12″ or 17.5″ × 17.5″ options. Avoid oversized blankets exceeding 30″ in any direction, as they become unwieldy and difficult to manage.
Select a Functional Form
Most fidget blankets are rectangular or square, but you can also create:
• Apron-style blankets with shoulder and waist ties for wheelchair users
• Pillow or lap mats, either stuffed or flat
• Travel pouches that fold into themselves
• Wheelchair caddies that attach to chair arms
Choose the form that best matches the user’s mobility and environment.
Select Therapeutic Colors and Textures

Use High-Contrast Colors for Visibility
For dementia patients or users with low vision, bright bold colors like red, orange, or fuchsia improve visibility significantly. Combine stimulating shades with calming ones, such as a blue zipper on yellow fabric, to balance engagement and relaxation. Avoid subtle pastels or busy prints that can cause confusion.
Incorporate Five Key Tactile Sensations
Mix various textures to activate different sensory responses throughout your blanket:
• Soft materials like fleece, minky, or velvet
• Smooth surfaces such as satin, nylon, or silk
• Rough textures including burlap, corduroy, or Velcro
• Stretchy components like elastic, spandex, or knit fabrics
• Crinkly elements such as taffeta, plastic mesh, or crinkle fabric
Add sheer layers like organza or lace for visual interest, and include textured trims such as pom-poms, rickrack, or fringe for extra sensory input.
Plan Your Layout and Sensory Zones

Arrange a 3×3 Grid of Fabric Squares
Cut nine 6.5″ × 6.5″ fabric squares, which allows for a ¼” seam allowance resulting in an 18″ × 18″ top. Use a mix of fat quarters, scrap fabrics, or repurposed clothing, making sure to pre-wash everything to prevent shrinkage. Lay out the squares in a grid before sewing, alternating textured and solid-color patches to avoid sensory overload.
Design Purposeful Sensory Zones
Divide your blanket into functional areas that guide the user’s hands:
• Texture zone with patches of different fabrics like fur, satin, or burlap
• Motion zone featuring zippers, buttons, toggles, and sliders
• Visual zone with bright colors, contrasting patterns, and reflective tape
• Memory zone using fabrics from old clothes, laminated photos, or hobby-related items
This zoning supports cognitive engagement and helps users navigate the blanket intuitively.
Gather Safe, Durable Materials
Core Fabric Layers
You will need three main layers for your fidget blanket. The quilt top consists of nine 6.5″ × 6.5″ fabric squares. The batting can be low-loft polyester, cotton flannel, or a fleece scarf. The backing should be soft and durable like flannel or fleece, cut slightly larger than the top. Add fusible interfacing to the back of each square to stabilize the fabric before attaching fidgets.
Approved Fidget Elements
Only use non-toxic, washable, securely attached items. Avoid anything that fits through a toilet paper roll, as this presents a choking hazard.
| Category | Safe Examples | Items to Avoid |
|---|---|---|
| Fasteners | Zippers, buttons, snaps, Velcro, buckles | Loose toggles, small clasps |
| Manipulatives | Ribbons, keychains, plush toys, rings | Beads, loose charms |
| Stretch Components | Elastic bands, bungee cords, spandex strips | Thin rubber bands |
| Pockets | Zippered, Velcro, filled with poly pellets | Open, unsecured pouches |
| Hardware | Nuts, washers, PVC fittings (filed smooth) | Sharp-edged metal |
| Interactive | Screw caps, sliding tabs, bendable figures | Detachable parts |
Tools You Will Need
• Sewing machine, preferably heavy-duty
• Scissors or rotary cutter
• Pins or fabric clips
• Iron and pressing cloth
• Spray basting adhesive or safety pins
• Heavy-duty thread for upholstery or topstitching
• Hand-sewing needle
• Measuring tape and fabric marker
Attach Fidgets Before Sewing Squares Together
Why Pre-Attach All Elements
Once your squares are sewn together, reaching tight spaces becomes nearly impossible. Attach all fidgets before assembling the top to ensure every element is properly secured in accessible locations.
Secure Each Type Properly
Zippers
Sew along both sides using a zipper foot. Reinforce ends with X-shaped stitching and cover raw ends with fabric tabs to prevent snagging.
Buttons
Use heavy-duty thread and double-knot the ends. Sew through all holes and apply fabric glue under knots for added security. For large buttons, add bar tacks using dense zigzag stitches.
Ribbons and Laces
Sew one end securely into a seam and leave the other end free to pull or tie. Weave through slits in fabric for added security.
Velcro
Place the soft side up and the rough side down. Stitch around all edges and avoid exposing the scratchy side where possible.
Elastic and Stretch Straps
Fold ends under and zigzag stitch. Stretch slightly while sewing to prevent puckering and anchor at both ends with reinforced stitching.
Keys, Nuts, and Washers
Thread with ric rac or cording. Sew across the square, securing both ends. File sharp edges smooth and cover with fabric if needed.
Poly-Pellet Pockets
Sew a 5″ × 5″ pouch from mesh or sheer fabric. Fill with washable plastic pellets and seal shut with tight stitching. Attach to the square with perimeter stitching.
Pro Tip: Use up-and-down hand stitching for plush toys. Pull the thread through the base five times before knotting for maximum hold.
Sew the Quilt Top Together
Join Squares with Strong Seams
Place two squares right sides together. Sew with a ¼” seam allowance, backstitching at start and end for security. Press seams open or to one side. Repeat for all rows, then join rows into a full 3×3 top. Nest seams by pressing adjacent rows in opposite directions for cleaner alignment.
Navigate Around Bulky Fidgets
Go slowly when sewing near zippers or buttons. Lift the presser foot to pivot if needed. Use a chopstick or knitting needle to poke out corners after turning.
Add a Border for Stability
Why Add a Border
A border adds stability, covers seam bulk, and slightly enlarges the blanket. Cut two 2.5″ wide strips for the sides and two for the top and bottom. Sew to the quilt top, press, and trim for squareness.
Layer and Baste the Quilt Sandwich
Assemble the Three Layers
From bottom to top, layer your blanket in this order:
- Backing fabric with right side facing down
- Batting cut 2″ larger than the top on all sides
- Quilt top with right side facing up
Smooth each layer to remove wrinkles. Secure with spray basting adhesive or safety pins placed every 3 to 4 inches.
No-Binding Option: Skip batting entirely. Place quilt top on fleece backing with right sides together. Sew a ¼” seam, leave a 6″ opening, trim corners, turn right side out, and hand-stitch the opening closed.
Quilt the Layers Together
Stitch-in-the-Ditch Method
Sew ¼” from each seam line, known as stitch-in-the-ditch, to secure all layers. This method hides stitches while reinforcing seams. Avoid sewing over bulky fidgets. Navigate around them with careful pivoting and use a walking foot if your machine has one to handle thick areas.
Alternative: Outline Each Square
For visual definition, stitch 1/8″ inside each square’s edge. This adds structure and helps maintain shape during washing.
Trim and Bind the Edges
Trim Excess Fabric
After quilting, trim batting and backing so all layers align, leaving a clean ¼” edge around the entire blanket.
Apply Binding for a Finished Look
Machine Binding: Cut four 2.5″ strips and join them diagonally. Press in half lengthwise. Sew the raw edge to the quilt, miter the corners, and overlap the ends.
Hand Binding: Fold binding over the edge and use an invisible ladder stitch every ¼”. This keeps the front clean and tactile-safe.
Use contrasting thread for visual appeal or matching thread for subtlety.
Perform Final Safety and Durability Checks
Test Every Attachment
Tug each fidget 20 or more times to simulate real use. Check for:
• Thread fraying
• Fabric tearing
• Component loosening
• Seam separation
Reinforce any weak spots with bar tacks, X-stitches, or fabric glue.
Follow Critical Safety Rules
• No small parts that could be swallowed
• No sharp edges on metal items
• All materials must be washable
• Supervise children and cognitively impaired users
• Avoid latex or known allergens
Golden Rule: If an item fits through a toilet paper roll, it is a choking hazard.
Clean and Maintain the Fidget Blanket
Washing Instructions
Machine wash cold on a gentle cycle using mild detergent. Air dry or tumble dry on low heat, as high heat can melt plastic components. Inspect after every wash for wear.
Care Tips
Remove soft toys before washing or place them in zippered pockets. Replace damaged elements promptly. Provide a care label with washing instructions to the recipient.
Customize for Personal Connection
Match Interests and Identity
Tailor the blanket to the user for maximum engagement:
• For men: Include denim, plaid, nuts, bolts, keys, or tool-themed zippers
• For women: Add lace, hankies, jewelry, floral fabrics, or cosmetic cases
• For children: Use bright colors, cartoon buttons, soft toys, or animal shapes
• For elderly users: Incorporate fabrics from old clothes, work uniforms, or hobby items
Use Thematic Designs
• Garden theme with flower buttons, green ribbons, and leaf felt
• Beach theme with shells, netting, rope pulls, and sand-colored fleece
• Kitchen theme with mini oven mitts, Velcro, and faux stove dials
• Nautical theme with anchors, rope, sailor knots, and boat zippers
• Mechanical theme with washers, PVC pipes, screw caps, and knobs
Explore Adaptive Variants
Apron-Style Fidget Blanket
Ideal for wheelchair users, add shoulder and waist ties using strong ribbon. Attach at corners with reinforced stitching to keep the blanket in place during movement.
Travel-Friendly Fidget Mat
Make with lightweight fleece and minimal hardware. Design it to fold into a zippered pouch and include pockets for small items.
Fidget Bag or Caddy
Sew into a hanging bag with fidgets on the front. Attach to wheelchairs, bed rails, or walkers to combine storage and sensory play.
Test and Improve Your Design
Functional Testing
Simulate real use by zipping and unzipping 20 times, pulling ribbons, stretching bands, and twisting knobs. Check for wear after each action.
Gather User Feedback
Observe which elements are used most and which are avoided due to texture or difficulty. Note whether the blanket stays in place during use. Adjust future versions based on responses.
Frequently Asked Questions About Making a Fidget Blanket
What is the best size for a fidget blanket?
The ideal size is 18″ × 24″ or 24″ × 24″ for lap use. Smaller sizes like 12″ × 12″ work well for children or travel. Anything over 30″ becomes difficult to manage.
What materials are safe for fidget blankets?
Use non-toxic, washable materials only. Safe options include zippers, buttons, snaps, Velcro, ribbons, and fleece. Avoid small beads, loose charms, sharp metal, or anything that could fit through a toilet paper roll.
How do I attach fidgets securely?
Attach all fidgets before sewing squares together. Use heavy-duty thread, backstitch at start and end, and reinforce with bar tacks or X-stitches. Apply fabric glue under knots for extra security.
Can I wash a fidget blanket?
Yes, machine wash cold on gentle cycle with mild detergent. Air dry or tumble dry low to protect plastic components. Inspect after each wash for wear or loose attachments.
How much does it cost to make a fidget blanket?
Estimated costs range from $16 to $28 for materials including fabric, batting, and fidget components. Many items can be sourced from thrift stores or repurposed to reduce costs significantly.
Key Takeaways for Creating a Fidget Blanket
Creating a fidget blanket combines craft with compassion. The process involves selecting appropriate sizes, mixing therapeutic textures and colors, and planning sensory zones that guide user engagement. Most importantly, every fidget element must be securely attached using heavy-duty thread and reinforced stitching. Test all attachments by tugging firmly before completing the project.
Washability and safety should guide your material choices. Avoid small parts, sharp edges, and anything that could present a choking hazard. Personalize the blanket with themes, colors, and items that match the recipient’s interests and background. Whether made for a loved one or donated to a care facility, each stitch carries the intention of soothing hands and calming minds through thoughtful, tactile design.

