
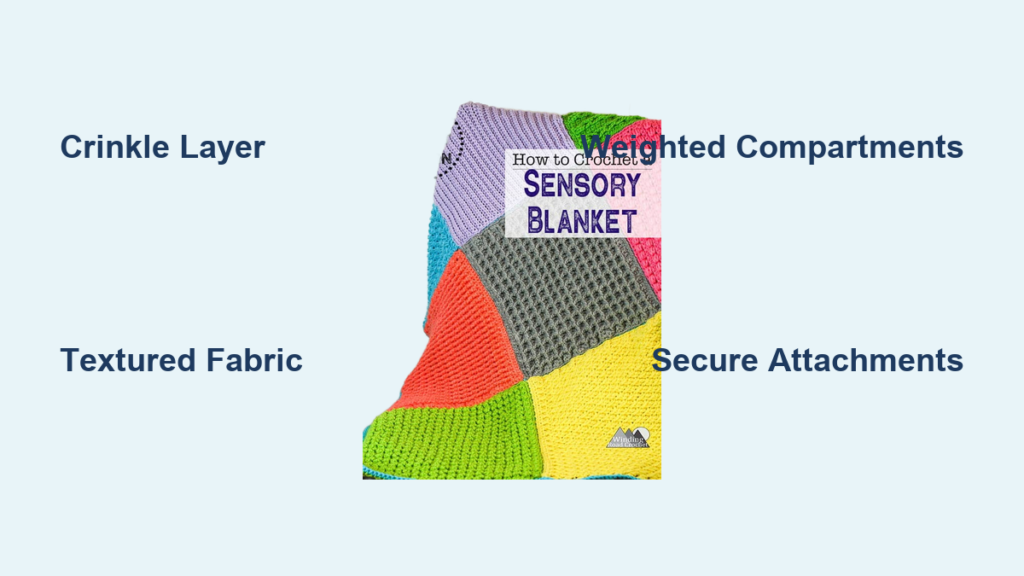
If you’ve ever wondered how to make a sensory blanket, you’re in the right place. These tactile-rich textiles are more than just cozy. They serve as powerful tools for development, therapy, and emotional regulation. Whether you’re crafting for a baby’s tummy time, a child with autism, or an adult needing calming deep pressure, a DIY sensory blanket offers customization, safety, and significant savings over store-bought versions.
From crinkle sounds to textured patches and weighted comfort, every element can be tailored to suit specific needs. This guide walks you through four proven methods using accessible materials like oven bags, fabric scraps, and poly pellets. You’ll learn step-by-step construction, age-appropriate features, safety essentials, and pro sewing tips to ensure your blanket is durable, engaging, and safe.
Choose Your Sensory Blanket Type
Different sensory blankets serve different purposes. Selecting the right type depends on the user’s age, developmental needs, and sensory goals.
Crinkle Blanket for Babies
The crinkle blanket uses an oven bag between fabric layers to create a satisfying auditory sound. This type works best for infants 0 to 12 months during tummy time and sensory exploration.
Best fabrics include fleece, cotton, and terry cloth. The key feature is auditory feedback from the crinkle layer. A 12×12 inch size works well for easy gripping.
Textured Patchwork Quilt
This blanket combines multiple fabric types into a tactile playground. Great for toddlers and sensory seekers who love touching different materials.
Add-on features include buttons, zippers, ribbons, and bead sliders. The design is customizable, allowing you to swap features as the child grows. This approach supports fine motor development and visual tracking.
Weighted Sensory Blanket
Weighted blankets use poly pellets or glass beads in stitched compartments to apply gentle, even pressure. This type works well for anxiety, ADHD, autism, or insomnia.
The weight rule is 10 to 15 percent of body weight for children and 5 to 10 percent for adults. Never use on infants under 12 months. Durable fabrics like cotton, canvas, and microfiber work best.
Triangle Hexagon Design
Six textured triangles form a hexagon-shaped blanket. This design is durable, symmetrical, and perfect for structured sensory play in classroom or clinic settings.
Fabrics like cotton, corduroy, and Cuddle work well. The design typically includes crinkle inserts and soft textures, built to last through heavy use.
Gather Essential Materials
Having the right materials before starting makes the construction process smoother. Here is what you will need.
Base Supplies You Will Need
The following table outlines essential materials for any sensory blanket project.
| Material | Purpose |
|---|---|
| Outer fabric | Fleece, cotton, minky, flannel, faux fur, satin |
| Crinkle layer | Oven bag, crinkle fabric |
| Sewing tools | Machine, scissors, pins, wonder clips, seam ripper |
| Binding | Satin binding tape, bias tape |
| Thread | Polyester for standard use, heavy-duty for weighted blankets |
| Yarn or thick thread | Securing beads and buttons |
Pro Tip: Use a walking foot when sewing slippery fabrics like minky or satin to prevent shifting.
Sensory Additions
These optional features enhance the sensory experience. Choose based on user needs and age appropriateness.
Ribbon loops provide grasping and pulling practice. Keep them 3 to 6 inches long and sew securely. Zippers offer fine motor practice. Use soft, non-metal options. Buttons develop pincer grasp. Secure with heavy thread and knot 10 or more times on the reverse side. Beads provide sliding and sound stimulation. Avoid for children under 12 months. Double-sided sequins deliver color-flip fun. Seal backing tightly. Wooden rings enable snap-on play. Attach with snaps. Teething beads provide oral stimulation. Use non-toxic, large-size options only.
Build a Crinkle Blanket (Beginner-Friendly)

This simple project takes about an hour and uses basic materials. Follow each step carefully for the best results.
Cut Fabric and Crinkle Layer
Cut two 12×12 inch squares from fleece or cotton. Cut an oven bag to the same size. Keep both plastic layers intact for maximum crinkle effect.
Why oven bags? They are cheap, effective, and widely available in any grocery store.
Layer and Pin Together
Stack in this order starting from the bottom. First, place the bottom fleece with right side facing up. Second, add the oven bag with right side facing up. Third, place the top fleece with right side facing down.
Insert ribbon ties that are 5 to 6 inches long at corners or edges before adding the top layer. Use wonder clips to hold all layers together. This prevents shifting during sewing.
Sew Perimeter with Opening
Stitch around all edges using a ¼ inch seam allowance. Leave a 3 to 4 inch gap unsewn for turning. Backstitch at both start and end points for security.
Trim and Turn Right Side Out
Clip corners diagonally to reduce bulk. Trim the oven bag ¼ inch inside the stitching line. Use a Clover turning tool to push out corners. Press flat with a low-heat iron, testing on a scrap piece first.
Close the Gap
Fold raw edges inward to meet the stitched line. Pin or clip closed. Topstitch around the entire blanket at ¼ inch to seal the opening.
Pro Tip: Mark the opening with clips before turning to make it easier to find later.
Add Play Features
Install snaps using a snap tool. Attach a wooden ring to one corner. Snap the ring to the opposite side for interactive play.
Make a Textured Patchwork Blanket
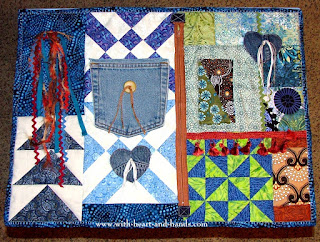
This project allows for maximum creativity. Use fabric scraps to keep costs low while creating endless texture combinations.
Cut and Prepare Fabric Squares
Use scrap fabric including felt, fleece, faux fur, velvet, and sequined cloth. Cut into 4×4 to 6×6 inch squares. One creator used double-sided sequined fabric for color-flip fun.
The only thing I bought new was the sequin fabric. Everything else came from my DIY closet.
Customize Each Square
Enhance individual pieces with various sensory elements. For bead sliders, thread beads onto yarn and sew through fabric. Knot 10 or more times on the reverse for security. Attach buttons, zippers, and ribbons with strong thread. Leave some squares plain for texture contrast.
Tip: Use yarn with a large needle when sewing into felt. Regular thread pulls through easily.
Assemble the Top
Arrange squares into a grid. Sew together with right sides facing. Use 3/8 inch seam allowance if mixing stretchy and non-stretch fabrics. Press seams open with a seam roller, which is safe for heat-sensitive fabrics.
Attach Backing
Cut fleece or minky to match the top size. Place backing right side down on the quilt top. Pin or clip layers together.
Add Border Ribbons
Create 3 to 5 inch ribbon loops. Position so the loop faces inward while the ends extend beyond the edge. Sandwich the ends between layers. Sew around the perimeter with ¼ inch seam, leaving a small gap for turning. Turn, press, and stitch closed.
Warning: Supervise use if the blanket includes beads or buttons that could pose choking hazards.
Create a Triangle Hexagon Blanket
This geometric design creates a durable, professional-looking sensory blanket. The hexagon shape provides structured sensory play.
Cut Six Fabric Triangles
Cut six 9×11 inch rectangles from cotton, corduroy, or Cuddle. Use an 8½ inch triangle ruler to mark and cut each into a triangle. Final triangle size should be approximately 8½ × 11 inches.
Make Crinkle Triangle Panels
For crinkle-enhanced triangles, layer main fabric right side up, then crinkle material, then muslin. Baste around edges. Mark triangle points and baste 1/8 inch inside the lines. Cut along basted lines.
Cut and Align Triangles
Use a Super Sidekick Ruler or template for precision. After the first cut, flip the ruler and align to the 8½ inch line. Cut the second edge for a perfect triangle.
Tip: Use a rotating cutting mat to avoid distorting stretchy fabric.
Sew Into a Hexagon
Pair up triangles and sew with 3/8 inch seam. Press seams open with a seam roller. Create two half-hexagons with three triangles each. Join the halves by clipping the center seam with wonder clips. Sew the first inch, check alignment, then continue if points match.
Add Backing and Quilt
Use Cuddle or minky for backing. Layer with the hexagon top with right sides together. No batting is needed.
Quilt by stitching in the ditch along all seams. Add parallel lines 1 inch from each ditch for subtle texture. Baste before binding to prevent shifting.
Bind and Finish
Trim backing even with the top. Bind with bias tape or fabric strips. Hand or machine stitch for durability.
Nate is a fan of his sensory blanket!
Sew a Weighted Sensory Blanket
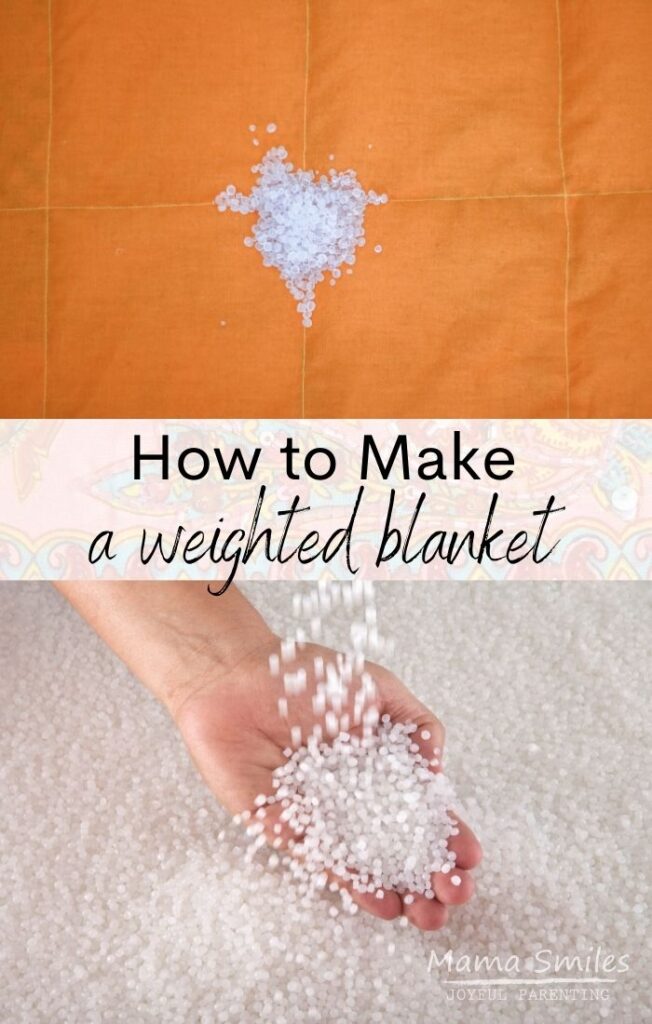
Weighted blankets provide deep pressure stimulation. This calming effect helps with anxiety, sleep issues, and sensory processing.
Calculate Proper Weight
For children, use 10 to 15 percent of body weight. For example, a 50 pound child needs a 5 to 7.5 pound blanket. For adults, use 5 to 10 percent of body weight. A 150 pound adult would use a 7.5 to 15 pound blanket.
Never exceed these limits without medical approval. Do not use on infants under 12 months.
Cut and Prep Fabric
Cut two identical pieces of durable fabric such as cotton or canvas. Pre-wash to prevent shrinkage later.
Sew Three Sides
Place fabrics with right sides together. Sew both sides and the bottom with a ½ inch seam allowance. Leave the top open.
Create Grid Compartments
Decide on compartment size, typically 4×4 inches to 6×6 inches. Mark vertical lines with disappearing ink pen. Sew vertical seams from bottom to top, stopping ½ inch from the top. Add a horizontal center seam if the blanket is large.
Fill Each Compartment
Calculate filling per square using this formula. Multiply total cups by 16 to get tablespoons. Divide by number of squares.
Example: ¼ cup or 4 tablespoons per 4×4 inch square. Use a kitchen scale for precision. Fill one column at a time using a funnel or spoon. Keep filling away from seams.
Seal Each Row
After filling a column, sew across each horizontal row. Repeat until all compartments are sealed. Leave the top 6 inches open.
Close the Top
Fold the top edge down ½ inch and press. Sew shut with a double row of stitching. Reinforce corners for durability.
Finish Edges
Choose one of three options. Bind with cotton or bias tape. Serge with an overlock machine. Or turn and topstitch for a clean edge.
Design for Maximum Sensory Impact
The effectiveness of a sensory blanket depends on thoughtful design. Consider texture variety, color contrast, and age-appropriate features.
Mix Textures Strategically
Combine soft materials like fleece, minky, and chenille with rough options such as corduroy and terry cloth. Add smooth fabrics like laminated cotton and satin. Include bumpy textures from faux fur and velvet. Incorporate crinkly elements using oven bags or crinkle fabric.
I used what I had on hand to create the biggest variety of textures that I could.
Use High-Contrast Colors
For infants 0 to 6 months, use black, white, red, and yellow for visual stimulation. For babies 6 months and older, choose bright patterns, animals, and polka dots. Double-sided sequins add interactive color-flip fun.
Match Features to Age
For 0 to 6 months, include crinkle, high-contrast, and soft textures. Avoid small parts. For 6 to 12 months, add ribbons, loops, and large buttons. Ensure all stitching is secure. For 12 months and older, include beads, zippers, and flaps while supervising play. For toddlers and special needs users, focus on laces, snaps, and pockets to develop fine motor skills.
Safety First: Critical Guidelines
Safety must be the top priority when making sensory blankets. Follow these guidelines without exception.
Prevent Choking Hazards
All beads, buttons, and sequins must be permanently secured. Use heavy-duty thread or yarn and knot 10 or more times on the reverse side. Test all attachments by pulling firmly before use.
Avoid Strangulation Risks
Keep ribbon loops to a maximum of 6 inches long. Avoid long strings or loose ends. Always supervise playtime.
Use Non-Toxic Materials
Choose baby-safe, pre-washed fabrics. Ensure plastics are BPA-free and food-grade. Oven bags are safe if not heated during use. Use teething-safe silicone beads that are certified non-toxic and large enough to prevent choking.
Weighted Blanket Rules
The user must be able to remove the blanket independently. Never use on infants under 12 months. Consult a doctor if the user has respiratory or circulatory issues.
Make sure you supervise your baby while he or she is playing with it.
Care and Maintenance Tips
Proper care extends the life of your sensory blanket. Follow these guidelines for lasting quality.
Washing Instructions
Machine wash cold on gentle cycle. Air dry or tumble dry on low heat. High heat melts oven bags. Spot clean heavily embellished areas. Inspect regularly for loose threads or damage.
Durability Boosters
Double-stitch high-stress seams. Reinforce corners on weighted blankets. Use organza lining in weighted compartments for extra safety. Check all attachments after every few washes.
Customize as Skills Grow
One of the best features of a DIY sensory blanket is its adaptability. Update features as the user develops new skills.
Modular Upgrades
Add snap-on rings, flaps, or zippers. Replace old features with new ones. Let the child help choose the next additions. This keeps the blanket engaging over time.
Long-Term Value
A sensory blanket can evolve with the child. Start simple with crinkle elements. Add complexity with zippers and lacing as skills develop. Use the blanket to track therapy progress and developmental milestones.
Frequently Asked Questions About Making a Sensory Blanket
What is the best fabric for a sensory blanket?
Fleece, cotton, minky, and faux fur work best. Choose soft fabrics for comfort and durable fabrics for longevity. Mix multiple textures for maximum sensory input.
How much does it cost to make a sensory blanket?
DIY sensory blankets cost $10 to $25 in materials. Store-bought versions range from $40 to $200. Using fabric scraps reduces costs even further, especially for expensive fabrics like minky.
Can I wash a sensory blanket with beads and buttons?
Yes, but use caution. Machine wash cold on gentle cycle. Air dry or tumble dry low. Inspect all attachments before and after washing. Reinforce any loose items immediately.
What age is appropriate for a weighted blanket?
Weighted blankets are not safe for infants under 12 months. For children, use 10 to 15 percent of body weight. For adults, use 5 to 10 percent. Always ensure the user can remove the blanket independently.
How do I secure beads to a sensory blanket?
Thread beads onto heavy yarn or thread. Sew through the fabric at both the start and end points. Knot 10 or more times on the reverse side. Pull test firmly before allowing use.
Can I make a sensory blanket without a sewing machine?
Yes, hand-sewing works for simple projects like crinkle blankets. Use a needle and strong thread. Hand-stitch around all edges. This takes longer but produces similar results.
Key Takeaways for Making Your Own Sensory Blanket
Making a sensory blanket is a meaningful project that supports development, comfort, and calm. The key to success lies in selecting the right type for your user, gathering quality materials, and following construction steps carefully.
Start with a simple crinkle blanket if you are new to sewing. This method uses basic materials and teaches fundamental techniques. Move on to textured patchwork or weighted blankets as your skills improve.
Safety must guide every decision. Secure all attachments firmly. Use age-appropriate features. Supervise playtime, especially with small parts.
The cost savings are substantial. A store-bought sensory quilt costs $40 to $80. Your DIY version costs $10 to $25. A professional weighted blanket runs $100 to $200. You can make one for $30 to $100.
Your sensory blanket can become a cherished tool that grows with its user. Start simple, build smart, and sew with purpose. The recipient will benefit from your careful craftsmanship for years to come.

