
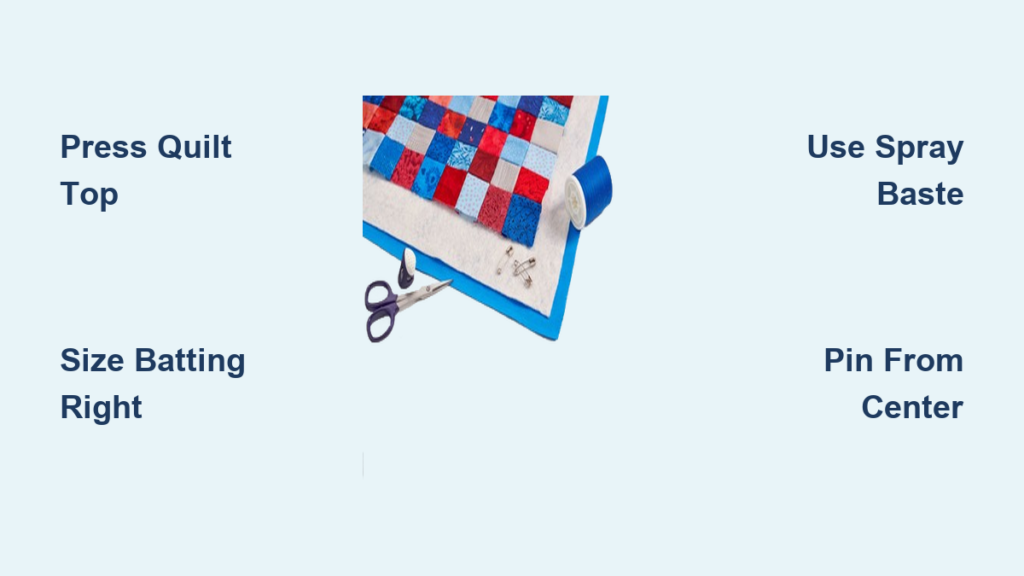
You’ve finished piecing your quilt top, and now it’s time to bring everything together. Learning how to assemble quilt top, batting, and backing correctly is the step that separates a homemade quilt from a professional one. Wrinkles, shifting layers, and puckering all start here, but the right technique makes this stage simple.
This guide walks you through every step of building a smooth quilt sandwich. You’ll learn how to size each layer, choose a basting method, and avoid the most common mistakes. By the end, you’ll have a flat, secure foundation ready for quilting.
Prepare Your Quilt Top for Assembly
A clean, flat quilt top sets the foundation for everything that follows. Skip this step and wrinkles will follow you through the entire project.
Press and Trim the Top
Iron your quilt top from the center outward to remove every wrinkle. Never stretch or pull the fabric while pressing, since distortion causes alignment problems later. Flip the top over and trim all loose threads and stray tails from the back. A smooth surface now saves frustration during basting and quilting.
Calculate Batting and Backing Sizes
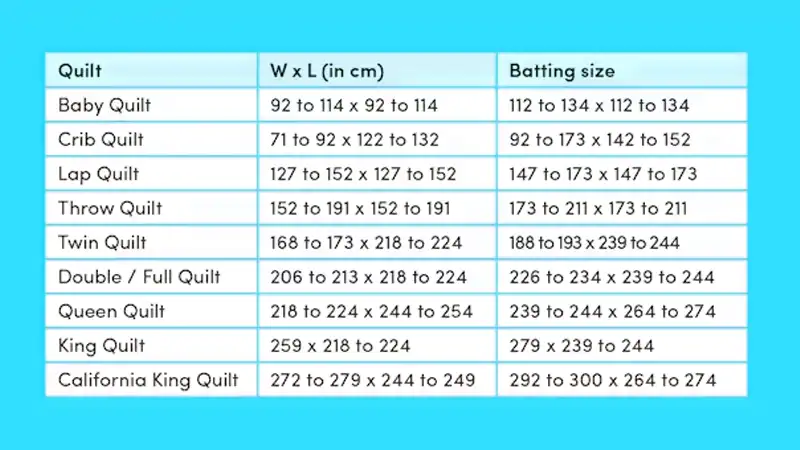
Correct sizing prevents the most common assembly problems. Both batting and backing need extra room around the edges for handling and framing.
Size the Batting Correctly
Batting must extend at least 4 inches beyond the quilt top on every side. That means adding 8 inches to both the width and length of your finished top.
- Formula: Quilt top width + 8 inches by quilt top length + 8 inches
- Example: A 60″ x 72″ quilt needs batting cut to 68″ x 80″
- High-loft tip: Add 5 inches per side (10 inches total) for extra margin
Lay your quilt top on the batting before cutting to center it perfectly. Save leftover batting scraps for smaller projects like table runners or potholders.
Cut and Piece the Backing
Backing fabric must also extend 4 to 5 inches beyond the quilt top on all sides. Always use 100% cotton quilting-weight fabric, since bedsheets create a stiff drape and resist quilting needles.
For extra-wide backing (108″ or 120″):
- Cut to length: Top length + 8 inches
- No piecing required, ideal for queen and king quilts
For standard 40″ to 45″ wide fabric:
- Divide the required width by fabric width to determine panel count
- Add seam allowance to the required length per panel
- Multiply panels by length to get total yardage
Use a 1/2″ to 1″ seam allowance when joining panels. A wider seam prevents splitting under quilting tension. Press seams open to reduce bulk under your needle.
Choose the Right Basting Method
Your basting method affects speed, smoothness, and how easily the layers shift during quilting. Match the method to your project size and comfort level.
Spray Basting for Speed
Spray basting works best for medium to large quilts and time-sensitive projects. It creates a smooth surface with fewer wrinkles than pinning.
Tools needed:
- Spray basting adhesive (505 Spray and Fix is a popular choice)
- Painter’s tape
- Clean floor or large table
Pros and cons:
- Faster than pinning
- Smoother glide under the machine
- Requires ventilation and a mask
- Higher cost per project
Pin Basting for Budget Projects
Pin basting suits hand quilters, small projects, and anyone avoiding chemical fumes. Curved safety pins are easier to insert and remove than straight pins.
Place pins every 2 to 3 inches in a grid pattern. Start from the center and work outward in concentric squares. Always insert pins so the heads and clasps face up, making removal simple during quilting.
Hand Basting for Heirloom Quilts
Hand basting offers the most secure hold, ideal for quilts that will spend months in a hoop. Use long, loose running stitches in a grid or diagonal pattern. Expect to spend 3 or more hours on a lap quilt.
Assemble the Quilt Sandwich on the Floor

The floor method gives you the most space and control. This technique works especially well for quilts larger than a twin size.
Tape Down the Batting
Vacuum the floor thoroughly to remove dust and debris. Lay the batting flat with the wrong side down. Tape all four corners to the floor with painter’s tape, keeping the surface taut but never stretched.
Attach the Backing
Place the backing wrong side up on top of the batting. Fold back the top half of the backing fabric. Spray adhesive evenly across the exposed batting, following the product instructions.
Smooth the backing down from center to edges, working out any air bubbles. Repeat the process for the bottom half. A quick pass with a dry iron helps set the bond and remove stubborn wrinkles.
Flip and Add the Quilt Top
Remove the tape from the batting corners. Carefully flip the entire assembly so the batting now faces up. Re-tape the batting edges to the floor.
Center the quilt top right side up on the batting. Confirm even overhang on all four sides. Fold back half the top, spray the exposed batting, and smooth the top down from center outward. Repeat for the remaining half.
Pin Baste Your Quilt Sandwich

Pins offer a reliable alternative when you prefer not to use spray adhesive. This method takes longer but costs less and avoids fumes.
Layer and Smooth Each Piece
Lay the backing wrong side up on a clean floor or table. Tape the edges down gently without stretching. Center the batting on top and smooth out creases. Place the quilt top right side up, matching centers and edges carefully.
Pin from Center Outward
Mark the centers by folding the quilt in half both vertically and horizontally. Place your first pin at the exact center, then work outward in concentric squares or diagonal lines.
- Pin every 2 to 3 inches
- Pay extra attention near seams and edges
- Use alignment pins at center edges to prevent shifting
Leave pin heads accessible from the top side. Closing pins from the wrong side traps them where you cannot reach them later.
Fix Common Assembly Mistakes
Even experienced quilters hit snags during assembly. Catching problems early saves hours of frustration.
Backing Falls Short
Misalignment or insufficient overhang causes this issue. Always add 5 or more inches per side as a safety margin. Use alignment pins at the center edges and measure twice before cutting.
Wrinkles Appear in the Backing
Poor smoothing or over-stretching creates wrinkles. Tape the backing taut but never tight. Smooth from center outward and inspect the back before adding the quilt top.
Pins Get Trapped
Closing pins from the wrong side makes removal impossible during quilting. Always insert pins with heads and clasps facing up. Curved quilting pins are designed for easy removal.
Quilt Feels Stiff
Non-quilting fabrics like bedsheets create a rigid drape. Stick with 100% cotton quilting-weight fabric for a soft, flexible finish.
Run Through the Pre-Quilting Checklist
Before you start stitching, verify every detail. A final check now prevents problems during quilting.
- Press: Top and backing are wrinkle-free
- Trim: All loose threads removed from the back
- Relax: Batting lies flat with no creases
- Align: 4 or more inches of overhang on all sides
- Secure: Pins are closed or spray is fully set
- Plan: Quilting design and thread color chosen
Lift an edge and inspect the back. If you spot wrinkles, fix them now before you begin quilting.
Pro Tips for a Flawless Quilt Sandwich
A few extra habits make assembly faster and smoother.
- Test batting samples before committing to a full project
- Choose busy prints for backing to hide stitching wobbles
- Match thread color to the backing for a forgiving finish
- Roll large quilts onto pool noodles to manage bulk
- Watch video tutorials to see the flip-and-spray technique in action
Frequently Asked Questions About Assembling Quilt Layers
What size should batting be for a quilt?
Batting must extend at least 4 inches beyond the quilt top on every side. Add 8 inches to both the width and length of your finished quilt top. For high-loft batting, add 5 inches per side instead.
Can I use a bedsheet for quilt backing?
Bedsheets are not recommended. They create a stiff drape and behave differently than quilting cotton. Use 100% cotton quilting-weight fabric for the best results.
How do I prevent wrinkles in quilt backing?
Smooth the backing from center to edges during basting. Tape it taut but never stretched. Flip the assembly before adding the quilt top to inspect the back for wrinkles.
How far apart should quilting pins be?
Place pins every 2 to 3 inches in a grid pattern. Start at the center and work outward in concentric squares. Closer spacing adds security for hand quilting projects.
How long does it take to baste a quilt?
Spray basting takes 15 to 30 minutes for most quilts. Pin basting requires 1 to 3 hours depending on size. Hand basting is the slowest, often taking 3 or more hours for a lap quilt.
Should I use spray baste or pins?
Spray baste works faster and creates a smoother surface, ideal for machine quilting. Pin basting costs less and avoids fumes, making it better for hand quilters and small projects.
Key Takeaways for Assembling Your Quilt Sandwich
A well-built quilt sandwich makes every step after assembly easier. Press and trim each layer before you begin. Size your batting and backing with at least 4 inches of overhang on every side. Choose a basting method that matches your project size, timeline, and comfort level.
Take your time during this stage. Rushing leads to wrinkles, shifting layers, and frustration during quilting. A smooth, secure foundation gives you the confidence to quilt freely and the results to match.

