
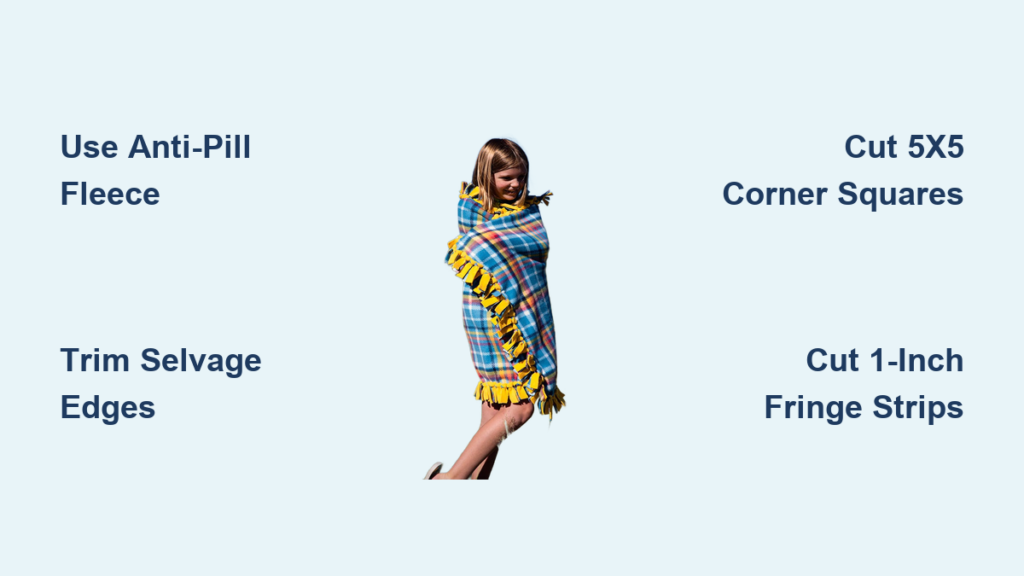
You want to make a cozy, custom blanket without a sewing machine. Cutting a fleece tie blanket is the perfect solution for creating a durable, machine-washable blanket with knotted fringe edges. This guide walks you through how to cut a blanket precisely using anti-pill fleece, essential tools like a rotary cutter, and a simple no-sew technique. You’ll learn exact measurements, fringe cutting methods, and pro tips to avoid common mistakes.
Choose the Right Fleece Fabric
Select anti-pill or no-fray fleece for your blanket project. This high-quality knit fabric resists pilling after washing and won’t unravel when you cut it. Standard fleece frays easily, but anti-pill holds up over time, making it ideal for no-sew blankets.
Use Anti-Pill Fleece for Best Results
Anti-pill fleece is specifically designed to maintain its smooth surface through multiple washes. The tight knit construction prevents fibers from balling up and creating those annoying little pills. This fabric choice ensures your blanket looks new even after repeated use.
Pick Double or Single Layer
Double-layer fleece uses two coordinating pieces to create a thicker, warmer blanket with a finished look on both sides. Single-layer fleece is lighter weight and faster to cut, but less durable for heavy use. Most crafters prefer the double-layer approach for its professional appearance and added warmth.
Pro Tip: Use contrasting or complementary patterns, like animal print on one side and solid color on the other, for a personalized touch that shows on both sides when tied.
Measure and Cut Fabric to Size

Accurate measurements ensure your blanket turns out the right size and your fringe aligns perfectly. Most fleece comes 58 to 60 inches wide, so plan your yardage accordingly.
Standard Blanket Sizes and Yardage
| Blanket Size | Fleece Needed Per Layer |
|---|---|
| Baby | 1 yard (36″ x 36″) |
| Child | 1.5 yards (54″ x 45″) |
| Adult/Throw | 2 yards (60″ x 45″) |
Trim the Selvage Edges
Remove the selvage, which is the tightly woven, dotted, or printed edge, on both fabric pieces. Use a rotary cutter and ruler or sharp scissors for straight cuts. The selvage can pucker or shrink differently than the rest of the fabric, so removing it prevents uneven edges.
Align Both Layers Together
Lay both pieces flat with right sides facing outward, meaning the decorative sides are visible. The wrong sides, which have a duller texture, should touch each other. Smooth out wrinkles and align edges perfectly, then trim both layers at once to ensure identical size.
Warning: Even a quarter-inch difference between layers can cause misaligned fringe. Precision is critical at this stage.
Cut the Corners to Reduce Bulk
Removing the corners prevents bulky knots and creates a smooth, clean edge. This step is essential for professional-looking results.
Remove 5-by-5 Inch Squares
Cut a 5-inch by 5-inch square from each corner of the layered fabric. Use a ruler to ensure straight, perpendicular cuts. This creates a clean square gap in each corner where knotting begins.
Use a Fleece Fun Ruler for Corners
Position the Fleece Fun Ruler so its tines meet one edge and the side aligns with the adjacent edge. Cut along the block cutting line to remove the corner cleanly. Rotate the ruler 90 degrees and repeat for all four corners.
Cut the Fringe Strips Evenly
The fringe is what makes your blanket distinctive. Cutting accurate, evenly spaced strips ensures beautiful knots.
Standard Fringe Dimensions
Along all four edges, excluding corners, cut 1-inch wide strips that go 5 inches deep into the fabric. Make cuts every 1 inch from the outer edge to the inner border. This creates paired strips, one from each layer, ready to be tied together.
Use a Fleece Fun Ruler for Fast Cuts
Align the ruler with the fabric edge and corner cut. Insert a rotary cutter into each slot and cut straight down through both layers. Reposition the ruler at corners to maintain consistent spacing. Cut all slots completely without skipping any.
Troubleshooting Tip: If the fabric shifts, stop and realign immediately. Missed cuts lead to loose ends that ruin the finished look.
Adjust Final Strip Width
If the last strip is more than 1.5 times wider than the others, cut it in half for consistency. If it’s slightly narrower, leave it as-is since knotting will hide minor inconsistencies.
Pro Tip: Work slowly on the first few cuts to establish a rhythm. Check spacing every 5 to 10 strips to maintain accuracy.
Tie the Fringe for a Secure Finish
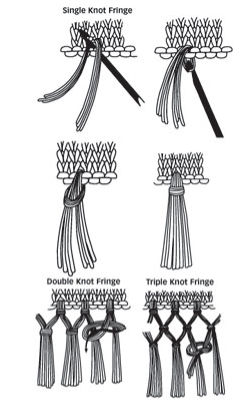
Knotting connects the two layers and creates the finished fringe edge. Proper technique ensures durability and visual appeal.
Knot Every Strip Pair
Take one strip from the top layer and one from the bottom layer. Hold both together and loop them around two fingers. Pull the ends through the loop from underneath. Pull upward so the knot from the bottom layer sits on top, creating visual contrast. Slide the knot down to the edge and tighten firmly.
Maintain Consistent Tension
Tie every 5 to 10 knots, then step back to check for even spacing and tightness. Avoid over-tightening, which can pucker the blanket edge. If a knot feels loose, re-tie it before moving on.
Optional Knot Styles
Double knot adds extra security, especially for children’s blankets. Alternate tying skips every other pair to create a braided effect. For a braided edge, braid groups of three fringe strips and knot the ends.
Creative Upgrade: Insert one-quarter-inch ribbon between layers before tying for a decorative border.
Tools That Make Cutting Easier
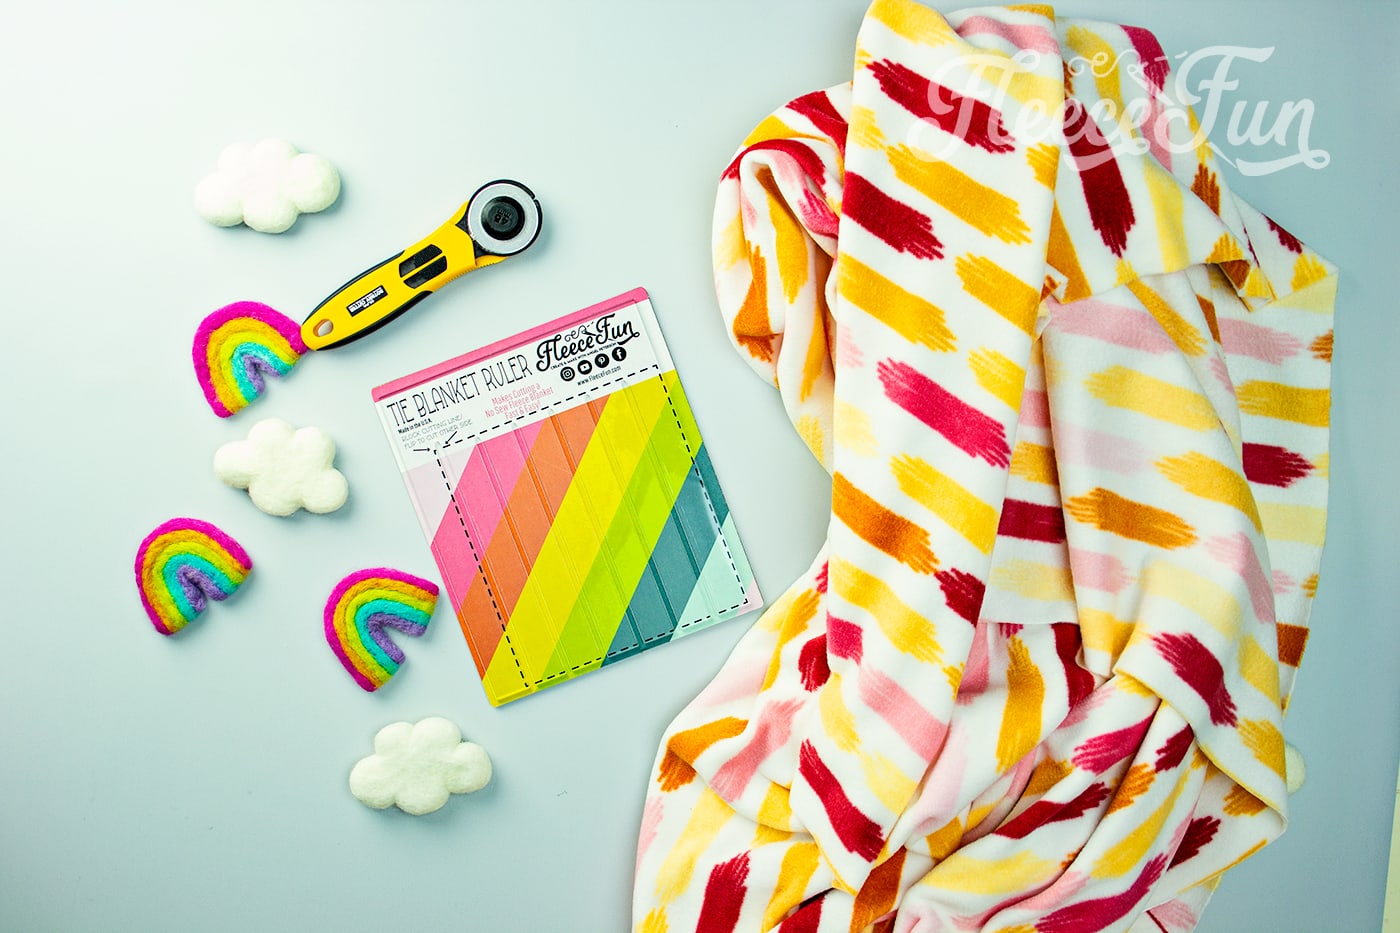
Having the right tools makes the project faster and more accurate. Invest in quality cutting tools for the best results.
Must-Have Cutting Tools
| Tool | Best For |
|---|---|
| Sharp scissors | Small cuts, trimming edges |
| Rotary cutter with mat | Straight, clean cuts across wide fabric |
| Acrylic ruler 12 inches or longer | Guiding cuts and measuring |
| Fleece Fun Ruler | Perfect fringe and corner cuts |
| Masking tape | Securing layers to prevent shifting |
Why Use a Rotary Cutter
A rotary cutter is faster than scissors for long cuts and more precise for straight lines. It also reduces hand fatigue on large blankets. Cut in one smooth motion, keeping fingers behind the ruler and cutting away from your body.
Safety First: Always cut away from your body. Keep fingers behind the ruler and replace dull blades regularly.
Avoid Common Cutting Mistakes
Learning what not to do saves time and materials. These mistakes are easy to prevent with careful technique.
Mismatched Fabric Sizes
Trimming layers separately or not squaring edges causes size mismatches. Always trim both pieces together after aligning them perfectly. Use whole-inch measurements and a straight edge to prevent this issue.
Incomplete or Missed Cuts
Dull blades, fabric wrinkles, or misaligned rulers cause incomplete cuts. Replace blades when they feel dull, smooth fabric before cutting, and re-cut any missed sections. Temporarily separate layers to see cutting lines clearly if needed.
Uneven Fringe Spacing
Inconsistent measuring or freehand cutting leads to uneven fringe. Use a ruler or Fleece Fun Ruler for uniform 1-inch gaps. Even spacing results in even knots and a polished final look.
Customize Your Blanket Design
Vary the standard dimensions to create unique looks. Testing on scrap fabric first helps you decide on the best style.
Vary Fringe Dimensions
Deeper fringe, using 6-inch strips, creates larger, looser knots. Shallower fringe at 4 inches gives a neater, tighter edge. Wider spacing at 1.5 inches creates fewer, chunkier knots. Narrower spacing at three-quarter inches produces denser, more delicate fringe.
Try Different Edge Treatments
Braided fringe braids three strips together and knots the end. Tassels tie groups of fringe into tassels at corners. Pom-poms attach handmade or purchased pom-poms to corners for decoration.
Care and Longevity Tips
Proper care extends the life of your blanket significantly. Fleece is low-maintenance but responds best to gentle handling.
Wash and Dry Properly
Machine wash cold on gentle cycle. Tumble dry low or air dry to prevent pilling. Avoid fabric softener, which can break down fleece fibers over time.
Maintain Softness Over Time
Wash inside out to protect the surface from abrasion. Store folded rather than hanging, which can stretch the fabric. Re-tighten any loose knots after the first wash.
Durability Note: A well-made tie blanket can last for years with proper care.
Frequently Asked Questions About Cutting a Blanket
What type of fleece is best for a no-sew tie blanket?
Anti-pill or no-fray fleece is best because it resists pilling after washing and won’t unravel when cut. Standard fleece frays easily and creates a messy appearance over time.
How do I keep the two layers of fabric from shifting while cutting?
Use masking tape or pins at the corners to secure the layers. Alternatively, work on a large flat surface and smooth out wrinkles before cutting. Some crafters lightly mist the fabric with water to help it lie flat.
Can I use scissors instead of a rotary cutter?
Yes, sharp scissors work well, especially for smaller blankets or beginners. However, a rotary cutter is faster and more precise for long straight cuts across wide fabric.
How deep should the fringe strips be?
The standard fringe is 1 inch wide by 5 inches deep. This creates balanced knots that sit nicely on the edge without being too bulky or too sparse.
Why do I need to cut squares from the corners?
Removing 5-by-5 inch squares from each corner reduces bulk where the fringe meets. This allows for smoother, neater knotting around the corners and prevents the edge from looking warped or puckered.
Final Thoughts on Cutting a Blanket
Cutting a blanket doesn’t require sewing skills or expensive equipment. With the right anti-pill fleece, a rotary cutter, and precise measurements, you can create a beautiful no-sew tie blanket in 30 to 90 minutes depending on size. Focus on accurate cuts, even fringe spacing, and consistent knot tension for professional results.
The key to success lies in preparing your fabric properly. Trim both layers together, remove selvage edges, and cut corners before creating fringe. Take your time with the fringe cuts since accuracy at this stage determines how even your finished knots appear.
Now that you know how to cut a blanket the right way, gather your materials and start crafting. This project makes a thoughtful handmade gift for baby showers, birthdays, or charity donations. Choose your favorite colors, personalize with patterns, and enjoy the satisfaction of creating something functional and beautiful with your own hands.

