
Nothing transforms fabric into art quite like a flower quilt block. With vibrant petals, leafy corners, and cheerful centers, these blocks capture the beauty of a garden in stitch form. Whether you want to craft a single pillow, build a row quilt, or design a full-sized heirloom, learning how to make a flower quilt block is the perfect starting point. This guide covers a beginner-friendly construction method, popular pattern inspiration, fabric strategies, and project variations. By the end, you will have the skills and confidence to create your own floral masterpiece.
Choose Your Flower Block Style

Before picking up your rotary cutter, decide on the aesthetic and skill level that matches your vision. Flower quilt blocks range from simple geometric designs to organic, curved compositions.
Square-Based Blocks for Beginners
The easiest way to make a flower quilt block is the square-in-a-square technique. This method uses a center square surrounded by colored squares for petals, with corner accents for leaves. It requires only basic piecing skills, a rotary cutter, a ruler, and straight-stitch sewing.
Hexagon Flower Gardens
For a timeless look, try Grandmother’s Flower Garden styles. These use hexagon pieces sewn together to form clusters of blooms. Patterns like Emma’s Garden or Sweet Grandmother’s Flower Garden often include video tutorials to walk you through the process.
Curved and Scrappy Designs
Some flower blocks, like the Holland Tulip Quilt, use curved piecing for soft, naturalistic petals. These require precision but yield stunning realism. Many such designs are “scrappy,” meaning they use a variety of fabrics and work beautifully with Layer Cake pre-cuts.
Star-Flower and Radiating Motifs
Blocks like Fresh Flowers or Magnolia Star-Flower combine floral themes with star geometry. These use angular, repeating units that radiate outward, creating dynamic movement. They are often fast to assemble when made with pre-cut fabric bundles.
Gather Your Materials and Tools
You do not need a lot to get started. Focus on quality basics that support accuracy and ease.
Essential Sewing Supplies
- Rotary cutter, ruler, and cutting mat for precise fabric cuts
- Sewing machine with a fresh needle (75/11 or 80/12 works well for cotton)
- 100% cotton thread in neutral or matching colors
- Pins or clips to hold pieces in place before sewing
- Iron and pressing surface for sharp points and alignment
Fabric Requirements for a Basic Block
For a single 12-inch finished square flower block, gather the following:
- One 3-inch x 3-inch center square in contrasting or solid fabric
- Four 3-inch x 3-inch colored squares for petals
- Four 3.5-inch background squares, marked diagonally for petal corners
- Four 2-inch x 2-inch green squares for outer corner leaves
- Four border strips: two 1.5-inch x 12.5-inch and two 1.5-inch x 15.5-inch
Pre-wash your cotton fabrics to prevent shrinkage later.
Cut Fabric with Precision

Accuracy starts here. Misaligned cuts lead to wobbly blocks, so measure twice and cut once.
Cut the Center and Petals
Using your rotary cutter and ruler, cut one 3-inch square for the flower center. Then cut four 3-inch squares in coordinating floral or bright prints for the petals. Arrange them on your work surface in a cross shape with the center square in the middle and petals above, below, left, and right.
Prepare the Petal Corners
To give petals a soft, angled look, cut four 3.5-inch squares from background fabric. Use a fabric marker or pencil to draw a diagonal line from one corner to the opposite corner on the back of each square. These will be sewn onto the outer corners of the petal squares, then trimmed to form half-square triangles.
Cut Leaves and Border Strips
Cut four 2-inch green squares for leaves and place them at the outer corners. Then cut four border strips: two 1.5-inch x 12.5-inch for top and bottom, and two 1.5-inch x 15.5-inch for the sides.
Assemble the Flower Block Step by Step
Now it is time to sew. Follow these steps carefully to ensure clean lines and perfect alignment.
Attach Petal Corner Squares
This “stitch and flip” method shapes the petals:
- Place one marked background square on a petal square, right sides together, aligning edges.
- Pin in place.
- Sew directly on the drawn diagonal line.
- Trim the excess fabric 1/4 inch beyond the seam.
- Press the new triangle open to form a clean, angled petal corner.
Repeat for all four petals. Chain-piece all four to save time by sewing one after another without cutting the thread.
Position the Flower Core
Lay out your block with the center square in the middle, angled petals attached to top, bottom, left, and right, and green 2-inch squares at each outer corner. Double-check placement before sewing.
Sew Rows for Stability
Sew the block in horizontal rows. The top row includes a petal with HST corner, the center square, and another petal with HST corner. The middle and bottom rows follow the same pattern. Press seams toward the petals for nesting. Then sew the three rows together, matching intersections carefully. Do not skip pressing, as it ensures seams lie flat and blocks align perfectly.
Add the Final Border
Borders frame the flower and stabilize the block. Sew the top and bottom 1.5-inch x 12.5-inch border strips to the block and press seams outward. Then attach the side borders measuring 1.5-inch x 15.5-inch and press again. Your finished block should measure 15 inches x 15 inches before quilting. For a garden feel, try a floral print or vine-themed fabric for the borders.
Explore Popular Flower Block Patterns
Once you have mastered the basics, try real-world designs that inspire quilters everywhere.
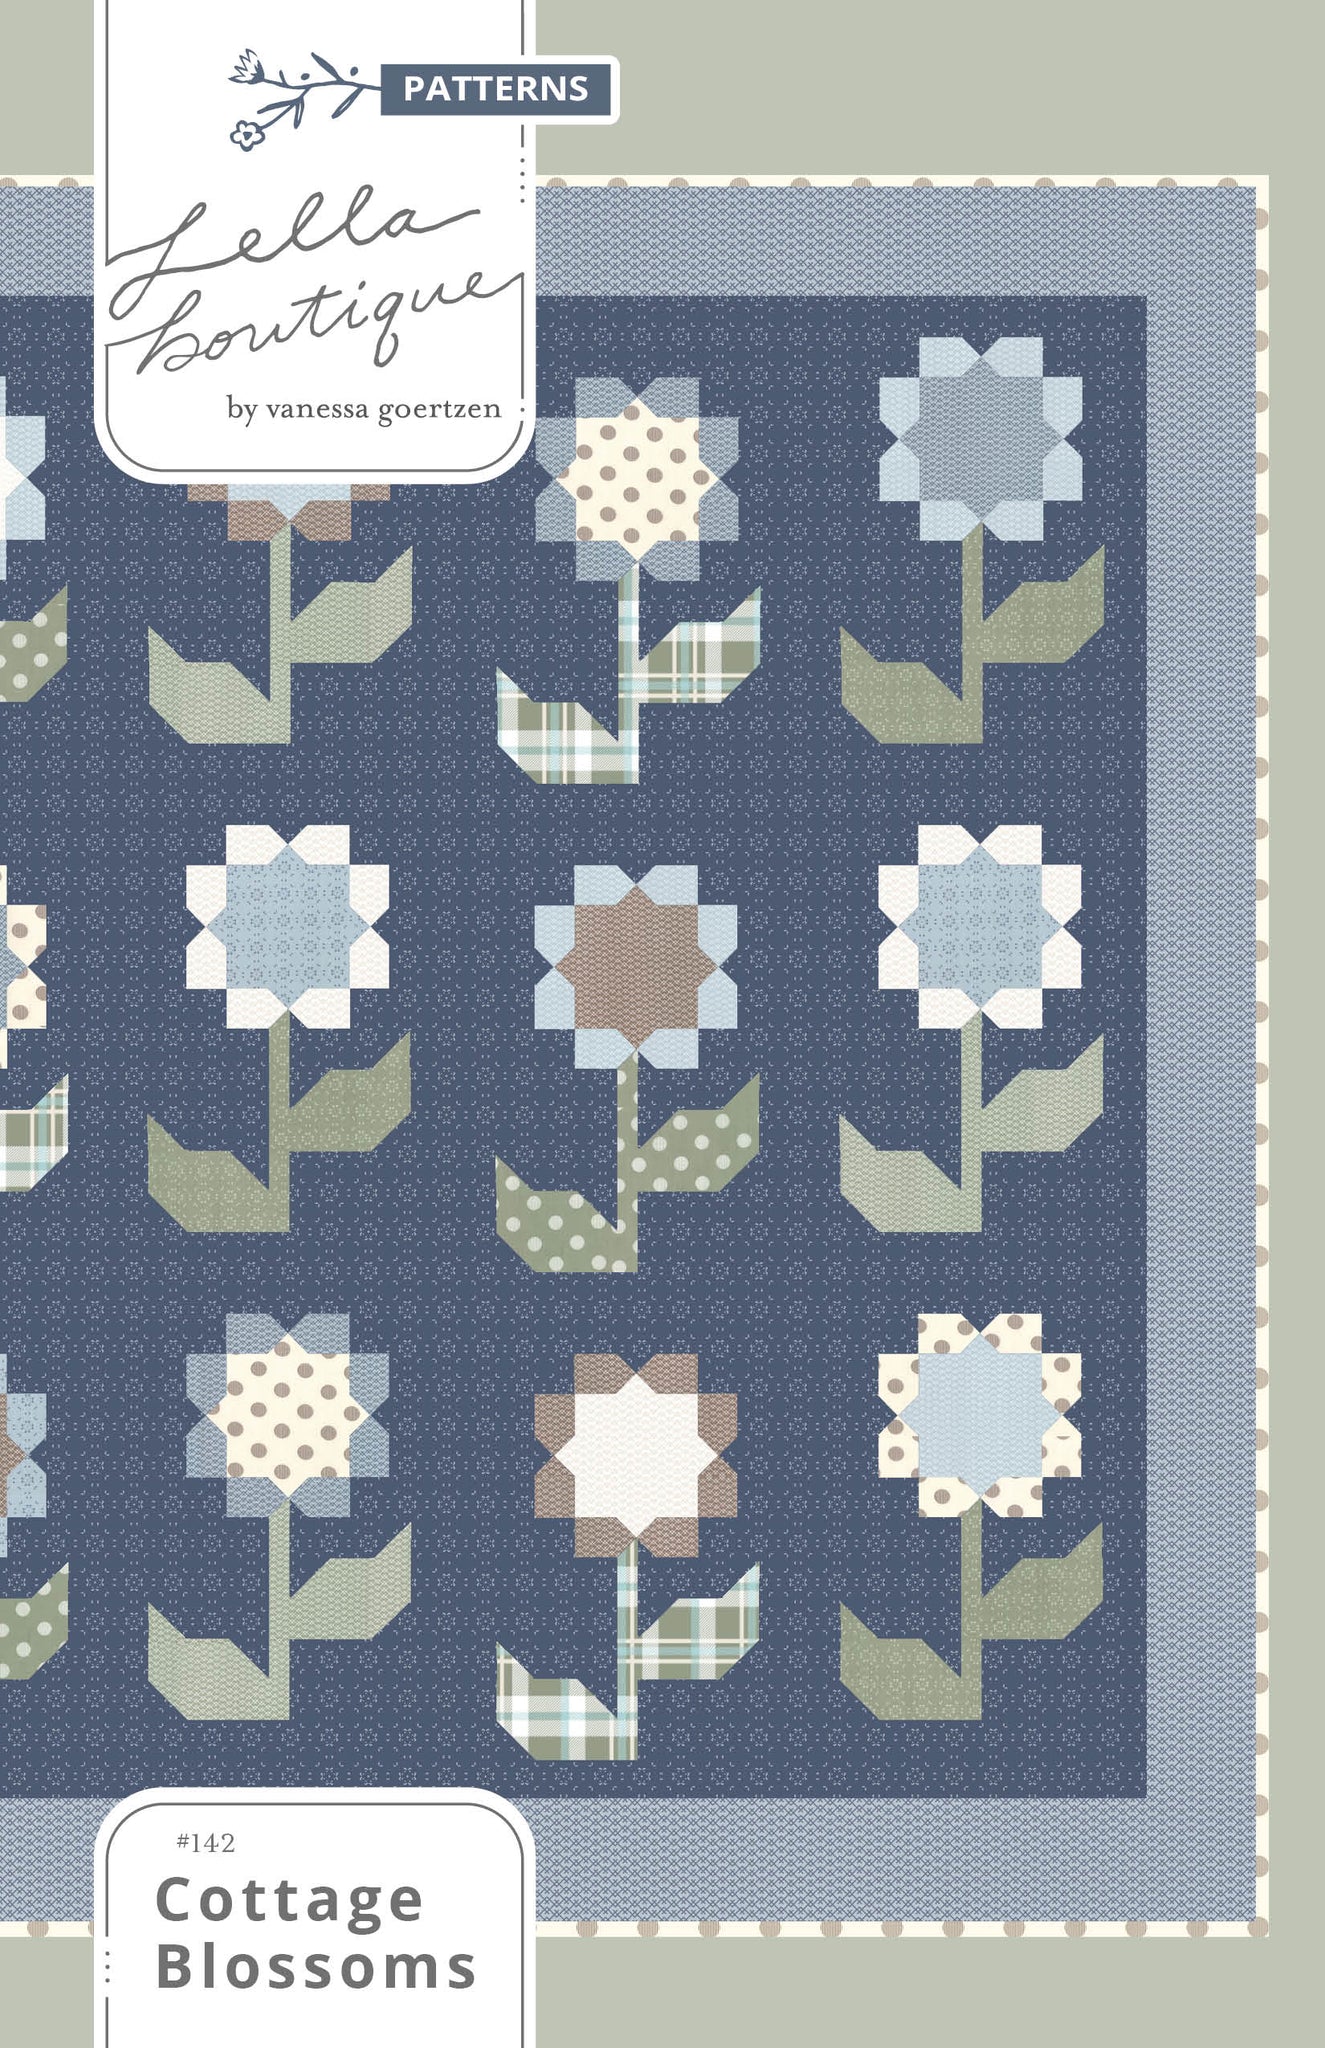
Cottage Blossoms by Lella Boutique
Designer Vanessa Goertzen created this charming, traditional flower block. Available as both a mini quilt and full-size quilt, it adapts easily into pillows. Some makers add tiny butterflies scaled down from Chelsi Stratton’s Monarch pattern. This design is perfect for gifts and nursery decor.
Vintage Tulips Mini
Created by Brenda of The Quilting Nook, this pattern mixes embroidered flowers with hexagon petals. Ideal for pillows or wall hangings, it is also available in larger quilt sizes. Combine embroidery for centers with pieced petals for added dimension.
Botanical Garden by Chelsi
Pieced with the Happy Days fabric collection, this Layer Cake friendly pattern uses 10-inch pre-cuts. It goes together quickly and offers a bright, modern botanical feel. It works well for quilters who love scrappy, colorful designs with minimal cutting.
Scrappy Sunflowers
Designed by Vanessa, this rustic and joyful sunflower block uses many different yellows, browns, and greens. It is perfect for scraps, and tone-on-tone prints add depth without overwhelming the design.
Adapt Blocks for Different Projects
One flower block can become many things. Do not limit yourself to full quilts.
Make a Flower Pillow
Use a single block, like Cottage Blossoms Mini, as the front panel. Finish edges with a border or binding, back with a zipper or envelope closure, and stuff with polyfill or an insert pillow form. Add machine-embroidered stems and leaves to the pillowcase background for extra charm.
Create a Row Quilt
Extract flower blocks from row quilts like Family Farm Row Quilt. Use the center flower with flanking leaves as a repeating unit, and alternate with plain or plaid blocks for balance. This approach works well for baby quilts or wall displays.
Scale Up or Down
For a mini quilt measuring 24 inches x 24 inches, use four flower blocks with sashing. For a lap quilt measuring 50 inches x 60 inches, arrange 12 to 15 blocks in a 3×4 or 4×5 grid. For a wall hanging, frame a single block with wide borders and a hanging sleeve.
Avoid Common Flower Block Mistakes

Even small errors can throw off alignment. Watch for these frequent issues.
Misaligned Seams
Inconsistent 1/4-inch seam allowance is the usual culprit. Use a quarter-inch presser foot and test on scrap fabric first.
Twisted or Bulky Blocks
Not pressing seams flat or sewing too fast causes this problem. Press after every seam and use clips to hold layers during sewing.
Dull or Clashing Colors
Random fabric choices without a plan lead to visual chaos. Pull fabrics from the same collection, such as Simply Delightful or Fig Tree, for harmony.
Uneven Borders
Sewing borders to distorted blocks causes unevenness. Stay-stitch around the block before adding borders to stabilize the edges.
Maintain and Display Your Quilt Blocks
Once made, your blocks deserve care and celebration.
Press for Professional Finish
Always press rather than iron seams to avoid stretching. Use starch or sizing spray for crispness, especially on borders.
Store Blocks Flat
If making multiple blocks over time, place them between tissue paper and store in a flat box or drawer. Avoid hanging, which can stretch the fabric.
Show Off Your Work
Display your finished blocks in a shadow box frame, use them as table toppers with a plexiglass cover, or gift them as heirloom pillows with care instructions.
Frequently Asked Questions About Flower Quilt Blocks
What is the easiest flower quilt block for beginners?
The square-in-a-square technique is the most beginner-friendly option. It uses basic piecing with a center square, four petal squares, and corner accents for leaves, requiring only straight-stitch sewing.
What fabric works best for flower quilt blocks?
100% cotton fabric in quilting weight works best. Pulling fabrics from a coordinated collection like Happy Days, Harper’s Garden, or Simply Delightful ensures color harmony across your project.
Can I make a flower quilt block without a sewing machine?
Hand-piecing is possible for square-based blocks, though it takes longer. Hexagon flower garden blocks were traditionally hand-sewn and work well for hand-stitching enthusiasts.
How big should a beginner flower quilt block be?
A 12-inch finished block is a comfortable starting size. It provides enough room to practice the stitch-and-flip method without being overwhelming to manage.
What is a scrappy flower quilt?
A scrappy flower quilt uses a wide variety of different fabrics rather than a uniform color scheme. Patterns like Holland Tulip Quilt and Scrappy Sunflowers embrace this aesthetic, making them ideal for using fabric scraps or Layer Cake pre-cuts.
How do I keep my flower block from looking flat?
Add dimension by combining embroidery with pieced petals, mixing prints within the flower, or using tone-on-tone fabrics. Pressing seams carefully also helps petals stand out visually.
Key Takeaways for Crafting Your Flower Quilt Block
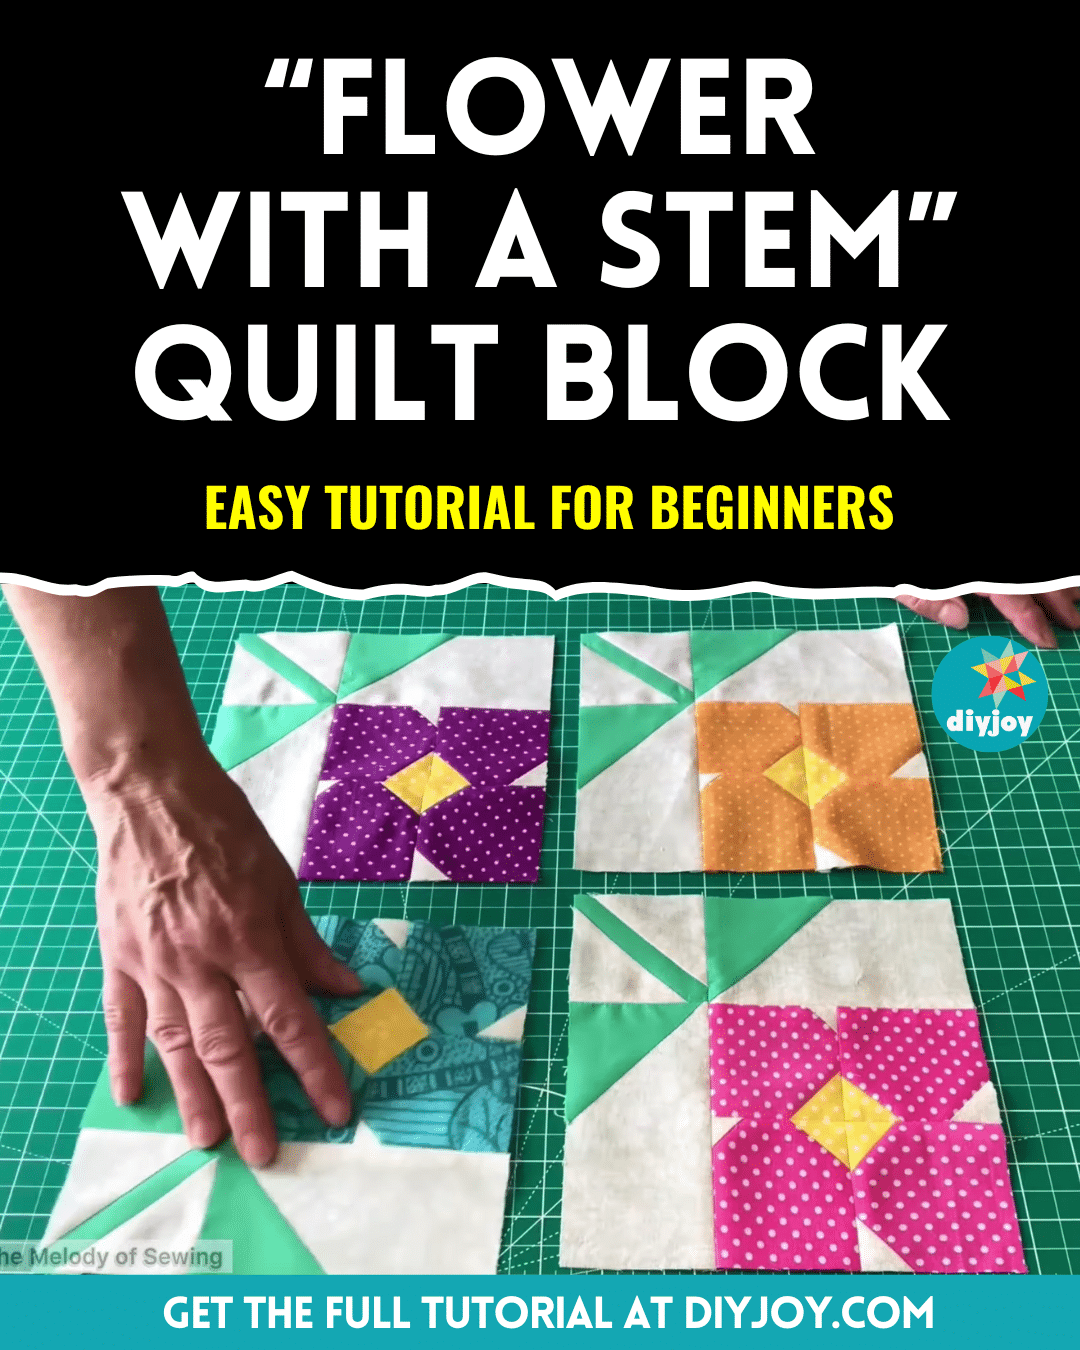
Learning how to make a flower quilt block is a rewarding skill that grows with practice. Start with the square-in-a-square method to master basic piecing, then explore patterns like Cottage Blossoms or Botanical Garden for inspiration. Pay attention to accurate cutting, consistent seam allowances, and pressing after every step to achieve professional results. Your next step is simple: gather your fabrics, cut your center square, and begin sewing your first petal today.

