
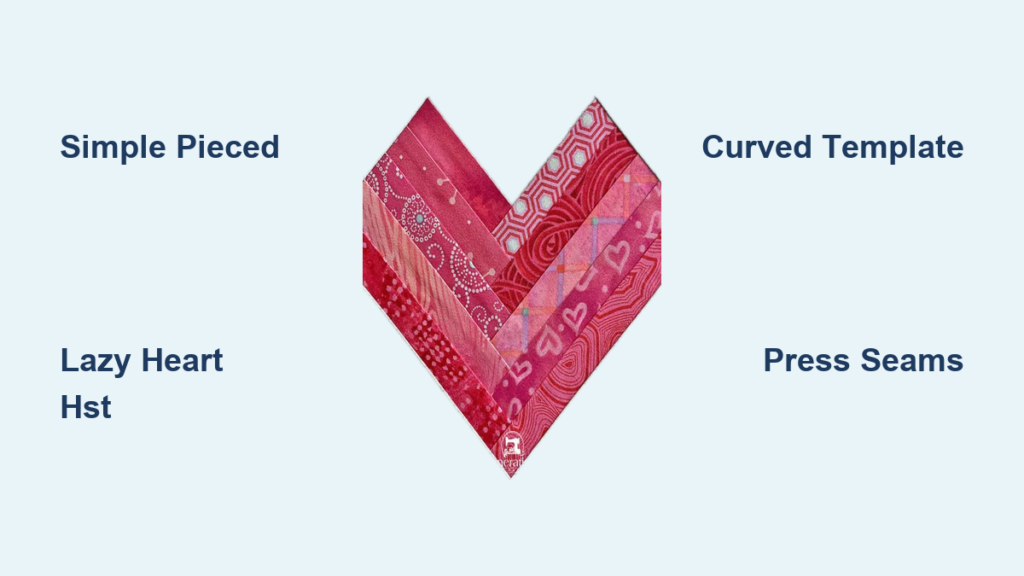
Few quilt blocks carry as much warmth and meaning as the heart. Whether you’re stitching a Valentine’s Day gift, a wedding quilt, or a cozy blanket for someone you love, learning how to make a heart quilt block opens the door to countless heartfelt projects. The best part is that several beginner-friendly techniques exist, so you don’t need advanced skills to create a beautiful result.
In this guide, you’ll discover three proven methods for making a heart quilt block, along with pressing tips, fabric selection advice, and finishing techniques. From simple square-in-a-square designs to smooth curved templates, you’ll find a style that matches your skill level and creative vision.
Choose the Right Heart Block Method for Your Project
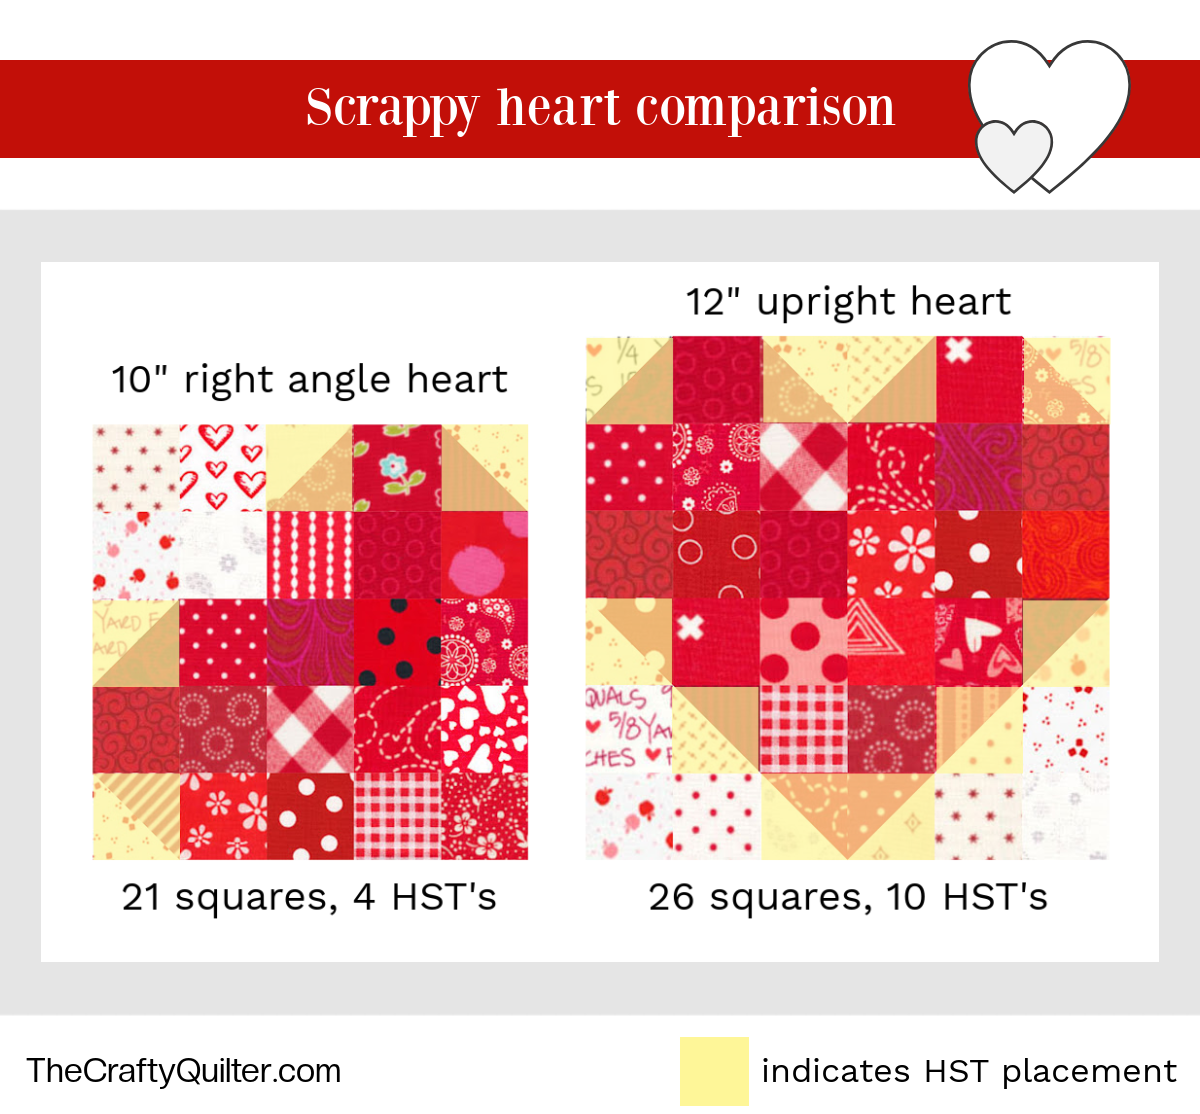
Before you cut a single piece of fabric, decide which construction method suits your goals. Each approach produces a different look and requires different tools.
Simple Pieced Heart (Square-in-a-Square Method)
This beginner-friendly technique creates a clean, upright heart using rectangular strips and small corner triangles. It minimizes seam bulk and allows easy resizing for any project.
Cut Your Fabric for a 7.5″ Unfinished Block
Gather these pieces before you begin:
- Print fabric (heart): 2 strips at 2.5″ x 4.5″
- Background fabric:
- 2 squares at 2.5″ x 2.5″
- 4 squares at 1″ x 1″
- 2 strips at 2″ x 4.5″
- 2 strips at 2″ x 7.5″
Attach the Bottom Corner Triangles
Draw a diagonal line on the wrong side of each 2.5″ background square. Place one square on the bottom corner of each print strip with right sides together. Sew directly along the drawn line, then trim ¼” beyond the seam and press the triangle outward. This step forms the rounded base of your heart.
Sew the Top Corners with 1″ Squares
Position a 1″ background square on each top corner of the print strips. Draw a diagonal line and sew from corner to corner. Trim the excess fabric, leaving a ¼” seam, then press open to reduce bulk. These small triangles create the heart’s upper curves.
Join the Print Halves at the Center Seam
Align the two pieced print halves at the center, matching raw edges carefully. Sew with a consistent ¼” seam and press open. This creates the symmetrical heart center with a clean vertical line down the middle.
Add Side and Border Strips
Sew the 2″ x 4.5″ background strips to the left and right sides of the heart center, pressing seams outward. Next, attach the 2″ x 7.5″ strips to the top and bottom. Your finished block should now measure exactly 7.5″ square.
Lazy Heart Block Using Half-Square Triangles
This clever sideways heart uses half-square triangles (HSTs) to minimize piecing while creating visual depth. It’s perfect for scrap fabrics and fast assembly, making it ideal when you want to learn how to make a heart quilt block quickly.
Cut Fabric for 7.5″ or 10″ Finished Block
| Component | 7.5″ Block | 10″ Block |
|---|---|---|
| White squares (for HSTs) | 4 at 2.5″ | 4 at 3.0″ |
| Red squares (for HSTs) | 4 at 2.5″ | 4 at 3.0″ |
| Solid white squares | 4 at 2.5″ | 4 at 3.0″ |
| Solid red squares | 17 at 2.5″ | 17 at 3.0″ |
The 17 red squares fill the main body, while the 4 additional red squares combine with white squares to create your HSTs.
Create the Half-Square Triangle Units
Draw a diagonal line on the wrong side of each white square. Place it right sides together with a red square of matching size. Stitch ¼” on both sides of the drawn line, then cut along the line to yield two HSTs per pair. Press the seams toward the red fabric to hide the threads.
Trim HSTs to the Correct Size
For a 7.5″ finished block, trim each HST to 2″ square. For a 10″ block, trim them to 2.5″ square. Accurate trimming ensures a crisp grid layout and clean intersections.
Arrange the Sideways Heart Grid
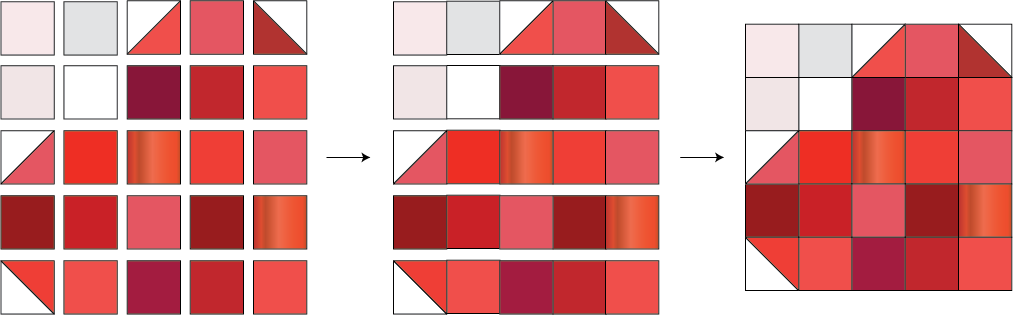
Lay out your 4 HSTs, 4 solid white squares, and 17 solid red squares in the “lazy heart” pattern. The heart lies on its side, with HSTs forming the top curve and red squares filling the body. Refer to a visual diagram if available to confirm placement.
Sew Rows and Nest the Seams
Sew pieces into horizontal rows. Press seams in alternating directions so odd rows go right and even rows go left. This alternating pressing allows seams to nest when joined, improving alignment and reducing puckering.
Join Rows into the Final Block
Pin adjacent rows together, nesting the pressed seams carefully. Sew with a consistent ¼” seam allowance and press the completed block gently. The result is a bold, scrappy heart with minimal effort.
Patchwork Heart with Curved Templates
For a smooth, professional heart shape, this advanced method uses 2.5″ squares and curved templates to achieve a polished finish. It’s a beautiful option when you want to elevate your heart quilt block design.
Prepare 2.5″ Squares from Scraps
Use Mini Charm Packs, sub-cut Charm Packs, or your personal fabric stash. You’ll need:
- 16 squares for the main body
- 8 squares (4 per lobe) for the top curved sections
Mix light, medium, and dark values for visual balance and depth.
Piece the Main Heart Body
Sew 16 squares into four rows of four squares each. Press Row 1 and Row 3 to the right; press Row 2 and Row 4 to the left. This alternating press allows seams to nest when rows are joined. Sew the rows together and press carefully.
Construct the Top Lobes
Sew 4 squares into two rows per lobe (creating two lobes total). Press according to your pattern’s guide, usually alternating per row. Join the rows and press. These curved sections will form the rounded upper part of your heart.
Trim with Curved Templates
Use a pre-made acrylic template from Cut Once Quilts or print one from “Love & Stitches” or “Meant to Be.” Place the template over each lobe section and trim the fabric to match the curve. This step shapes the smooth heart top.
Attach Background Fabric for Quilt Blocks
If you’re making a standalone block, sew background fabric to the curved lobes and main body as directed by your pattern. This creates space for quilting and defines the heart’s silhouette against the surrounding fabric.
Assemble the Final Heart
Sew the curved top sections to the main body. Press seams open or to one side based on your pattern instructions. The result is a smooth, continuous heart shape with a modern pixel-to-curve transition.
Explore Alternative Heart Block Styles

Beyond the three main methods, many creative variations exist for unique projects and personalized gifts.
Pixelated Heart from Robert Kaufman
This block is made entirely from small squares, mimicking digital art. Scale it up for a full quilt or down for a small pin cushion. No curves required, just straight seams and accurate cutting.
Scrappy 14″ Heart by Heather Givens
This style uses a wide variety of fabric scraps for a lively, eclectic look. It’s perfect for using up your stash and creating personalized gifts with sentimental fabric choices.
Woven Heart Blocks from Generations Quilt Patterns
These strip-pieced blocks resemble woven fabric and are available in 5″, 6″, 7.5″, 9″, 10″, 12″, and 15″ sizes. They work beautifully for modern or rustic quilts.
Strip-Pieced Variations to Try
Several strip-based options offer different visual effects:
- Vertical Strips: Craftsy method with strips sewn top to bottom
- Ombre Effect: Horizontal strips graded from light to dark
- Angled Strips: 45-degree placement for dynamic movement (Modern Domestic “Take Heart”)
- Blend Fabrics “Love Heart”: A refined version of angled strip design
Complex Log Cabin and Nested Hearts
For more intricate designs, consider these options:
- Log Cabin Heart: Combines log cabin geometry with a heart shape
- Heart-in-a-Heart: A smaller heart centered inside a larger one (Diary of a Quilter)
- Cluck Cluck Sew Multi-Size: Offers printable patterns for seven sizes, perfect for customization
Pressing and Seam Best Practices
Proper pressing ensures sharp points and accurate blocks every time you make a heart quilt block.
Use a Consistent ¼” Seam Allowance
All methods rely on a precise ¼” seam. Use a quarter-inch presser foot or tape a guide to your machine bed for accuracy.
Press Open for Low Bulk
For center seams and HST corners, press the seams open. This reduces thickness and prevents distortion at intersections.
Press Toward the Dark Fabric
When pressing HSTs, always press toward the darker fabric. This hides the seam thread and prevents light fabric from showing through on the right side.
Alternate Row Pressing for Nesting Seams
When sewing rows together, press odd-numbered rows right and even-numbered rows left. This creates interlocking seams that nest together, dramatically improving accuracy at every intersection.
Fabric and Design Tips for Stunning Results
A well-chosen palette makes your heart block pop and gives your quilt visual impact.
Choose Strong Value Contrast
Use a mix of light, medium, and dark fabrics throughout your block. High contrast creates depth, especially in scrappy designs where multiple fabrics appear together.
Select the Right Background Fabric
Opt for low-volume prints, solids, or white-on-white fabrics. Busy backgrounds compete with the heart shape and can distract from your focal point.
Try These Color Themes
Consider these popular palettes for your project:
- Classic: Red and white for timeless appeal
- Romantic: Pink, blush, and ivory for soft elegance
- Modern: Monochrome or rainbow scrappy for contemporary style
- Seasonal: Holiday or nature-inspired prints for themed quilts
Appliqué and Embellishment Techniques
Turn your finished heart block into a wearable or decorative piece with these appliqué methods.
Fuse for Appliqué Projects
Back the finished heart with fusible web like Heat n Bond Lite. Iron to adhere following manufacturer instructions, then stitch around the edges with a straight or zigzag stitch for security.
Prevent Fraying Over Time
Raw edges will fray with use and washing. For durability, choose one of these finishing methods:
- Turn under ¼” and stitch for a clean edge
- Use a satin or blanket stitch for decorative durability
- Add a tight zigzag stitch for quick finishing
Use Heat-Resistant Pins
When fusing your heart to clothing or bags, use Magic Pins or similar heat-safe pins to hold the design in place before pressing. Regular pins can melt or warp under the iron’s heat.
Final Assembly and Quilting Options
Once your blocks are complete, bring the full project together with these finishing steps.
Plan Your Layout
Choose from these popular layout options:
- Grid: 5×4 arrangement for a 36″ x 43″ finished quilt
- Sashing: Add white strips between blocks for breathing room
- Alternate Blocks: Pair hearts with plain squares for visual rhythm
Add Borders for a Polished Finish
For a 20-block quilt, cut these border pieces:
- Side borders: 2 strips at 4.5″ x 35.5″
- Top and bottom borders: 2 strips at 4.5″ x 36.5″
Sew side borders first, then attach the top and bottom borders.
Bind the Quilt Edges
Use 2.5″ wide binding strips joined at diagonal seams for a continuous edge. Miter the corners for a clean, professional finish.
Quilt with Style and Texture
Enhance your design with these quilting options:
- Outline quilting around each heart shape
- Swirls in the background areas
- Straight-line stitching for modern flair
Frequently Asked Questions About Heart Quilt Blocks
What is the easiest heart quilt block for beginners?
The Simple Pieced Heart using the square-in-a-square method is the most beginner-friendly option. It uses basic rectangular strips and small corner triangles, requires only straight seams, and produces a clean upright heart with minimal complexity.
How big should I cut my fabric for a 7.5″ unfinished heart block?
For the Simple Pieced Heart method, cut 2 print strips at 2.5″ x 4.5″, 2 background squares at 2.5″ x 2.5″, 4 background squares at 1″ x 1″, 2 background strips at 2″ x 4.5″, and 2 background strips at 2″ x 7.5″. These pieces assemble into a 7.5″ unfinished block that finishes at 7″ after quilting.
Can I make a heart quilt block without curved piecing?
Yes, absolutely. The Simple Pieced Heart and Lazy Heart methods both use only straight seams and standard squares. Curved templates are optional for those who want a smoother heart shape, but they are not required for a beautiful finished block.
What fabrics work best for heart quilt blocks?
Low-volume prints, solids, or white-on-white fabrics work best for backgrounds because they don’t compete with the heart shape. For the heart itself, choose fabrics with strong value contrast (mixing lights, mediums, and darks) to make the design pop, especially in scrappy versions.
How do I prevent my heart block from fraying when used as appliqué?
Raw edges will fray over time with use and washing. To prevent this, turn under ¼” and stitch the edges, use a satin or blanket stitch, or apply a tight zigzag stitch around the perimeter. Fusible web alone won’t stop fraying on its own.
How many heart blocks do I need for a small throw quilt?
A 36″ x 43″ throw quilt typically uses 20 heart blocks arranged in a 5×4 grid. You can also add sashing strips between blocks for a larger finished size or pair hearts with alternate plain squares for visual variety.
Key Takeaways for Making Beautiful Heart Quilt Blocks
Learning how to make a heart quilt block is a rewarding skill that grows with your practice. Start with the Simple Pieced Heart method if you’re new to quilting, then progress to the Lazy Heart or curved template techniques as your confidence builds. Remember that accurate cutting, consistent ¼” seams, and proper pressing make the biggest difference in your finished results.
Choose your fabrics carefully, mixing values for depth and selecting low-volume backgrounds that let your heart shine. Whether you’re making a single appliqué for a tote bag or piecing an entire quilt of hearts, these methods give you the foundation to create something truly meaningful.
Your next step is simple: pick one method from this guide, gather your fabrics, and cut your first pieces. Within an afternoon, you’ll have a finished heart quilt block ready to become part of a larger project or a sweet standalone gift for someone you love.

