
You’re snuggled under your favorite blanket when you notice it, a growing hole, a split seam, or frayed edges threatening to unravel. Before you toss it, know this: patching a blanket is not just possible, it’s powerful. With the right technique, you can restore warmth, extend its life by years, and even turn flaws into unique design features.
Patching isn’t just about function. It’s a quiet act of sustainability, a nod to craftsmanship, and a way to preserve sentimental value. Whether it’s a child’s well-loved fleece, a vintage wool throw, or a moth-eaten heirloom, every tear tells a story. And you get to write the next chapter. In this guide, you’ll learn how to diagnose damage, choose the best repair method, and patch any blanket, invisibly or with bold, artistic flair. No sewing machine? No problem. All techniques here are hand-sewn, accessible, and built to last.
Assess the Damage Before You Start
Before thread meets fabric, evaluate what you’re working with. The repair method depends entirely on damage type, location, and fabric structure.
Identify the Tear Type
Blanket damage falls into five main categories, each requiring a specific approach:
- Seam rips occur along edges or corners from stress or pet chewing. The ladder stitch works best for these.
- Center holes come from moths, snags, or wear. These need darning, patching, or embroidery.
- Frayed edges result from loose weaves or repeated washing. Reinforce these with whipstitch or a border patch.
- Pile fabric damage hides beneath fluffy surfaces like fleece and minky. Use double-sided patches and ladder stitching.
- Small moth holes appear frequently in wool. Cover these with invisible mending or embroidered designs.
Check Fabric Type First
Your repair must match the material for lasting results. Plush fabrics like fleece and minky require clips instead of pins and need knots anchored in the base fabric, not surface fibers. Wool and knit blankets stretch easily, so support edges during repair and use wool yarn for darning. Cotton, denim, and woven fabrics are stable but fray quickly, so apply fray check on patch edges.
Pro Tip: For multiple small holes within a 20 cm radius, cover the entire zone with one large patch instead of repairing each individually.
Warning: Never iron pile fabrics. Synthetic fibers like polyester can melt under heat.
Gather the Right Tools for Blanket Repair
Using proper tools ensures durability and makes the job easier, especially on thick or delicate fabrics.
Essential Sewing Kit
You’ll need these core items for any blanket repair:
- Hand sewing needle in sizes 3 to 7 for heavy fabrics, smaller for fine weaves
- Yarn darning needle with blunt tip and large eye for thick yarn or knitting repairs
- Sharp scissors or snippers for clean thread and fabric cuts
- Measuring tape or ruler to add 1.5 cm seam allowance when cutting patches
- Pins or clips with clips preferred for plush fabrics to avoid sinking hazards
Choose the Correct Thread
Match thread strength to fabric weight for the best results. All-purpose thread works for lightweight patches and seam touches. Topstitch thread is durable and visible, perfect for blanket stitch. Embroidery floss serves decorative cover-ups, and you can use 2 to 3 strands together for strength. Button or craft thread handles heavy-duty repairs on fleece and minky. Polyester-wrapped thread offers superior strength and stretch resistance for structural repairs.
Pro Tip: Use short thread lengths of 18 to 22 inches. Long threads weaken from friction during stitching.
Close Seams with Ladder Stitch
When a blanket splits along a seam, the ladder stitch makes the repair nearly disappear. This technique creates a flat, seamless finish perfect for fleece, minky, or faux fur.
Step-by-Step Ladder Stitch Repair
- Thread and Knot: Cut 20 to 22 inches of heavy-duty thread. Double it, thread the needle, and tie a secure knot.
- Start from Inside: Insert the needle from the wrong side, just inside the seam edge. Pull through, hiding the knot.
- Cross to Opposite Side: Move directly across to the other fabric edge. Insert and pull straight through.
- Alternate Sides: Continue stitching across, forming a ladder pattern. Keep stitches 3 to 5 mm apart.
- Maintain Tension: Gently tighten each stitch to close the gap without puckering.
- Finish Securely: Leave 3 to 4 inches at the end. Run the needle under 3 to 4 previous stitches on the underside, pull to form a knot, repeat, then trim.
For Right-Handed Sewers: Work from right to left, using your left hand to hold the seam closed.
Special Tips for Plush Fabrics
Pile fabrics require special handling. Trim pile sparingly to see the seam line without creating bald spots. Anchor knots in the base fabric, not just surface fibers. Avoid stretching since plush materials distort easily. Never iron synthetic piles.
Repair Holes with Darning

Darning restores small to medium holes in knit or woven blankets by weaving new threads directly into the fabric structure. This technique mimics the original weave and maintains flexibility.
When to Darn
Darning works best on knit blankets like wool or cotton jersey, on small to medium holes up to 3 cm, and on areas needing flexibility and stretch retention.
How to Darn a Hole Properly
- Thread the Needle: Use matching yarn or thread. Double it for strength.
- Anchor the Thread: Come up from the wrong side, avoiding pulling the knot through.
- Stitch Around the Edge: Work 2 to 3 mm outside the hole to stabilize the area.
- Lay Foundation Threads: Place parallel stitches across the hole horizontally. Don’t pull tight yet.
- Weave Perpendicular Threads: Go over and under foundation threads vertically.
- Tighten Gradually: Gently pull to close the hole and blend with surrounding fabric.
- Secure the End: Pass the needle under several stitches on the back. Trim close.
Result: A tight, flexible weave that mimics the original fabric. If safe, lightly press from the back to flatten.
Best Yarns for Different Fabrics
Use wool yarn for wool blankets. For cotton knits, embroidery floss works well. After darning, block the blanket to restore shape by pinning it flat and letting it dry.
Attach Patches with Blanket Stitch
Turn damage into design with the blanket stitch, a durable, decorative edge that secures patches beautifully while adding visual interest.
When to Use Blanket Stitch
Blanket stitch works for covering holes in cotton, wool, or synthetic blankets, reinforcing frayed edges, and adding visual flair with heart-shaped patches or contrasting fabrics.
How to Apply a Patch
- Cut the Patch: Make it 1 to 2 cm larger than the hole. Use felt, denim, or matching fabric.
- Mark and Position: Trace the shape with fabric chalk. Place patch over the hole.
- Pin or Clip: Hold in place and remove pins as you stitch.
- Thread the Needle: Use topstitch thread or doubled embroidery floss.
- Begin Stitching: Come up through the blanket just below the patch edge. Loop thread around the edge, then insert needle down through both layers.
- Continue Around: Move forward one stitch length. Bring needle up, pass through the previous loop to form a knot.
- Keep Spacing Even: Maintain 4 to 6 mm between stitches.
- Finish Strong: Tie a double knot on the reverse. Trim excess.
Pro Tip: Add an underpatch for large tears. It prevents snagging and adds support.
Double-Sided Patch for Heavy-Duty Repair
Cut two identical patches. Sandwich the blanket between them. Stitch through all layers using blanket stitch. Align perfectly so both sides look intentional.
Cover Flaws with Embroidery
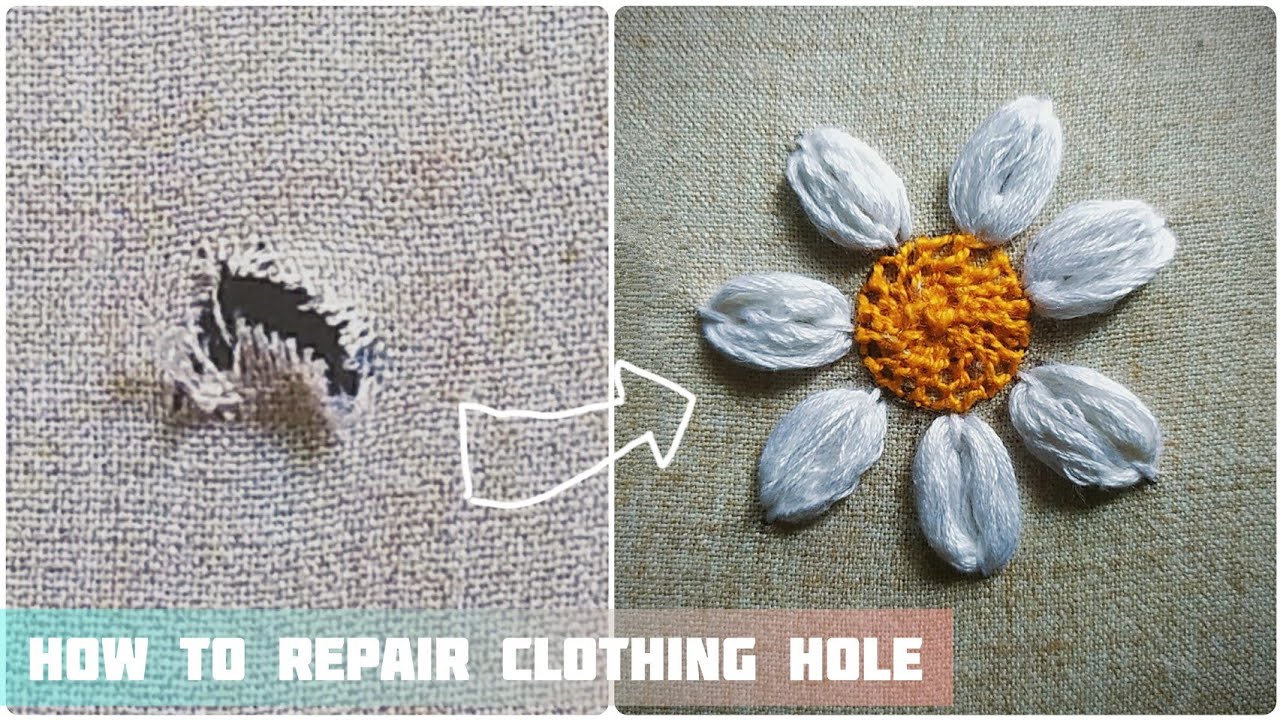
Transform small holes into art. Embroidery cover-up turns moth damage into a unique design element that adds character rather than hiding it.
When to Embroider
Embroider over tiny holes in wool or cotton blankets, vintage or handmade textiles, and anywhere you want personalization or upcycling.
How to Embroider Over a Hole
- Trace the Shape: Draw your design around the hole with water-soluble marker.
- Start in the Center: Bring needle up from the back. Leave a tail to secure later.
- Fill the Design: Work outward with overlapping stitches. Cover the hole completely.
- Secure Threads: Pass under stitches on the back, pull through to knot, trim.
Design Tip: Add symmetry by placing a matching embroidered motif on the opposite side of the blanket.
Creative Embroidery Ideas
Consider flowers, stars, or animals for decorative cover-ups. Add initials or dates for personalization. Try sashiko-inspired geometric patterns following the Japanese boro tradition.
Fix Small Holes with Invisible Mending
For a seamless repair, invisible mending blends thread back into the fabric weave so well that the repair is nearly undetectable.
Best Uses for Invisible Mending
This technique works best on tight weaves or knits and on areas where appearance matters most.
Step-by-Step Invisible Repair
- Anchor the Thread: Start stitching a few mm from the edge of the tear.
- Stitch Across: Work perpendicularly to the tear. Place stitches 1 mm apart. After each, move up 1 mm to close the gap.
- Reinforce with Return Pass: Stitch back in the opposite direction. Align new stitches between the first row.
- Secure the End: Stitch over the last few mm 3 to 4 times on the reverse. Trim close.
Goal: An almost invisible mend under natural light.
Fabric-Specific Repair Tips
Match your method to the material for lasting results.
Plush and Pile Fabrics
For fleece, minky, faux fur, chenille, and velvet, use ladder stitch for seams and double-sided patches for holes. Avoid pins and use clips instead to prevent sinking hazards. Anchor knots in the base fabric, not surface fibers.
Wool and Knit Blankets
Darn with matching wool yarn. Embroider to cover small holes. Block after repair to restore shape. Hand wash only with no heat or agitation.
Cotton, Denim, and Woven Fabrics
Use blanket stitch or whipstitch for edges. Apply fray check to raw patch edges. Try contrasting thread for decorative effect. Embrace visible mending as art.
Make Repairs Last Longer
A well-patched blanket can last decades with proper care.
Wash and Dry Safely
Hand wash or use gentle machine cycle. Turn inside out if the patch is visible. Air dry or tumble dry low with no high heat. Never iron pile fabrics.
Store with Care
Fold or roll heavy blankets instead of hanging them to prevent stretching. Use breathable cotton bags for wool storage. Add cedar blocks or lavender sachets to deter moths.
Inspect and Reinforce
Check repaired areas every few months. Re-stitch loose threads before they fail. Re-block wool blankets if they lose shape.
Why Patching Matters
Beyond repair, patching carries deeper value for both you and the environment.
Environmental Impact
Patching reduces textile waste since the average person throws away 70 pounds of clothing yearly. It lowers your carbon footprint by avoiding energy used in new production. Supporting repair aligns with slow fashion and mindful consumption.
Emotional and Cultural Value
Patching preserves heirlooms and handmade items. It honors traditions like Japanese boro and sashiko. Each repair adds story and character, making your blanket a record of care.
“Even small repairs make a big difference in reducing waste and keeping textiles out of landfills.”
Frequently Asked Questions About Patching a Blanket
Can I patch a blanket without sewing?
Yes. For small holes, fabric adhesive or heat-bonded patches offer temporary fixes. However, these won’t hold up as well as hand-stitched repairs, especially through washing.
What is the easiest stitch for beginners to learn?
The ladder stitch is beginner-friendly and creates nearly invisible seams. It works well for joining split edges on any blanket type.
How do I repair a hole in a fleece blanket?
Use ladder stitch for seam rips. For holes, apply a double-sided patch and secure with blanket stitch. Use heavy-duty thread and anchor knots in the base fabric.
Can I use a sewing machine instead of hand sewing?
A sewing machine works for straight seams but struggles with thick or plush blankets. Hand stitching gives better control and more durable results for blanket repairs.
How do I match the thread color to my blanket?
Bring a small fabric sample to the store for color matching. If exact match isn’t possible, choose a slightly darker shade, as lighter thread stands out more.
Is it worth repairing an old blanket?
Absolutely. Repair extends the blanket’s life potentially by decades, saves money compared to replacement, and preserves sentimental or heirloom value.
Final Thoughts on Patching a Blanket
Patching a blanket is more than stitching fabric. It’s restoration, resistance to disposability, and personal expression. Whether you choose an invisible ladder stitch or a bold embroidered flower, you’re not just fixing a tear. You’re extending life, reducing waste, and adding meaning.
With the right tools, technique, and intention, any blanket, no matter how worn, can be revived. So next time you spot a hole, don’t despair. Grab your needle, choose your method, and mend with pride. Your blanket isn’t just repaired. It’s renewed.

