
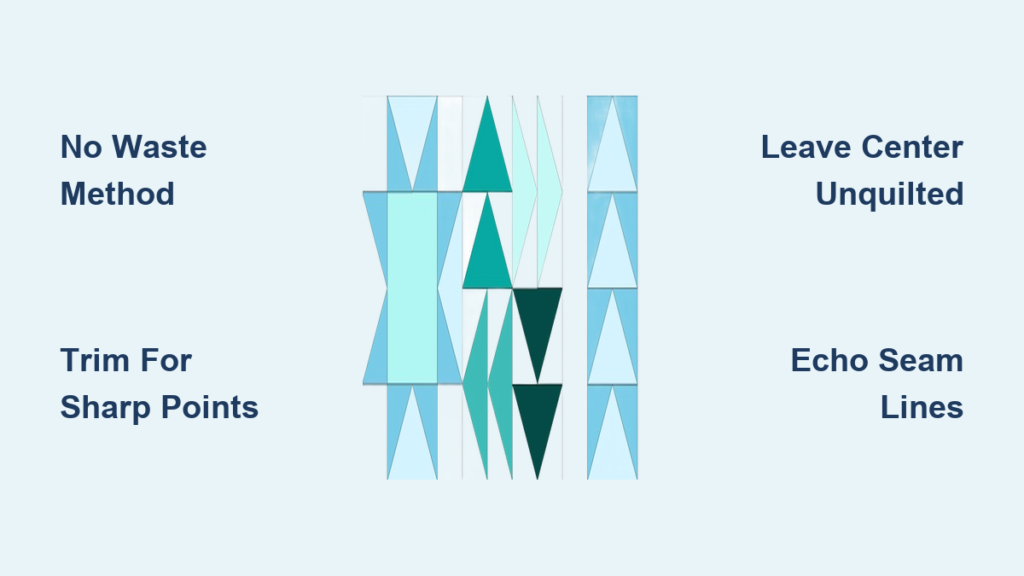
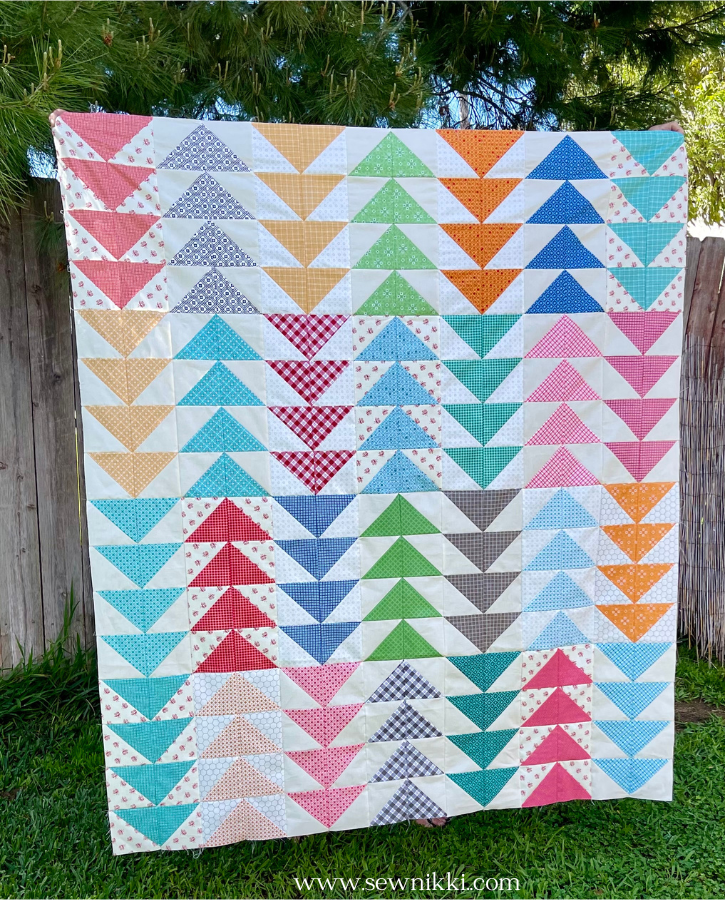
Flying geese blocks are a quilting classic, instantly recognizable for their directional movement and geometric clarity. When you learn how to quilt flying geese blocks with intention, you transform simple triangles into a textured heirloom that highlights contrast and flow. The secret lies in balancing precise piecing with quilting motifs that enhance, rather than overwhelm, the block’s natural geometry.
This guide walks you through every step of the process, from cutting and construction to choosing motifs that match your skill level. You’ll discover tested formulas for perfect sizing, professional trimming techniques, and design strategies that make your geese truly pop. Whether you’re quilting a small border or an entire flying geese quilt, these methods will help you achieve sharp points, consistent sizing, and beautiful visual impact.
Master Flying Geese Dimensions Before You Cut

Follow the 2:1 Ratio Rule
Every flying geese block must maintain a 2:1 width-to-height ratio to read clearly as a flying goose. Common finished sizes include 2″ x 4″ and 3″ x 6″, though any size works as long as the proportion holds. Decide on your finished size first because it drives all your cutting calculations and ensures your blocks align perfectly in rows.
Apply the No Waste Formula for Batch Production
The No Waste method lets you cut one large square and four small squares to yield four identical blocks with minimal fabric waste. Use these formulas:
– Large square (goose): Finished width + 1.5″
– Small squares (sky): Finished height + 1.25″
For a 3″ x 6″ finished block, cut one 7.5″ goose square and four 4.25″ sky squares. Always cut oversized so you can trim after sewing for accuracy.
Try the Precision Trimming Formula
Some quilters prefer a tighter formula based on unfinished size (finished size + 0.5″ in each dimension):
– Large square: Unfinished width + 1.25″
– Small squares: Unfinished height + 7/8″ (0.875″)
For a 2″ x 4″ finished block (2.5″ x 4.5″ unfinished), cut a 5.75″ large square and four 3.375″ small squares. This version reduces bulk and improves pressing accuracy. Test both formulas on scraps to see which suits your machine and seam allowance best.
Build Blocks with the No Waste Method
Cut and Mark with Precision
Start with a sharp rotary cutter, self-healing mat, and acrylic ruler. Accuracy here prevents blunted points later. On the back of each small square, draw a diagonal line from corner to corner using a water-soluble pen or chalk.
Place two small squares on opposite corners of the large square, aligning the drawn lines so they point toward the center. Pin if needed, especially with slippery fabrics.
Sew and Cut in the Correct Sequence
Stitch a scant 1/4″ seam on both sides of the diagonal line for each small square. A scant seam is just shy of 1/4″ and prevents the block from shrinking too much after trimming.
After sewing, cut directly along the drawn line to split the unit into two halves. Press seams open to reduce bulk. You now have two half-units, each with a sky triangle attached.
Place a remaining small square on the open corner of one half-unit, aligning the diagonal line from the top corner down to the previous seam intersection. Stitch both sides of the line, then cut along it. Press to complete the block. Repeat for the second half-unit.
Trim for Perfect Points Every Time
Untrimmed blocks will be slightly oversized, which is intentional. Use a square ruler with a 45° line to trim:
– To unfinished size (e.g., 2.5″ x 4.5″ for a 2″ x 4″ finished block)
– Align the goose tip with the 1/4″ mark on the ruler’s diagonal line
– Trim top, bottom, and both sides
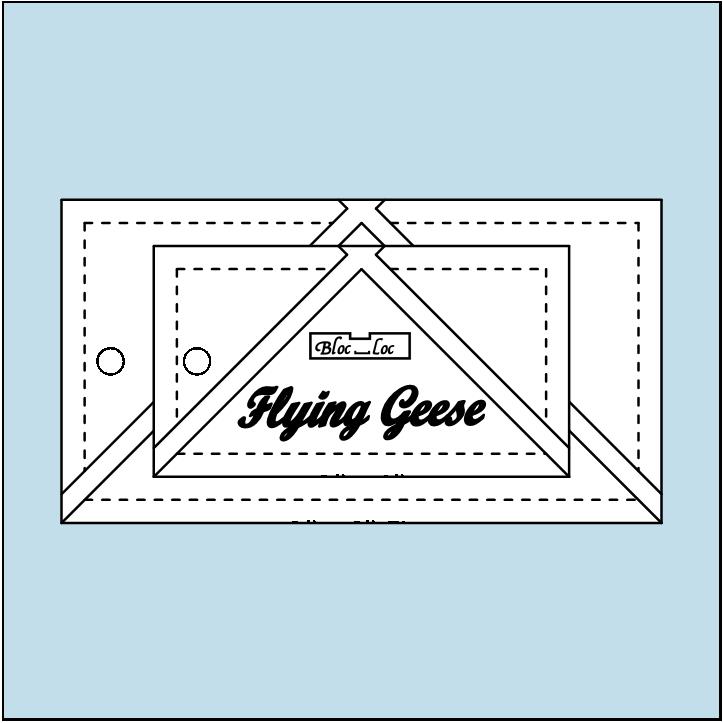
This ensures sharp points and uniform sizing. For frequent projects, a Bloc Loc Flying Geese ruler speeds up trimming for standard sizes like 2″ x 4″.
Quilt for Contrast and Movement
Leave the Center Unquilted for Maximum Pop
For small flying geese under 3″ tall, leave the center triangle completely unquilted. The unquilted goose will puff slightly when washed, creating a 3D effect that makes it stand out against the quilted background. This is the simplest and most effective way to emphasize directionality.
Use dense meandering or stippling in the sky areas to enhance the contrast. The denser the background quilting, the more the unquilted goose will pop visually.
Echo the Seams with Straight Lines
For a clean, modern look, use echo quilting with a walking foot:
– Mark lines 1/4″ inside each seam using a ruler and water-soluble pen
– Start in a background triangle, stitching the horizontal and diagonal echoes
– Move to the goose triangle and repeat
– Continue into adjacent blocks without cutting thread
This method highlights the geometry and creates a crisp, structured finish. It’s ideal for modern or minimalist quilts where clean lines matter.
Add Continuous Curves for Flowing Motion
For a softer, flowing effect, use continuous curved-line quilting:
– Plan S-shaped curves that travel through multiple blocks
– Start in one sky triangle, curve up into the goose, then into the next sky
– Keep the needle down when pivoting to maintain thread continuity
– Use an open-toe free motion foot for better visibility
This technique blurs block boundaries and creates a sense of motion that mimics geese in flight. It works best for whole-quilt designs or borders where you want unified flow.
Choose Motifs by Skill Level

Start with Meanders and Swirls as a Beginner
Beginners should practice loopy meanders or switchbacks in the background only. Avoid quilting the goose to keep things simple. These motifs are forgiving and build muscle memory for free motion quilting.
Use 50-weight cotton thread like Aurifil 50wt 2024 and cotton batting such as Hobbs Heirloom for soft drape. Always test tension on a scrap sandwich before starting your actual quilt.
Upgrade to Ribbon Candy and Wood Grain
Intermediate quilters can add ribbon candy or wood grain fills inside the goose triangle. These linear designs follow the block’s direction and add subtle texture without losing shape definition.
Quilt the background with a stipple, then move to the goose. Keep line spacing consistent at about 1/2″ apart for a balanced look that doesn’t compete with the piecing.
Master Feathers and Butterfly Effects
Advanced quilters can create feather motifs that emerge from the goose’s tip. On a single block, this can slow the sense of flight, but when two geese are placed nose to nose, the feathers form a butterfly.
To execute this advanced technique:
– Place the point where two geese meet
– Quilt symmetrical feathers radiating outward
– Use continuous stitching to avoid thread starts and stops
– Keep feathers small and tight for precision
This technique transforms a geometric block into a whimsical, organic design that adds personality to your quilt.
Prevent Common Mistakes Before They Happen
Fix Blunted Points Quickly
Blunted tips usually result from inaccurate seam allowances or poor pressing. To fix this issue:
– Always sew a scant 1/4″ seam
– Press seams open to reduce bulk at the tip
– When assembling blocks, place the goose point on top and sew through the “X” where seams intersect
This ensures the point stays sharp and aligns perfectly with adjacent blocks in your quilt top.
Stop Wonky Blocks Before They Spread
Distorted blocks often come from stretching fabric during sewing. Prevent this by:
– Trimming all blocks to the same unfinished size
– Using a square-up ruler with a 45° line to align the goose tip
– Checking that the block is exactly twice as wide as it is tall
If blocks vary, re-trim before sewing them into rows to maintain consistency.
Avoid Inconsistent Sizing Across Your Quilt
Cutting inaccurately or pressing unevenly causes mismatched blocks. Always:
– Cut with a sharp rotary blade
– Use the same ruler for all cuts
– Press, don’t iron, seams to avoid stretching
– Trim every block in a batch to the same dimensions
Consistency is the key to clean rows and sharp points that make your quilt look professional.
Use Advanced Layouts and Textures
Create Dynamic Borders with Flying Geese
Flying geese make striking borders around any quilt. Arrange them to fly in one direction for motion, or alternate directions for a zig-zag effect. Quilt the border with the same motif as the main quilt for unity.
For extra impact, stitch-in-the-ditch around each goose, then densely stipple the background. This gives a crisp, framed look that draws the eye to the border design.
Build Star and Arrowhead Blocks
Four flying geese units form the arms of a star block when combined with a center square. Quilt the geese with directional motifs and the center with a medallion design for a stunning focal point.
For arrowhead blocks, leave the geese unquilted and stipple the background. The contrast makes the arrows float above the quilt surface, creating a dramatic 3D effect.
Quilt Whole-Geese Quilts Seamlessly
When an entire quilt is made of flying geese or bow-ties, ignore the internal seams. Instead, quilt large-scale feather flowers or continuous curves across multiple blocks.
This technique creates yummy texture, a soft, organic feel that unifies the geometric piecing. Use shirting fabrics for the background to add subtle variety without disrupting the flow of your design.
Equip Yourself for Success
Use the Right Tools from the Start
Essential tools for quilting flying geese blocks include:
– Rotary cutter and self-healing mat
– Acrylic ruler with 45° lines
– Walking foot for straight-line quilting
– Open-toe free motion foot for FMQ
– Water-soluble marker for marking lines
– New needle for every project
A Bloc Loc ruler is worth the investment if you make many 2″ x 4″ blocks because it trims perfectly every time and saves significant time.
Choose Ideal Materials for Lasting Quality
For thread, choose 50wt 100% cotton like Aurifil for durability and softness. For batting, select 100% cotton or wool such as Hobbs for excellent drape and warmth. For fabric, pick high-contrast solids or shirting prints for clear definition between goose and sky.
Avoid polyester thread in heirloom quilts because it shrinks differently than cotton and can cause puckering over time, ruining the smooth finish.
Test Everything Before You Quilt
Always follow these testing steps:
– Draw your quilting plan on paper first
– Test motifs on a scrap sandwich
– Check thread tension on a test piece
This prevents costly mistakes and builds confidence before you commit to stitching your actual quilt top.
Frequently Asked Questions About Flying Geese Blocks
What is the standard size for flying geese blocks?
The most common finished sizes are 2″ x 4″ and 3″ x 6″, though any size works as long as you maintain the 2:1 width-to-height ratio. Custom sizes can be created using the provided formulas without strict limits.
Should I quilt the center of small flying geese blocks?
For blocks under 3″ tall, leaving the center unquilted creates maximum contrast and a 3D effect when washed. The unquilted goose puffs slightly while the densely quilted background stays flat, making the shape pop visually.
What thread works best for quilting flying geese blocks?
50-weight or 40-weight 100% cotton thread like Aurifil is recommended for blending and durability. Cotton thread ages and shrinks at the same rate as cotton fabric, preventing puckering over time in heirloom quilts.
How do I prevent blunted points on flying geese?
Always sew a scant 1/4″ seam, press seams open to reduce bulk, and sew through the “X” where seams intersect when assembling blocks. Place the goose point on top so you can see the intersection clearly and stitch directly through it.
Can I quilt an entire quilt made of flying geese as one continuous design?
Yes, when a quilt consists entirely of flying geese or bow-ties, ignore the internal seams and quilt large-scale feather flowers or continuous curves across multiple blocks. This creates unified texture that transcends individual geometric units.
What is the best batting for flying geese quilts?
100% cotton or wool batting like Hobbs is preferred because natural fibers remain soft and drapey even with heavy quilting density. Synthetic battings may stiffen with dense quilting, reducing the soft drape quilters prefer.
Key Takeaways for Quilting Flying Geese Blocks with Confidence
Mastering how to quilt flying geese blocks comes down to three core principles: precise cutting using the No Waste formula, accurate trimming to unfinished size, and intentional motif selection that matches your skill level. Start with the 2:1 ratio rule, cut oversized, and trim every block to exact dimensions for consistent results.
Choose your quilting design based on the visual effect you want. Leave small geese unquilted for dramatic contrast, echo seams for modern structure, or add continuous curves for flowing motion. Match your thread and batting to natural fibers for heirloom quality that ages beautifully.
Your next step is to gather your tools, cut a few practice blocks using the No Waste method, and test your chosen motif on a scrap sandwich. Once you see the results, you’ll have the confidence to quilt your full flying geese project with precision and creativity.

