
You’ve spent hours piecing your quilt top, and now it’s time for the crucial next step: sandwiching your quilt. This process layers the quilt top, batting, and backing together securely before quilting, ensuring smooth, professional results. Without proper sandwiching, you risk shifting, puckering, and uneven tension during quilting, which can ruin all your hard work.
Sandwiching might sound simple, but precision matters. Each layer must be prepped correctly, sized right, and basted tightly. Whether you use pins, spray, fusible batting, or thread, the goal is the same: a flat, wrinkle-free foundation that holds firm under the needle. In this guide, you’ll learn exactly how to sandwich a quilt like a pro, avoiding common mistakes and setting yourself up for flawless quilting.
Prepare All Three Layers
Before assembly, each component of the quilt sandwich needs individual attention. Skipping prep leads to bubbles, tucks, and frustration later.
Press the Quilt Top Flat
Start with a perfectly pressed quilt top. Use starch on the right side to add stability and reduce shifting. Press seams flat first, then press them to one side or nested, especially where blocks meet. This reduces bulk and creates a smoother surface for quilting.
Inspect the top for lumps or distorted blocks. Fix any issues now, because once quilted, they become permanent.
Cut Backing 4 to 6 Inches Larger
The backing must extend 4 to 6 inches beyond the quilt top on all sides. This extra fabric allows for:
- Quilt sprawl during machine quilting
- Clamping on longarm frames
- Trimming after quilting
If your backing requires seaming, use a 1-inch seam allowance to prevent rips and ensure durability. Press seams open or to one side, and press the entire backing flat.
Trim Batting 4+ Inches Oversized
Like the backing, batting should be at least 4 inches larger than the quilt top. This prevents edge bearding (batting showing through seams) and gives room for shrinkage.
For cotton batting with stubborn creases, toss it in the dryer with a damp washcloth for 5 minutes on high heat. This relaxes fibers and removes folds without damaging the material.
Choose Your Basting Method

How you secure the layers depends on your project size, tools, and preferences. There are four effective basting methods, each with pros and cons.
Pin Basting: Secure and Reusable
Best for small to medium quilts or quilters avoiding chemicals.
Tools Needed:
– Curved safety pins (nickel-plated)
– Pin cushion or magnetic holder
– Painter’s tape or weights
Steps:
1. Lay batting on a clean floor or table.
2. Place quilt top face up on batting. Roll both together from top to bottom.
3. Lay backing right side down, then tape edges to surface.
4. Unroll the top and batting combo onto the backing.
5. Smooth from center outward, then pin every 3 to 4 inches in a grid pattern.
Avoid placing pins in block centers. Place them in open sashing or borders for easier removal during quilting.
Pro Tip: Flip the sandwich to check for wrinkles on the back before you start quilting.
Spray Basting: Fast and Flat
Most popular for modern quilters due to speed and even hold.
Tools Needed:
– Quilt basting spray (e.g., 505, SpraynBond)
– Respirator mask
– Painter’s tape
– Well-ventilated space (outdoors ideal)
Steps:
1. Tape backing wrong side up to floor or table. Keep taut, not stretched.
2. Fold back half the backing, then spray adhesive evenly from 12 inches away.
3. Lay batting on sprayed area and smooth from center out.
4. Repeat for the second half.
5. Fold back half the batting, then spray top surface lightly.
6. Roll quilt top (face up), unroll onto batting, and smooth carefully.
7. Let sit 24 hours before quilting to dry fully.
Warning: Over-spraying causes sticky needles. Less is more.
Fusible Basting: No Pins, No Spray
Ideal for wall hangings, art quilts, or small projects.
Tools Needed:
– Double-sided fusible batting (e.g., Warm Fleece 2)
– Iron (cordless preferred)
– Parchment paper or pressing cloth
Steps:
1. Place fusible batting on a protected surface.
2. Lay backing wrong side up on batting. Press with iron using 5-second up-and-down motions.
3. Flip so batting is up. Place quilt top wrong side down.
4. Press again with 8 to 10 seconds per spot, working outward.
5. Final press on backing side.
Fusible basting makes the quilt stiffer, which is great for structure but not ideal for super-soft throws.
Thread Basting: Traditional and Removable
Used by hand quilters or longarm users with soluble thread.
Tools Needed:
– Hand needle
– Contrasting or water-soluble thread
– Thimble
Steps:
1. Layer and tape as usual.
2. Sew long running stitches in a spiral from center to edges.
3. Keep stitches loose. Tight threads pull and pucker fabric.
If using soluble thread on a longarm, it washes out after quilting. For regular thread, remove stitches post-quilting.
Set Up the Right Workspace
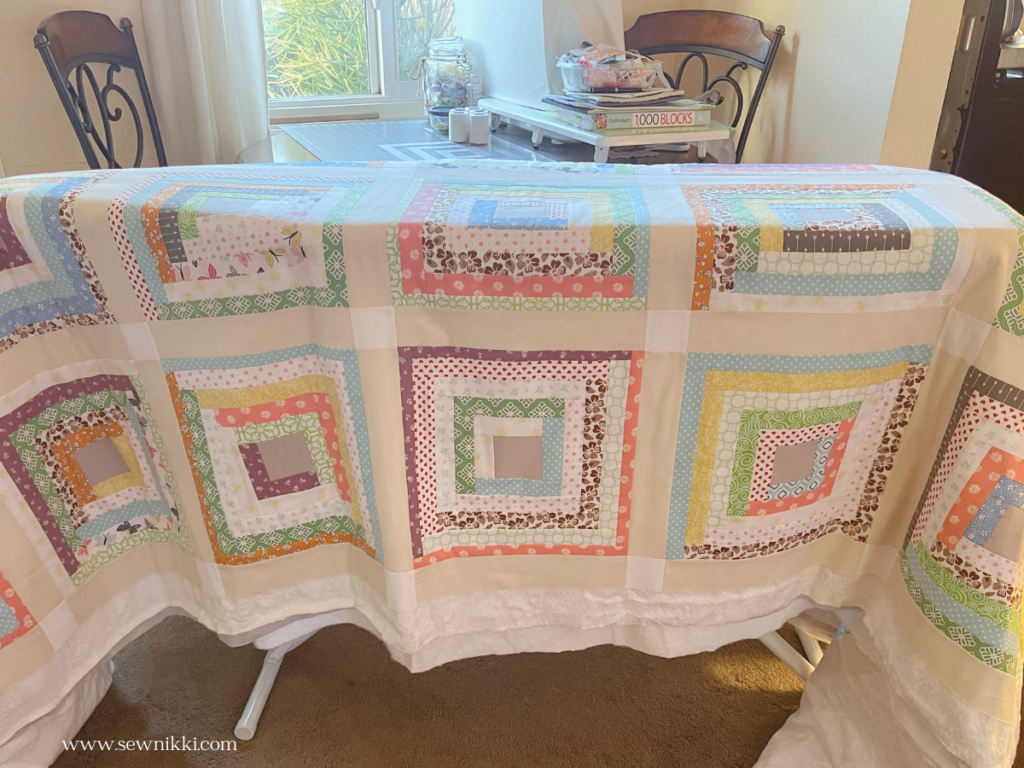
Your environment plays a big role in successful sandwiching.
Use a Clean, Flat Surface
Options include:
– Hardwood or tile floors
– Large cutting table
– Bed (for smaller quilts)
Vacuum the area first. Lint and dust can stick to sprays or cause slippage.
Secure Layers with Tape or Weights
Use painter’s tape to anchor the backing fabric at all four corners and sides. This prevents shifting while you add batting and top.
If tape isn’t available, use soup cans or sewing weights to hold edges down.
Ensure Good Lighting and Ventilation
Bright light helps spot wrinkles instantly. For spray basting, work near open windows or outdoors, since fumes are strong and potentially harmful.
Avoid Common Sandwiching Mistakes
Even experienced quilters run into issues. Here’s how to fix them fast.
Fix Wrinkles and Bubbles
Cause: Poor smoothing or insufficient adhesion.
Solutions:
– Spray: Peel back the affected section, re-smooth, and re-spray lightly.
– Fused: Reheat the area with an iron, slide a ruler between layers to lift and release bubbles, then re-press.
– Pinned: Remove nearby pins, smooth flat, and repin.
Always smooth from the center outward to push air to the edges.
Prevent Puckering During Quilting
Puckers come from uneven tension, often because the backing wasn’t taut during basting.
Check the back fabric regularly in the first few inches of quilting. If it starts to gather, stop and re-baste that section.
Stop Layers from Shifting
If layers slide during quilting, your basting wasn’t dense enough.
- Add more pins every 2 to 3 inches in problem areas.
- For spray, reapply adhesive lightly where hold is weak.
Avoid Sticky Needles
Caused by undried spray adhesive. Always wait at least 24 hours after spray basting before quilting.
Let the quilt hang over a doorway or lay flat to dry completely.
Don’t Use Regular Straight Pins
They break easily and are hard to manipulate through thick layers.
Use curved quilting pins, which glide through layers smoothly and resist breaking.
Transition Smoothly to Quilting
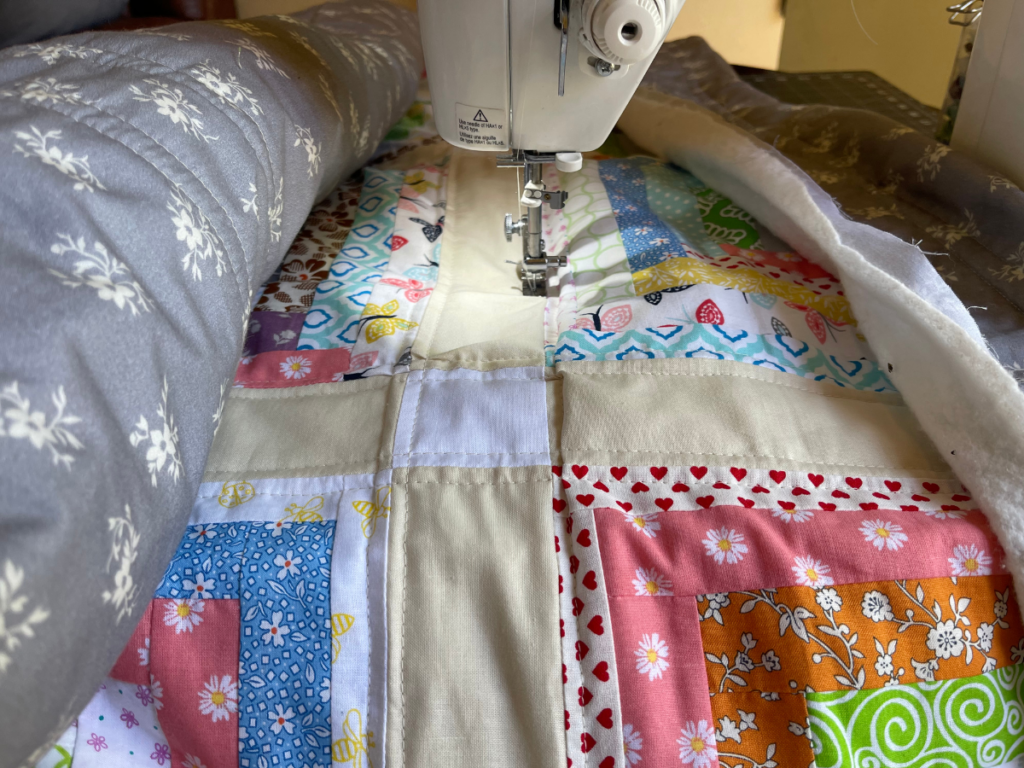
A perfect sandwich sets you up for great quilting, but setup matters too.
Use a Walking Foot on Your Machine
The walking foot is essential for domestic machine quilting. It feeds all three layers at the same rate, preventing:
- Top layer shifting
- Bottom layer puckering
- Uneven stitch tension
Some heavy-duty machines (like Juki) can manage without one, but most home machines need it.
Start Quilting from the Center
Always begin stitching in the center of the quilt and work outward. This pushes air and minor wrinkles toward the edges, where they’re less noticeable.
Roll the Quilt for Easy Handling
For large quilts, roll both sides around cardboard tubes or paper towel rolls. This reduces bulk under the machine arm and lets you feed only the section being quilted.
Unroll gradually as you progress.
Remove Pins Just Before Sewing
If pin basting, take pins out right before the needle reaches them. This prevents:
- Needle breakage
- Machine jams
- Snagged fabric
Never sew over pins.
Quilt in One Direction First
Stitch all horizontal lines first, then rotate and do vertical lines. This maintains consistent tension and avoids distorting the quilt.
Start and Stop on the Batting
Begin and end your stitching on the batting, just off the edge of the quilt top. This hides thread knots and prevents bulky starts and stops on the visible surface.
Longarm Quilting: Special Prep Tips
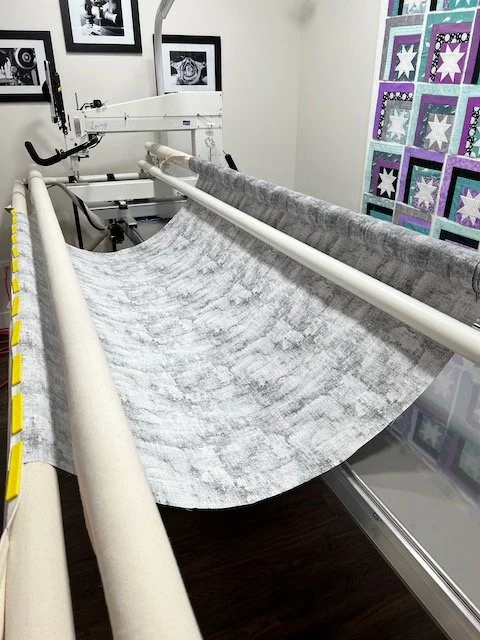
Sending your quilt to a professional? Follow these rules.
Extend Backing and Batting 4+ Inches
Longarm frames require minimum 4 inches of extra backing and batting on all sides. Measure carefully, because short edges mean delays or extra fees.
Don’t Pre-Quilt or Bind
Never bind the edges or do any quilting before sending it out. Leave it fully basted but unquilted.
Label Your Preferences
Include a note with:
– Desired quilting pattern
– Batting type (if you’re providing it)
– Any special instructions (e.g., “echo quilt around blocks”)
Best Materials and Cost-Saving Hacks
Use quality supplies, but save where you can.
Recommended Batting Types
| Type | Best For | Notes |
|---|---|---|
| Cotton (Warm & Natural) | Heirloom, antique look | Pre-shrunk, breathable |
| 80/20 Blend (Fairfield) | Machine quilting | Soft, holds shape, minimal bearding |
| Polyester | High loft, warmth | Less drape, great for kids’ quilts |
| Fusible (Warm Fleece 2) | Art quilts, stability | Stiffer finish, no pins or spray |
Top Basting Supplies
- Sprays: 505 Spray, SpraynBond
- Pins: Nickel-plated curved safety pins (avoid cheap black-coated ones, which stain)
- Tape: Blue painter’s tape (low residue, strong hold)
Save Money on Supplies
- Buy batting on sale. Stores often have 40 to 60% off coupons, so stock up.
- Piece backing from stash. Use old sheets, denim, or thrifted fabric.
- Save batting scraps. Use trimmings for placemats, coasters, or small projects.
Final Checklist: Did You Sandwich Right?
Before you start quilting, run through this list:
- Quilt top pressed and starched
- Backing cut 4 to 6 inches larger than top
- Batting at least 4 inches oversized
- Batting de-wrinkled (dryer trick used if needed)
- Workspace clean, flat, and taped
- Backing secured smoothly with no stretch
- Layers smoothed from center out
- Basted every 3 to 4 inches (pins) or fully adhered (spray or fuse)
- Sandwich flipped and checked for bubbles
- Ready to roll for machine quilting
Frequently Asked Questions About How to Sandwich a Quilt
What size should backing and batting be when sandwiching a quilt?
Backing fabric should be 4 to 6 inches larger than the quilt top on all four sides. Batting should extend at least 4 inches beyond the top. This extra material accommodates quilt sprawl during quilting and allows for trimming afterward.
Can you use regular straight pins to baste a quilt?
No. Regular straight pins break easily and are difficult to push through thick quilt layers. Use curved, nickel-plated quilting pins instead. They glide through layers smoothly and resist breaking under pressure.
How long does spray basting need to dry before quilting?
Let the quilt sit for at least 24 hours after spray basting. Quilting too soon causes sticky needles and gum-up in your machine. Hang the quilt over a doorway or lay it flat to ensure complete drying.
Is fusible batting good for large quilts?
Fusible batting works best for small projects, wall hangings, and art quilts. For large quilts, it becomes time-consuming and expensive. It also creates a stiffer drape, which may not suit all projects like soft throws or bed quilts.
Do you have to baste a quilt before quilting?
Yes. Basting holds the three layers together and prevents shifting, puckering, and wrinkles during quilting. Without basting, layers slide around and create uneven tension, leading to a distorted finished quilt.
What is the easiest basting method for beginners?
Spray basting is generally the easiest for beginners. It’s fast, creates an even hold, and eliminates the need for pinning. Just work in a well-ventilated area, use a respirator mask, and let the quilt dry fully before quilting.
Key Takeaways for Sandwiching Your Quilt Perfectly
Learning how to sandwich a quilt properly is the hidden key to a flawless finish. It’s not glamorous, but skipping steps guarantees problems later. Take your time, press everything, size correctly, and baste securely.
Once your sandwich is flat and stable, you’re ready to quilt with confidence, knowing every stitch will lie smooth and true. Start by gathering your materials, clearing a clean workspace, and choosing the basting method that fits your project. Your future self will thank you when every layer stays put under the needle.

