
You have a collection of cozy throws and quilts with nowhere proper to store them. Tossing them over the couch looks messy, and stuffing them in a closet means they are out of sight and out of use. A blanket holder solves both problems, combining storage and style in one simple piece. Whether you want a sleek wall-mounted rack or a freestanding ladder for draping multiple blankets, building your own takes less time, money, and skill than you might think.
This guide shows you exactly how to make a blanket holder using affordable materials and basic tools. You will learn how to choose the right design for your space, cut and assemble sturdy joints, and finish with a polished look that matches your decor. With just $6 to $20 in supplies and 1 to 3 hours of work, you can build a functional, attractive blanket holder that lasts for years.
Choose Your Blanket Holder Design
Wall-Mounted Blanket Rack
A wall-mounted rack is perfect for small spaces. This minimalist design mounts flush to the wall and can hold 6 or more blankets. It works well behind a door, in a hallway, or above a bed. Made from 2×2 pine, it uses mitered corners for a clean frame and mounts with hidden screws or a sawtooth hanger.
This design extends 8 to 12 inches from the wall and works best in apartments, bathrooms, and tight spaces. The skill level is moderate because it requires miter cuts, but the result is a sleek, permanent storage solution.
Freestanding Blanket Ladder
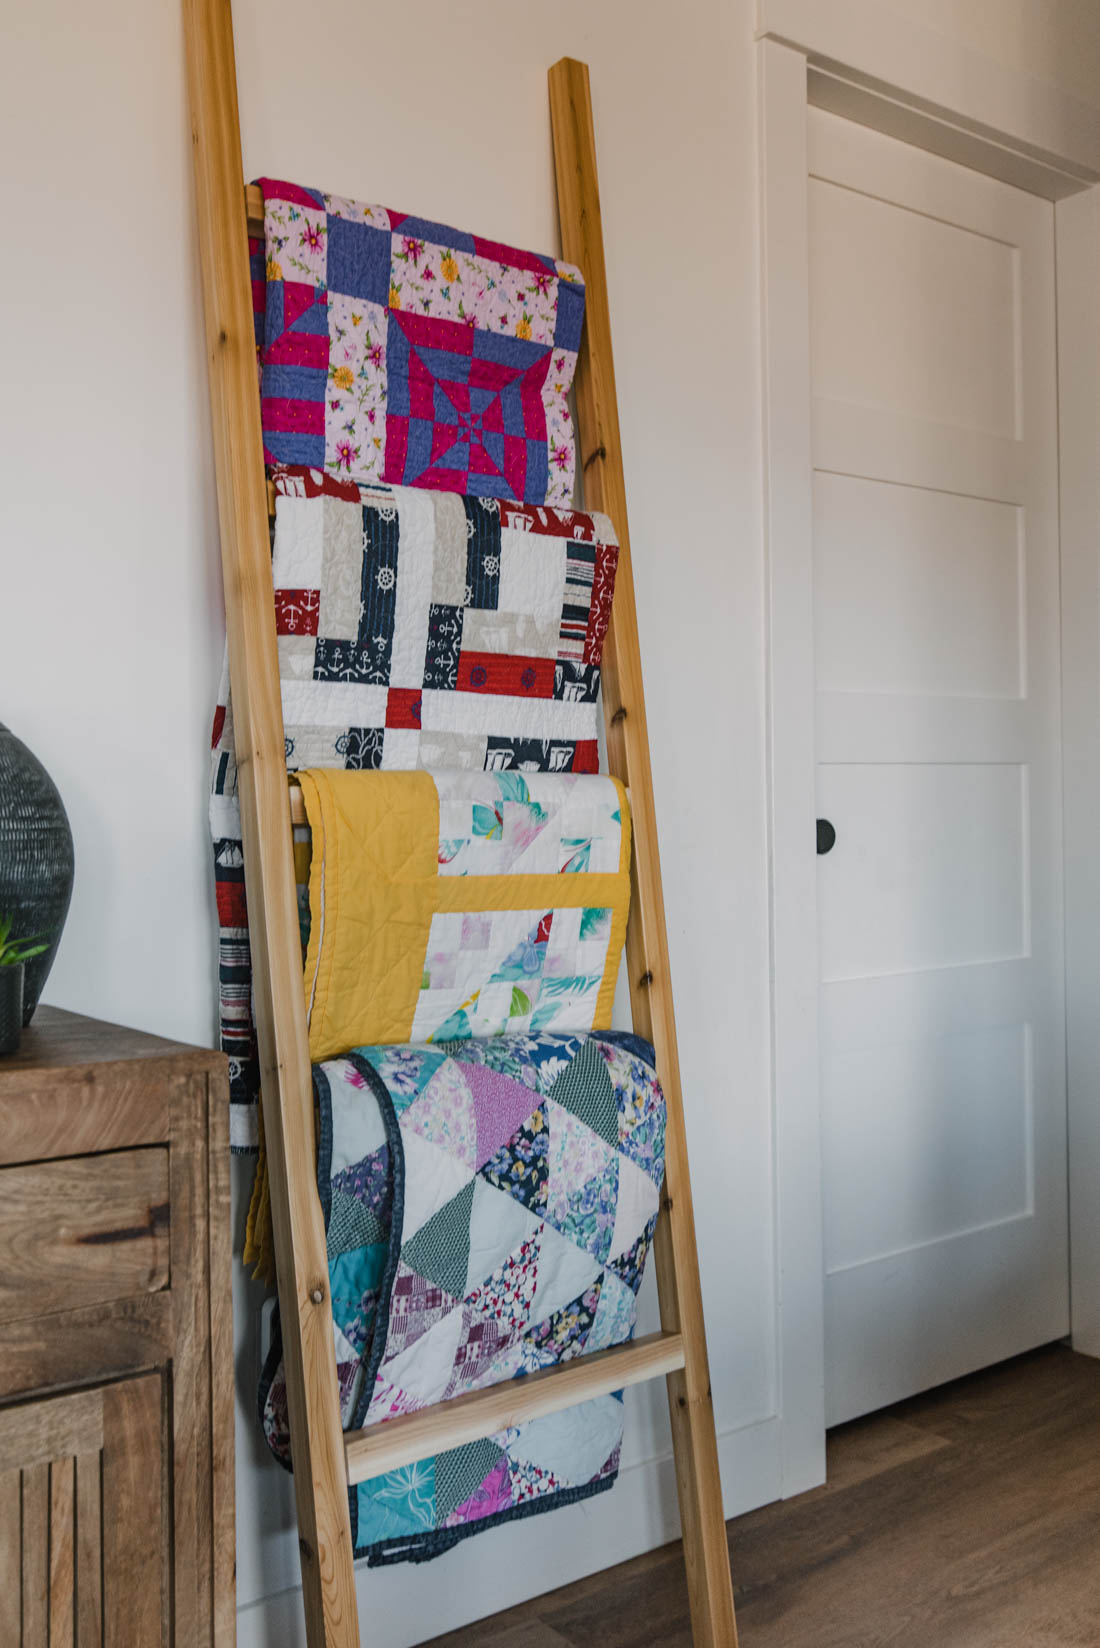
A lean-to ladder with horizontal rungs offers a portable option that fits in corners, beside sofas, or at the foot of a bed. At 5 to 6 feet tall with 5 to 6 rungs, it is easy to assemble and move. Rungs spaced 10 to 14 inches apart let you drape thick quilts or light throws.
This design works best in living rooms, bedrooms, and boho-style decor. It stands 60 to 72 inches tall and spans 18 to 24 inches wide. The skill level ranges from easy to moderate, making it ideal for beginners.
Freestanding Quilt Rack
A box-frame design features vertical legs and two cross beams, perfect for draping one or two large quilts. A 15-inch 2×4 base adds stability. This minimalist rack is corner-friendly and fits well in traditional or modern rooms.
This design stands about 35 inches tall with a 15-inch base width. It works best for minimalist spaces and seasonal displays. The skill level is easy, and it provides a simple, elegant way to showcase your blankets.
Pick the Right Wood and Materials
Best Wood Options
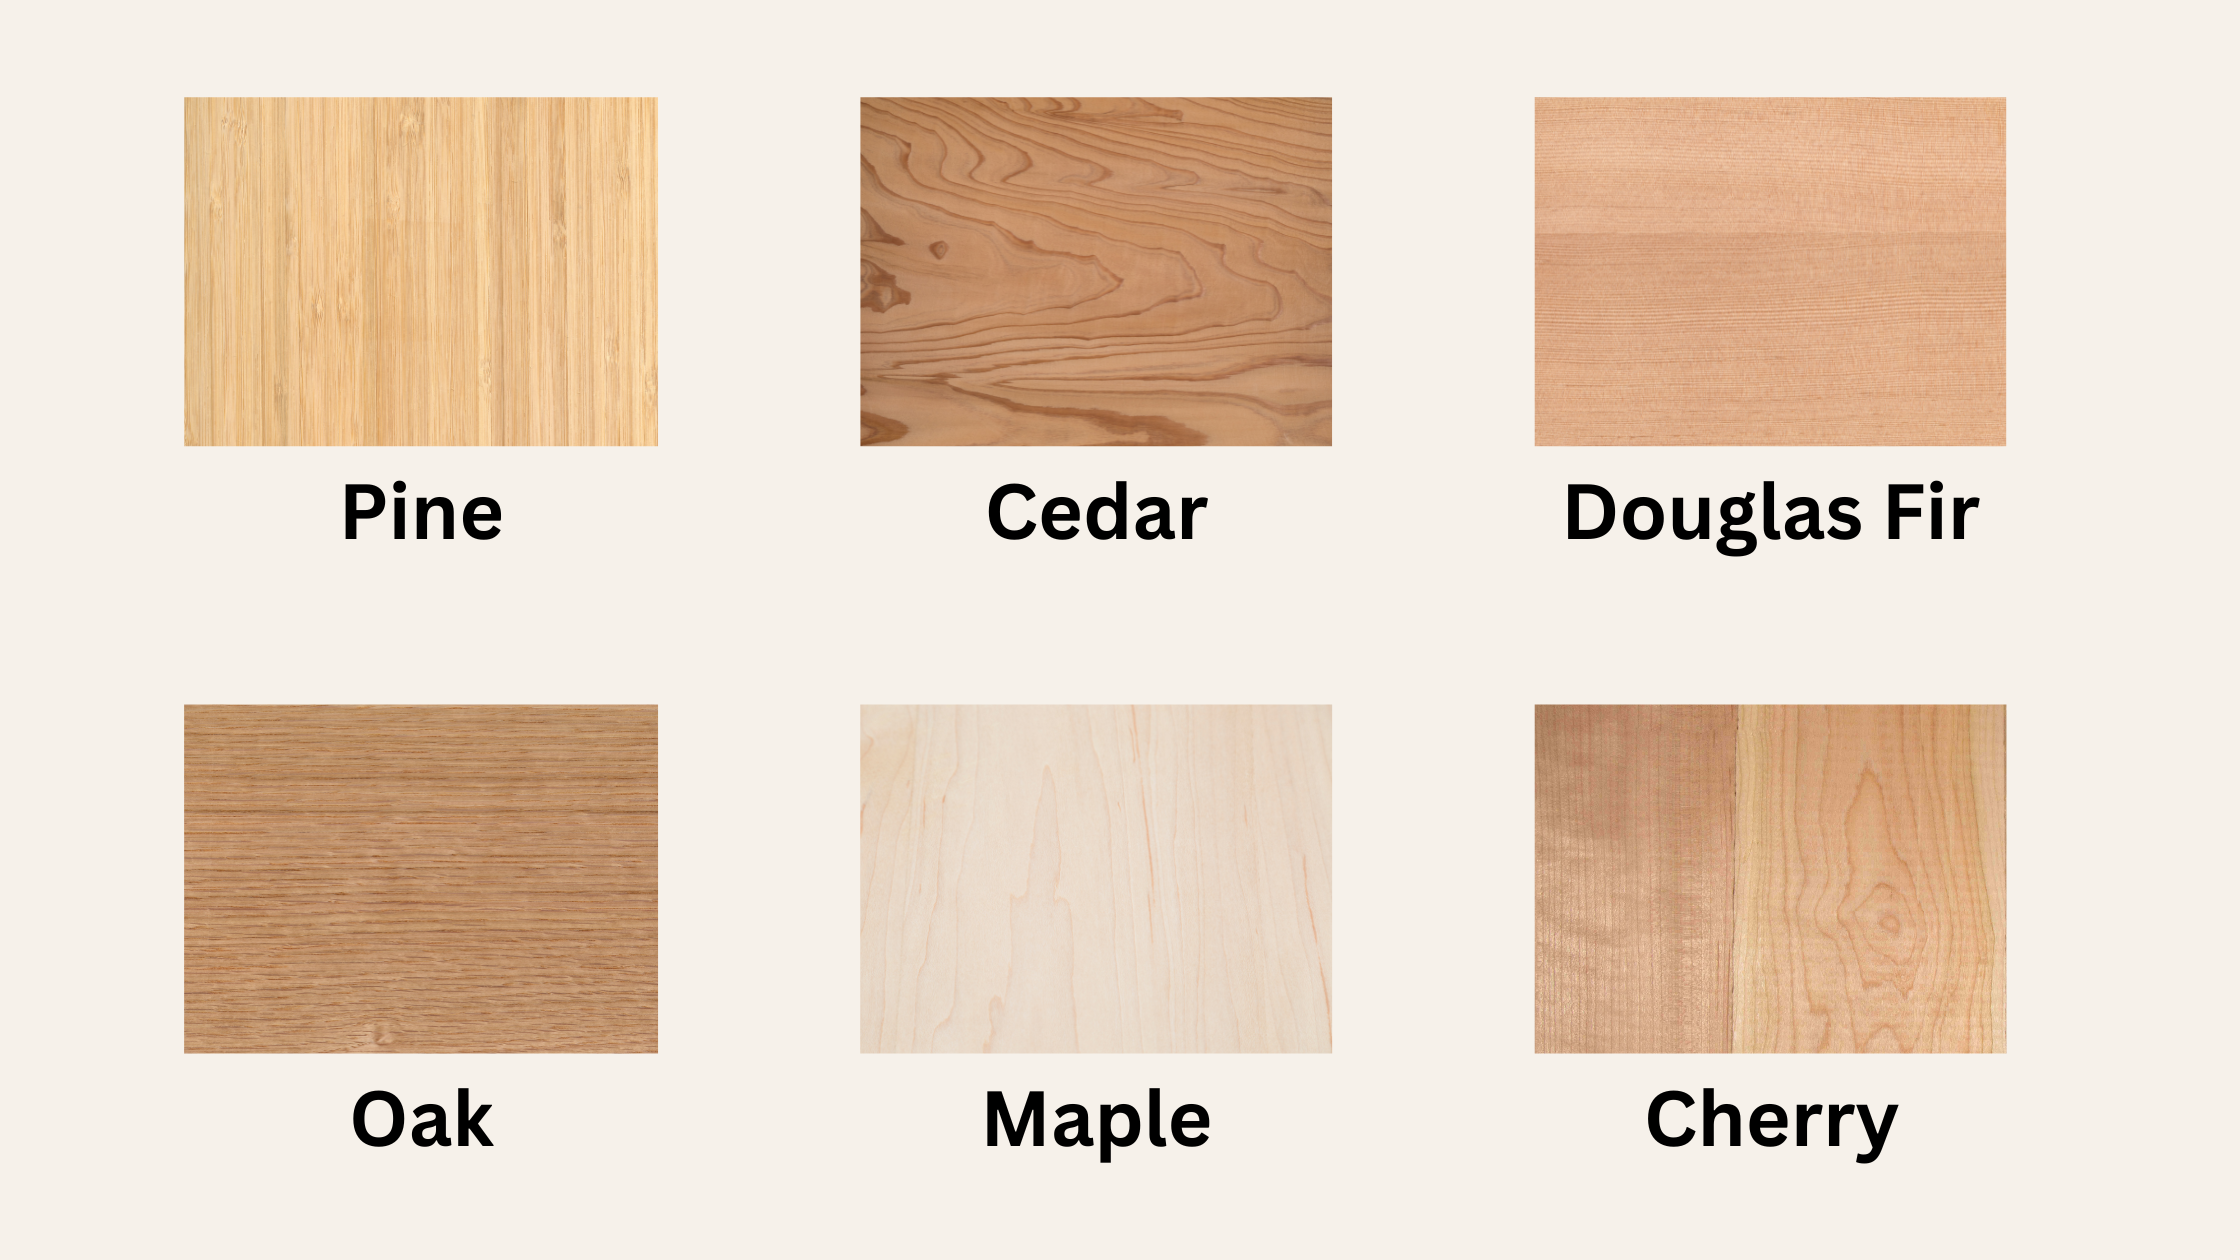
Several wood types work well for blanket holders. Pine (2×2 or 2×3) is affordable, easy to cut, and paint-grade. Poplar, oak, and maple are hardwoods better suited for staining and more durable over time. Pre-sanded pine saves sanding time, and scrap or reclaimed wood costs nothing.
Pro Tip: Ask your hardware store to cut wood for free. Simply bring your measurements, and they will make the cuts while you wait.
Materials by Design
For a wall-mounted rack, you need two 36-inch 2×2 pieces for vertical side rails and six 12-inch 2×2 pieces for horizontal arms. Use 10-inch arms for narrow spaces. Optional items include wooden dowels or a sawtooth hanger for mounting.
For a blanket ladder, gather two 72-inch 2×3 pieces for side rails and five to six 18-inch 2×2 pieces for rungs. You also need 3-inch wood screws or 1.5-inch pocket screws.
For a quilt rack, collect two 34.5-inch 2×2 pieces for legs, two 35-inch 2×2 pieces for cross beams, and two 15-inch 2×4 pieces for base feet.
Most builds cost between $6 and $20. Using scrap wood can bring the cost to zero.
Gather Essential Tools
Must-Have Tools
A tape measure and pencil mark cuts accurately. A speed square ensures straight lines. Clamps hold joints during glue-up. A sander with 120 to 220 grit sandpaper smooths edges. A drill driver drives screws and pilot holes.
You also need a 1/4-inch drill bit for wall mounting, a 1/8-inch Forstner bit for countersinking screw heads, a level for keeping wall racks straight, and safety goggles to protect your eyes during cutting.
Optional But Helpful Tools
A miter saw creates clean 45-degree cuts for wall racks. A Kreg Jig creates hidden pocket holes. A router chamfers edges to prevent snags. Chisels are needed for mortise and tenon joints in advanced builds.
Beginner Hack: Use a miter box and hand saw instead of a power saw if you want to keep costs low.
Build Strong Joints for Durability
Mitered Joints for Wall Racks
Cut all ends at 45 degrees to form a rectangle. Apply wood glue to joints and secure with 18-gauge brad nails. Clamp with corner clamps for 30 minutes or longer. Allow full cure time of 24 hours before handling.
To avoid splitting wood, use a stop block on your saw for consistent cuts.
Butt Joints with Screws
Butt the rung or beam end against the side rail. Pre-drill pilot holes to prevent cracks. Use wood glue plus 2.5 to 3-inch screws. Clamp before tightening and check for squareness with a speed square.
Pocket Hole Joinery
Drill 3/4-inch pocket holes at both ends of each rung. Attach with 1.5-inch pocket screws. This creates a strong, hidden connection. Combine with wood glue for extra strength.
If you do not have a Kreg Jig, drive 3-inch screws from the outside of side rails into rung ends instead. Always pre-drill to prevent splitting.
Key Rule: Never rely on glue alone. Always clamp for full bond strength.
Assemble Your Blanket Holder
Wall-Mounted Rack Step-by-Step
-
Cut the wood. You need two 36-inch pieces for side rails and six 12-inch pieces for arms. Miter both ends of the arms at 45 degrees.
-
Drill mounting holes. On one 36-inch rail, mark 2 to 3 spots for 1/4-inch holes. Pre-drill and countersink with an 1/8-inch bit.
-
Assemble the frame. Lay pieces in a rectangle shape. Glue all joints. Nail with brad nails. Clamp for 30 minutes.
-
Mount to the wall. Option one involves inserting wooden dowels into holes, gluing them, then mounting. Option two uses 1/4-inch screws into wall studs or heavy-duty anchors. Option three attaches a sawtooth hanger plus a Command strip for a lightweight version.
-
Finish by sanding, painting, or staining.
Freestanding Quilt Rack Build Steps
-
Cut pieces. You need two 34.5-inch 2×2 pieces for legs, two 35-inch 2×2 pieces for beams, and two 15-inch 2×4 pieces for base feet.
-
Attach beams to legs. Place the top beam 2 inches from the top and the bottom beam 15.5 inches from the top. Use glue plus 2.5-inch screws from the outside.
-
Add base feet. Option A involves chiseling a recess in the 2×4, seating the leg, then gluing and screwing from below. Option B is easier: glue and screw the base directly to leg bottoms.
-
Clamp and let dry for several hours up to 24 hours.
-
Sand and finish. Use 180 to 220 grit paper, then stain or paint.
Blanket Ladder Fast Build
-
Cut or pre-cut pieces. You need two 72-inch 2×3 pieces for side rails and five to six 18-inch 2×2 pieces for rungs.
-
Mark rung positions. Place the first rung 10 to 12 inches from the bottom. Space others 10 to 14 inches apart. Leave 6 inches at the top.
-
Attach rungs. The best method uses pocket holes plus 1.5-inch screws for hidden connections. The alternative is 3-inch screws from the outside into rung ends. Always pre-drill.
-
Sand and finish. Lightly sand all surfaces. Apply driftwood stain with a rag, wait 5 minutes, then wipe off. Add polyurethane for durability.
-
Optional upgrades include adding L-shaped corner guards to hide joints or using black nails for easier installation.
Finish for Beauty and Protection
Paint for Color
Use acrylic paint for a rustic look. Burnt umber creates a warm, country feel. Paint dries fast and applies easily. Paint only the visible side and leave the back bare for better glue adhesion.
Stain for Natural Look
Driftwood or walnut stain enhances the natural grain. Apply with a cloth, wait 5 minutes, then wipe excess. This finish works well for Scandinavian, modern, or coastal styles.
Add Protective Topcoat
Polyurethane prevents scratches and moisture damage. Use UV-protective finish in sunny rooms to reduce fading. This is essential for bathrooms or homes with kids and pets.
Smooth Edges
Chamfer the top edges of beams and base feet with a router. This prevents snags when pulling out blankets and improves both comfort and appearance.
Mount and Stabilize Your Holder
Wall-Mounted Rack Stability
Mount into wall studs for the strongest hold. If studs are not available, use heavy-duty drywall anchors. Countersink screws so they do not snag blankets. A sawtooth hanger plus a Command strip works for lightweight racks.
Freestanding Ladder Safety
Lean at 15 to 20 degrees from vertical for best balance. Attach rubber pads to bottom feet to prevent slipping. Add felt pads to top corners to protect walls. A wider base provides more stability.
User Tip: Rubber pads are essential on hardwood or tile floors to prevent sliding.
Quilt Rack Base Options
Use 15-inch 2×4 feet for a wide, stable base. Angled legs or chiseled joints add strength. Avoid placing in high-traffic areas where the rack could be bumped.
Use It Beyond Blankets
Multi-Functional Uses
Your blanket holder works as a towel rack in bathrooms when you use a mildew-resistant finish. It serves as a robe or scarf hanger in bedrooms. Add small potted plants to rungs for a plant stand. Hang wreaths, stockings, or string lights for holiday decor. Drape tapestries or shawls for textile display.
Ideal Placement
Place blanket holders behind couches or armchairs, in bedroom corners, beside fireplaces, or in hallways and entryways. Blankets can be casually tossed over and still look tidy.
Customize Your Design
Adjust Size and Spacing
A shorter rack at 36 inches works for compact walls. Wider ladders at 24 inches accommodate bulky quilts. Taller options up to 72 inches create full visual impact. Space rungs 10 inches apart for thin throws or 14 inches for thick wool blankets.
Add Functional Upgrades
Add hooks on sides for bags or robes. Include a small shelf at the top for candles or books. Use 1×3 rungs for more surface area. Consider casters for mobility.
Style Variations
Hardwood plus stain creates a premium, long-lasting look. Painted MDF offers a modern, flat-panel aesthetic. Metal pipes plus wood create an industrial vibe. Natural pine fits modern decor, while dark walnut suits rustic or farmhouse styles.
Keep It Safe and Stable
Safety Checklist
Clamp all glued joints. Glue needs pressure to bond properly. Pre-drill screw holes to prevent wood splitting. Wear safety goggles during cutting and drilling. Sand all edges to prevent splinters or fabric snags. Check level and squareness before final tightening. Mount into studs or use rated anchors for wall units. Lean ladders at 15 to 20 degrees to prevent tipping.
Child-Friendly Note: Freestanding ladders can tip if bumped. Place them in low-traffic zones away from children.
Maintain for Long Life
Care Tips
Dust regularly with a dry or slightly damp cloth. Avoid prolonged moisture exposure, especially on unstained wood. Re-tighten screws every few months in high-use areas. Inspect joints annually for glue separation. Reapply finish every 1 to 2 years if exposed to sun or wear. Replace rubber pads when worn.
Durability Facts
Well-built ladders last 5 or more years indoors. Joints stay strong if glued and screwed properly. Pine may dent over time, while hardwoods resist wear better. UV light fades finishes, so use UV-protective topcoat in sunny rooms.
Final Thoughts on Building Your Blanket Holder
With under $20 in materials and 1 to 3 hours of work, a DIY blanket holder is one of the easiest and most useful home projects you can tackle. Whether you choose a wall rack, a leaning ladder, or a quilt frame, you gain storage, style, and satisfaction from a few boards and some screws. Test-fit all pieces before gluing, work on a flat surface, and use clamps generously for stronger joints. Match your finish to the room decor, and consider the floating look by painting wall-mounted racks the same color as your wall.
Now go build one and finally give your blankets the home they deserve.
Frequently Asked Questions About Making a Blanket Holder
What is the easiest blanket holder to build for beginners?
A freestanding blanket ladder is the easiest project for beginners. It uses simple butt joints or pocket holes, requires no wall mounting, and can be completed in under an hour. The design is forgiving, and any minor mistakes are less noticeable than on a precision wall-mounted rack.
How much does it cost to make a DIY blanket holder?
Most blanket holder projects cost between $6 and $20. The freestanding ladder is the cheapest at around $6. Using scrap or reclaimed wood can reduce costs to zero. Wall-mounted racks cost slightly more due to hardware and mounting supplies.
What tools do I need to make a blanket holder?
You need basic tools including a tape measure, pencil, speed square, clamps, sander, sandpaper, drill driver, and drill bits. A level is essential for wall-mounted racks. Optional tools like a miter saw or Kreg Jig make the project easier but are not required.
How do I prevent my freestanding ladder from tipping?
Lean the ladder at 15 to 20 degrees from vertical for optimal balance. Attach rubber pads to the bottom feet to prevent slipping on hard floors. Place the ladder in low-traffic areas away from pets and children who might bump it.
Can I use a blanket holder for things other than blankets?
Yes, blanket holders work as towel racks in bathrooms, robe or scarf hangers in bedrooms, plant stands, and holiday decor displays. You can hang wreaths, stockings, or string lights on them. Just use a mildew-resistant finish for bathroom use.
How long does it take to build a blanket holder?
A freestanding ladder takes under 1 hour. A wall-mounted rack or quilt rack takes 1 to 3 hours depending on your experience level and whether you need to purchase or cut materials first.

