
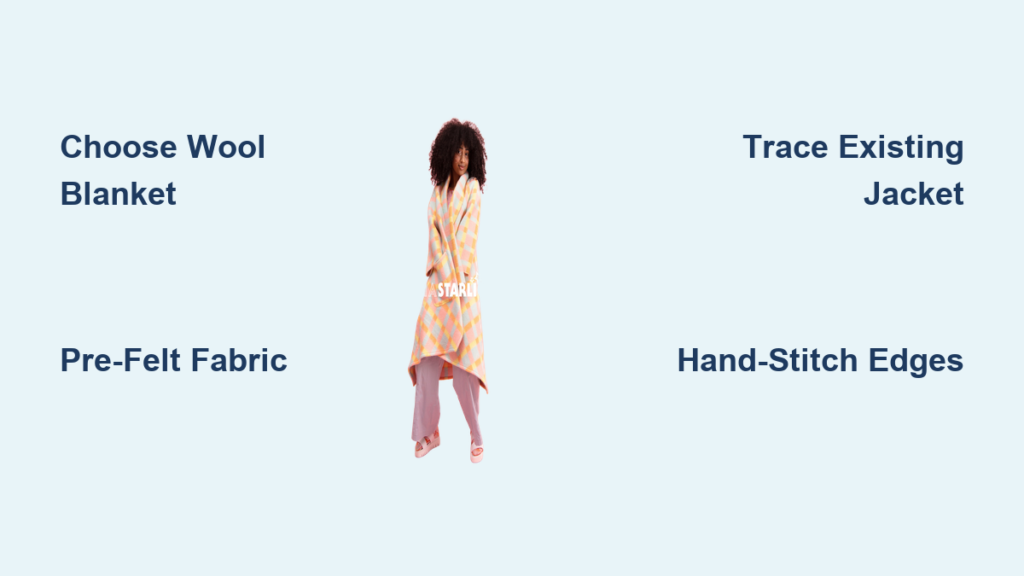
You don’t need a sewing degree or expensive fabric to create a stylish, warm jacket. Transforming a blanket into a wearable coat is one of the most accessible and satisfying DIY projects you can tackle. Whether it’s an old wool throw from your attic or a thrifted quilt with character, how to make a blanket jacket is a skill that blends practicality with personal expression. This guide walks you through every step, from choosing the right blanket to adding hand-stitched details, so you can create a one-of-a-kind piece that keeps you cozy and turns heads.
The beauty of this project lies in its simplicity. You get to walk outside in the cold wrapped in a blanket, but one that looks like it came from a boutique, not a bed. With options for hand-sewing, machine stitching, no-sew methods, and full customization, there’s a version for every skill level. You’ll learn how to cut, stitch, finish edges, add pockets, closures, and embellishments, all while reducing waste and making something truly yours.
Choose the Right Blanket for Your Jacket
Pick Wool for Warmth and Durability
Wool blankets are the top choice for making jackets. They are naturally insulating, moisture-wicking, and incredibly durable. Wool fibers can bend over 20,000 times without breaking, making them ideal for long-lasting outerwear. Virgin or vintage wool blankets often come in large sizes, giving you enough fabric for full-length coats. Felted wool is especially useful because it resists fraying, allowing for clean raw-edge finishes.
Know Your Fabric Options
Consider these blanket types based on your skill level and climate:
Fleece or knit blankets are soft, stretchy, and beginner-friendly since they do not fray. Quilted blankets are already insulated and visually rich, perfect for reversible or bohemian-style jackets. Cotton or flannel is lighter weight and works best for spring or fall wear or as a lined layer. Avoid thin or heavily worn blankets with holes or pilling unless you are planning a patchwork design.
Check Size and Condition Before Buying
Ensure your blanket is at least 51 × 60 inches to fit an average adult. Lay it flat and inspect both sides, especially if you want a reversible jacket. Make sure the design or pattern aligns with your vision, and avoid stains or weak spots that could compromise the final structure.
Pre-Treat Wool Blankets by Felting
Shrink and Strengthen With a Hot Wash
If you are using raw wool that has not been pre-felted, pre-shrink it before cutting. Run the blanket through a hot water cycle with a cold rinse in the washing machine. Add jeans or towels to increase agitation. Repeat if needed until the fibers felt together, which makes the fabric denser and resistant to fraying.
Pro Tip: Place the blanket in a pillowcase during washing to reduce lint and pilling.
Felting causes significant shrinkage, so do this step first. Otherwise, your finished jacket might end up too small after completion.
Create a Pattern Without Buying One
Trace a Jacket or Sweater You Own
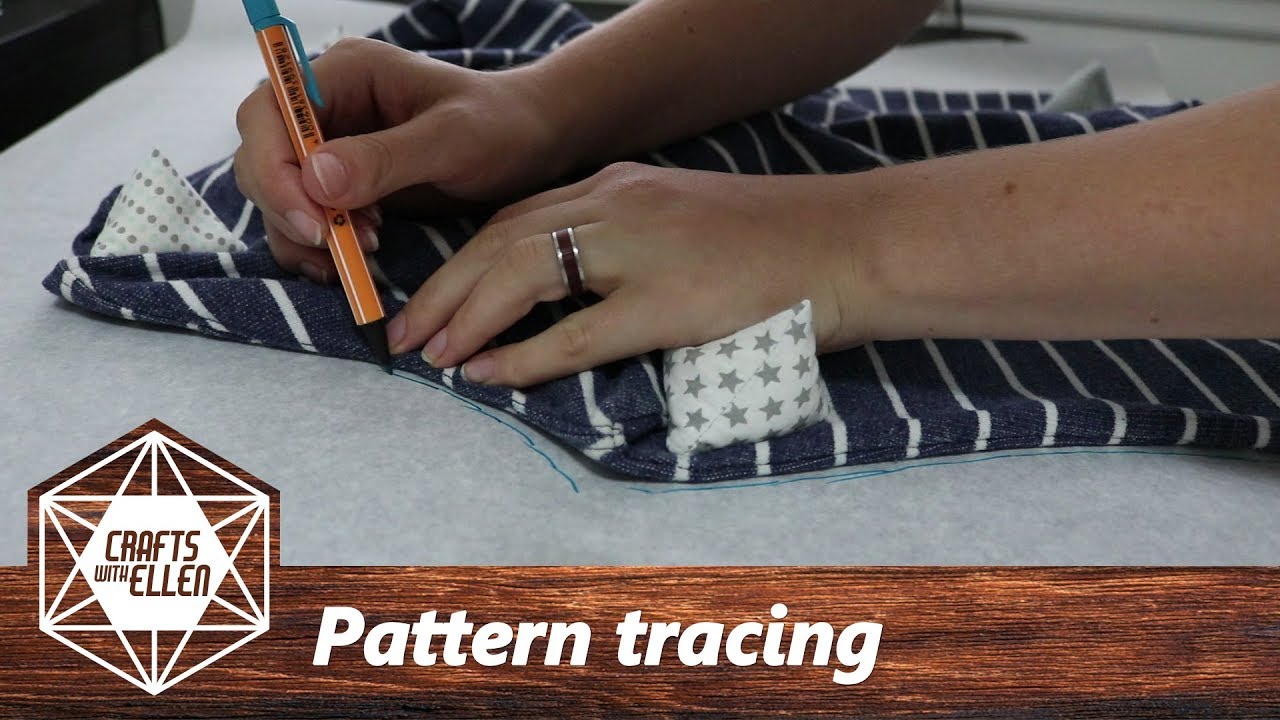
The easiest way to get a good fit is to trace a garment you already own. Lay a well-fitting jacket, sweatshirt, or sweater flat on the blanket. Trace around it, adding 1.5 to 2 centimeters of seam allowance. Cut one side, then mirror it for symmetry. Mark key points including shoulder seams, armpits, and sleeve cuffs. This method ensures a personalized fit and works with any style.
Use the No-Pattern Bog Coat Method
For a minimalist, oversized look, follow these steps:
Fold your blanket in half along the longest edge. Mark the center of the folded edge, then mark 3 inches left and right from that center point. Cut a half-oval arc downward from the center to form the neckline. In each corner of the rectangle, trace an 11 × 11-inch shape to create armholes and curved sides. Cut only the top layer down the center for a front opening about 19.5 inches deep.
This creates a T-shaped silhouette, a loose, vest-like base ready for sleeves, collar, and closures.
Cut Your Blanket Pieces With Precision
Align for Symmetry and Design
Lay the blanket on a large, flat surface. If your blanket has a pattern like plaid or floral, center the back panel on the motif. For pieces labeled “Cut 2,” mirror them across the fabric. For pieces marked “Cut on Fold” like collars, fold the blanket and align the pattern edge with the fold before cutting.
Warning: Double-check that all pieces fit before cutting. Mistakes are hard to fix with thick fabric.
Use sharp fabric scissors and a fabric marker or tailor’s chalk to trace cleanly.
Sew Shoulder and Side Seams
Hand-Stitch With Blanket Stitch
For a rustic, handcrafted look, use the blanket stitch. Thread a tapestry needle with double yarn and tie a double knot. Overlap the front panel over the back by half to three-quarters of an inch and pin in place. Start from the back of the top layer, half an inch from the edge. Pass the needle down through both layers at the edge, leave a loop, then bring the needle up through the loop to lock. Continue with evenly spaced stitches along the seam.
This method works beautifully on felted wool and adds a decorative, folk-art finish.
Machine-Stitch for Speed
Use a heavy-duty needle size 90/14 and a zigzag or straight stitch. Sew shoulder seams first, then side seams from hem to armpit. For thick wool, consider overlap seams by folding one edge over the other and topstitching to reduce bulk.
Add Sleeves to Your Blanket Jacket

Cut and Assemble Sleeve Panels
Each sleeve needs two pieces. The concave curve forms the top shoulder area, while the convex curve creates the bottom wrist area. Place right sides together, pin, and sew along the long edge using a machine or blanket stitch.
Attach Sleeves Carefully
Pin the widest part of the sleeve under the shoulder seam. Ease the fabric inward from both sides, matching the curves. This step can be tricky with thick material, so work slowly and pin incrementally. Sew with strong thread or blanket stitch.
Tip: Try on the jacket before final stitching to check sleeve length and mobility.
Install Functional Pockets
Make Lined Patch Pockets
Cut two pieces for each pocket: an outer piece 8.5 × 7.5 inches from the blanket and a matching lining piece from cotton or lightweight fabric. Place right sides together and sew three sides with half-inch seam allowance, leaving a 3-inch gap for turning. Clip corners diagonally, turn right side out, press flat, and topstitch all edges to close the gap.
Attach Pockets to the Jacket
Position pockets 3 inches from the front opening, with the bottom edge aligned with the hem. Sew three sides to the jacket with a narrow seam, leaving the bottom open for a functional pocket.
Add Pocket Flaps for Style (Optional)
Cut small rectangles 5 × 3 inches. Pin 1.5 inches above the pocket and stitch only the top edge. Use contrasting thread or appliqué for flair.
Attach a Collar or Lapel
Cut on Fold for Symmetry
Mark the collar pattern so the center aligns with a fold in the blanket. Cut around the shape, unfold, and you will have a symmetrical piece.
Pin and Stitch to Neckline
Fold the collar in half and match the center to the center back of the neckline. Pin outward to both sides and sew using blanket stitch or machine. For a lapel effect, leave the straight edge open and fold it down.
Finish the Edge
Use bias tape or blanket stitch along the outer edge. A 9 mm binder attachment makes this fast and clean on a sewing machine.
Finish the Neckline and Front Opening
Cut the Front Opening
After cutting the half-oval neckline, slice down the center front through the top layer only, about 19.5 inches deep. Round the top and bottom corners to prevent tearing.
Choose a Closure That Fits Your Style
Buttons and loops work well for a classic look. Make loops from 1.5-inch bias tape strips and attach them 6.5 inches below the shoulder seam. Use large, sturdy buttons like mother-of-pearl or hammer-in jeans buttons. For a zipper, pin an open-ended zipper to the front edges and sew with an edgestitch foot for precision. For a belt, cut a 3-inch-wide strip from the blanket, add 1-inch slits in the front flaps to thread through, and tie at the waist for an adjustable fit.
Hem the Cuffs and Bottom
Hem the Sleeves
Fold the raw edge in a quarter inch, then again a quarter inch, and stitch. For felted wool, a single fold over a strip is enough. Use a twin needle or coverlock stitch for a professional finish.
Hem the Bottom
Fold the bottom edge half an inch up, tuck the raw edge under, and sew. For heavy coats, use bias tape binding or an overlap seam to reduce bulk.
Pro Tip: Apply stabilizer tape to cuffs and collar before sewing to prevent stretching.
Seal and Finish All Edges
Use Bias Tape on Fraying Fabrics
For cotton or non-felted wool, apply double-fold bias tape to raw edges. Sew to the right side, fold over to the wrong side, and topstitch close to the inner edge. Miter corners at 45-degree angles to minimize bulk.
Embrace Raw Edges on Felted Wool
If your blanket is felted, raw edges are safe. Finish with a hand-sewn blanket stitch for a decorative, textured look.
Reduce Bulk With Overlap Seams
Instead of sewing right sides together, overlap edges and topstitch. This works great for thick wool and allows contrast thread to become a design feature.
Customize With Appliqués and Embellishments
Add Mushroom Appliqués (Popular Design)
Trace shapes onto cotton calico. Caps can be 9 or 14 inches tall, with stems cut separately. Place shadow fabric, a darker underlayer, beneath the stem for depth. Attach with zigzag stitch using gold-mustard thread. Sew the stem to the cap, then re-stitch for strength. Add wavy brown thread for gill texture and bold black lines for striations. Use mother-of-pearl buttons as spots.
Other Embellishment Ideas
Consider a kitty appliqué from Etsy, flower clusters made from repurposed vintage fabric or curtains, or patches using scraps, embroidered motifs, or thrifted textiles.
Placement Tips for Appliqués
Place two small elements near the chest on the front. On the back, position one large and one medium piece, centered or asymmetrical. Avoid functional areas like buttons, pockets, and sleeves.
Make a Reversible Blanket Jacket
Design Both Sides to Shine
A reversible jacket means both sides are wearable. Use the original blanket side for a bold pattern or vintage design. Use the second side for appliqués, patches, or decorative stitching.
Finish Both Sides Properly
Use bias binding or blanket stitch on all edges so neither side looks like the inside. Choose a consistent thread color or contrast intentionally.
Balance the Visual Weight
Avoid one side feeling busier than the other. If one side is patterned, keep the other simple, or embrace intentional asymmetry for artistic flair.
Final Touches That Elevate Your Jacket
Add Decorative Stitching
Use blanket stitch along the hem, cuffs, and collar edge. This reinforces edges and gives a handmade, folk-art aesthetic.
Test Fit and Adjust at Key Stages
Try on the jacket after shoulder seams, post-pocket attachment, and before final edging. Adjust button loop placement, hem length, and sleeve mobility as needed.
Press and Clean Up
Iron seams flat, using steam for wool. Trim loose threads and remove pins and chalk marks.
Care for Your Handmade Blanket Jacket
Wash With Caution
Felted wool requires hand washing in cold water or dry cleaning. Fleece can be machine washed cold on gentle cycle. Quilted blankets should follow original tag instructions.
Dry and Store Properly
Air dry flat to prevent stretching. Store on a wide hanger or folded to maintain shape. Avoid hanging heavy wool coats long-term, as they can stretch out of form.
Frequently Asked Questions About Making a Blanket Jacket
What type of blanket is best for making a jacket?
Wool blankets are the best choice because they are warm, durable, and resist fraying when felted. Quilted blankets work well for reversible designs, while fleece is ideal for beginners since it does not fray.
Do I need a sewing machine to make a blanket jacket?
No, you can hand-sew the entire project using a blanket stitch. A sewing machine speeds up the process, especially for thick wool, but hand-stitching creates a charming folk-art aesthetic.
How much does it cost to make a blanket jacket?
A thrifted blanket typically costs under $3. Add buttons, thread, and optional bias tape, and your total investment is usually under $10, far less than commercial blanket coats from brands like Pendleton or Free People.
Will the jacket be warm enough for winter?
Wool and quilted blankets provide excellent insulation suitable for temperatures below 50°F. The loose fit accommodates layering with sweaters underneath for added warmth.
How do I prevent the edges from fraying?
Use felted wool, apply bias tape, or finish edges with zigzag stitch. Hand-sewn blanket stitch also secures edges while adding decorative appeal.
Key Takeaways for Making Your Own Blanket Jacket
Making a blanket jacket transforms a simple textile into a wearable work of art. Choose a wool or quilted blanket at least 51 × 60 inches, felt it if needed to prevent fraying, and create your pattern by tracing a garment you already own. The construction process involves cutting pieces with proper seam allowance, sewing shoulder and side seams, adding pockets and a collar, and finishing all edges with bias tape or blanket stitch. Embellishments like mushroom appliqués or contrasting buttons elevate the design from functional to fashionable. This project aligns with sustainable fashion principles, costing under $10 while reducing textile waste. Your blanket jacket becomes more than outerwear; it carries your creativity and tells your story with every wear.

