
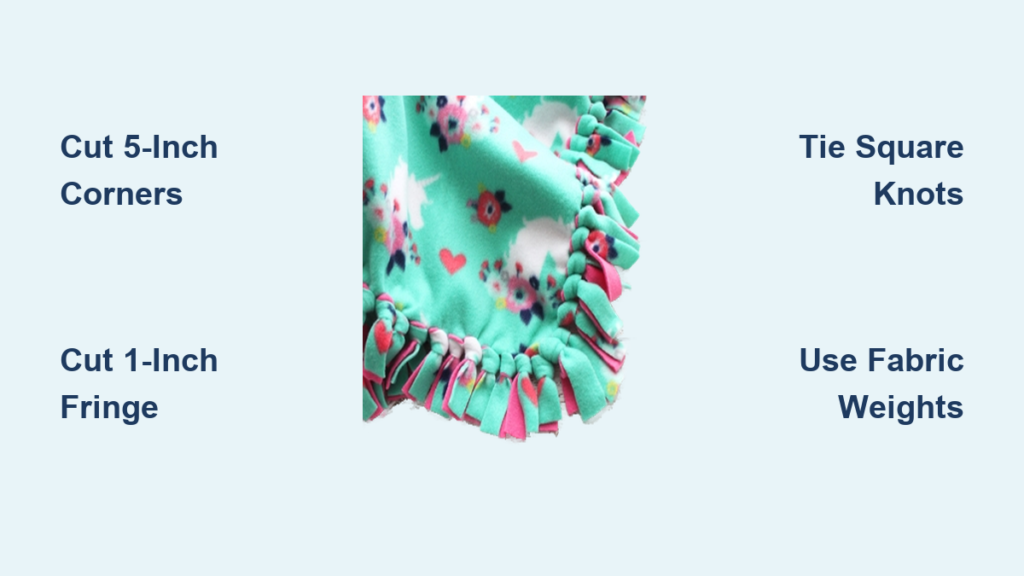
There’s no quicker, cozier way to welcome a new baby than with a handmade tie blanket. Soft, warm, and completely no-sew, a baby tie blanket is the perfect DIY project for beginners, parents, and craft lovers alike. Made from two layers of fleece tied together at the edges with fringe, this cozy creation requires no sewing machine, no pins, and no experience. Just scissors, fabric, and a little time.
By the end of this guide, you’ll know exactly how to make a baby tie blanket that’s soft, safe, and built to last through countless washes and cuddles. You’ll learn how to cut clean edges, tie secure knots, and even upgrade to a braided edge for long-term durability.
Choose the Right Fabric for Your Baby Tie Blanket
Picking the best fabric is the first step to a beautiful, durable tie blanket. The ideal materials are fleece, minky, or blizzard fleece. All of these are 100% polyester, soft, and won’t fray when cut.
Pick Fleece or Minky Fabric
Fleece is the most popular choice. It’s lightweight, affordable, and available in endless prints and solids. For a luxurious upgrade, use minky fabric on one side. It’s ultra-plush and loved by babies for its silky texture. Minky runs slightly more expensive but adds a high-end feel.
Avoid cotton, flannel, or wool. These fabrics will fray without sewing and aren’t safe for a no-sew project.
Pro Tip: Combine a smooth fleece top with a minky backing for a dual-texture sensory blanket. Just don’t pair two thick fabrics unless you extend the fringe length.
Match Fabric Patterns and Colors
Coordinate your two layers for a polished look:
- Solid plus print: White fleece with dinosaur print, gray with polka dots
- Themed combos: Unicorns plus pastel pink, jungle animals plus green
- Gender-neutral: Sage green plus cream, navy plus mustard, gray plus white
Use high-quality, thick fleece to prevent pilling after washing. Cheap, thin fleece may feel stiff and wear out quickly.
Cut Two Identical Fabric Pieces
For a standard baby size, cut both pieces to 36 inches by 54 inches. This uses one yard of each fabric. Other popular sizes include:
- 30 inches by 40 inches: Compact swaddle
- 40 inches by 40 inches: Square stroller blanket
- 54 inches by 54 inches: Toddler-sized
Since most fleece is sold in 54 to 60 inch widths, one yard gives you a ready-to-use baby blanket size. Always trim the selvage edges to ensure even cuts and clean fringe.
No pre-washing needed: Fleece doesn’t shrink or fray, so you can cut and craft right from the bolt.
Align and Secure Fabric Layers
Proper alignment ensures a neat, professional-looking edge after tying.
Lay Fabric Right Sides Up
Place your first fleece piece flat on a clean surface, right side facing up. Then place the second piece directly on top, also right side up. This means both outer pretty sides will be visible once tied.
Exception: For blizzard fleece, always place the nubby right side outward. So both layers have right sides up.
Smooth and Weight Down Edges
Gently smooth out wrinkles from the center outward. Ensure all four edges are perfectly aligned. Any shift now will cause uneven fringe later.
Instead of pins which can distort fleece, use books, cans, or fabric weights to hold the layers in place at all four corners and along the edges.
Work on a large surface: A clean floor or big table gives you space to move without dragging the fabric.
Cut Corners to Reduce Bulk
Cutting squares from each corner keeps the edges flat and prevents bulky knots.
Remove 5-Inch by 5-Inch Corner Squares
Use a ruler and fabric scissors to cut a 5-inch by 5-inch square from each corner. Cut through both layers at once to keep them matched.
This step is essential. Without it, tied corners become thick and lumpy.
Alternative sizes:
- 7 inches by 7 inches: For longer 7-inch fringe
- 2 inches by 2 inches: Required for braided edge method
Use a Cardboard Template
Cut a 5-inch by 5-inch square from a cereal box or packaging. Place it in each corner to guide consistent cuts. Reuse it for every blanket you make.
Visual cue: After cutting, each corner should have a clean, right-angled notch. No rounded or jagged edges.
Cut Uniform Fringe Strips
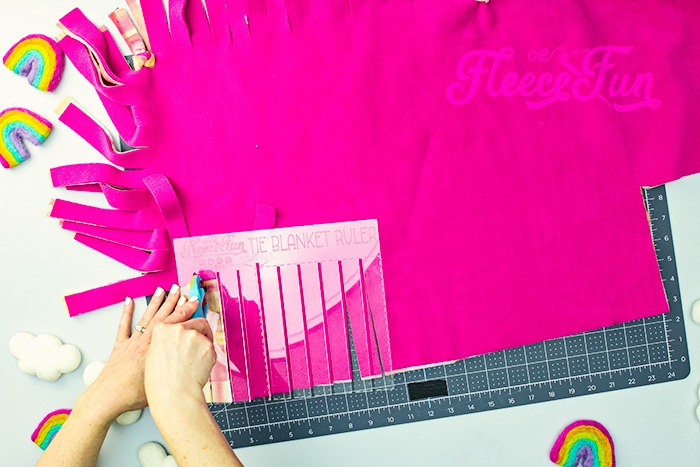
Crisp, evenly spaced fringe ensures your knots look neat and professional.
Mark 1-Inch Intervals Around Edges
Starting just past the corner cut, measure and mark every 1 inch along the entire perimeter. Use a measuring tape or yardstick for accuracy.
For faster, consistent spacing, create a cardboard template with 1-inch gaps and slide it along the edge as you go.
Cut 5-Inch Deep Strips Through Both Layers
At each mark, cut straight toward the inner corner. Make the cuts 5 inches deep to create fringe. Most sources recommend 1-inch wide by 5-inch deep strips.
Use sharp fabric scissors or a rotary cutter with ruler to keep cuts straight and perpendicular. Avoid angling or curving.
Cut both layers together: This keeps top and bottom strips perfectly aligned for tying.
Adjust for Fabric Stretch
Fleece has a slight stretch depending on the weave. If one side resists cutting or feels tighter, use 7-inch deep strips on that side to allow for easier tying.
Skip pre-marking?: Use masking tape along the cutting line as a visual guide. Low-adhesion tape won’t damage fabric.
Tie Secure Fringe Knots
Now for the fun part. Tying the fringe. Choose a knot style based on security, speed, or look.
Use Square or Granny Knots
For durability, tie square knots. Left over right, pull through. Then right over left, pull tight. Or use granny knots, which are double overhand knots. These stay tight through washing.
Avoid single balloon knots for baby blankets. They can loosen over time.
Pro Tip: Pull knots tight and check tension by gently tugging. Consistent pressure gives a uniform edge.
Try the Knot-One, Skip-One Pattern
For a decorative, two-sided effect, follow these steps:
- Tie every other fringe pair on the front
- Flip the blanket
- Tie the remaining pairs on the back
This creates a color-switching border and reduces bulk.
Let Kids Join In
This project is safe for ages 8 and up. Let children tie knots using the balloon knot method. It’s like tying a balloon. It’s easy and builds motor skills.
Work corner to corner: Start at one corner and move steadily around the blanket. Double-check that no fringe pairs are missed.
Upgrade with Braided Edge for Maximum Durability
For a no-loose-ends, ultra-durable finish, try the braided weave method.
Cut 2-Inch Corners and Shorter Strips
Cut 2-inch by 2-inch squares from each corner. Then cut 1-inch wide by 2-inch deep fringe strips.
Weave Strips Through Slits
Follow these steps:
- Fold each strip over by half an inch, grabbing both fabric layers
- Cut a quarter-inch slit in the center of the fold
- Take the next strip on the left and pull it through the slit of the strip on the right
- Continue around the blanket, guiding fabric smoothly at corners
Finish with Hidden Knot
For the final connection, thread only the bottom layer of the last strip through the first slit. Wrap it back and double-knit with the top layer. Tuck the knot inside the edge to hide.
Advantage: This edge never unravels, making it ideal for long-term baby use.
Customize and Personalize Your Blanket
Make your blanket one-of-a-kind with simple upgrades.
Add Embroidery or Vinyl
After tying, embroider a name or birth date in a corner using a hoop and embroidery floss. Or apply a heat-transfer vinyl design with Cricut or Silhouette to the center.
Safety: Keep embellishments away from edges and ensure they’re securely attached.
Include Sensory Features
From leftover scraps, sew or tie on:
- Crinkle fabric patches
- Textured fabric tags
- Soft ribbons or pom-poms
These stimulate touch and hearing. Great for tummy time.
Make Matching Accessories
Turn scraps into:
- Lovey toys
- Pacifier clips
- Burp cloths
- Baby hats
Charity idea: Donate sets to NICUs or foster care programs.
Prevent Common Mistakes
Even small errors can affect the final look and safety.
Avoid Short or Uneven Strips
Strips under 4 inches may be too short to tie. Always cut 5 to 7 inches deep, especially on less stretchy fabric sides.
Fix misaligned layers: If fabric shifted before cutting, realign and re-cut fringe before tying.
Skip Pins and Use Weights Instead
Pins can distort fleece and leave holes. Use books or weights to hold layers in place.
Do Not Use Fabric Softener
When washing, never use fabric softener or bleach. They degrade polyester fibers. Wash in cold water, gentle cycle, and tumble dry low or air dry.
No ironing: Fleece can melt under high heat.
Care for Long-Lasting Use
A well-made tie blanket can last through multiple children with proper care.
Wash Cold and Dry Low
Follow these washing guidelines:
- Machine wash in cold water with mild detergent
- Use minimal soap to prevent residue
- Tumble dry on low or air dry to preserve softness
- Avoid high heat to prevent pilling
Air drying tip: Hang or lay flat. It extends the blanket’s life and keeps fleece plush.
Check Knot Security Over Time
After several washes, inspect knots. Retie any that have loosened, especially if using single overhand knots.
Durability note: Square knots and braided edges hold up best over time.
Final Touches and Safety Tips
Finish strong with quality checks and safety awareness.
Inspect for Flat, Even Edges
Run your hand around the blanket. Edges should lie flat with no curling or bunching. Corners should be smooth, not bulky.
Ensure:
- All knots are tied and tight
- No fringe pairs were missed
- No loose threads or embellishments
Follow Safe Sleep Guidelines
While tie blankets are great for strollers, car seats, and playtime, avoid loose bedding in cribs. Use them under supervision, not for unsupervised sleep.
Safe for all ages: Newborns love the soft texture. Toddlers enjoy tying and untying the knots.
Key Takeaways for Making a Baby Tie Blanket
Making a baby tie blanket is fast, affordable, and deeply personal. With just two pieces of fleece and an hour of time, you create a gift that’s as practical as it is heartfelt. Whether you stick to the classic tied fringe or upgrade to a braided edge, your handmade blanket will be a cherished keepsake. It’s soft, washable, and full of love.
The most important steps are choosing quality fleece that won’t fray, cutting consistent 5-inch fringe strips, and using secure square or granny knots. Always cut corner squares to prevent bulky edges, and skip the pins. Use weights instead to keep layers aligned. For longevity, wash in cold water and air dry when possible.
Ready to start? Grab two coordinating pieces of fleece, sharp scissors, and a ruler. Your perfect baby tie blanket is just a few hours away.
Frequently Asked Questions About Baby Tie Blankets
How many yards of fleece do I need for a baby tie blanket?
You need 1 yard of each fabric for a standard baby blanket. That’s 2 yards total, yielding approximately 36 inches by 54 inches.
Can I use other fabrics besides fleece?
Not recommended. Cotton, flannel, or wool will fray without sewing. Only non-fraying fabrics like fleece or minky are suitable for no-sew projects.
What age group is this project suitable for?
All ages can enjoy it. Newborns use them as swaddles or stroller blankets. Toddlers love them as comfort items. Children ages 8 and up can help with tying as a fun craft project.
Is this safe for newborns?
Yes, if no loose embellishments are attached, knots are secure, and fabric is soft and hypoallergenic. Follow pediatric safe sleep guidelines and avoid loose bedding in cribs.
Can I make this without a rotary cutter?
Yes. Sharp fabric scissors work well. Use a ruler and masking tape to guide straight cuts if you don’t have a rotary cutter.
How do I make the blanket more durable?
Use square or granny knots instead of single balloon knots. Alternatively, try the braided edge method for a self-contained finish that never unravels. Wash in cold water and air dry to extend the blanket’s life.

