
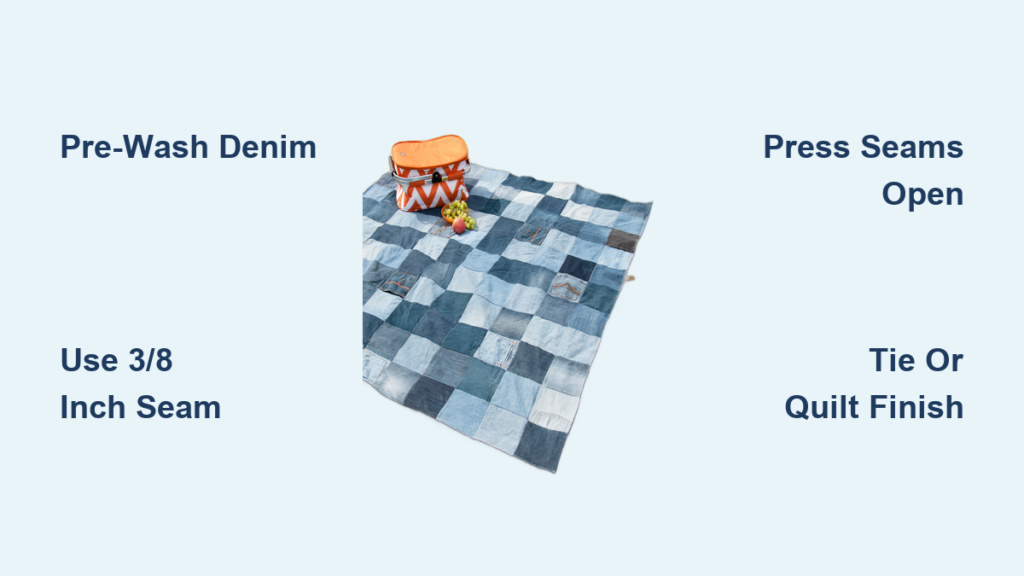
Tired of old jeans taking up space in your closet? Transform them into a cozy blue jean blanket that turns worn denim into a durable, eco-friendly keepsake. This guide walks you through every step, from deconstruction to finishing, with tips that make the process beginner-friendly and rewarding. Whether you’re creating a picnic throw, memory quilt, or soft rag blanket, you’ll learn exactly how many jeans you need and which techniques work best.
Denim Prep and Deconstruction
Start by converting each pair of jeans into flat, workable fabric panels. Lay a pair flat and cut along the inner and outer leg seams from cuff to waist, avoiding the zipper area and pockets unless you plan to save them. This method gives you four long panels per pair. Remove zippers and waistbands to reduce bulk, and leave at least 3/8 inch of fabric around any pockets you want to keep.
Pre-wash all denim pieces before cutting to prevent dye bleeding and shrinkage. One pair of jeans yields approximately 2.5 fat quarters, so save scraps over 6 inches for borders or smaller projects. Use a rigid template made from cereal box or oak tag to trace consistent blocks, and work in batches of 10 squares with labeled sticky notes between stacks to stay organized.
Choose Your Quilt Size and Layout

Your square size directly impacts how many jeans you’ll need for a blue jean blanket. For 8×8 inch squares, plan on 108 squares for a large throw arranged in a 12×9 layout, which requires about 12 pairs of jeans. A queen-size blanket needs 132 squares in a 12×11 layout, requiring approximately 15 pairs.
Smaller 5.5×5.5 inch squares need only 72 blocks for a lap quilt, which uses roughly 8 pairs of jeans. Lay all cut pieces on the floor to design your layout before sewing. Mix light, medium, and dark denim for visual contrast, and avoid clustering too many pocketed or thick sections in one area. Take a photo of your final layout to avoid confusion during sewing.
Cut Denim Blocks Correctly
Use sharp fabric scissors or pinking shears to cut denim, as pinking reduces fraying. A rotary cutter with a self-healing mat and quilting ruler makes large projects faster and more precise. Trace your template with fabric chalk or washable marker, and cut in stacks of 2-3 layers at a time since thick denim shifts easily and causes misalignment.
Keep back pockets, brand tags, and embroidered sections as focal points in your blue jean blanket. Cut around pockets with at least 3/8 inch allowance, and position tags in the center or corner of blocks for visual interest. Save all denim scraps for borders, appliqué patches, or covering mistakes.
Assemble the Quilt Top
Set your sewing machine to a 3/8 inch seam allowance, which reduces stress on thick denim seams. Use a 90/14 or 100/16 denim needle with 30-weight thread and a stitch length of 2.5-3.0 mm. Place blocks right sides together and sew across one edge, backstitching at start and end. Chain-piece multiple blocks to save time.
Press all seams open with a hot iron and steam to flatten bulk and align blocks better than pressing to one side. When joining rows, press seam allowances in opposite directions so they interlock when sewn together. Match seam intersections carefully, and if edges don’t line up perfectly, angle slightly during sewing and trim later. For large quilts, group rows into foursomes before joining them.
Square Up the Quilt Top
After all rows are joined, square the quilt top to fix any crooked edges. Use a rotary cutter, quilting ruler, and cutting mat for clean results. Start at one corner, place the ruler at a 90-degree angle slightly inside the fabric edge, and cut. Repeat for all four corners without following existing seam lines, which may be misaligned. A squared edge ensures clean binding and a professional finish.
Add Backing and Batting
A flat flannel sheet makes the best backing for a blue jean blanket because it’s soft, pre-washed, and affordable. A queen-size sheet set costs under $40 at most discount stores and provides thickness and durability. Cut the backing 2-3 inches larger than the quilt top on all sides.
Batting is optional but adds warmth without heaviness if desired. Use low-loft polyester batting and avoid thick cotton, which makes quilting difficult. Skip batting entirely for rag quilts or reversible picnic blankets. To baste layers, lay backing right side down on a flat surface, tape edges with painter’s tape, place batting on top, then add quilt top right side up. Secure with safety pins or wonder clips every 4-6 inches.
Finish with Tying or Quilting
Tying offers an easy, social finish perfect for beginners. Use strong yarn in matching or contrasting color and a large-eye yarn needle. Insert from back to front at block corners or center, pull through, and tie a square knot close to the surface. Trim ends to 1-2 inches for a shaggy look. One quilter completed tying in 2.5 hours with help.
For a polished, long-lasting finish, machine quilt using a 100/16 needle, walking foot, and stitch length of 3.0-4.5 mm. Choose neutral or bold thread that pops against blue denim. Quilt with straight lines across rows, X-pattern from center outward, or stitch-in-the-ditch around blocks, spacing lines 2-4 inches apart.
Bind or Fray: Choose Your Style

For a polished edge, use 3.5 inch wide binding strips, which are more forgiving with thick seams. Fold flannel backing over the edge, first folding 1/2 inch, then rolling over the quilt top another 1/2 inch. Miter corners for clean 90-degree angles and hand-stitch or machine-stitch in place. Add a label with the recipient’s name and date using heat-n-bond and a blanket stitch.
For a soft, shaggy finish, create a rag quilt by cutting 6×12 inch rectangles and arranging in a brick pattern. Sew with 1/2 inch seam allowance but wrong sides together, which exposes raw edges for fraying. Do not press seams. After assembly, clip seams every 1/2 inch along all stitched lines, then wash in warm water without detergent and dry in the dryer. Repeat 2-3 times. The more you wash, the softer it gets.
Troubleshoot Common Issues
If denim stretches during sewing, spray with starch before cutting or apply lightweight fusible interfacing to the wrong side. This stabilizes thin or stretchy denim. If your machine struggles with thick seams, use a walking foot to feed layers evenly, replace needles frequently since denim dulls them fast, and increase stitch length to 3.0-4.5 mm.
Mismatched corners happen. To fix, appliqué a patch over the flaw with contrasting fabric, or accept slight imperfections as part of the charm of a handmade blue jean blanket.
Customize Your Design
Combine dark, faded, and ripped denim for depth, and include jeans with embroidery, patches, or whiskering. Add cotton squares in plaids, stripes, or solids for contrast, and stabilize non-denim fabrics with interfacing if needed. For a memory quilt, use jeans from family members and label blocks with names and dates.
Make a reversible picnic blanket by using denim on both sides, or add a waterproof layer on the back for outdoor use. Heavy denim provides gentle pressure, making these blankets ideal for therapy purposes that soothe anxiety.
Care and Maintain Your Blanket
Machine wash cold or warm with color catchers if your binding contains red or dark dyes. Tumble dry low or hang to dry. For rag quilts, wash multiple times to enhance softness and fraying. Fold and store in a breathable cotton bag, avoiding plastic bins that trap moisture and cause mildew. Iron with high heat and steam if needed.
Save Time and Money
Source old jeans for free by asking friends and family, visiting thrift stores, or checking clothing swaps. Buy denim by the yard for $10-15 if you need more of one color. Use old bedsheets, duvet covers, or flannel shirts for backing to keep costs low. Involve a partner to cut and label batches faster, and use a serger for stronger, fray-resistant seams.
Frequently Asked Questions About Blue Jean Blankets
How many pairs of jeans do I need for a blue jean blanket?
For an 8×8 inch square throw blanket, you need approximately 12 pairs of jeans yielding 108 squares. A queen-size blanket requires about 15 pairs for 132 squares. Smaller 5.5×5.5 inch squares need roughly 8 pairs.
What is the best backing for a denim quilt?
A flannel sheet from a bedding set works best because it’s pre-washed, soft, durable, and cost-effective. A queen-size set typically costs under $40 and provides better thickness than buying quilt backing fabric by the yard.
Can I use stretch denim for a blue jean blanket?
Stretch denim requires stabilization before use. Apply lightweight fusible interfacing to the wrong side or spray with starch before cutting to prevent stretching during sewing.
How do I make a rag quilt with blue jeans?
Cut 6×12 inch rectangles and arrange in a brick pattern. Sew with wrong sides together using 1/2 inch seam allowance, clip seams every 1/2 inch, then wash repeatedly without detergent to create soft, frayed edges.
How long does it take to make a blue jean blanket?
Cutting takes several hours, sewing takes 4-6 hours, and hand-tying takes approximately 2.5 hours with help. Total project time ranges from 10-40 hours depending on size and method chosen.
Key Takeaways for Making a Blue Jean Blanket
A blue jean blanket transforms old jeans into a durable, personalized keepsake that tells your story. Pre-wash all denim before cutting to prevent shrinkage and dye bleeding, use 3/8 inch seam allowance for thick denim, and press seams open for flat, aligned blocks. Choose between tying for a beginner-friendly social project or machine quilting for a polished finish. For rag quilts, sew wrong sides together and wash multiple times to achieve soft fraying. Start with a small project, embrace slight imperfections as part of the handmade charm, and enjoy giving your old jeans a second life.

