
You’ve decided to make a soft, breathable cotton blanket. This is a satisfying project that works perfectly for baby shower gifts, cozy couch throws, or handmade keepsakes. Whether you’re a beginner or have some sewing experience, you don’t need a complex pattern. With just two layers of fabric and a few basic tools, you can create a durable, washable blanket in under two hours.
This guide walks you through exactly how to make a cotton blanket, from choosing the right fabric and pre-washing it properly to selecting the best construction method for your skill level and finishing with a clean, professional edge. You’ll learn how to avoid common mistakes like puckering, shifting layers, and uneven corners.
Choosing the Right Cotton Fabric for Your Blanket

Not all cotton is the same. The type you pick affects softness, warmth, and durability. For 100% cotton blankets, these four fabrics work best.
Best Cotton Types for Blankets
Flannel offers a brushed surface that feels soft and warm, making it ideal for winter baby blankets or cozy throws. Double gauze is lightweight and airy, perfect for summer swaddles or newborn wraps. Quilting cotton provides a crisp feel with endless print options, great for decorative throws. Muslin features a plain weave that breathes well, often used as backing or for practice projects.
All these fabrics are machine-washable and safe for sensitive skin, which makes them ideal for babies and everyday use.
Pairing Cotton With Other Fabrics
You can mix cotton with a soft backing for added comfort and texture. Popular combinations include cotton paired with minky for a soft, plush feel great for baby blankets. Cotton combined with fleece creates warmth and coziness, though you should never iron fleece directly. Cotton with sherpa provides extra warmth with a textured backing. Cotton and corduroy offer durability with a vintage look.
Pro Tip: Pre-wash both layers even if only one is cotton. Unwashed cotton shrinks, which causes puckering and distortion.
Pre-Washing Fabric to Prevent Shrinkage and Puckering
Skipping pre-washing is the number one cause of puckered, warped blankets. Cotton shrinks up to 5% on its first wash. If only one layer shrinks while the other stays the same size, your blanket will twist or bubble.
How to Pre-Wash Correctly
Wash both fabric layers in warm water with mild detergent. Tumble dry on medium heat to fully shrink the fabric. For baby items, use fragrance-free, hypoallergenic detergent to avoid skin irritation.
Iron both layers using the cotton setting with steam to remove wrinkles. This step is critical for achieving a flat, professional finish.
Warning: Do not iron synthetic backings like minky or fleece. Use a pressing cloth or press around them instead. Direct heat can melt these materials.
Cutting Cotton Fabric to the Right Size
Standard fabric width is 42 to 45 inches. After trimming the selvedges, your usable width is approximately 40 inches.
Standard Cotton Blanket Sizes
| Blanket Type | Cut Size (inches) | Fabric Needed (per layer) |
|---|---|---|
| Lovey | 13″ square | ½ yard |
| Receiving blanket | 19″ square | 1 yard |
| Swaddle | 41″–45″ square | 1.25–1.5 yards |
| Stroller blanket | 31″ × 41″ | 1.25 yards |
| Crib blanket | 41″ × 61″ | 1.5–2 yards |
| Child blanket | 46″ × 61″ | 1.75 yards |
| Throw blanket | 51″ × 61″ to 73″ long | 2 yards |
Cutting Tips for Precision
Use a rotary cutter, self-healing mat, and quilting ruler for straight edges. Stack both fabric layers right sides together and cut at once for perfect alignment. For large prints like animals or florals, center the design on the main fabric. Buy an extra quarter to half yard if you need to match patterns or plan to add borders.
Selecting Your Blanket Construction Method
Your choice depends on blanket size, skill level, and desired finish. All four methods work well with 100% cotton.
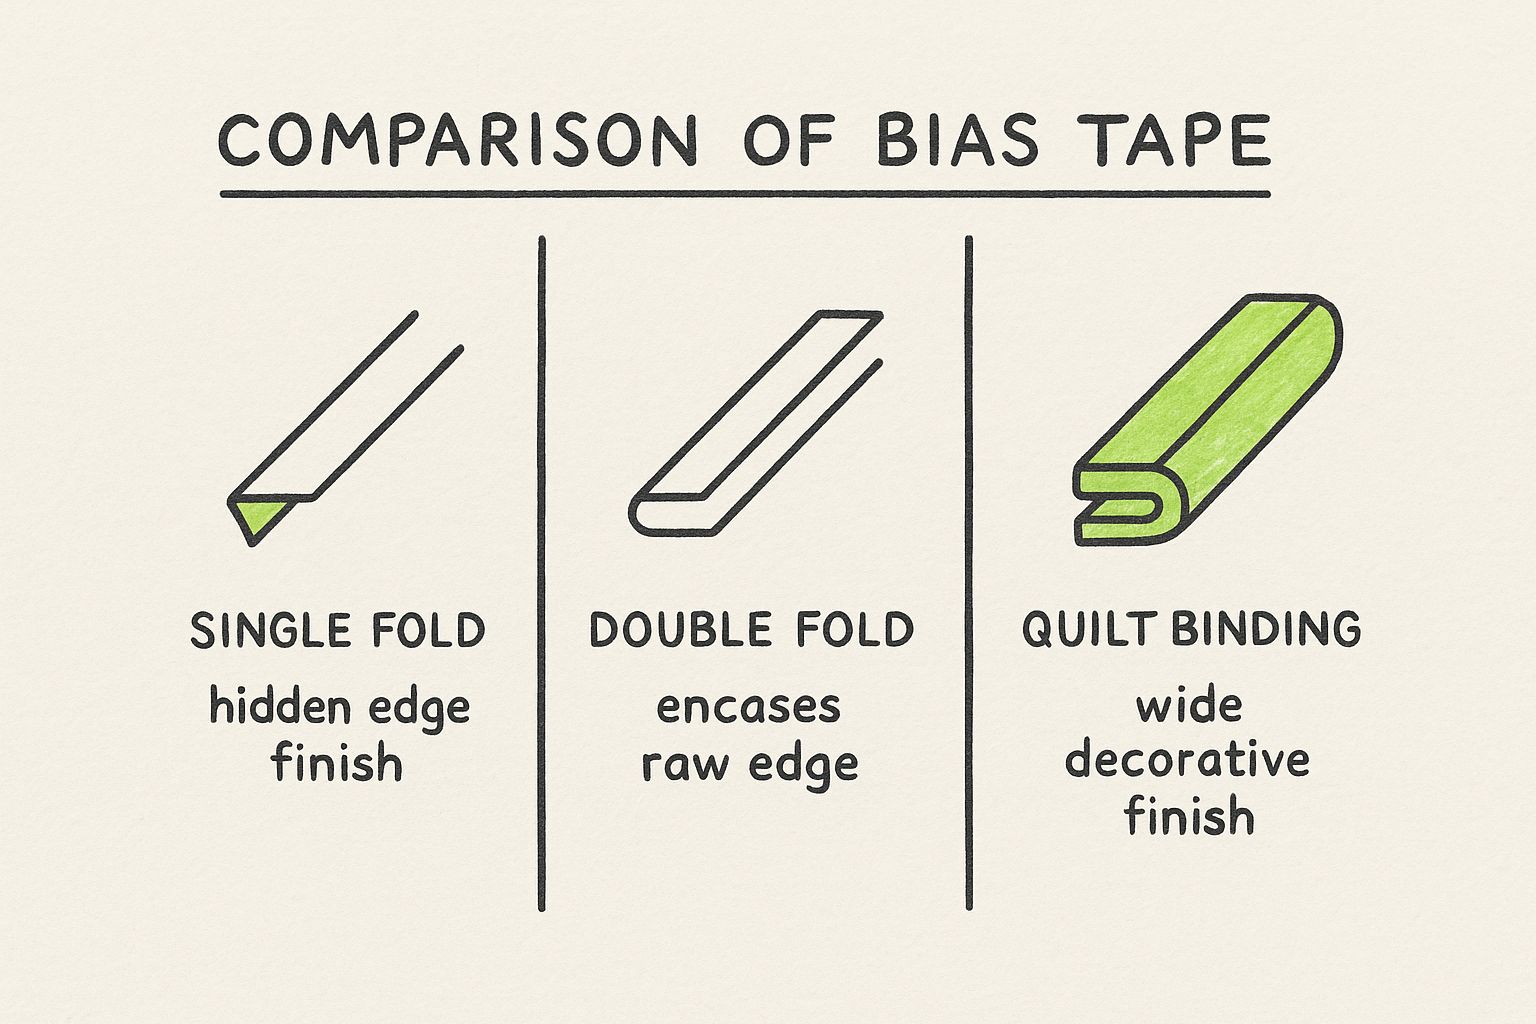
The double-layer turned edge method works best for small to medium blankets up to 40 inches and is beginner-friendly. Machine-tied quilting suits large blankets over 40 inches and prevents layer shifting. Bias tape-bound edges provide a professional finish without turning the blanket inside out. Quilt-style construction works best for large blankets over 50 inches and mimics traditional quilt-making.
Sewing a Double-Layer Turned Edge Blanket
This beginner-friendly method produces a clean, finished blanket with minimal tools.
Step-by-Step Construction
Pin the layers together every 8 inches, with right sides facing each other. Sew around the edges with a half-inch seam allowance, leaving a 6 to 10 inch gap unsewn. Backstitch at the start and end for security.
Trim the corners diagonally, cutting close to the stitches but not through them. This reduces bulk and helps corners sit flat.
Turn the blanket right side out through the gap. Use a chopstick or turning tool to push out the corners gently. Press the entire blanket, folding in the seam allowance at the opening.
Topstitch around the edge at a quarter to half inch from the border, pivoting at corners. Add a second row for durability if desired. Backstitch at the beginning and end.
Close the gap using a ladder stitch. Insert the needle into the fold on one side, stitch across to the opposite fold about a quarter inch, then alternate sides. Pull tight after each stitch to close the gap seamlessly.
Pro Tip: Use double pins at the turning gap to mark exactly where to stop sewing.
Adding Machine-Tied Quilting for Large Blankets
Large blankets over 40 inches need extra security to prevent layers from shifting during use and washing.
How to Secure Layers With Machine Ties
After turning and pressing, mark a 12-inch grid across the surface using pins or a washable marker. Set your machine to maximum stitch width (about 4 mm) and minimum stitch length (0 to 1 mm). At each grid intersection, stitch back and forth 20 or more times in a small area about a quarter inch wide. Trim all threads when finished.
Repeat this process at every grid point across the blanket. For a decorative touch, replace the grid with stars, hearts, or circles spaced 12 inches apart.
Finishing Edges With Bias Tape Binding
This method creates a professional finish without the turning step, which is ideal for thick or bulky fabric combinations.
Bias Tape Binding Process
Place both fabric layers wrong sides together with right sides facing outward. Pin or clip the edges, leaving 2 to 3 inches free at one corner for clearance.
Open one fold of double-fold bias tape and place it over the raw edge, aligning the raw edges. Clip in place, then sew along the inner crease of the tape. At corners, stop about 1 inch before the corner, leave the needle down, lift the presser foot, pivot 90 degrees, and continue. Fold the tape diagonally at the back to create a mitered corner.
Join tape ends by overlapping slightly, opening both ends, sewing a quarter inch seam with right sides together, pressing the seam open, then re-folding and continuing.
Advantage: No turning required, making this perfect for cotton plus minky or cotton plus fleece combinations.
Setting Your Sewing Machine for Cotton Blankets
Proper machine settings ensure clean, durable stitches that hold up to washing.
Recommended Stitch Settings
| Stitch Type | Use Case | Settings |
|---|---|---|
| Straight Stitch | Seaming and topstitching | Length: 2.5–3.5 mm |
| Zig-Zag Stitch | Decorative edges | Width: 3–4 mm, Length: 1 mm |
| Backstitch | Reinforce start and end | Reverse lever forward a quarter inch, reverse, then forward |
| Machine-Tied Stitch | Secure large layers | Max width, min length, 20+ passes per spot |
Use 3.0 to 3.5 mm stitch length when sewing thick layers like cotton plus minky.
Customizing Your Cotton Blanket
Make your blanket unique with these personalization options.
Mix textures by pairing printed cotton with solid flannel or minky for visual contrast. Align directional prints so animals or stripes face the same way throughout the blanket. Add a fabric label with a baby’s name, birth date, or your maker’s mark. Embroider initials using floss for a small monogram near the corner. Use bold contrast thread for topstitching, like red on white, for visual pop.
Create matching accessories from the same fabric, including burp cloths, bibs, wristlets, or coordinated tumblers.
Caring for Your Cotton Blanket Long-Term
Proper care keeps your blanket soft and durable through hundreds of washes.
Wash in cold or warm water with mild detergent. For baby items, use fragrance-free, hypoallergenic detergent. Tumble dry on low or medium heat and remove promptly to reduce wrinkles. Iron with medium heat and steam, but only on the cotton side. Never use bleach, as it weakens fibers and fades colors.
With proper pre-washing and secure stitching, your cotton blanket lasts for years and gets softer with each wash.
Troubleshooting Common Cotton Blanket Problems
| Problem | Cause | Solution |
|---|---|---|
| Puckered edges | Uneven shrinkage | Always pre-wash both layers |
| Layers shifting | Poor pinning or large size | Use grid quilting or quilt-style method |
| Dull corners | Not pushed out fully | Use chopstick or turning tool |
| Visible gap | Poor ladder stitch technique | Practice on scrap fabric first |
| Bias tape unraveling | Ends not joined securely | Sew and press seam open before continuing |
| Fleece melted | Ironed directly | Never iron fleece; use pressing cloth |
| Wavy topstitching | Fabric stretched during sewing | Guide gently; do not pull |
Expert Note: Test your stitches on fabric scraps before starting your actual blanket.
Frequently Asked Questions About Making Cotton Blankets
How long does it take to make a cotton blanket?
Small blankets between 12 and 30 inches take 30 to 60 minutes. Medium blankets with topstitching take 1 to 1.5 hours. Large blankets with machine ties take 1.5 to 2 hours. One maker completed a 45 by 60 inch blanket in 1 hour and 15 minutes including photos.
What is the best cotton fabric for a baby blanket?
Flannel provides warmth and softness, making it ideal for winter baby blankets. Double gauze offers breathability and lightness, perfect for summer use. Quilting cotton works well for decorative blankets with fun prints. All three are machine-washable and safe for sensitive baby skin.
Do I need to pre-wash cotton fabric before making a blanket?
Yes, pre-washing is essential. Cotton shrinks up to 5% on its first wash. If only one layer shrinks, your blanket will pucker or warp. Wash both fabric layers in warm water, tumble dry on medium heat, then iron with steam before cutting.
Can I combine cotton with minky fabric for a blanket?
Absolutely. Cotton paired with minky creates a soft, plush blanket perfect for babies. Place the minky side down when sewing, and never iron the minky directly. Use a pressing cloth or press around the minky instead.
What construction method works best for large blankets?
Machine-tied quilting or quilt-style construction works best for blankets over 40 inches. These methods prevent layers from shifting during use and washing. The bias tape binding method also works well for large blankets since it eliminates the difficult turning step.
Key Takeaways for Making Cotton Blankets
Making a cotton blanket is one of the most rewarding beginner sewing projects. With breathable fabric, simple construction, and endless customization options, each blanket becomes a personal gift or cherished home item.
Start small with a 12-inch lovey, then build up to full-sized throws as your confidence grows. Whether you choose the turned edge, machine-tied, bias-bound, or quilt-style method, the result is the same: a handmade piece that combines comfort, care, and craftsmanship.
Remember these essentials: pre-wash both fabric layers, cut precisely with a rotary cutter, secure edges properly, and press at every stage. Your cotton blanket will last for hundreds of washes and become softer with each use.

