
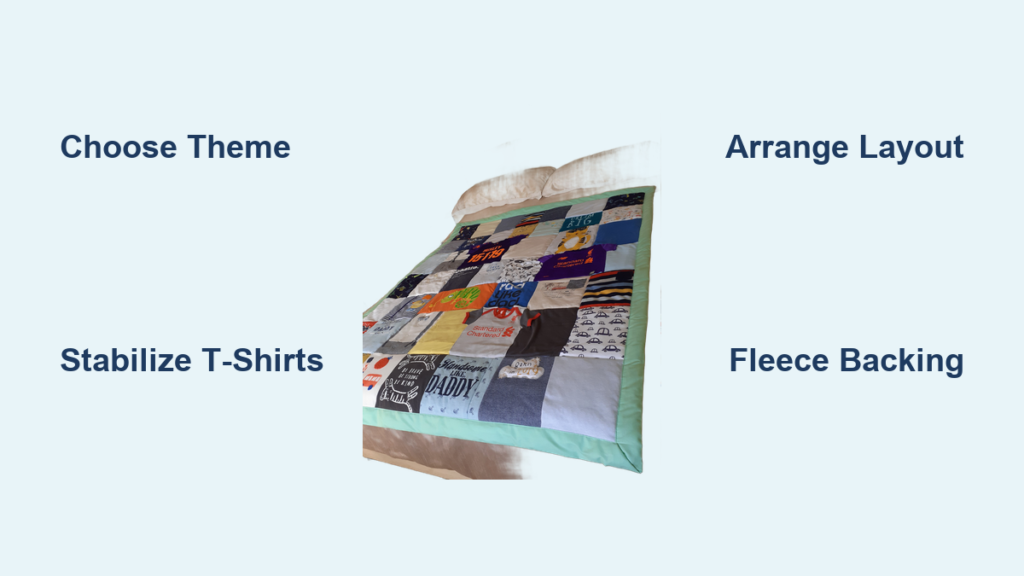
Creating a memory blanket transforms meaningful clothing into a cozy, lasting tribute. Whether you’re honoring a lost loved one, celebrating a graduation, or preserving baby clothes, this project turns sentimental garments into a functional keepsake that carries stories in every seam. The process requires patience and care, but the result is a tangible embrace from the past.
This guide walks you through every step from emotional preparation to final stitching. You’ll learn how to choose fabrics, stabilize stretchy T-shirts, arrange blocks for visual impact, and finish with professional touches like binding or topstitching.
Choose Your Memory Blanket Theme
Before cutting fabric, define the emotional purpose of your blanket. A strong theme guides fabric selection, layout, and design.
Determine Your Story Purpose
Memory blankets commonly serve these emotional purposes:
• Grief and remembrance using clothing from a deceased family member
• Milestone celebration such as graduation shirts, wedding attire, or retirement uniforms
• Childhood keepsake from onesies, holiday pajamas, or first shoes
• Family legacy combining shirts across generations
Preserve pockets, stains, or frayed edges if they carry emotional weight. These imperfections are part of the story.
Group Fabrics for Visual Harmony
Unless aiming for a nostalgic collage, group fabrics by color palette, event type, or time period. This creates visual harmony and helps the blanket tell a coherent story.
Plan Your Blanket Size and Layout
:max_bytes(150000):strip_icc()/5x5_600-cc65e5a854a3435586c93b7a58435625.jpg)
Select Dimensions Based on Use
| Use Case | Grid Size | Finished Size | Block Count |
|---|---|---|---|
| Lap quilt | 3×4 | ~36″ × 48″ | 12 blocks |
| Throw | 4×5 | ~48″ × 60″ | 20 blocks |
| Twin | 5×6 | ~60″ × 72″ | 30 blocks |
Most memory blankets use 12″ to 14″ finished blocks, allowing room for large T-shirt graphics.
Arrange and Photograph Your Layout
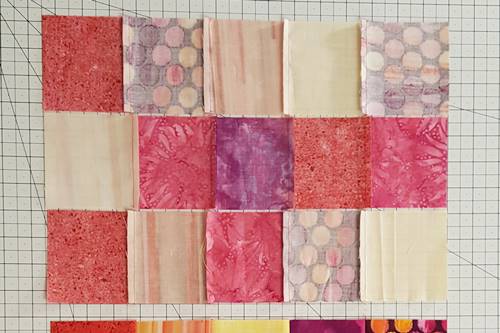
Lay blocks out on the floor or bed first. Group by color, contrast, and pattern density. Alternate busy prints with solids to avoid visual clutter. Take a photo of the final layout before sewing to prevent mistakes later.
Gather Essential Materials and Tools
Core Supplies Needed
• Sentimental clothing including T-shirts, baby clothes, uniforms, or jeans
• Fusible interfacing to stabilize stretchy knits
• Backing fabric such as fleece, cotton sheet, or flannel
• Batting if not using fleece backing
• Binding or facing for clean edges
• Thread, pins, and seam ripper
Best Interfacing Choices for T-Shirts
| Type | Best For | Notes |
|---|---|---|
| Trico | Knits, T-shirts | Soft drape, professional finish |
| Pellon P44F | Lightweight stability | Easy to iron on |
| Pellon 905F | Extra body | Slight loft, great for baby clothes |
| Heat’n’Bond Lite | Appliqué letters | Adhesive backing for names |
Cut interfacing 1″ larger than your target block size to ensure full coverage.
Prepare Fabrics Properly Before Cutting
Wash and Handle Sentimental Clothing
Wash all garments in unscented detergent to remove odors. Dry completely to prevent shrinkage later. Wear unscented gloves if preserving a loved one’s scent is important. One maker noted washing clothes in the person’s favorite detergent made the blanket feel closer.
Cut Out Panels Correctly
• T-shirts: Cut front and back panels, avoiding side seams and hems
• Baby clothes: Open shoulder and side seams, remove zippers
• Pants: Slice up inner leg seam, discard waistband elastic
• Dress shirts: Use front, back, collar, cuffs, or placket
Cut each piece larger than needed to allow for trimming after interfacing.
Stabilize Stretchy Fabrics with Interfacing
Knit fabrics like T-shirts will stretch and pucker without support. Interfacing prevents this problem.
Apply Fusible Interfacing Step by Step
- Place fabric wrong side up on your work surface
- Position interfacing adhesive side down on the fabric
- Press with hot iron on cotton setting, moving slowly
- Let cool before handling
- Repeat for all blocks
Pro tip: Stack 4 layers of interfacing, trace template 7 times, and cut all at once to save hours of work.
Trim Blocks to Exact Size
After fusing, use a rotary cutter, ruler, and mat to trim each block precisely. Target 12.5″ × 12.5″ for a 12″ finished block with ½” seam allowance. Ensure corners are square because misaligned blocks ruin the grid.
Assemble the Quilt Top
Sew Blocks into Rows First
Arrange blocks in rows working left to right. Sew together with 3/8″ seam allowance. Reverse stitch at start and end for durability. Press seams open or toward darker fabric. Press each seam before adding the next row to keep alignment sharp.
Join Rows into Complete Top
Pin rows together, weaving pins across seam intersections. Match seams carefully and nest them if pressed open. Sew with 3/8″ seam, back-tacking at every seam. Press again after joining rows. Use a walking foot if your machine struggles with thick seams.
Add Design Accents and Personalization
Create Filler Blocks for Empty Spaces
If you do not have enough memory fabric, create accent blocks. For nine-patch fillers, cut 18 small squares from scraps. Chain-sew into 3×3 grid and press seams toward center. These measure approximately 5″ × 5.6″ to fit between larger blocks.
Add Names or Symbols with Appliqué
Turn favorite shirts into custom appliqués. To make name appliqué, print the name backwards on paper. Trace onto Heat’n’Bond Lite and iron to wrong side of chosen fabric. Cut out letters, peel backing, and position on fleece panel. Zigzag stitch around edges to secure. Place in center block or corner for a focal point.
Attach Backing and Finish Edges
Option 1: Fleece Backing Without Batting
This method is simple, warm, and fast, ideal for beginners.
- Cut fleece to same size as quilt top
- Place fleece right side up on flat surface
- Lay quilt top right side down on fleece
- Pin around edges
- Sew three sides with 3/8″ seam
- Turn right-side out through open side
- Tuck raw edges in and topstitch all four sides closed
Use zigzag stitch to prevent popped seams on stretchy areas.
Option 2: Traditional Quilt Sandwich
For heirloom quality with batting, layer backing right side down, then batting, then quilt top right side up. Baste layers together with spray adhesive or pins. Sew around perimeter with 3/8″ seam, leaving a 12″ gap. Turn right-side out and topstitch gap closed.
Quilt the Layers Together
Even if basted, final quilting secures everything permanently.
Stitch in the Ditch Method
Sew along seam lines between blocks using zigzag stitch. Slightly stretch top layer while sewing to prevent puckering. Back-tack at intersecting seams, then jump over to continue.
Grid Quilting Approach
Sew vertical lines between blocks first, then horizontal lines. This creates a clean block outline effect. Start at center and work outward. Use painter’s tape as a guide for straight lines.
Finish with Professional Binding
Create Mitered Binding
Cut 1″ wide strips from fleece or sheet fabric. Fold in half lengthwise and press. Attach to front edge with 3/8″ seam. At corners, fold at 45°, miter by folding fabric back-to-back, then sew perpendicular seam. Trim dog ears and press flat.
Alternative: Topstitch Edge
For fleece-backed blankets, tuck raw edges in after turning right-side out. Topstitch ¼” from edge all around to create a soft, no-bulk finish.
Label and Preserve Your Keepsake
Attach a small fabric tag with recipient’s name, date made, occasion, and maker’s name. Sew or iron this on the back corner. Consider it heirloom documentation because future generations will appreciate knowing the story behind each fabric.
Final touches include trimming uneven edges, pressing seams flat with a clapper, removing basting stitches, and lightly steaming to smooth needle holes.
Frequently Asked Questions About Making a Memory Blanket
How long does it take to make a memory blanket?
The time varies based on experience and blanket size. A lap-sized blanket with 12 blocks typically takes 8 to 12 hours across several sessions. Larger throws with 20 or more blocks may require 15 to 25 hours total.
What is the best fabric for a memory blanket backing?
Fleece is the most popular choice because it provides warmth without requiring batting. It comes in many colors, is affordable, and creates a soft, cozy finished piece. Cotton sheets also work well and offer a lighter weight option.
Can I use clothes made of different fabrics together?
Yes, but stretchy fabrics like T-shirts require fusible interfacing to prevent puckering. Stable fabrics like denim or dress shirts can be combined but may need different needle types. Test stitches on scrap fabric first.
How do I preserve the scent of a deceased loved one’s clothing?
Wash the clothes in the person’s preferred detergent before cutting. Wear unscented gloves during handling to avoid transferring other scents. Avoid storing in plastic because it traps odors. The scent will fade over time naturally.
What if I do not have enough clothing for a full blanket?
Use filler blocks made from coordinating fabric or create nine-patch blocks from scraps. Thrift stores often have matching fabrics to fill gaps. Some makers create accent panels with fleece and add appliqués for personalization.
Key Takeaways for Crafting Your Memory Blanket
Creating a memory blanket requires careful planning, proper stabilization of stretchy fabrics, and thoughtful layout. Choose a meaningful theme and group fabrics by color or event to create visual harmony. Always use fusible interfacing on T-shirts and other knits to prevent puckering.
The most important step is photographing your layout before sewing. This prevents costly mistakes. Take time with finishing details like mitered corners and proper labeling because these elements transform a simple project into a true heirloom.
Ready to start your project? Gather your sentimental clothing, choose your block size, and begin the healing process that comes from transforming meaningful garments into a cozy, lasting tribute.

