
Nothing says “I care” like a handmade mini blanket. Whether you’re crafting a keepsake for a newborn, donating to a grieving family, or making a cozy throw for your couch, learning how to make a mini blanket opens the door to fast, rewarding projects for all skill levels. With just a few yards of fabric or yarn, you can create something soft, practical, and deeply personal. No advanced skills required.
You can make a mini blanket without sewing, using just scissors and fleece, or step it up with a sewing machine or crochet hook. This guide walks you through three methods: no-sew braided edge, sewn blankets, and crocheted bobble patterns. You’ll learn exact sizes, material tips, customization ideas, and pro tricks to ensure a polished finish.
Choose the Right Mini Blanket Size for Your Purpose
Mini blankets aren’t one-size-fits-all. The right dimensions depend on who it’s for and how it will be used. Always add seam allowance when cutting fabric. For a 12-inch finished blanket, cut fabric 12.5 by 12.5 inches with a 1/4-inch seam. For folded hems, add 2 inches total (1 inch per side).
Match Size to Purpose
Different projects call for different dimensions. Here are the most common sizes:
- 12 inches by 12 inches: Angel baby blankets for hospital donations
- 34 inches by 52 inches: Lap throws for adults
- 40 inches by 40 inches: Baby swaddles or lightweight stroller covers
- 16 inches by 16 inches: Pillow covers or decorative accents
Pre-Wash Your Fabric First
Cotton and flannel shrink after washing. To prevent distortion, pre-wash in cold water and dry on low before cutting. This ensures your final blanket stays square and true to size.
Pick the Best Fabric for Your Project
The fabric you choose affects comfort, safety, and ease of construction. Here are the top material combinations to consider.
Safe and Soft Material Combinations
| Combination | Best For |
|---|---|
| Flannel and cotton | Newborns, donations (breathable, gentle) |
| Cotton and minky | Reversible baby blankets (print front, plush back) |
| Fleece and fleece | No-sew throws (no fraying, warm) |
| Acrylic yarn | Crocheted bobbles (soft, washable) |
Fabrics to Avoid
Some materials simply don’t work well for certain projects. Avoid using fleece for preemies because it can stick to delicate skin and isn’t hospital-safe. Skip non-pre-shrunk cotton because it risks shrinking and puckering after washing. Also avoid loose weaves because they may fray or irritate sensitive skin.
Stick to pre-shrunk cotton flannel or minky for baby items. For no-sew projects, fleece is ideal because it doesn’t fray and requires no sewing skills.
No-Sew Braided Edge Blanket in 50 Minutes
Skip the sewing machine with this beginner-friendly method. You’ll braid the edges for a clean, durable finish that looks professional.
Cut Corners and Strips
- Cut two 36-inch by 36-inch squares of fleece or minky (one patterned, one solid)
- Place layers wrong-sides together and align edges
- Cut a 2-inch square from each corner
- Along each edge, cut 1-inch wide strips that are 2 inches deep, spacing them 1 inch apart
Pro Tip: Use a rotary cutter and mat for straight, even cuts.
Braid the Edges
- Fold each strip (both layers) in half
- Cut a 1/4-inch slit through both layers at the fold
- Thread the first strip through the slit of the next strip
- Continue around the entire blanket
- At the last corner, thread only the bottom layer through the first strip, knot tightly, and tuck inside
The result is a wash-durable, professional-looking edge without any needle or thread required.
Sewn Mini Blankets: Three Simple Methods
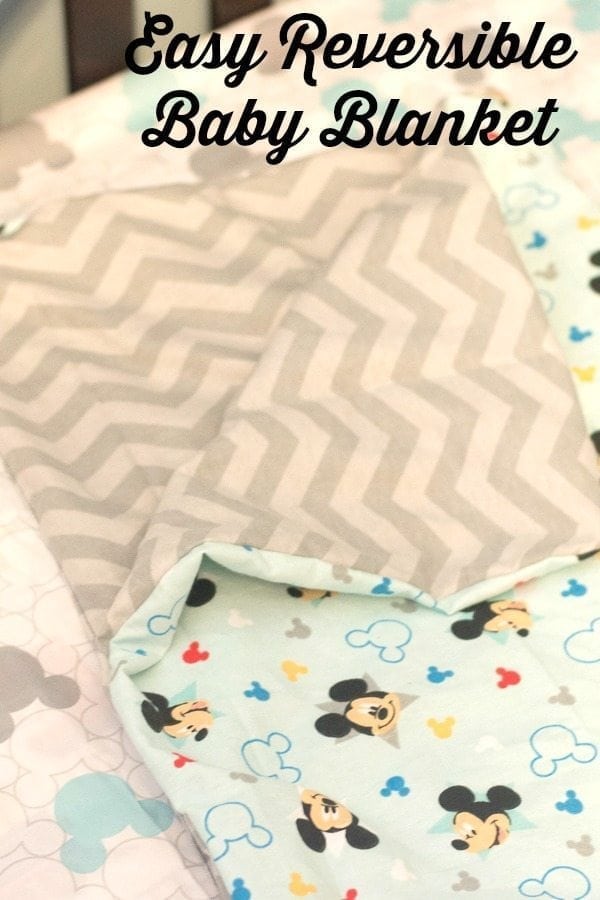
Folded Hem Blanket with Reversible Finish
Create a store-bought look with a double-fold hem.
- Cut 36-inch by 36-inch squares of minky and cotton
- Place minky wrong-side up, then center cotton on top right-side up
- Fold each edge 1 inch inward, then another 1 inch (double fold)
- Pin with ballpoint pins because minky is slippery
- Sew along inner fold with 1/4-inch seam
- Trim corners diagonally to reduce bulk
This version is reversible, soft on both sides, and perfect for gifts.
Turned and Topstitched Blanket
Ideal for baby showers or last-minute presents. This method takes under 30 minutes.
- Place fabrics right sides together
- Pin around edges and leave a 6-inch gap on one side
- Sew with 1/2-inch seam allowance, backstitching at the gap
- Clip corners diagonally
- Turn right-side out through the gap
- Push out corners with a chopstick or blunt tool
- Press flat, then topstitch 1/4-inch around the entire edge
- Hand-stitch the gap closed
Flannel Swaddle with Blanket Stitch
Add handmade charm with a hand-stitched border.
- Cut two 40-inch by 40-inch flannel pieces
- Sew right sides together with 1/4-inch to 1/2-inch seam, leaving a 6-inch opening
- Trim corners, turn right-side out, and press
- Thread a tapestry needle and use blanket stitch around the edge
- Butt each stitch against the folded seam
Safety Tip: Lightweight flannel reduces overheating risk for babies.
This version feels heirloom-quality and is cherished in bereavement kits or as keepsakes.
Crocheted Bobble Mini Blanket
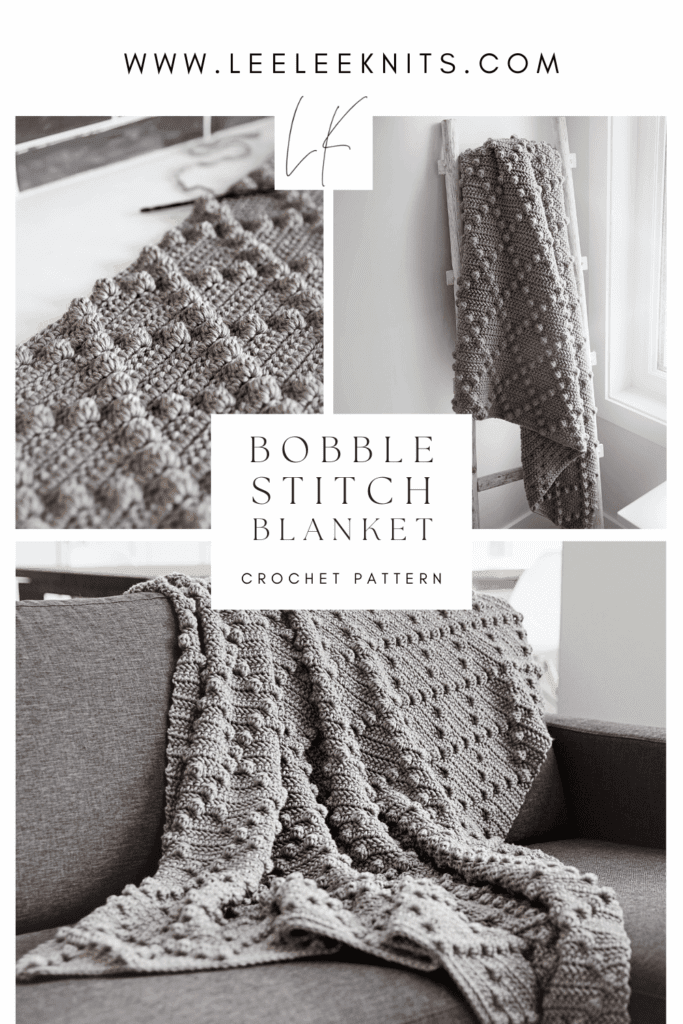
Start with the Right Chain
Use Caron BabyCakes yarn for self-striping color effects.
- Chain a multiple of 2
– For mini size: Chain 18, plus 3 turning chains equals 21 total
– For full size: Chain 88, plus 3 turning chains equals 91 total - Work into the third chain from the hook
Master the One-Row Repeat
This pattern uses only single crochet (sc) and double crochet (dc).
First row:
1. Dc in third chain
2. Skip 2 chains, then in next chain: sc plus 2 dc (bobble cluster)
3. Repeat across
4. End with sc in last chain
Next row:
1. Chain 3 (counts as dc), turn
2. Dc in first stitch
3. Skip 2 stitches, then sc plus 2 dc in next
4. Repeat, end with sc in space between last dc and chain-3
Repeat until desired length. For a pillow cover, stop at approximately 40 rows.
Finish and Weave In Ends
- After final sc, chain 1, cut yarn, pull through
- Leave a 6-inch tail
- Thread through a yarn needle
- Weave in multiple directions, then trim excess
Pro Tip: Keep the turning chain loose to prevent edge curling.
Customize Your Mini Blanket
Add Personal Touches
Make it one-of-a-kind with these options:
- Embroidery: Stitch a name, birth date, or initials
- Heat-transfer vinyl: Use a Cricut to add animals, stars, or quotes
- Contrast borders: Crochet a colorful edge or topstitch in bold thread
- Matching sets: Pair with burp cloths, bibs, or no-sew hats
Coordinate with Themes
Match your blanket to any aesthetic. Consider nursery colors, furniture, or decor. Use gender-neutral palettes like sage, mustard, cream, or charcoal. Try custom prints through Spoonflower for personalized fabric designs.
Even small details like a tiny embroidered heart turn a simple blanket into a cherished keepsake.
Prepare for Hospital Donation
Follow Organization Guidelines
Organizations like Teeny Tears require strict standards for donated blankets.
- Size must be 12 inches by 12 inches
- Use flannel or cotton only (no fleece)
- Include two stockinette hats per blanket
- Package in a ziplock bag with a tracking card
Note: These blankets are not paired with diapers. Keep sets separate.
Fold and Present Neatly
Use the “Sleeping Bag Fold” for a clean presentation:
- Fold in thirds lengthwise
- Roll from bottom to top
- Secure with ribbon or place in bag
Donated blankets offer comfort during loss. Make each one perfect, soft, and safe.
Care and Longevity Tips
Wash and Dry Properly
| Method | Care Instructions |
|---|---|
| No-sew fleece | Cold wash, low dry or air dry |
| Sewn blankets | Machine wash, air dry (especially minky) |
| Crocheted acrylic | Wash cold, air dry flat to prevent stretching |
Avoid fabric softeners because they can irritate baby skin.
Prevent Common Issues
Puckering edges? Loosen thread tension or use a walking foot. Slippery minky? Use ballpoint pins or fabric clips. Crochet curling? Keep turning chain loose and maintain even tension.
A quick press with steam makes any blanket look professionally finished.
Pick the Best Method for Your Skill Level
Match Skill and Time
| Method | Time | Skill Level | Best For |
|---|---|---|---|
| No-sew braided edge | 50 minutes | Easy | Beginners, quick gifts |
| Sewn (turned) | 30 minutes | Easy | Baby showers, polished look |
| Sewn (folded hem) | 60 minutes | Easy | Reversible, heirloom feel |
| Crocheted bobble | 2 to 6 hours | Beginner | Texture lovers, creatives |
Start with no-sew or flannel swaddle if you’re new. Move to crochet or minky for more challenge.
Maximize Efficiency
Cut two blankets at once to save time. Pre-cut strips if making multiple no-sew versions. Use a walking foot for thick fabrics like minky.
With practice, you can make two high-quality mini blankets in under two hours.
Key Takeaways for Making Mini Blankets
Whether you’re sewing, crocheting, or braiding by hand, making a mini blanket is a simple act with deep meaning. It’s a gift of warmth, comfort, and care perfect for babies, donors, or your own cozy corner. Start with the no-sew braided edge method if you’re a beginner because it requires no special equipment. Choose pre-shrunk cotton or flannel for baby items and hospital donations. Always pre-wash your fabrics and follow donation guidelines if you plan to give to organizations.
With the right size, fabric, and finish, your handmade blanket won’t just look great. It’ll be treasured for years.
Frequently Asked Questions About Making Mini Blankets
What is the easiest way to make a mini blanket without sewing?
The no-sew braided edge method is the easiest. Cut two squares of fleece, cut strips along the edges, and braid them together. This creates a durable edge in about 50 minutes with no needle or thread required.
What size mini blanket should I make for a hospital donation?
Most hospitals accepting donations like Teeny Tears require 12-inch by 12-inch blankets made from flannel or cotton. Avoid fleece because it can stick to delicate infant skin.
Can I make a mini blanket with just yarn and a crochet hook?
Yes. The crocheted bobble blanket uses only single crochet and double crochet stitches. It requires a 6mm hook and about 2 to 6 hours depending on size. Caron BabyCakes yarn works well because it’s soft and self-striping.
How do I keep my sewn blanket from puckering at the edges?
Loosen your thread tension or switch to a walking foot. Make sure you’re not pulling the fabric as you sew. Press seams thoroughly between steps and consider using a longer stitch length for bulky fabrics.
What fabric is safest for baby blankets?
Pre-shrunk cotton flannel or minky are safest for babies. Both are breathable, soft, and gentle on sensitive skin. Always pre-wash fabric before cutting to prevent post-wash shrinkage.

