
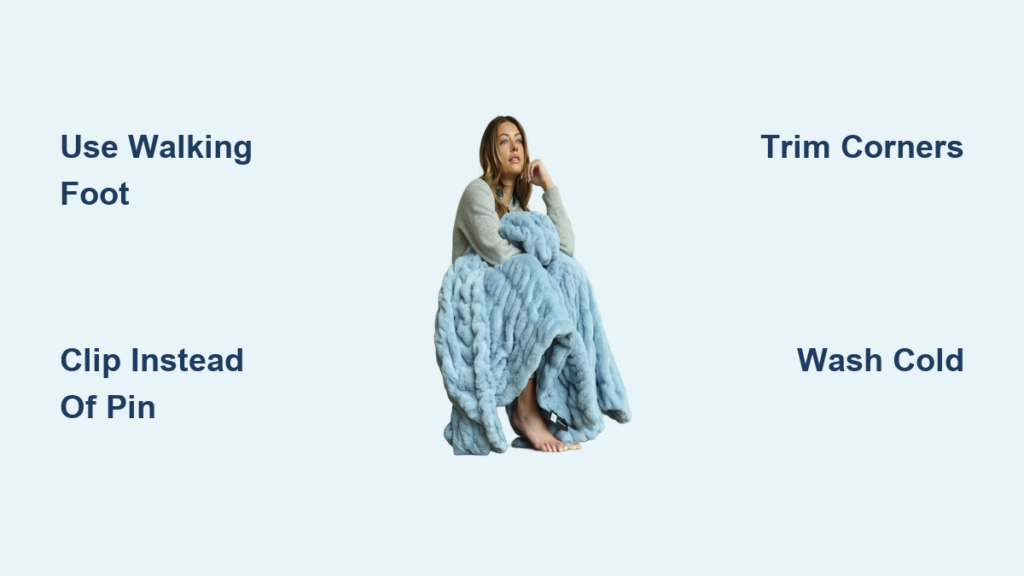
Nothing feels quite like a minky blanket, with its ultra-soft, luxuriously plush texture perfect for snuggling. Whether you are making a baby shower gift, a cozy throw for your couch, or a sensory-friendly blanket for a child, learning how to make a minky blanket opens the door to fast, rewarding DIY projects that look store-bought but carry a personal touch. Minky fabric, typically a microfiber polyester knit, is beloved for its velvety feel, durability, and ease of care. However, it is also notoriously slippery and stretchy, which can frustrate beginners. The good news is that with the right tools and techniques, anyone can master it. In this guide, you will learn every step from fabric selection to final topstitching, including pro tips to avoid common pitfalls like shifting layers, skipped stitches, and melted pile.
Choose the Right Minky Fabric for Your Project
Minky comes in several textures and constructions, each suited to different blanket styles. Smooth minky offers a classic soft finish, ideal for elegant throws. Minky dots feature raised bumps for added sensory appeal, perfect for babies. Waffle minky has a grid-like texture that hides stitching well and resists slipping slightly better than smooth varieties. For a premium feel, consider Cuddle 3 by Shannon Fabrics, known for its ultra-dense, luxurious pile.
Pick the Best Fabric Combo
For baby blankets, pair minky with cotton flannel for a soft, breathable backing. For adult throws, double-sided minky delivers maximum coziness. If you want structure without bulk, skip batting because minky is self-insulating, and washing naturally fluffs the fibers to bind layers. However, for winter-weight quilts, add a thin layer of polyester or cotton batting. To reduce friction when sewing minky to cotton, place the cotton layer on the bottom during sewing because it feeds more smoothly under the walking foot. Avoid combining minky with tightly woven fabrics that resist stretch, as this can cause puckering.
Gather the Right Tools for Minky Sewing
Making a minky blanket is not about fancy machines. It is about using the right attachments that handle the fabric’s unique properties.
Essential Equipment for Success
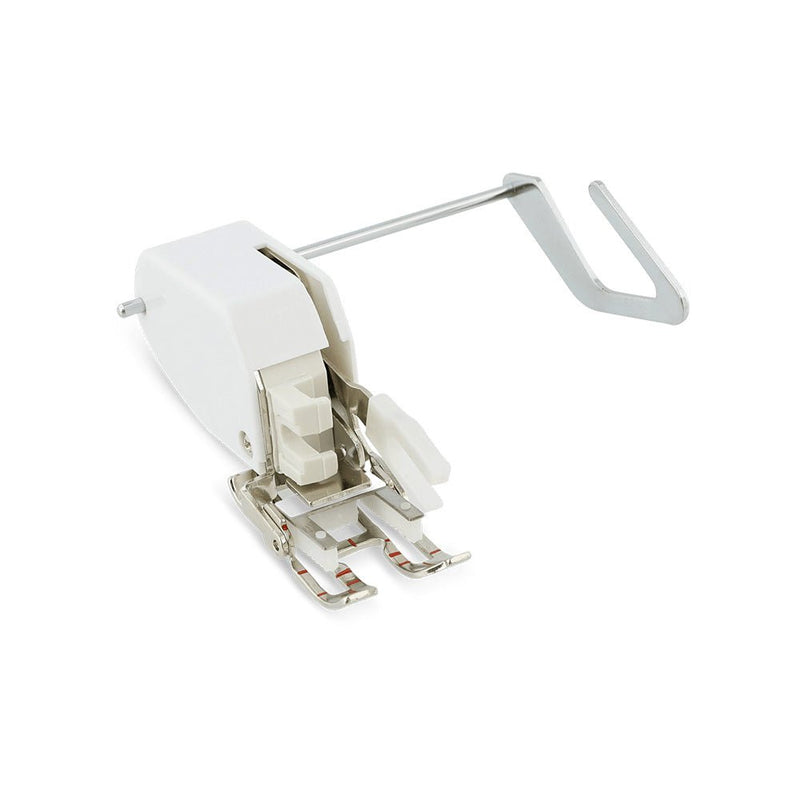
A walking foot is non-negotiable. It feeds both layers evenly, preventing the dreaded slippage that plagues minky projects. Pair it with Clover Wonder Clips instead of pins because pins can snag the pile or leave permanent holes. Flat-head or long-headed pins are acceptable alternatives, but clips are faster and safer.
Use a 90/14 jersey or stretch needle, especially Schmidt’s 90/14 stretch needle for Cuddle fabric. Regular needles often skip stitches or break under the dense microfiber. For lighter minky, a 75/11 or 80/12 stretch needle works well. Thread should be polyester all-purpose or heavy-duty because it matches minky’s strength and resists breaking.
Cutting tools matter too. A rotary cutter, self-healing mat, and clear grid ruler ensure clean, straight edges. Use a water-soluble pen or chalk to mark seam lines, corners, and turning gaps. Avoid permanent markers that can bleed.
Optional Add-Ons Worth Having
Keep a stiletto or knitting needle handy to guide fabric under the presser foot and push out corners after turning. A chopstick or purple lint brush helps pull stray fibers from seams. For drying, wool or tennis balls fluff the blanket and prevent matting. If you press seams, use a pressing cloth to shield the pile from heat damage.
Cut Fabric to Size Without Shifting
Start by deciding your blanket size. A 30 by 30 inch receiving blanket needs 1 yard of fabric per side. A 50 by 60 inch throw requires about 2 yards. Add 1 inch total, which is half an inch per side, for seam allowance. For example, cut two 31 by 31 inch panels for a finished 30 by 30 inch blanket.
Measure and Align Properly
To preserve grain alignment, lay both fabric pieces selvedge to selvedge, right sides together. Smooth out wrinkles and clip the edges. For double-sided minky, ensure the prints or colors face each other. If using cotton backing, place it on top of the minky with right sides together.
Minky shifts easily on cutting mats. To stabilize, use quilting weights or binder clips at the corners. Cut slowly with a sharp rotary blade to avoid jagged edges. After cutting, check both panels for size consistency and trim if needed.
Layer and Secure the Panels Correctly
Lay the first panel face down, which is wrong side up. Place the second panel on top, right sides together. For single-sided blankets, minky goes face down and cotton or flannel face up. For double-sided blankets, both minky pieces face each other.
Smooth each layer from center to edges to eliminate bubbles. Align all corners and edges precisely because minky stretches, so even small misalignments show after sewing.
Use Clips Instead of Pins
Use Wonder Clips every 1 to 2 inches along the perimeter. Place extra clips near cut edges, which are more stretchy than selvedges. Avoid over-clipping, just enough to hold layers together without distorting the fabric.
Leave a 6 to 8 inch opening on one side for turning. An 8-inch gap is easier to work with, especially for larger blankets. Backstitch at both ends of the opening to prevent unraveling during turning.
Work on a large, flat surface like a dining table. This supports the fabric and reduces strain on your seams.
Sew the Perimeter Seam Without Skipped Stitches
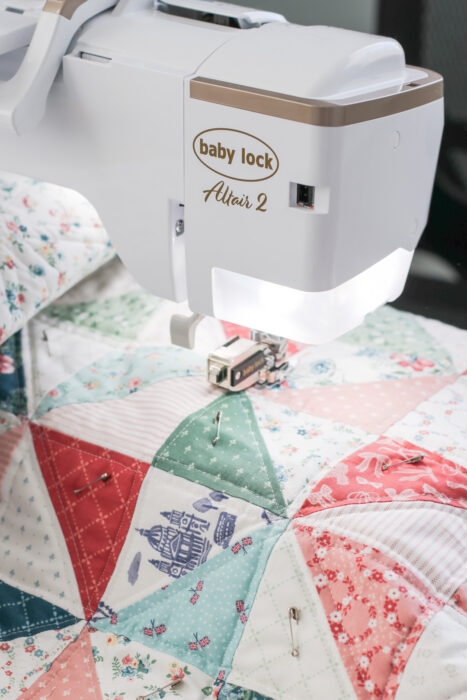
Attach the walking foot and set your machine to a 2.5 to 3.5 millimeter stitch length. Longer stitches prevent skipped stitches and handle the fabric’s thickness better. Use a half-inch seam allowance.
Sew slowly around all four sides, removing clips just before the needle reaches them. Guide the fabric with your hands, not by pulling. Let the walking foot do the work. Use the edge of the foot as a guide for consistent seam width. Backstitch at the start and end of the seam, especially at the opening.
Handle Corners with Precision
Approach each corner by sewing to the pivot point, which is half an inch from the edge. Lower the needle, lift the presser foot, turn the fabric, then continue. This creates sharp, durable corners.
After sewing, trim all four corners diagonally, cutting a quarter to half an inch from the seam. This reduces bulk and helps corners turn out smoothly. For rounded corners, trace a plate before sewing, then clip the curve every quarter inch.
Turn and Shape the Blanket
Turn the blanket right side out through the 8-inch opening. Use your hands to start, then a stiletto or chopstick to push out corners. Be gentle because minky is strong but delicate in high-friction areas.
Ensure all edges are fully extended. If a corner feels thick, snip the seam allowance, not the stitches, to allow the fabric to spread. The result should be crisp, square corners.
Press Without Damaging the Pile
Once turned, run your fingers along the edges to smooth seams. Use a dry iron on low heat with a pressing cloth to flatten the seam allowance. Never press directly on minky because high heat can melt or flatten the pile. Alternatively, hover a steam iron above the fabric without touching it.
Fold in the raw edges of the opening and press flat. Clip or pin closed for topstitching.
Close the Gap and Topstitch Like a Pro
You can hand-stitch the gap with a ladder stitch for invisibility, but machine topstitching is faster and just as clean. Use a quarter to third inch seam allowance and a 3.5 millimeter straight stitch. Backstitch at both ends.
Sew slowly around the entire perimeter. This topstitching secures the layers and gives a polished look. Minky hides stitches beautifully. Your work will look seamless after washing.
Add Decorative Stitching Options
For extra durability and style, sew a second line of topstitching 7 inches from the edge, creating a large inner rectangle. This prevents layer shifting and adds design flair. Use contrasting thread for a bold effect.
Try a serpentine stitch for Cuddle 3 because it is stretchy and decorative. For thick layers with double gauze, use a zigzag stitch at 5 millimeter width and length. Always test stitches on scraps first.
Position the needle fully to the left for a wider seam and more visible edge detail.
Explore Popular Design Variations
With 108-inch wide minky, you can create a self-bound blanket. Place the smaller backing fabric centered on the large minky piece. Fold the excess minky over the edges, aligning raw edges. Pin or clip, then sew along the diagonal lines marked earlier. Trim excess, turn, and press. The result is a seamless, professional edge with no binding tape.
Try a Tied Blanket for Beginners
Skip machine quilting. Instead, tie the layers with embroidery floss or yarn every 3 to 4 inches. Use a bodkin or large needle to pull ties through. This rustic method is perfect for soft, cuddly throws and avoids the challenge of sewing through thick minky layers.
Mix Textures and Fabrics
Combine smooth minky with dotted or waffle for visual contrast. Back a starry print with solid navy flannel for a gender reveal blanket. Add embroidery or fabric labels with a baby’s name and birth date. For photo blankets, print images on cotton fabric and pair with solid minky.
Wash and Care for Long-Lasting Softness
Always wash in cold water on the gentle cycle. Use a mild, bleach-free detergent because fabric softener coats fibers and dulls softness over time. Wash alone or with similar fabrics to prevent lint transfer. Run an extra rinse cycle to remove residue. Spot clean when possible to extend time between washes.
Dry Without Causing Damage
Air dry is best. Lay flat or hang to preserve fluffiness. If machine drying, use air-only with no heat or the lowest heat setting. Add 2 to 3 wool or tennis balls to fluff the fibers and prevent matting. Clean the lint trap before and after because minky sheds during drying.
Remove promptly to reduce wrinkles. Never use high heat because it can melt, pill, or flatten the pile.
Fix Common Minky Sewing Problems
If layers shift during sewing, slow down and use more clips. Ensure the walking foot is properly attached and the feed dogs are clean. Reduce presser foot pressure if your machine allows because it minimizes compression of the thick fabric.
Replace dull needles to prevent skipped stitches. Use a fresh 90/14 stretch needle and increase stitch length. Check thread tension because minky often requires slight loosening. Test on scraps before sewing the final piece.
Never iron directly on minky. Always use a pressing cloth or steam hover. If the pile gets flattened, brush gently with a lint remover or fluff in the dryer with wool balls.
After washing, use a chopstick or purple lint brush to pull out trapped fibers from seam allowances. This prevents bald spots and keeps edges fluffy.
Where to Buy Quality Minky Supplies
Purchase Cuddle, Luxe Cuddle, and Cuddle 3 directly from Shannon Fabrics at shannonfabrics.com, the original source. They offer free patterns and host SewTogetherTuesday for project inspiration.
For pre-cut kits at 29 by 35 inches, visit quilt101.com, ideal for beginners. Joann Fabrics, Etsy, and Amazon also carry minky by the yard and in kits. Check for dye lot consistency when buying multiple pieces.
Final Thoughts on Making Minky Blankets
A finished minky blanket should feel soft, balanced, and well-constructed. Edges are smooth, corners are sharp, and stitching is secure. After washing, the blanket fluffs up, hides seams, and feels even more luxurious. With proper care, it lasts for years through countless snuggles, washes, and gifts.
Making a minky blanket is a beginner-friendly project that yields professional results when you use the right tools. From choosing fabric to topstitching and care, every step builds toward a cozy, custom creation. Whether you make a quick 30-minute baby blanket or a detailed self-bound throw, the process is as satisfying as the final cuddle.
Frequently Asked Questions About Making Minky Blankets
What is the best needle for sewing minky fabric?
Use a 90/14 jersey needle or stretch needle, such as Schmidt’s 90/14 stretch needle specifically recommended for Cuddle fabric. Regular needles often skip stitches or break under the dense microfiber pile.
Do I need a walking foot to make a minky blanket?
Yes, a walking foot is essential. It feeds both layers of fabric evenly and prevents the slippage that makes minky difficult to sew. Without one, layers shift and create puckered seams.
Can I use pins instead of clips when sewing minky?
Clover Wonder Clips are preferred over pins because pins can snag the delicate pile or leave permanent holes. If you must use pins, choose flat-head or long-headed pins and remove them just before the needle reaches them.
How do I prevent my minky blanket from shedding after washing?
Wash in cold water on gentle cycle with no fabric softener. Use an extra rinse cycle to remove loose fibers. Air dry or use the lowest heat setting with wool dryer balls to minimize shedding.
Do I need to add batting to a minky blanket?
No, batting is optional. Minky is self-insulating, and washing naturally fluffs the fibers to bind layers together. Add thin polyester or cotton batting only for extra warmth in winter-weight quilts.

