
You love your horse and want them comfortable, happy, and performing at their best. But store-bought saddle blankets often fall short, too thin, poorly shaped, or just not you. Learning how to make a saddle blanket gives you complete control over fit, comfort, materials, and design.
This guide covers all three major methods: sewn quilted pads, pulled wool pads, and hooked wool blankets. Each technique offers different tools, skill levels, and outcomes. From material selection to final finishing, you’ll discover everything needed to create a functional, durable, and beautiful custom saddle blanket.
Choose Your Saddle Blanket Construction Method
Three main types dominate handmade saddle blankets. Each serves different riders, climates, and purposes.
Sewn Quilted Pad: Fast and Washable
Ideal for casual riders, kids, or show use. Made with cotton fabric, foam padding, and flannel backing, this type is sewn on a machine, easy to clean, and highly customizable in color and design.
Best for:
• Beginners with basic sewing skills
• Riders needing machine-washable pads
• Decorative or seasonal designs
Time to complete: 4-8 hours
Pulled Wool Pad: Natural and Therapeutic
Uses carded wool pulled through a canvas base by hand. Creates a breathable, moisture-wicking pad ideal for sensitive horses or therapeutic riding.
Best for:
• Natural fiber enthusiasts
• Horses prone to back soreness
• Artisans wanting texture and warmth
Time to complete: 10-20+ hours
Hooked Wool Blanket: Durable and Traditional
Built using latch hook canvas and wool roving. Extremely long-lasting, some last 30+ years, and favored in ranch work for breathability and structural integrity.
Best for:
• Working riders and endurance events
• Heirloom-quality gear
• Those willing to invest time for unmatched performance
Time to complete: 20-40+ hours
Pro Tip: Start with a sewn quilted pad if you are new to crafting. Move to wool methods once you feel comfortable.
Sew a Quilted Saddle Pad
Make a lightweight, washable pad perfect for everyday use.
Gather Your Materials
You will need:
• Existing saddle pad for tracing
• 1½ yards cotton fabric (two pieces if directional print)
• 1½ yards dark flannel backing
• 2 yards of ½-inch upholstery foam
• Matching thread
• 2 yards nylon webbing for billet straps
• Bias tape (length to cover perimeter)
• Optional: 5 yards cording or ribbon for decoration
Why upholstery foam? It resists compression better than craft foam, maintaining cushion over time.
Cut Foam With Seam Allowance
- Place your current saddle pad on the foam.
- Trace around it, adding a ½-inch seam allowance all around.
- Cut out the shape.
- Place the foam on the flannel backing and trace again to ensure perfect alignment later.
This extra margin prevents shifting during assembly.
Cut Fabric Correctly
Cut two identical pieces from cotton fabric. For directional prints like animals or text, cut two separate pieces so the design faces the right way on both sides. For non-directional prints, fold the fabric and cut one piece to save material and reduce seams. Always match grain lines to prevent twisting.
Mark Quilting Lines
Use a washable fabric marker or chalk:
1. Start 2 inches from the outer edge and draw a continuous line around.
2. Add three to four concentric circles inward, spaced evenly.
3. These guide straight-stitch quilting to lock layers together.
Pro tip: Print a photo of your desired quilting pattern and tape it under the fabric for precision.
Sew the Cotton Layers
- Place both cotton pieces right sides together.
- Sew around the edges with a ½-inch seam, leaving a 4-6 inch gap for turning.
- Clip curves lightly to reduce bulk.
- Turn right side out through the opening.
- Press edges flat and hand-stitch or topstitch the gap closed.
Now you have a smooth outer shell ready for layering.
Layer and Baste
Stack in this order:
1. Flannel backing (wrong side up)
2. Foam (centered)
3. Sewn cotton shell (right side down)
Pin or hand-baste around the edge to prevent shifting. Then quilt along the marked lines using a walking foot on your sewing machine.
Apply Bias Tape
Encase raw edges neatly:
1. Unfold one side of the bias tape and align with the back edge of the pad.
2. Pin every few inches, especially on curves.
3. Sew along the inner fold.
4. Fold over to the front, pin down, and stitch close to the edge.
For a decorative touch, slide cording under the bias tape before sewing and use a zipper foot to stitch tightly around it.
Attach Billet Straps
- Cut nylon webbing to match your saddle’s billet length.
- Position near front and rear edges, aligning with girth points.
- Fold ends under and pin securely.
- Sew with a zigzag or box stitch for strength and reinforce with multiple passes.
Warning: Misaligned straps can shift the saddle. Double-check placement before finishing.
Final Touches
Trim all threads and inspect stress points. Air out the pad if foam has odor, as some off-gas initially. Pre-wash fabrics before building for shrinkage control. Your pad is now ready to ride.
Build a Pulled Wool Saddle Pad
Create a natural, therapeutic pad using hand-pulled wool fibers.
Learn the Pulled Wool Method
Pulled wool pads are made by drawing carded wool top through a sturdy canvas or felt base. The result is a dense, soft layer that conforms to your horse’s back, wicks moisture, and stays breathable. Unlike synthetic pads, pulled wool does not trap heat and molds naturally over time.
Note: Raw fleece is not used. Only pre-carded wool top (processed into smooth strands) works efficiently.
Source Tools and Wool
While you can buy items separately, War Knot Wool offers a complete starter kit including pulling hooks, tensioning device, premium wool top, video tutorials, and access to student portal.
Or source individually:
• Wool top from fiber suppliers or sheep farms
• Canvas base: heavy-duty felt or pulling canvas (3.75 mesh recommended)
• Pulling tool: modified crochet hook or latch hook
Follow Video Instructions
The War Knot Wool video series walks you step-by-step through preparing the canvas, loading the wool, pulling technique, and joining new strands seamlessly. Includes bonus marketing and business course for makers.
Join the Maker Community
After buying, email meghan@warknotwool.com to request access to student portal, private Facebook group, and instructor feedback. This support network helps troubleshoot issues and grow your craft into a business.
Customize Design and Color
While most pulled wool pads use solid colors, you can mix wool colors for ombre effects, pull denser in high-pressure zones under the saddle bars, or add subtle branding with colored wool accents.
Craft a Hooked Wool Saddle Blanket
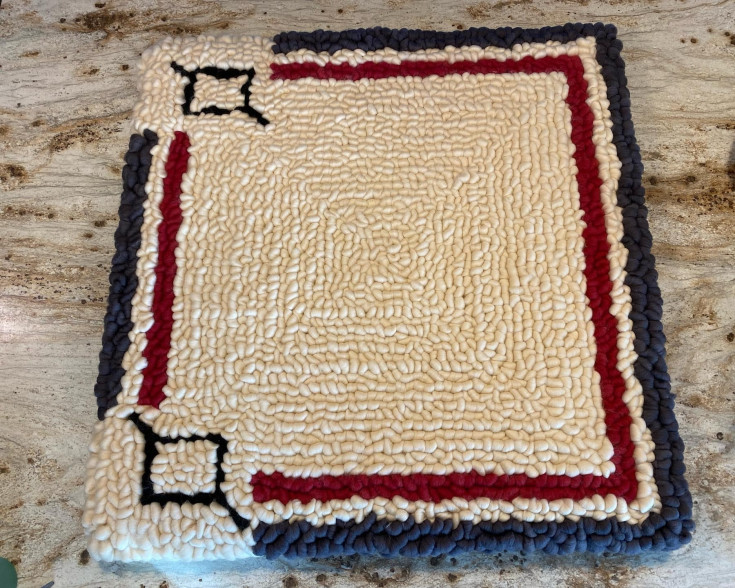
Make a rugged, long-lasting blanket built for ranch life.
Understand the Benefits
Hooked wool blankets last decades with proper care, breathe better than felt or foam, resist compression and matting, and can be washed without falling apart. They cup the horse’s back when shaped correctly.
Compared to woven or felted versions, they are easier to make at home and more affordable.
Buy Latch Hook Canvas
Get 3.75 mesh canvas, 36 inches wide. Length: 48 inches (you will cut it down). Available at Michaels, knitting/craft supply stores, or online fiber retailers.
Cut Canvas to Size
- Mark one end “F” (Front) with permanent marker.
- Remove factory binding or selvage edges.
- Measure saddle skirt length (example: 28 inches).
- Add 2 inches front and back for coverage = 32 inches.
- Add 1 inch each end for hems = 34 inches total.
Cut canvas: 36 inches wide by 34 inches long.
Insert Front Wedge (6-Inch Spread)
Shape the blanket to fit the horse’s high withers:
1. Fold canvas in half (18 inches by 34 inches) and find the “F” mark.
2. From front edge, measure 14 inches and cut a vertical slit.
3. From back edge, measure 12 inches and cut another slit.
4. Take scrap canvas and attach a patch over the top of the front slit.
5. Sew over the end and one square past the bottom, overlapping 4 squares.
6. Open the slit and spread it to 6 inches wide.
7. Sew from top to bottom, securing the wedge.
8. Trim excess fabric.
This creates a butterfly shape that lifts over the withers.
Add Rear Wedge (4-Inch Spread)
Repeat at the rear slit, but spread only 4 inches, matching the horse’s narrower hindquarters. The blanket now contours the back, stays in place, and prevents pressure points.
Spray Paint the Canvas
Enhance durability:
1. Spray both sides with flexible fabric paint.
2. Let dry completely.
3. Apply second coat.
Purpose prevents canvas from slipping during hooking, adds water resistance, and protects against sweat and abrasion.
Fit Blanket on Horse
Before adding wool, place canvas under saddle on your horse. Check for proper wither clearance and even contact. Adjust wedge size if needed. Real-world fitting ensures optimal performance.
Choose and Prepare Wool
Use wool roving or roping, not raw fleece. Amount: 6-8 lbs depending on thickness, horse size, and climate. Color: natural whites and grays are popular. Source from Custom Woolen Mills.
Skip processing raw wool. It is labor-intensive and not worth it for most makers.
Hook the Wool by Hand
Process:
1. Cut roving into manageable lengths (12-18 inches).
2. Use a latch hook tool to pull a loop through each canvas square.
3. Pack loops tightly for even cushioning.
4. Splice new strands by overlapping in the same hole.
Work row by row, edge to center.
Ergonomic tip: Use a Color Crazy Ergonomic Latch Hook to reduce hand fatigue.
Trim and Finish
Once fully hooked, trim loops evenly with scissors for a plush, uniform surface. Inspect for missed holes or loose ends. Optional: add leather binding or reinforced edging. Your blanket is ready for decades of use.
Select Materials Wisely
Use Natural Wool When Possible
Benefits include wicks moisture even when damp, naturally antimicrobial, resilient under pressure, and regulates temperature. Source from domestic producers for sustainability. Some artisans dye their own wool for custom palettes.
Pick the Right Canvas
For hooked or pulled wool, 3.75 mesh canvas is ideal. It holds wool securely, allows tight even loops, and is durable enough for daily use. Also called latch hook canvas, sold in 36-inch rolls.
Use the Right Tools
Essential Tools
- Latch Hook Tool: Pulls wool through canvas, ergonomic versions reduce strain, lasts for multiple projects.
- Measuring Tape: Ensures accurate saddle fit, critical for wedge placement.
- Scissors: For trimming wool and cutting canvas, keep sharp and dedicated to fiber work.
Helpful Extras
Pins or clamps secure canvas edges. Templates work for logos or brands. Stencils help with pattern transfer.
Customize Your Design
Standard Size vs. Custom Fit
Most pads: 32 inches by 32 inches, 2 inches thick. But always measure your horse’s back length, saddle skirt width, and withers height. Adjust accordingly for English, Western, or pony saddles.
Add Personal Touches
Options include initials or ranch brand in contrasting wool, geometric patterns like diamonds or stripes, themed designs like floral or western, and team colors for show riders.
Care for Longevity
Clean Twice a Year
Best schedule: spring and fall.
Cleaning steps:
1. Hand wash in lukewarm water or gentle machine cycle if wool permits.
2. Use mild wool detergent.
3. Rinse thoroughly.
4. Air dry flat, never in direct sun or dryer.
Avoid heat because it causes shrinkage and fiber damage.
Expect 5+ Years of Use
With care, wool pads last 5 years or more. Hooked blankets can exceed 30 years. Factors affecting lifespan include frequency of use, sweat exposure, and storage conditions. Store in a dry, ventilated area.
Comparison: Which Method Should You Choose?

| Feature | Sewn Quilted | Pulled Wool | Hooked Wool |
|---|---|---|---|
| Skill Level | Intermediate | Intermediate-Advanced | Advanced |
| Time Required | 4-8 hours | 10-20+ hours | 20-40+ hours |
| Durability | Moderate | High | Very High |
| Breathability | Moderate | High | Very High |
| Washability | Machine safe | Hand wash | Hand wash |
| Best Use | Show, casual | Therapy, natural | Ranch, endurance |
| Cost to Make | $30-$60 | $80-$150 | $70-$120 |
New to crafting? Choose sewn quilted pad. Love natural fibers? Choose pulled wool pad with War Knot Wool training. Need long-term durability? Choose hooked wool blanket.
Where to Buy Supplies
| Item | Where to Find |
|---|---|
| Latch Hook Canvas | Michaels, knitting stores, online |
| Wool Roving | Custom Woolen Mills |
| Starter Kit | War Knot Wool (tools + training) |
| Video Tutorials | War Knot Wool (digital only) |
| Nylon Webbing | Tack shops, outdoor fabric suppliers |
| Upholstery Foam | Craft or upholstery stores |
| Bias Tape | Sewing supply stores |
Contact for support: meghan@warknotwool.com
Real-World Success Story
JBrennan Pulled Wool Pads, founded by a stay-at-home mom of four, turned craft into business. Every pad is custom-made and sold via Facebook and Instagram. Features customer photos and testimonials. Combines love of horses with artistic expression, showing how a personal project can grow into a sustainable brand.
Frequently Asked Questions About Making a Saddle Blanket
What is the easiest saddle blanket method for beginners?
The sewn quilted pad is the easiest method for beginners. It requires only basic sewing skills and a sewing machine. You can complete a quilted pad in 4-8 hours, making it perfect for a weekend project.
How long does a handmade wool saddle blanket last?
A properly cared-for hooked wool saddle blanket can last 30 years or more. Pulled wool pads typically last 5-10 years, while quilted pads last 2-5 years depending on use and maintenance.
Can I wash my wool saddle blanket?
Yes, but hand washing is recommended. Use lukewarm water and mild wool detergent. Air dry flat away from direct heat or sunlight. Avoid machine washing unless the blanket is specifically labeled as machine washable.
What materials do I need to make a hooked wool saddle blanket?
You will need 3.75 mesh latch hook canvas (36 inches by 34 inches), 6-8 pounds of wool roving, a latch hook tool, and optionally spray paint for canvas treatment. Custom Woolen Mills and craft stores like Michaels carry these supplies.
Is raw wool suitable for making saddle blankets?
No, raw wool is not recommended. Processing raw fleece into roving or roping is extremely labor-intensive. Purchase pre-processed wool top or roving from fiber suppliers for much better results.
How do I ensure proper fit for my horse?
Measure your horse’s back length, saddle skirt width, and withers height. For hooked wool blankets, create front and rear wedges (butterfly shape) to accommodate the horse’s conformation. Test the canvas under your saddle before adding wool.
Key Takeaways for Making Your Own Saddle Blanket
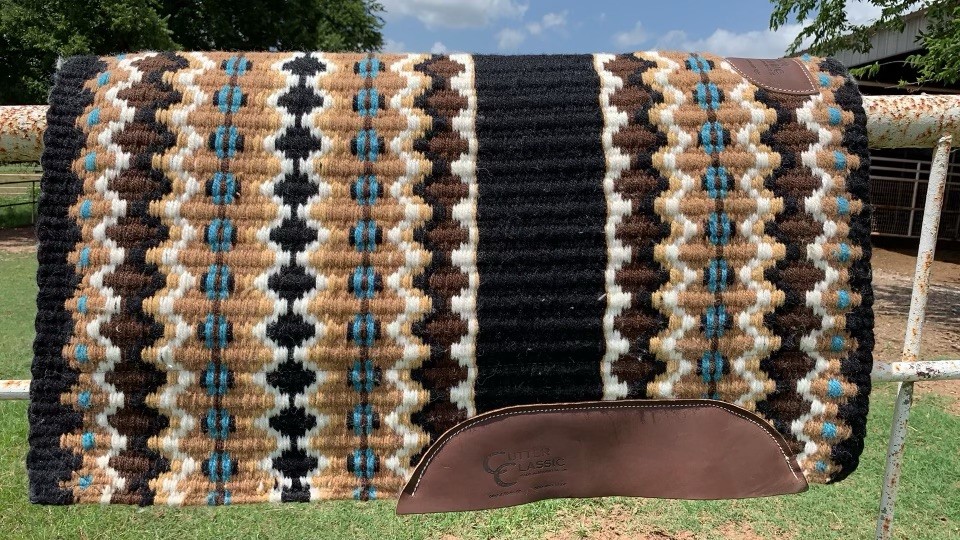
Making a saddle blanket gives you complete control over comfort, fit, and design. Choose your method based on skill level and goals: sewn quilted pads for quick results, pulled wool for natural comfort, or hooked wool for heirloom durability. Use quality materials like 3.75 mesh canvas, upholstery-grade foam, and natural wool for best results. Join maker communities like War Knot Wool for training and support. With proper care, a well-made wool saddle blanket can last decades, making your investment worthwhile.

