
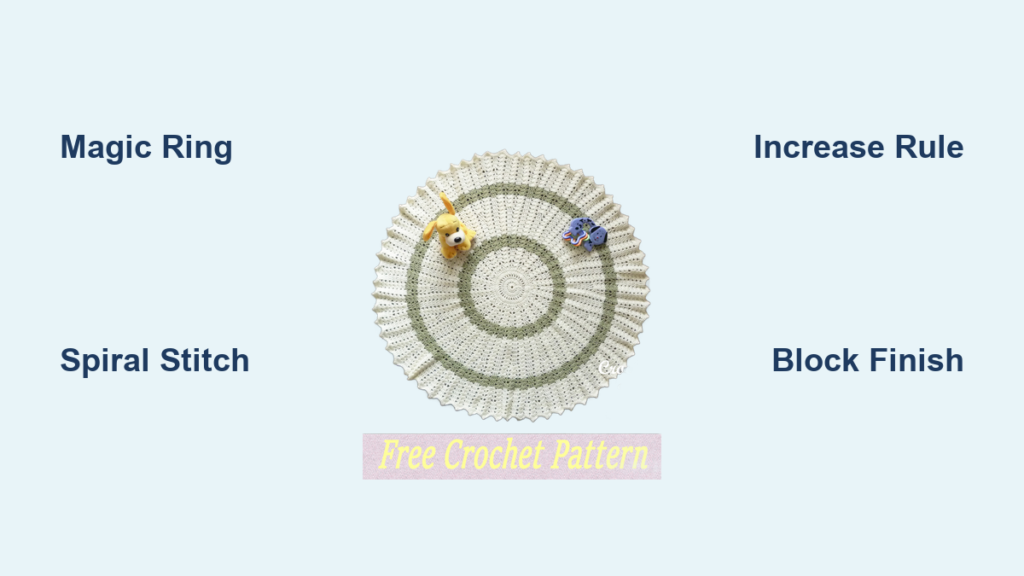
You’ve seen them in nurseries and living rooms alike—soft, swirling circles of color that drape like a dream or hang as wall art. A round blanket is more than just a cozy throw. It’s a statement piece, a mindful project, and a beautiful way to showcase your yarn and stitchwork. Whether you’re making a baby afghan, a lapghan for a loved one, or a mandala-inspired textile, learning how to make a round blanket opens the door to endless creative possibilities.
Crocheting a round blanket may seem intimidating at first, but with the right foundation, tools, and technique, it’s surprisingly intuitive. The secret lies in mastering flat-circle construction: consistent increases, proper stitch counts, and smart color transitions. This guide walks you through every step, from choosing yarn to blocking your finished piece, so you can create a perfectly round, professional-looking blanket with confidence.
Gather Essential Materials for Round Blanket Crochet
Before you pick up your hook, gather the essentials. The right materials set the stage for success.
Choose the Best Yarn
Select yarn that matches your project goals. Worsted weight (#4) offers durability and even stitch definition. Lightweight (#3) creates a drapey, elegant feel perfect for ombre designs.
Consider fiber content for your needs. Acrylic is affordable and machine-washable, ideal for baby blankets. Cotton provides structure and breathability. Wool blends offer warmth and elasticity, perfect for blocking.
Plan your color strategy. Ombre or gradient cake yarn creates seamless color transitions. Variegated or self-striping yarn adds visual interest without manual color changes. Solid colors let stitch patterns shine. Use white, ivory, or light gray between bold shades to soften contrast.
Stock up on 4 to 5 skeins depending on your desired size and color distribution.
Pick the Correct Hook Size
A 5.5 mm (I/8) hook is standard for worsted weight yarn. Adjust based on yarn label suggestions and your personal tension. A larger hook prevents curling. A smaller hook increases density.
Essential Tools Youll Need
You need several key supplies beyond yarn and hook. A stitch marker tracks the first stitch in spiral rounds. A yarn needle weaves in ends and executes invisible joins. Scissors cut yarn during color changes. Blocking mats and pins shape the final piece. A steam iron or spray bottle applies moisture during blocking.
Create a Tight Foundation Ring
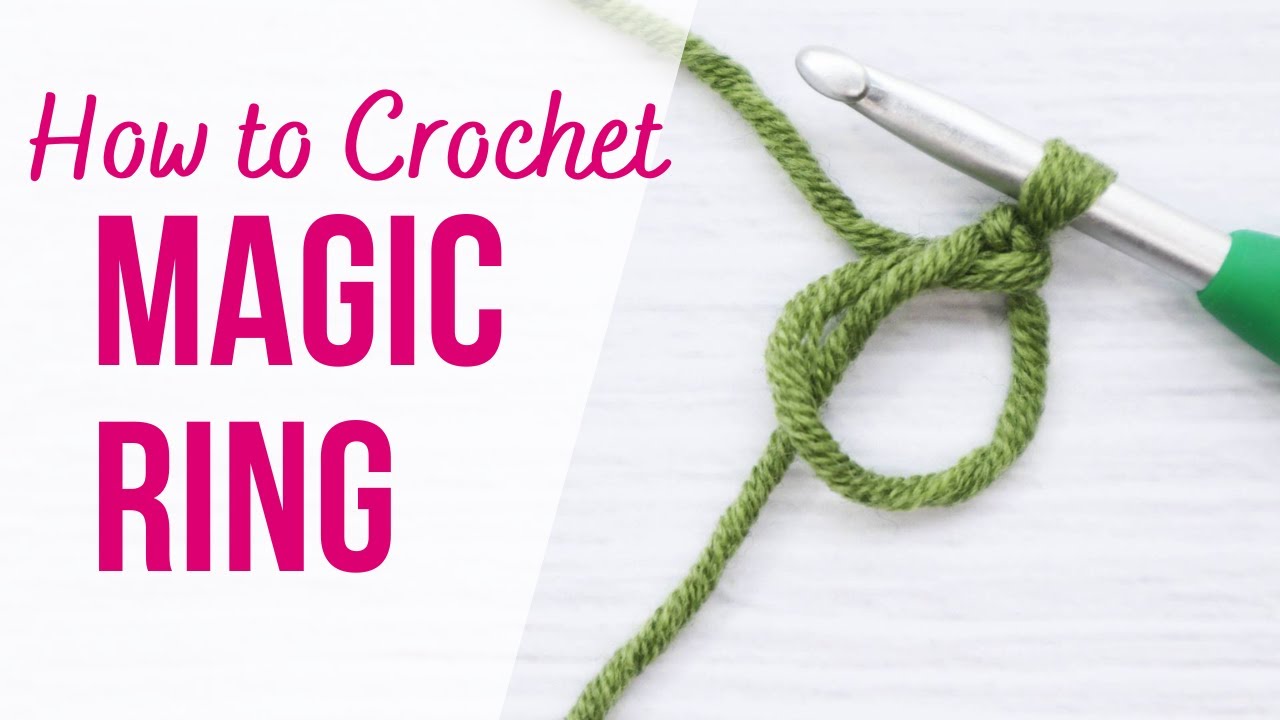
The center of your blanket starts with a solid foundation. Two methods dominate: the magic ring and the chain-3 ring.
Use a Magic Ring for a Tight Center
Form a loop with yarn, insert hook, and pull up a loop. Work the required starting stitches into the ring. Pull the tail to close the hole completely. This method provides a clean, adjustable center with no gap.
Try the Chain-3 Ring for Easier Access
Chain 3, then slip stitch into the first chain to form a ring. Keep it loose while working Round 1 to avoid puckering. This method may leave a small hole but allows easier access to the center space.
Expert Note: The magic ring is preferred for most modern patterns due to its neat finish.
Build Rounds with the Spiral Technique
The spiral method is the gold standard for round blankets. It eliminates visible seams and creates a smooth, continuous look.
Work in Continuous Spiral
Do not join with a slip stitch at the end of each round. Place a stitch marker in the first stitch of Round 1. Move the marker up each time you start a new round. This keeps track of where each round begins and maintains the spiral flow.
Or Use Joined Rounds for Defined Seams
End each round with a slip stitch into the first stitch. Start the next round with a turning chain (for example, ch 3 for dc). This creates structured, geometric lines ideal for certain ripple patterns.
Calculate Increases for Flat Circles

Flatness is key. Too few stitches cause curling. Too many cause ruffling. Stick to proven formulas for each stitch type.
Single Crochet Increase Rule
Round 1: 6 sc in magic ring yields 6 stitches. Round 2: (sc inc) × 6 yields 12 stitches. Round 3: (sc, sc inc) × 6 yields 18 stitches. Round 4: (sc 2, sc inc) × 6 yields 24 stitches.
The rule: add 6 stitches per round. Increase every n stitches, increasing n by 1 each round.
Half Double Crochet Increase Rule
Round 1: 8 hdc in ring yields 8 stitches. Round 2: (hdc inc) × 8 yields 16 stitches. Round 3: (hdc, hdc inc) × 8 yields 24 stitches. Round 4: (hdc 2, hdc inc) × 8 yields 32 stitches.
The rule: add 8 stitches per round. Starting with 8 stitches ensures even distribution.
Double Crochet Increase Rule
Round 1: Ch 3 (counts as dc), 11 dc in ring yields 12 stitches. Round 2: (dc inc) × 12 yields 24 stitches. Round 3: (dc, dc inc) × 12 yields 36 stitches. Round 4: (dc 2, dc inc) × 12 yields 48 stitches.
The critical principle: number of increases per round must equal the starting stitch count.
Try the Sunburst Ripple Pattern
This classic design features dramatic peaks and valleys that radiate outward from the center.
Begin with Foundation Rounds
Round 1: Magic ring, 11 dc, ch 3 (counts as dc), ss into top yields 12 dc. Round 2: Ch 3, 2 dc in each st around, ss into top yields 24 dc. Round 3: Ch 3, skip next st, (dc, ch 2, dc) in next st; repeat around; finish with dc and ch 2 in base, ss into top. This forms 12 V-peaks. Round 4 through 6 continue building the ripple structure.
Repeat the Motif for Size
Repeat rounds 7 through 9 until you reach your desired diameter. Round 7 creates small peaks. Rounds 8 and 9 create large peaks. Alternate these rounds to build outward.
Manage Color Changes in Peaks
Join new color in a ch-2 space for clean alignment. Change color every 4 rows for even stripes. Use white filler rounds between bold colors to blend transitions. This pattern works beautifully with rainbow, two-tone, or ombre palettes.
Master the Merry-Go-Round Design
This simple, repetitive pattern is perfect for ombre yarn and beginner-friendly construction.
Build from Four Corners
Round 1: In magic ring, work (sc, ch 2) × 4 to create 4 corner spaces. Round 2: In each ch-2, work sc, ch 2, sc, ch 1 to create corners separated by ch-1 sides. Round 3 and beyond: Continue increasing only at ch-2 corner spaces.
The key rule: growth happens only at corners, preserving roundness.
Plan Your Color Sequence
Use a gradient cake yarn for best results. Example sequence: pink, white, purple, white, blue, white, mint, white (border). End one color during its lightest section and start the next at its lightest. Insert white rounds between bold colors to soften transitions.
Finish at a Corner
In your final round, approach a ch-2 corner space. Instead of working a full corner (sc, ch 2, sc), work only one sc. Cut yarn, pull through, and fasten off. This creates a clean break in the spiral.
Change Colors Without Visible Seams

A flawless color transition elevates your blanket from handmade to high-end.
Use Cake Yarn Strategically
Pull your desired ending color from the center of the cake. Cut yarn at the transition point. Join new color using a magic knot. Tie new yarn around old, then old around new. Pull tight, slide tails together, and pull again. Trim excess.
Maintain consistent tension after joining to avoid loose spots.
Prevent Misaligned Joins
Join new color in inconspicuous spots like ch-2 spaces or corners. Use neutral filler rounds between bold colors. Plan transitions during similar hues for the smoothest effect.
Fix Common Crochet Problems
Even experienced crocheters face issues. Here’s how to solve them quickly.
Stop Curling Edges
Curling results from not enough stitches, tight tension, or a small hook. Frog and rework with the correct increase count. Count stitches at the end of each round. Switch to a larger hook. Block the piece to flatten it.
Eliminate Ruffling
Ruffling comes from too many stitches or uneven increases. Block lightly to relax the fabric. Frog and reduce stitch count if needed. Recalculate increases when mixing stitch types.
Correct Polygonal Shape
A decagonal or octagonal shape indicates uneven increases or skipped rounds. Verify your stitch count is a multiple of 12 for ripple patterns or maintains four corners for Merry-Go-Round designs. Use stitch markers every 12 stitches or at corners. Avoid pulling corner clusters too tightly.
Add Professional Finishing Touches
The final steps make all the difference between a handmade project and a professional piece.
Use an Invisible Join
Before the marker, work 3 hdc. After the marker, work 3 sc. Pull the loop through the last stitch. Thread a yarn needle and go back into the last of the three hdc. Skip a stitch, return down through fabric, and pull tight. Sew in the tail securely.
This technique creates a seamless transition with no visible seam.
Add a Decorative Border
Work into the back edge of the blanket. Insert hook before the slope and pull up a loop with border yarn. Slip stitch with both strands and drop the tail. Chain 3 (counts as first dc). In each space, work sc, ch 2, sc to create picot corners. Slip stitch into first ch-3 to close. Turn and work into the front: 3 dc in space, 1 dc in next st. Repeat around and finish with an invisible join.
A border adds structure, prevents curling, and enhances visual appeal.
Block Your Blanket for a Polished Look
Blocking evens stitches, improves drape, and ensures perfect roundness.
Why Block
Blocking evens out tension across the entire piece. It opens lacework in patterns with gaps. It corrects minor shape flaws. It gives a professional finish that elevates your work.
How to Block Properly
Lay your blanket on a clean towel or blocking mat. Pin outward from the center, focusing on corners and peaks. Mist or steam lightly (never soak unless yarn allows). Let dry fully, which takes 8 to 12 hours.
Steam Tip: Hold the iron above the fabric. Never press down directly.
Customize Your Round Blanket Size
Make it uniquely yours by choosing the right dimensions and style.
Choose the Right Size
A baby blanket should be approximately 30 inches in diameter (50 to 60 rounds). A lapghan works well at 45 inches (70 to 80 rounds). A throw-size blanket reaches 60 inches or more (100+ rounds). Measure from center to edge periodically to check your progress.
Experiment with Stitch Variations
Try treble clusters for taller peaks. Use shell stitches in corner spaces. Add picot edges for a delicate finish. Always test gauge when substituting stitches.
Match Themes to Occasions
Gender-neutral projects benefit from earth tones or pastel gradients. Seasonal palettes work beautifully: soft pinks and mint for spring, rust and mustard for fall, navy and silver for winter. For gifts, consider birth month colors or add a name tag.
Frequently Asked Questions About Making Round Blankets
What is the best yarn for a round blanket?
Worsted weight (#4) acrylic yarn is the most versatile choice. It’s durable, machine-washable, and shows stitch definition clearly. For a drapey feel, use lightweight (#3) yarn. Cotton works well for structured blankets, while wool blends are ideal if you plan to block your finished piece.
How do I keep my round blanket from curling?
Curling usually means you don’t have enough stitches or your increases are uneven. Count stitches at the end of every round. Ensure you’re adding the correct number based on your stitch type. Switch to a larger hook if your tension is tight. Block the finished piece to flatten it completely.
Can I use ombre yarn for a round blanket?
Absolutely. Ombre or gradient cake yarn works beautifully for round blankets, especially the Merry-Go-Round pattern. The colors transition naturally as you work. Insert white or light gray rounds between bold colors to soften transitions and extend the visual flow.
How long does it take to make a round blanket?
A baby-size blanket (30 inches) takes approximately 15 to 20 hours. A lapghan (45 inches) requires 20 to 30 hours. A full throw (60 inches) can take 40 hours or more. Your speed depends on your experience level and the pattern complexity.
Do I need to block my round blanket?
Blocking is highly recommended, especially for patterns with lace or ripple stitches. It evens out tension, opens stitch definition, and ensures a perfectly round shape. Even dense blankets benefit from light blocking to improve drape and achieve a professional finish.
What is the magic ring technique?
The magic ring is a foundation technique where you form a loop with yarn, work stitches into that loop, then pull the tail to close the center completely. It creates a tight, adjustable center with no hole. This is the preferred method for modern round blanket patterns.
Key Takeaways for Creating Your First Round Blanket
Creating a round blanket is more than a craft project. It’s a journey of color, rhythm, and precision that rewards you with a stunning piece. Start with a magic ring foundation and follow the correct increase rules for your chosen stitch type. Single crochet requires 6 increases per round, half double crochet needs 8, and double crochet requires 12.
Work in a continuous spiral using a stitch marker to track your rounds. Increase only at designated points, whether that’s corners in the Merry-Go-Round pattern or chain spaces in the Sunburst Ripple. Change colors using hue matching or white filler rounds for smooth transitions.
Finish with an invisible join, add a decorative border if desired, and block thoroughly for a professional look. With practice, you’ll create blankets that drape beautifully and draw compliments. Now grab your hook, pick your colors, and start in the center. Your perfect round blanket begins with one simple stitch.

