
You’ve spent hours carefully piecing your quilt top, and now the backing demands your attention. Many quilters treat this final layer as an afterthought, but a poorly made backing can ruin even the most beautiful top. It causes puckering, shifting during quilting, and weak spots that fail after a few washes. Learning how to make a backing for a quilt properly ensures your finished piece lies flat, holds together, and lasts for generations.
The good news is that backing construction is straightforward once you understand sizing, fabric choices, and seam techniques. This guide covers every step, from selecting wide-back fabric to assembling panels and basting the quilt sandwich. You’ll learn four proven construction methods, the right seam allowance for durability, and how to avoid common beginner mistakes.
Choose the Right Fabric for Your Quilt Backing
Pick Quality Cotton or Wide-Back Material
Always match the durability of your backing fabric to your quilt top. Lightweight or low-thread-count material wears faster and creates weak spots over time. Most quilters choose 100% cotton because it shrinks predictably and holds up well to repeated washing. If your quilt is wider than 40 inches, consider 108-inch wide-back fabric. It eliminates center seams and saves significant time, especially for twin, queen, or king sizes.
Wide-back fabric costs more per yard, but you typically use fewer total yards. This makes it more economical for large quilts in the long run. Keep in mind that pattern options are more limited compared to standard 44-inch fabric.
Mind Directional Prints and Patterns
If your backing features a directional print such as arrows, text, or animals, ensure all pieces face the same direction. A simple trick is folding a long piece of fabric in half with cut ends together before sewing the side seam. This guarantees the pattern runs consistently across the back.
Matching patterns across seams is possible but requires extra yardage and precision. Most quilters skip this step since the back is rarely visible during use. If you want a seamless look, purchase extra yardage to accommodate pattern repeats.
Size the Backing Correctly

Add 8 Inches Total to Your Quilt Top
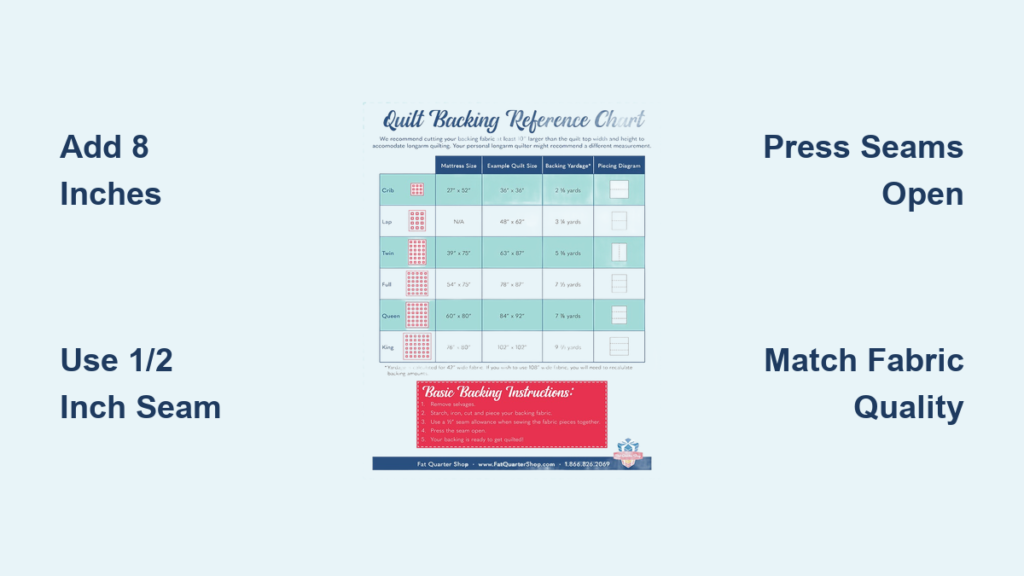
Your backing must be larger than the quilt top to allow for shifting during basting and quilting. The standard rule is to add 8 inches total, or 4 inches per side, to both the width and height of your quilt top.
For example, a quilt top measuring 60″ x 72″ requires a backing of 68″ x 80″. This overage gives you room to clamp or pin the quilt into a frame, which is especially critical when using a longarm quilting service. Some longarmers require at least 4 inches of extra backing on all sides, so always confirm their specifications before cutting.
Know Your Quilt Size Requirements
Different quilt dimensions demand different approaches to backing construction:
| Quilt Size | Width Needed | Best Backing Method |
|---|---|---|
| Small Baby (≤36″) | 44″ | Single width of fabric |
| Large Baby (40″+) | >44″ | Pieced panels |
| Lap or Throw | 50 to 60″ | Two WOF panels or fold method |
| Twin | ~70″ | 108″ wide-back or pieced |
| Queen | ~90″ | 108″ wide-back (ideal) |
| King | >108″ | Wide-back plus piecing |
For quilts wider than 108 inches, even wide-back fabric must be pieced together.
Calculate Yardage for Pieced Backings
Use the Formula for Standard Fabric
When using 42 to 44 inch wide fabric, you typically need two panels sewn together. Calculating yardage in advance prevents frustrating shortages at the fabric store.
Follow this step-by-step formula:
- Add 8 inches to quilt top width and height to get the final backing size.
- Cut Panel 1 at Width of Fabric (WOF) by Final Height.
- Cut Panel 2 at (Final Width minus WOF plus 2 inches) by WOF. The extra 2 inches accounts for seam allowances.
- Total length equals Height plus 2 times (Final Width minus WOF plus 2 inches).
- Convert to yards by dividing total inches by 36, then round up.
Example for a Queen quilt:
- Top: 88″ x 92″
- Backing: 96″ x 100″
- WOF: 43″
- Panel 1: 43″ x 100″
- Panel 2: 55″ long, cut at WOF
- Total length: 155 inches, which equals 4.3 yards (round to 4.5)
Apps like QuiltingCalc can automate these calculations by inputting your quilt size and WOF.
Use a 1/2 Inch Seam for Strength
Why Wider Seams Matter
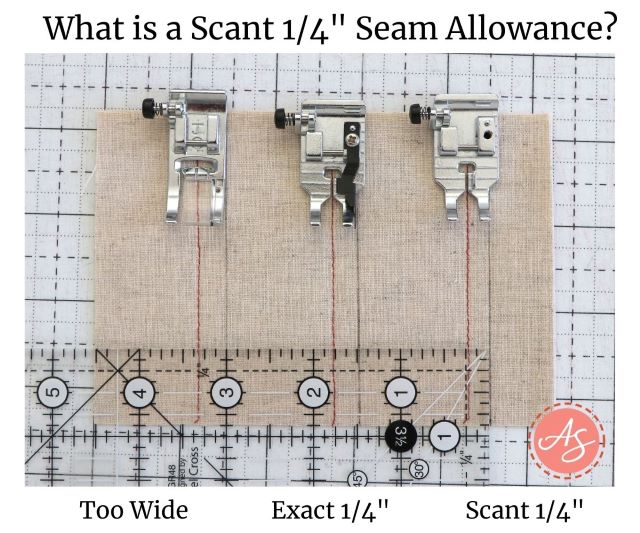
Most quilting uses a 1/4 inch seam, but quilt backings need 1/2 inch seams. The structural reasoning is simple. The quilt top contains many small seams that distribute stress across numerous connection points. The backing often has just one or two long seams that bear the full strain of pulling and washing.
A 1/2 inch seam doubles the thread grip on the fabric, dramatically reducing the risk of splitting. Yes, it uses slightly more fabric, but durability matters more than saving an inch.
Press Seams Open
After sewing, trim off the selvages completely. They are tighter than the rest of the fabric and can cause puckering. Then press the seam open to distribute bulk evenly. This helps the backing lie flat when basting and quilting.
Avoid pressing seams to one side unless absolutely necessary. Open seams reduce thickness and prevent ridges from showing through the quilt top.
Pick a Construction Method
Two-Piece Cut and Sew Method
This is the go-to approach for most medium to large quilts when your quilt is slightly wider than standard fabric.
Steps:
- Fold backing fabric selvage to selvage.
- Lay the quilt top on the floor and align the folded edge with one side, leaving 4 inches of overhang.
- Fold the fabric back to the other side to mark where to cut.
- Cut along the fold to create two panels.
- Sew panels right-sides together with a 1/2 inch seam.
- Trim selvages and press the seam open.
This visual method reduces measuring errors and works well for beginners.
Fold-and-Sew Single Piece Method
Best for quilts under 80 inches long, especially those with directional prints.
Steps:
- Calculate needed length as (Quilt Height plus 8 inches) times 2, plus 1 inch for the seam.
- Cut one long strip at this length.
- Fold it in half width-wise with cut ends together.
- Sew along one open edge with a 1/2 inch seam.
- Cut off the folded edge to open the rectangle.
- Press the seam open.
Now you have a seamless-looking backing with matched directionality and no complex math.
No-Fuss Eyeball Method
Best for fast assembly or awkward sizes where precision feels overwhelming.
Steps:
- Lay the quilt top on a bed or floor.
- Drape backing fabric over it, estimating 4 inches of overhang all around.
- Cut roughly to size without measuring.
- Piece if needed, press, and baste.
Since final trimming happens after quilting, slight inaccuracies don’t matter. This approach is perfect for time-crunched quilters.
Three-Piece Assembly Method
Best for throw quilts where two WOF panels create excessive waste.
Steps:
- Cut Piece 1 at WOF by (Quilt Height plus 8 inches).
- Cut Pieces 2 and 3 at (Backing Width minus WOF plus 2 inches) wide.
- Sew Pieces 2 and 3 end-to-end to make a long strip.
- Sew this strip to the side of Piece 1.
- Press seams open and trim to final size.
This minimizes yardage and maximizes fabric efficiency.
Handle Selvages and Press Properly
Never Leave Selvages in the Seam
Selvages are tightly woven and don’t stretch like the rest of the fabric. If left in the seam, they pull and pucker when washed.
Fix: Sew the seam first using the selvage as a straight guide, then trim it off completely before pressing. This keeps the seam flat and strong.
Iron the Entire Backing
Before basting, give your assembled backing a full ironing. Remove all wrinkles and creases. A smooth backing prevents tucks and bubbles in the final quilt.
Use a dry iron or light steam. Avoid stretching the fabric as you press.
Baste and Prepare the Quilt Sandwich
Layer Backing, Batting, and Top
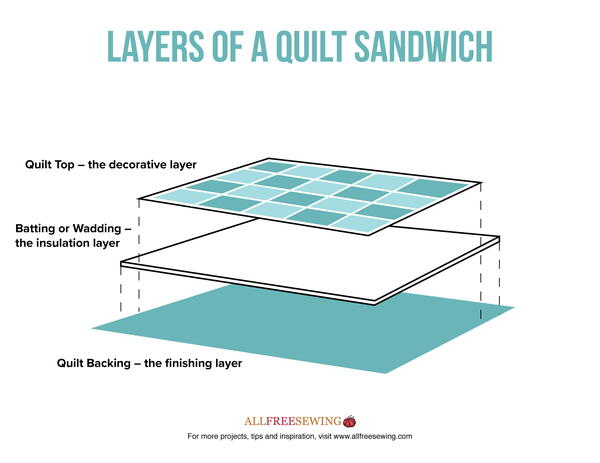
Once your backing is ready, follow these layering steps:
- Lay it wrong-side up on a clean floor or bed.
- Smooth it flat with no wrinkles.
- Add batting centered on top.
- Place the quilt top right-side up, centered over the batting.
- Ensure even 3 to 4 inches of overhang on all sides.
Secure with Pins or Spray
Baste all three layers together using safety pins every 3 to 4 inches, or apply a light, even coat of basting spray. Basting prevents shifting during quilting, so don’t skip this step. Loose layers lead to tucks and uneven stitching that are difficult to fix later.
Trim and Finish After Quilting

Square Up the Edges
After quilting is complete, the edges will be uneven. Now is the time to clean them up.
Steps:
- Lay the quilt on a large cutting mat.
- Use a large square ruler and rotary cutter.
- Align the ruler with the edge of the quilt top.
- Trim batting and backing flush with the top.
This is why precise pre-quilting cuts aren’t critical. The final shape is defined after stitching.
Bind the Raw Edges
Once squared, apply binding to encase all three layers. You can use fabric from the backing, top, or a contrasting print. Binding finishes the quilt neatly and protects the raw edges from fraying.
Try Creative Alternatives
Make a Scrappy Backing
Don’t want to buy new fabric? Use leftovers from your stash. Piece together fat quarters, half-yards, or extra blocks from your quilt top. A scrappy backing adds color and texture while turning scraps into art.
Just ensure all pieces are securely sewn with 1/2 inch seams and pressed open. Avoid tiny scraps that might tear under stress.
Save Large Leftovers for Future Use
When piecing a two-panel backing, shift the seam off-center to leave one large leftover piece. This scrap can become binding, pillow covers, or future quilt blocks.
Centered seams give you two small scraps. Offset seams give you one big piece. Plan accordingly based on your future needs.
Cut Binding from the Backing
Want perfect color matching? Buy extra backing fabric and cut your binding strips from the same material. This creates a seamless look between the edge and the back of your quilt.
Frequently Asked Questions About Quilt Backings
What is the standard size for a quilt backing?
The standard formula is to add 8 inches total to your quilt top dimensions, or 4 inches per side. For example, a 60″ x 72″ quilt top needs a backing of at least 68″ x 80″. This overage accommodates shifting during basting and quilting.
Can I use a bedsheet for quilt backing?
Yes, but with caution. Bedsheets often have a lower thread count than quilting cotton and may not hold up as well over time. They also tend to shrink differently than the quilt top, which can cause distortion. If you use a sheet, pre-wash it thoroughly and test a small seam first.
How much extra fabric do I need for longarm quilting?
Most longarmers require at least 4 inches of extra backing on all sides, though some request more. Always contact your longarm quilter before cutting and confirm their specific overage requirements. Failing to provide enough backing can result in your quilt being rejected.
Should I pre-wash quilt backing fabric?
Pre-washing is highly recommended. It removes sizing, preshrinks the fabric, and prevents puckering after the quilt is finished. Wash and dry your backing using the same method you plan to use for the finished quilt.
What seam allowance should I use for quilt backing?
Use a 1/2 inch seam allowance when piecing backing panels. This is wider than the standard 1/4 inch quilting seam because backing seams bear more stress. The extra width provides better thread grip and reduces the risk of seam failure.
How do I match directional prints on the back?
The fold-and-sew method works best for directional prints. Cut one long strip, fold it in half with cut ends together, sew the side seam, then cut open the fold. This naturally aligns the pattern direction without complex math or pattern matching.
Key Takeaways for Making a Durable Quilt Backing
A strong, well-sized backing forms the foundation of every professional quilt. Choose quality cotton or 108-inch wide-back fabric for larger projects. Always add 8 inches of total overage to your quilt top dimensions. Use 1/2 inch seams for strength, trim selvages, and press seams open for a flat finish.
Select a construction method that matches your quilt size and skill level. The two-piece cut-and-sew works for most quilts, while the fold-and-sew method excels with directional prints. Don’t forget to baste the quilt sandwich securely before quilting to prevent shifting.
Your next step: Measure your quilt top, calculate your backing size using the formulas above, and choose your construction method. Cut your fabric, sew with 1/2 inch seams, and press everything flat. Your quilt will lie smoother, quilt more easily, and last for generations to come.

