
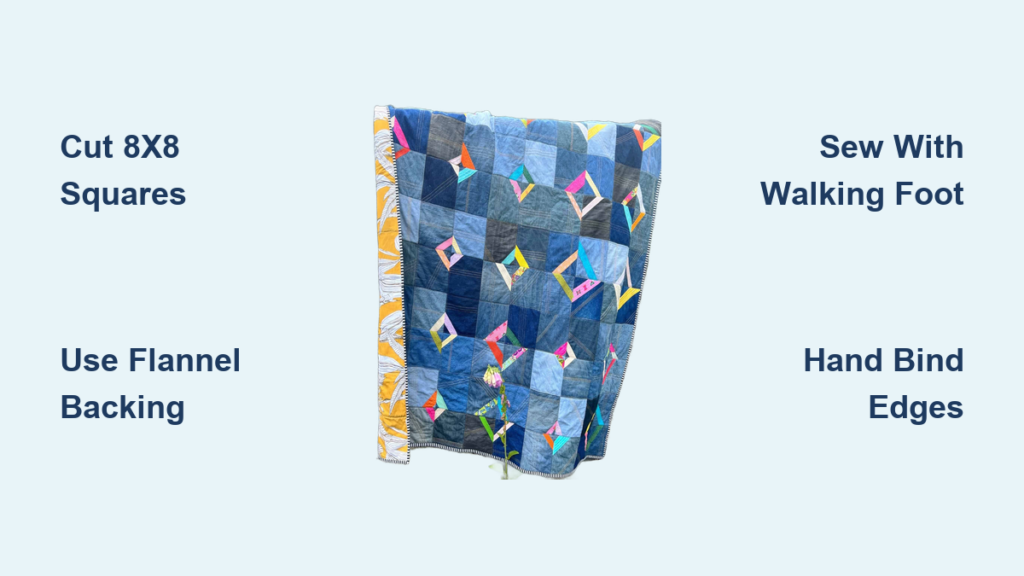
Few things blend nostalgia, sustainability, and comfort like a handmade denim quilt. These heavy, cozy textiles transform old jeans into durable, heirloom-quality blankets perfect for chilly nights, picnics, or even pet beds. The weight of the denim gives a comforting, grounding feel, while the soft flannel backing adds plush warmth. More than just a craft project, learning how to make a denim quilt means turning worn-out clothing into something beautiful and functional.
If you have ever wondered how to make a denim quilt, this guide walks you through every stage of the process. You will learn two main construction methods, plus expert tips on sourcing jeans, cutting fabric, layering, quilting, and adding personal touches like pockets and labels. By the end, you will know exactly how to turn 18 pairs of old jeans into a one-of-a-kind masterpiece.
Choose Your Quilt Construction Method

Square vs. Strip Construction
There are two primary ways to build a denim quilt: the patchwork square method and the strip method. Each has its own advantages depending on your time, tools, and design goals.
The square method uses uniform 8×8 inch pieces cut from jeans, arranged in a grid. It is ideal for achieving a classic quilt look and works well if you want to highlight color contrast. However, it requires more precision and cutting time.
The strip method uses 6-inch-wide strips cut from pant legs. It is faster, wastes less fabric, and allows for creative layouts like ombre gradients. Since strips follow the natural length of the leg, you get longer pieces with fewer seams.
For beginners, the strip method is often easier. For those who love symmetry and control over pattern, go with squares.
Rag Quilt Option
A third variation is the rag quilt, where seams are left exposed and frayed after washing. This creates a soft, textured edge with a cozy, lived-in feel. To make a rag quilt, sew pieces right sides together with a half-inch seam, then clip every quarter inch along the seam allowance before washing. After several washes, the edges will fluff up into a fuzzy fringe.
This style works best with tightly woven denim and flannel backing, as loose weaves may over-fray. It is a great choice if you want a softer drape and do not mind extra laundering.
Gather and Prepare Your Denim Materials
Source Jeans Efficiently
The foundation of your quilt is old jeans, ideally adult-sized for maximum fabric yield. Aim for 18 pairs for a queen-size quilt, giving you room to discard damaged areas like thin knees or worn-out backs.
The cheapest and most sustainable source is garage sales. You can often buy jeans for $1 or less per pair. Thrift stores work too, but prices may be higher. Look for a mix of washes including dark indigo, medium blue, light fade, and black denim. This range adds depth and visual interest.
Avoid jeans with heavy distressing, holes, or excessive stretch, as these weaken the structure. Save sentimental pairs, like a child’s first jeans or a loved one’s favorite pair, for focal points in memory quilts.
Wash and Soften Denim
Before cutting, wash all jeans. This prevents shrinkage later and removes dirt, dyes, and stiffness. For extra softness, soak them in a brine solution made of one cup salt per gallon of water for 30 minutes before washing. This helps break down the fibers, giving your quilt a softer drape.
Dry completely, then inspect each leg. Discard any sections that are overly faded, stretched, or thin. These will not hold up during sewing or use.
Cut Fabric with Precision
Tools You Will Need
Use the right tools to make cutting fast and accurate:
- Rotary cutter and self-healing mat (or large floor space)
- Clear acrylic ruler (at least 12 inches)
- Thick paper template (cereal box or oak tag)
- Fabric marker or pen
A rotary cutter is essential for clean, straight cuts through multiple layers. If you do not have one, sharp scissors will work, but the process will be much slower.
Cut 8×8 Inch Squares

For the patchwork method, create a template from thick paper measuring 8×8 inches. This is the largest usable size from most pant legs.
Open each leg fully by removing the inseam. Lay the fabric flat, place the template, and trace. Butt edges together to minimize waste. Include original seams or pockets if they fit within the square, as these add character.
Leave at least 3/8 inch of fabric around any pocket to ensure it can be securely sewn later. Mark pockets you want to preserve.
One pair of jeans typically yields 4 to 6 usable squares, depending on size and wear.
Cut 6-Inch Strips

For the strip method, cut legs off at the crotch, then slice straight down the outer seam. You will get two long strips per leg.
Trim away knee sections if they are stretched or discolored. Aim for consistent 6-inch widths. These strips can vary in length; just sew them end-to-end to form rows.
This method is faster and uses fabric more efficiently, especially from shorter legs or kids’ jeans.
Sort and Count Pieces
Organize cut pieces into three piles: light, medium, and dark. This makes layout easier and ensures even color distribution.
For square quilts, count in groups of ten. Place a labeled scrap of paper (such as “10” or “20”) between stacks so you do not lose count.
Refer to standard quilt sizes:
- Queen: 11 squares wide by 12 rows equals 132 squares
- Full or Picnic: 9 by 12 equals 108 squares
- Strip Quilt: about 17 rows of 6-inch strips to reach 88 inches long
Assemble the Quilt Top
Sew Square Rows
Start by building rows. Arrange squares on the floor to preview your layout. Alternate shades for visual interest.
To sew:
- Place two squares right sides together.
- Use a 3/8-inch seam allowance.
- Sew with a denim needle (size 100/16) and strong thread.
- Chain piece by not lifting the presser foot between squares to save time.
After sewing a full row (11 for queen, 9 for full), press seams open or to one side. To reduce bulk, flip adjacent seam allowances in opposite directions so they nest when joining rows.
Join Rows with the Foursome Technique
Denim is heavy. Sewing all rows at once can overwhelm your machine. Instead, use the foursome method:
- Sew four rows together into a block (4 by 11 or 4 by 9).
- Repeat to make four blocks total.
- Join two blocks into a half-quilt.
- Join the other two.
- Finally, sew the two halves together.
Align nested seams carefully. Pin or clip intersections to prevent shifting. Give yourself plenty of space around the machine, as this quilt will be bulky.
Build Strip Rows
For the strip method, lay out strips in your desired order. Try a gradient from dark to light for an ombre effect.
Sew strips together into rows using a half-inch seam. Press all seams open to reduce bulk.
When adding the next row, stagger seams so vertical lines do not line up. This strengthens the quilt and avoids long, weak seam lines.
Once all rows are complete, sew them together horizontally. Press seams open again. Trim the top slightly larger than your final size, as you will square it later.
Prepare Backing and Batting
Choose Flannel Backing
The best backing for a denim quilt is thick flannel. Thin flannel will not support the weight and may tear over time.
Smart hack: Buy a queen-size flannel sheet set (around $39 at discount retailers). You get a flat sheet, fitted sheet, and pillowcases, which is more than enough fabric, often at a lower cost than buying 6 or more yards by the bolt.
Wash and dry the flannel before use to pre-shrink.
Skip the Batting
Traditional batting is optional in denim quilts. The combination of heavy denim and thick flannel provides enough warmth and weight. Omitting batting:
- Reduces bulk
- Makes machine quilting easier
- Speeds up assembly
If you want extra warmth, use a thin cotton or low-loft batting. Avoid thick or polyester blends, since they make the quilt stiff and hard to sew.
Layer and Baste the Quilt
Align All Three Layers
Work on a large, clean floor space.
- Lay the flannel backing face-up. Smooth out wrinkles.
- Place the quilt top face-down on top. Center it.
- If using batting, place it between the top and backing.
Smooth each layer from the center outward. Remove any folds or bubbles.
Baste to Prevent Shifting
Secure layers together so they do not move during quilting.
Option 1: Safety Pins
Use quilting safety pins every 3 to 4 inches across the quilt. Work in sections, smoothing as you go. This is the fastest method.
Option 2: Hand Basting
Use long stitches with thick thread or yarn. Start from the center and work outward. This is more secure but time-consuming.
Avoid spray basting, since adhesives may not hold well on denim and flannel.
Quilt the Layers Together
Machine Quilting with Straight Lines
Straight-line quilting is ideal for denim. It is fast, durable, and enhances the modern, rustic look.
Setup:
- Place your sewing machine in the center of a large table to support the quilt’s weight.
- Use a walking foot to feed thick layers evenly.
- Wear grippy quilting gloves for better fabric control.
Technique:
- Mark lines with masking tape spaced 1 inch apart.
- Align the presser foot with the tape edge.
- Use a long stitch length (3.5 to 4.0 mm).
- Roll the quilt into a log on the right side as you sew.
Move the tape after each pass to maintain even spacing.
Hand Tie for a Cozy Finish
Hand tying is a quick alternative to quilting. It adds texture and a vintage feel.
Steps:
- Cut 12-inch lengths of yarn (color-matched to the flannel).
- Tie knots at the four corners and center of each square or block.
- Use a darning needle to pull the yarn through all layers.
This method takes about 2.5 hours with two people and does not require a quilting frame.
Rag Quilt Stitching
For a rag quilt, sew all pieces together first with a half-inch seam. Then clip the seam allowances every quarter inch before washing. Use a rotary cutter or small scissors.
After washing and drying, the edges will fray into soft, fluffy ruffles. Repeat washing to enhance the effect.
Finish with Binding

Square Off the Edges
Before binding, trim the quilt into a clean rectangle.
- Spread it on the floor.
- Tape a string or ruler as a straight guide.
- Slide a cutting mat under the edge.
- Use a rotary cutter and ruler to trim excess backing and top fabric.
Do this on all four sides. This ensures even, professional-looking edges.
Apply Flannel Binding
Use flannel or denim for binding. Pre-wash it first.
Hand Binding Method (Recommended):
- Let the flannel backing extend 1 inch beyond the quilt top.
- Fold the flannel edge over half an inch.
- Fold it again over the denim edge (another half inch).
- Hand-sew with a ladder stitch to hide the thread.
This encases the raw denim completely and creates a soft, durable edge.
Machine Binding:
Use a double-fold binding tutorial. Lower your thread tension to prevent bunching on thick layers. Use matching bobbin thread to minimize visibility.
Add Personal Touches
Highlight Pockets and Tags
Preserve interesting pockets or brand tags in your design. Place them in the center or corners for visual impact.
Ensure each pocket has at least 3/8 inch of surrounding fabric for secure sewing. Reinforce with a second line of stitching.
Attach a Personal Label
Add a fabric tag with the recipient’s name, date, or a sweet message like “Made with Love from Dad’s Jeans.” You can sew on a store-bought label or make your own from cotton fabric.
Use fabric paint or iron-on letters for a custom look.
Troubleshoot Common Denim Quilt Issues
Fix Misaligned Seams
If seams do not match, it is likely due to bulk at intersections. Always nest seams by flipping one up and one down so they interlock before sewing.
Pin or clip the intersection and ease the fabric through slowly.
Prevent Machine Struggles
Denim is thick. If your machine skips stitches or jams:
- Use a denim needle (100/16 or 110/18)
- Lower the presser foot pressure if possible
- Sew slowly
- Use a walking foot to feed layers evenly
Avoid Binding Bunching
If the binding puckers, your thread tension is too high. Lower the upper tension and use matching bobbin thread. Roll the quilt tightly as you sew to reduce drag.
Reduce Fabric Waste
Maximize yield by:
- Butting templates edge-to-edge
- Using both pant legs fully
- Saving scraps for pot holders, patches, or string quilts
Even small pieces can be used in future projects.
Frequently Asked Questions About Making a Denim Quilt
How many pairs of jeans do I need to make a denim quilt?
For a queen-size denim quilt, you need about 18 pairs of adult jeans. This gives you enough fabric to discard damaged sections like thin knees or worn-out backs. For a full or picnic-size quilt, you can get by with slightly fewer pairs depending on the layout.
What is the best backing for a denim quilt?
Thick flannel is the best backing for a denim quilt. Thin flannel will not support the weight of the denim and may tear over time. A queen-size flannel sheet set is a cost-effective option that provides more than enough fabric.
Do I need batting in a denim quilt?
Batting is optional in a denim quilt. The combination of heavy denim and thick flannel provides enough warmth and weight on its own. Adding batting increases bulk and can make machine quilting more difficult. If you want extra warmth, choose a thin cotton or low-loft batting.
How do I soften stiff denim for a quilt?
Soak the jeans in a brine solution of one cup salt per gallon of water for 30 minutes before washing. This breaks down the fibers and gives your quilt a softer drape. Machine washing and drying the denim several times also helps soften the fabric.
Can I sew a denim quilt on a regular sewing machine?
Yes, you can sew a denim quilt on a regular sewing machine. Use a denim or heavyweight needle (size 100/16 or 110/18), sew slowly, and use a walking foot if available to feed the thick layers evenly. Place your machine on a large table to support the quilt’s weight.
How long does it take to make a denim quilt?
The time required depends on the method and your experience. A strip-method quilt is faster than a patchwork square quilt. On average, expect to spend several weekends on the project, including cutting, sewing, quilting, and binding. Hand tying takes about 2.5 hours with two people.
Key Takeaways for Your First Denim Quilt
Making a denim quilt is a rewarding project that combines sustainability with creativity. Start by sourcing 18 pairs of adult jeans from garage sales or thrift stores, then wash and soften them in a brine solution before cutting. Choose between the patchwork square method for a classic look or the strip method for faster assembly and ombre effects.
Use thick flannel as backing, skip the batting to reduce bulk, and quilt with straight lines using a walking foot. Finish with hand-bound flannel edges and add personal touches like original pockets and fabric labels. With patience and the right tools, you will create a durable, beautiful quilt that lasts for generations.
Gather your jeans, clear a large workspace, and start cutting your first squares or strips today.

