
Have you ever admired the soft, ruffled beauty of a yo-yo quilt and wondered how quilters create those charming rosettes? These textile treasures, also called “Suffolk puffs,” date back over a century and were especially popular during the 1930s and 1940s. Today, learning how to make a yo-yo quilt is a rewarding hand-sewing project that transforms simple fabric scraps into heirloom-quality pieces.
This guide walks you through every stage of the process, from selecting your first fabric to stitching your final quilt top. You’ll discover how to cut perfect circles, form smooth rosettes, and join them into a cohesive design. Whether you’re crafting a vintage-inspired scrap quilt or a personalized gift, you’ll gain the confidence to start stitching today.
Choose the Right Fabric for Your Yo-Yo Quilt

Start with Cotton Quilting Fabric
Cotton quilting fabric is the gold standard when learning how to make a yo-yo quilt. It cuts cleanly, holds a crease well, and stays put while you sew. Small prints like gingham, tiny florals, or polka dots work especially well because gathering accentuates the pattern, giving each rosette a lively, dimensional appearance.
If you’re new to the technique, skip slippery or tightly woven fabrics at first. Cotton helps you build confidence and consistency in your stitches.
Avoid Batiks and Tight Weaves
Batiks and tightly woven fabrics may look beautiful, but they create real challenges for hand-sewn yo-yos. Their dense threads make it hard to push the needle through multiple gathered layers, leading to hand fatigue and broken needles. Save these materials for machine appliqué projects instead.
Experiment with Silk and Flannel
Once you’ve mastered the basics, try silk for a luxurious drape and sheen. Silk slips easily, so use a yo-yo maker tool or clips to keep edges secure. For a cozy winter blanket, flannel adds softness and warmth, though it may fray more, so trim excess carefully.
Cotton lawn offers breathability for lightweight summer throws. Vintage scraps from feed sacks, old clothing, or heirloom textiles add nostalgic charm and sentimental value to any yo-yo quilt project.
Gather Essential Tools and Materials
Use Templates for Perfect Circles
Circular templates help you cut uniform yo-yo bases. A 5-inch template produces a 2.5-inch finished rosette, ideal for beginners. Sturdy materials like plastic, acrylic, or cardboard work well, and household items like jar lids, coasters, or small bowls serve as backup options.
For precision and speed, try a rotary cutter with a circular template on a self-healing mat. A turntable mat helps rotate the fabric smoothly. Always cut 1/4 inch outside your traced line to allow for seam allowance.
Mark Circles Clearly
Trace your template onto the right side of the fabric using a chalk marker, pencil, or white removable pen. The Clover white pen shows up well on dark fabrics and fades cleanly after washing.
Space circles about 1/2 inch apart on your fabric to maximize yardage without crowding your cuts.
Select the Best Needle and Thread
Hand quilting thread is thicker and stronger than regular thread, resisting breakage when you pull gathers tight. If quilting thread isn’t available, double your all-purpose polyester thread (two strands) for added durability.
Cut an 18-inch working length from a yard of doubled thread. This length completes about four yo-yos before re-threading. Keep small embroidery scissors handy for trimming threads and WonderClips for holding folded edges when needed.
Cut and Prepare Your Fabric Circles
Trace and Cut Efficiently
Place your template on the right side of the fabric and trace around it with your marking tool. Repeat, spacing each circle by 1/2 inch to allow for cutting clearance.
Cut out each circle, going 1/4 inch beyond the traced line. This extra margin ensures enough fabric to fold under neatly during stitching.
Speed Up with Rotary Cutting
For large batches, use a rotary cutter with a circular guide. Secure the fabric on a cutting mat and rotate it against the blade. This method is faster but requires care to avoid finger injuries. Always use a protective template and keep your fingers clear of the blade.
Form Perfect Yo-Yos with Running Stitches
Fold and Stitch the Edge
Thread your needle with quilting thread or doubled polyester thread and knot the end securely. Bring the needle up from the wrong side at the edge of the circle.
Fold about 1/4 inch of the raw edge to the wrong side, aligning it with your traced line. Insert the needle through both the folded edge and the base layer to anchor the fold.
Take long running stitches, about 3/4 inch to 1 inch long. These gather faster and create a more attractive, open rosette than short stitches. As you sew, continue folding the edge under with your finger.
Pro Tip: Experienced sewers often skip the traced line and fold by feel. Beginners should use the guide for even results.
Pull and Gather into Rosettes
Once you’ve stitched all the way around and returned to the start, gently pull the thread tail. The fabric will draw inward, forming a rosette shape.
Pull slowly to avoid breaking the thread. Keep the right side of the fabric facing out and the folded edges turning inward.
Secure and Finish Each Yo-Yo
Pull until the folded edges meet in the center, leaving a small hole. Even out the gathers so they’re evenly spaced around the circle.
Press the folds gently with your fingers. Secure the thread with three backstitches through the base, then tie a firm knot. Trim excess thread and re-knot before starting the next yo-yo.
Plan Your Quilt Layout and Design
Sketch Your Arrangement
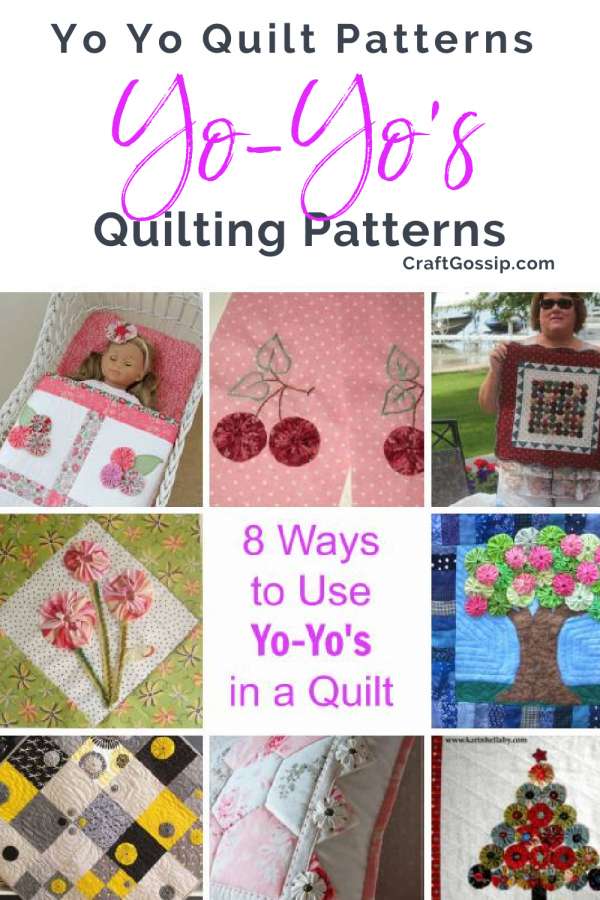
Lay finished yo-yos on a flat surface to design your quilt top before sewing. Try a random scrap pattern for vintage charm, color gradients for a modern touch, or structured designs like “Simple Star” or “Basic Grid” for beginners.
Take a photo to remember your arrangement before assembly.
Match Template to Finished Size
Remember that finished diameter equals roughly half the cut circle. A 5-inch cut circle produces a 2.5-inch finished yo-yo. For a 2-inch finished yo-yo, start with a 4.5-inch circle.
Beginners should aim for 2 to 4-inch finished sizes, large enough to handle easily yet small enough to keep projects manageable.
Adjust Stitch Length for Style
Short stitches (3/8 inch) create more gathers and a tighter center but take longer to make. Long stitches (3/4 to 1 inch) produce fewer gathers, faster stitching, and a cleaner look. Most quilters prefer longer stitches for both speed and visual appeal.
Assemble Yo-Yos into Rows
Join Yo-Yos with Whipstitch
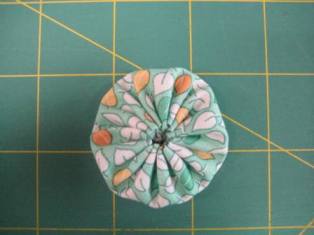
Place two yo-yos back to back with gathered sides touching. Use a whipstitch to sew along the shared edge.
Insert the needle from the back of one yo-yo, over the edge, and into the back of the next. Take 3 to 4 stitches per connection.
Pro Tip: Place a pin through the center of each yo-yo before stitching to prevent shifting and maintain alignment.
Backstitch at the start and end of each seam. Add a knot for extra security.
Build Full Rows
Continue adding yo-yos until you complete a full row. Keep tension consistent, tight enough to hold but loose enough to allow flexibility.
Lay rows flat and check for straightness. Adjust with pins if needed before moving to the next step.
Connect Rows into the Finished Quilt Top

Sew Rows Together Seamlessly
Once all rows are complete, join them side by side using the same whipstitch method. Match connection points carefully across rows.
Work slowly at this stage because it defines your quilt’s structure. Use center pins to align yo-yos across rows for a polished result.
Try the Ladder Stitch for a Cleaner Look
For a nearly invisible seam, use a ladder stitch (also called a slip stitch). This creates a flatter, more polished joint between yo-yos, ideal for display quilts and heirloom pieces.
While slightly slower than whipstitch, the ladder stitch is worth the effort when you want a refined finish.
Finish the Quilt with Backing and Binding
Pre-Wash Before Binding
Wash the assembled yo-yo top before final assembly. Fabric shrinks slightly during the first wash, which helps even out tension and prevents warping later.
Air dry flat to maintain shape. Once dry, press gently if needed.
Sandwich and Bind the Quilt
Now treat your yo-yo top like a traditional quilt:
- Layer with batting and a backing fabric
- Baste layers together
- Quilt by hand or machine, or tie at yo-yo centers for a rustic look
- Bind the edges with bias tape or a fabric strip
Alternative: Sew yo-yos directly onto a foundation fabric first, then layer with batting and backing.
Troubleshoot Common Yo-Yo Quilt Problems
Stop Yo-Yos from Flaring Open
If rosettes flare or won’t lie flat, the issue is usually loose stitching or weak thread. Switch to stronger thread (quilting or doubled polyester) and consider using a ladder stitch for tighter seams. Ensure you pull gathers firmly and secure knots well.
Avoid Thread Breakage
The most common failure when learning how to make a yo-yo quilt is thread snapping during gathering. Prevent this by using hand quilting thread, doubling regular thread, not pulling too hard, and keeping thread lengths under 18 inches.
Keep Sizes Uniform
Freehand cutting leads to mismatched yo-yos. Use a rigid template or Clover yo-yo maker for consistent sizing. These tools ensure every circle is identical, making assembly much easier.
Explore Creative Uses Beyond Traditional Quilts
Make Hair Accessories
Glue a single yo-yo to a barrette or hair clip for a sweet, handmade accessory. This works great for kids or vintage-inspired styles. Use silk or cotton with playful prints like polka dots, animals, or florals.
Embellish Garments
Sew yo-yo rows along shirt plackets, cuffs, or dress hems. They add texture and whimsy to blouses, aprons, or children’s wear. Secure with tight hand stitches or a machine zigzag for durability.
Craft Home Decor
Create pillow covers by attaching a grid of yo-yos to a backing fabric. Arrange yo-yos in a long rectangle for festive table runners. Frame a small cluster as textile wall art for a unique decorative piece.
These smaller projects let you practice the technique without committing to a full quilt.
Build a Lasting Heirloom
Choose Sentimental Fabrics
Advanced quilters often curate fabrics with meaning, such as a grandmother’s apron, a wedding dress, or vintage feed sacks. These textiles tell a story and turn a quilt into a legacy piece.
Wash and press old fabrics gently before cutting.
Adapt for Seasonal Use
Use flannel for winter warmth and weight. Choose cotton lawn for summer lightness and breathability. This makes your yo-yo projects both beautiful and functional year-round.
Enjoy the Process
Yo-yo quilting is slow, meditative, and deeply satisfying. An experienced sewer makes one yo-yo in 10 to 15 minutes. A full quilt takes time, but every stitch adds character.
Let go of perfection. Slight variations give handcrafted charm. Focus on consistency, not flawlessness.
Frequently Asked Questions About Yo-Yo Quilts
What size should I cut my fabric circles for a yo-yo quilt?
Your template should be twice the desired finished diameter plus 1/2 inch for seam allowance. A 5-inch template produces a 2.5-inch finished yo-yo, while a 4.5-inch circle yields a 2-inch finished rosette. Beginners should aim for 2 to 4-inch finished sizes.
Can beginners learn how to make a yo-yo quilt easily?
Yes, yo-yo quilting is beginner-friendly. Start with cotton quilting fabric, simple patterns like “Basic Grid” or “Simple Star,” and a 5-inch template. The technique requires only a running stitch and basic whipstitching to assemble.
What thread works best for gathering yo-yos?
Hand quilting thread is the top choice because it’s thicker and resists breaking under gathering tension. Alternatively, use 100% polyester thread doubled to two strands. Cut an 18-inch working length to complete about four yo-yos before re-threading.
Should I wash my yo-yo quilt before binding it?
Yes, pre-wash the assembled yo-yo top before final assembly. Fabric shrinks slightly during the first wash, which helps even out tension and prevents distortion. Air dry flat to maintain shape, then layer with batting and backing.
How long does it take to make a yo-yo quilt?
An experienced sewer completes one yo-yo in about 10 to 15 minutes. A full quilt requires hundreds of yo-yos and significant assembly time, so plan for a long-term project. Start with a small pillow cover or table runner if you want quicker results.
Can I use fabric scraps to make a yo-yo quilt?
Absolutely. Yo-yo quilts originated as scrap quilts during the 1930s and 1940s, when makers used feed sack fabrics and clothing remnants. Small prints like florals, gingham, and polka dots work especially well because gathering highlights the pattern details.
Key Takeaways for Making Your First Yo-Yo Quilt
Learning how to make a yo-yo quilt connects you to over a century of resourceful makers who transformed scraps into treasured heirlooms. Start with cotton fabric, strong doubled thread, and a simple template. Master the running stitch and gather technique before moving on to assembly.
Your first project doesn’t need to be perfect. Gather your materials today, cut a few circles, and stitch your first rosette. With patience and practice, you’ll soon have a collection of yo-yos ready to join into something beautiful.

