
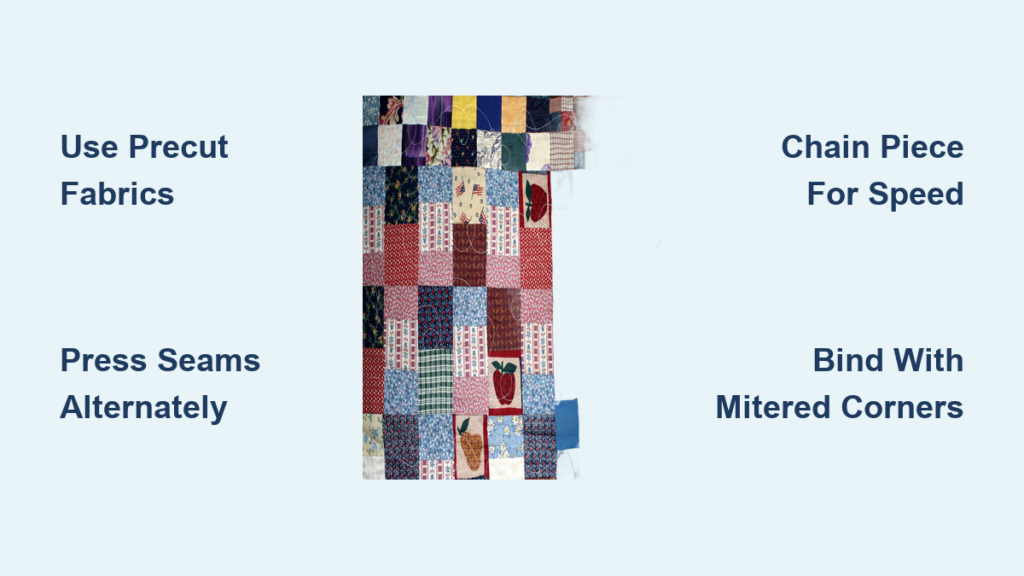
You’ve spotted them draped over armchairs, folded at the foot of beds, and tucked into baby cribs. Those colorful, stitched-together blankets look like heirlooms, but learning how to make a patchwork quilt is far easier than most people imagine. With precut fabric packs, a sewing machine, and a few simple techniques, you can stitch a finished throw in a single day. The whole process breaks down into four stages: sew squares into rows, join the rows, quilt the layers, then bind the edges.
This guide walks you through every step with clear instructions you can follow at your own pace. You’ll discover which precut packs save the most time, how to press seams so intersections match perfectly, and how to finish raw edges with professional-looking binding. No advanced math, no complicated templates, no special equipment. Just squares, thread, and a little patience. Let’s turn simple fabric into something warm, personal, and built to last.
Pick Beginner-Friendly Precut Fabrics
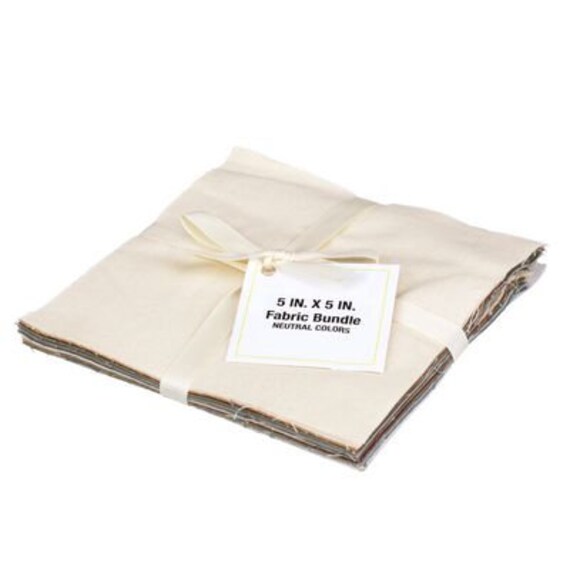
Use Precut Packs to Skip the Cutting
The fastest path to a finished quilt starts with precut fabric. These factory-cut bundles arrive perfectly sized and color-coordinated, removing the guesswork from fabric selection. Three popular options cover nearly every project size:
- Charm Packs (5″ squares): Contain about 42 squares with 20+ different prints. Two packs yield 81 squares, enough for a 40.5″ x 40.5″ baby quilt.
- Layer Cakes (10″ squares): Include roughly 40 squares measuring 10″ x 10″. One pack is ideal for lap quilts or larger throws.
- Cheater Panels: Pre-printed fabric sheets that mimic pieced designs. Cut along the dotted lines for ready-to-sew squares that add visual scale.
Precuts cost less than buying 20 individual fat quarters and guarantee coordinated colors across your quilt.
Skip Pre-Washing to Protect Square Edges
Modern quilting cottons rarely bleed, so pre-washing is unnecessary. In fact, washing precut squares causes serious problems. The factory-cut pinked edges will fray and distort, ruining the precision you paid for. Instead, toss a Shout Color Catcher sheet into the first wash of your finished quilt to trap any loose dye safely.
Gather Thread, Tools, and Notions
Stock the Right Sewing Supplies
Before you thread your machine, gather these essentials:
- 50wt cotton thread: Strong enough for durable seams without adding bulk.
- Quarter-inch presser foot: Guarantees accurate seam allowances throughout the project.
- Rotary cutter, self-healing mat, and acrylic ruler: Needed only if cutting custom squares.
- Design wall or large flat surface: A bed, floor, or flannel-backed board lets you arrange the full layout before sewing.
- Lint roller: Pinked precut edges shed lint during sewing, so keep your workspace clean.
Take a Photo of Your Layout
Once you arrange squares on your design surface, snap a picture with your phone. If the layout gets disturbed by a curious pet or a clumsy elbow, you can rebuild the exact pattern in minutes.
Plan Your Quilt Size and Layout
Match Square Size to Finished Dimensions
Your final quilt size depends on square dimensions and grid layout. Remember that finished blocks measure half an inch smaller than cut squares because of seam allowances. The table below shows common configurations:
| Cut Size | Finished Size | Grid Layout | Approx. Quilt Size | Best For |
|---|---|---|---|---|
| 4″ | 3.5″ | 20 x 20 | 70″ x 70″ | Bed quilt |
| 5″ | 4.5″ | 9 x 9 | 40.5″ x 40.5″ | Baby quilt |
| 6.5″ | 6″ | 10 x 10 | 60″ x 60″ | Lap quilt |
| 10″ | 9.5″ | 12 x 10 | 114″ x 95″ | Large throw |
A 40.5″ baby quilt from two Charm Packs is the easiest weekend project for first-timers.
Balance Colors and Print Scale
Lay out every square before sewing a single seam. Aim for even distribution of three elements:
- Color: Mix warm tones, cool tones, and neutrals across the grid.
- Print scale: Alternate large florals with small geometrics for visual rhythm.
- Value: Spread lights, mediums, and darks evenly to avoid clumping.
Step back and squint at your design. If similar tones cluster together, rearrange until the values blend smoothly.
Cut and Organize Squares for Sewing
Cut Accurate Squares If Skipping Precuts
When cutting from yardage, precision matters. Follow these steps:
- Place fabric on the self-healing mat, aligning the grain with grid lines.
- Cut one straight edge with the rotary cutter.
- Slice the fabric into even strips of your chosen width.
- Cut across the strips to form perfect squares.
Measure one square with the ruler to confirm accuracy before cutting the rest.
Stack Rows to Preserve Order
After finalizing your layout, organize squares into numbered row stacks. Place the leftmost square on top of each stack, then add the next square underneath. This stacking method keeps the sequence intact when you carry stacks to the sewing machine.
Sew Squares into Rows Using Chain Piecing
Maintain a Consistent Quarter-Inch Seam
Accuracy starts with the seam allowance. Test your quarter-inch foot on scrap fabric first, then sew with right sides together throughout. Consistent seams keep your grid aligned when rows meet.
Chain Piece for Speed and Efficiency
Chain piecing lets you sew multiple units without cutting threads between them. Follow this process:
- Feed the first pair of squares through the machine.
- Add the next pair without cutting the thread tail.
- Continue feeding pairs until the row is complete.
- Clip the threads between units afterward.
This technique saves time, thread, and frustration.
Build Each Row Left to Right
Work through each row systematically:
- Sew Square 1 to Square 2, then open the pair flat.
- Pin Square 3 to the open right edge of Square 2.
- Sew and open, then add Square 4 the same way.
- Continue until all squares in the row are joined.
Repeat for every row before moving to the next step.
Press Seams for Flat, Aligned Intersections

Press Seams to the Side in Alternating Directions
Never press patchwork seams open. Instead, use directional pressing to create nesting seams:
- Odd-numbered rows: Press all seams to the left.
- Even-numbered rows: Press all seams to the right.
When you join rows later, the pressed allowances butt together like puzzle pieces, locking intersections in place.
Flatten Every Row From Both Sides
After pressing seams to the side, flip the row over and press from the right side. This removes puckers and creates sharp, flat corners. Repeat this two-sided pressing after every sewing step, including joining pairs, completing rows, and assembling sections.
Assemble the Quilt Top in Manageable Sections
Match Nested Seams When Joining Rows
Place Row 1 and Row 2 face to face. The seam allowances should interlock where the squares meet. Pin at each intersection to prevent shifting, then sew with a quarter-inch seam. Repeat for all row pairs.
Sew in Pairs to Control Bulk
Large quilts grow heavy fast. Prevent tangles by breaking the assembly into stages:
- Sew rows in pairs (Row 1+2, Row 3+4, Row 5+6).
- Join pairs into quadrants (Rows 1–4, Rows 5–8).
- Sew quadrants together to complete the top.
This sectioning strategy keeps the project manageable under your machine’s arm.
Layer, Baste, and Quilt the Three Layers

Build the Quilt Sandwich
A finished patchwork quilt has three layers: the top, batting, and backing. Lay them out in this order:
- Spread the backing fabric face down on a clean surface.
- Center the batting on top of the backing.
- Place the quilt top right side up over the batting.
- Smooth wrinkles outward from the center.
The backing should be at least two inches larger than the top on every side.
Baste Layers to Prevent Shifting
Choose one of two basting methods:
- Safety pins: Insert curved basting pins every three to four inches across the surface.
- Spray baste: Lightly mist adhesive between layers in a ventilated space.
Both methods hold the layers steady during quilting.
Quilt with a Walking Foot
A walking foot feeds thick layers evenly through your machine, eliminating puckers. For a simple grid effect, stitch a quarter inch to the left and right of every patchwork seam. This outlines each square and reinforces the seams. For more texture, try a serpentine stitch set to the widest width with a length of three.
Hand quilting, tying knots with yarn, or sending the quilt to a long-arm service are all valid alternatives.
Bind the Edges for a Clean Finish
Trim Excess Batting and Backing
After quilting, use a rotary cutter and ruler to trim all three layers. The edges should align perfectly with the quilt top, creating straight, even borders ready for binding.
Cut and Join Binding Strips
Prepare double-fold binding with these steps:
- Cut four strips of fabric, each 2.5″ wide and the full width of the fabric.
- Sew the strips end-to-end to form one long continuous strip.
- Fold the strip in half lengthwise with wrong sides together, then press.
The result is a 1.25″ wide double-layer binding ready for attachment.
Attach Binding With Mitered Corners
Align the raw edges of the binding with the raw edge of the quilt. Sew with a quarter-inch seam, stopping a quarter inch before each corner. At each corner, fold the binding up at a 45-degree angle, then fold it back down to meet the next side. Continue sewing around the quilt, then fold the binding to the back and hand stitch in the ditch for an invisible finish.
Avoid Common Patchwork Mistakes

Distribute Color Evenly Across the Grid
Color clumping ruins otherwise beautiful quilts. Spread lights, mediums, and darks across the entire layout before sewing. Use your phone photo to verify balance, and rearrange until the values blend smoothly across the design.
Fix Misaligned Seams With Re-Pressing
If rows don’t match when joined, check your pressing direction first. Odd rows should press left, even rows should press right. Re-press any seams that point the wrong way, then pin intersections carefully before sewing. Small alignment errors often disappear in the finished quilt because patchwork patterns are naturally forgiving.
Never Pre-Wash Precut Squares
This rule bears repeating. Pre-washing causes pinked edges to fray and distorts the precision cuts. Trust modern quilting cottons and use a color-catcher sheet during the first wash instead.
Care for Your Finished Patchwork Quilt
Wash Gently for Long-Term Durability
Treat your finished quilt with care to preserve its beauty:
- Wash every few months using mild detergent.
- Add a color-catcher sheet to the first wash.
- Dry on low heat or lay flat to prevent shrinkage.
Quilts grow softer with every wash, developing that beloved, well-loved feel over time.
Store Folded to Avoid Crease Damage
Fold your quilt for storage rather than rolling it. Rolling creates permanent creases that weaken fibers over decades. Store in a cool, dry space away from direct sunlight to prevent fading.
Repurpose Leftover Squares
Save every scrap for future projects. Small squares work beautifully for pillow tops, coasters, mini quilts, and patchwork bags. Over time, these leftovers build a “scrap mountain” ready for the next creative burst.
Frequently Asked Questions About Patchwork Quilts
How long does it take to make a patchwork quilt?
A small baby quilt from two Charm Packs can be finished in a single day. Lap quilts and larger throws typically take a weekend, depending on your sewing speed and how much time you spend on layout and quilting.
What size squares are best for a beginner patchwork quilt?
Five-inch squares from Charm Packs are the most beginner-friendly option. They sew together quickly, create a classic look, and require minimal fabric coordination. Two packs provide enough squares for a 40.5″ baby quilt.
Do you need to pre-wash precut fabric squares?
No. Pre-washing precut squares causes the pinked edges to fray and distort. Modern quilting cottons are color-safe, so pre-washing is unnecessary. Use a color-catcher sheet during the first wash of the finished quilt for extra protection.
How do you keep seams aligned when joining rows?
Press seams in alternating directions. Odd-numbered rows press left, even-numbered rows press right. This creates nested seams that butt together perfectly when rows meet. Pin at every intersection before sewing to prevent shifting.
What is the easiest binding method for a patchwork quilt?
Double-fold binding made from 2.5″ wide fabric strips is the simplest method. Sew the binding to the front, fold it to the back, and hand stitch in the ditch for an invisible finish. Mitered corners create a clean, professional look.
Can you mix flannel and cotton in a patchwork quilt?
Yes. Mixing flannel and cotton works well for patchwork quilts. Flannel adds softness and warmth, while cotton provides structure. Just remember that flannel shrinks more than cotton, so pre-wash flannel yardage before cutting if mixing fabric types.
Key Takeaways for Finishing Your First Patchwork Quilt
Learning how to make a patchwork quilt comes down to mastering a few core skills: cutting or selecting accurate squares, sewing consistent quarter-inch seams, pressing in alternating directions, and binding the edges cleanly. Precut fabric packs eliminate the hardest part for beginners, while chain piecing and section sewing keep the project moving quickly.
Start with a small baby quilt from two Charm Packs to build confidence before tackling larger projects. Focus on accurate seam allowances and proper pressing, because these two habits determine whether your finished quilt looks handmade or professional. Once you complete your first quilt, the techniques transfer directly to bigger throws, bed quilts, and gift projects for years to come.
Your next step? Gather two Charm Packs, a quarter-inch foot, and a spool of 50wt cotton thread. Lay out your squares on a flat surface, snap a photo for backup, and start sewing. Your first patchwork quilt is closer than you think.

