
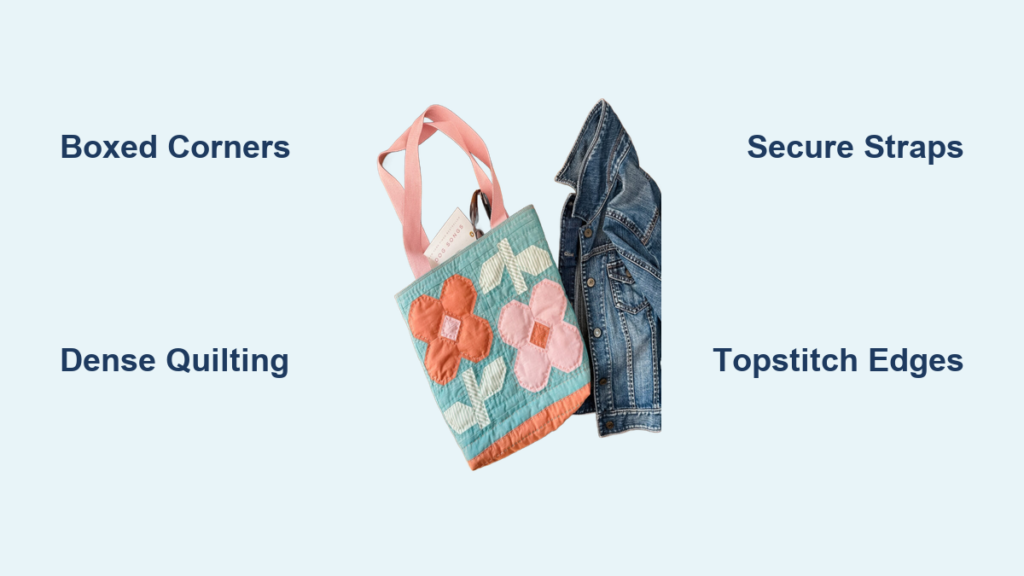
That vintage quilt block tucked away in your linen closet deserves a second life. Turning treasured fabric into a quilt tote bag lets you carry memories, style, and function in one handmade piece. Whether you’re rescuing a sentimental heirloom or designing fresh patchwork, this project transforms flat fabric into a daily companion.
In this guide, you’ll learn how to size panels correctly, quilt for lasting strength, attach straps that won’t quit, and finish seams with a polished look. By the end, you’ll have a quilt tote bag that stands up to groceries, books, and beach days while showcasing your craftsmanship.
Choose the Right Size for Your Quilt Tote Bag
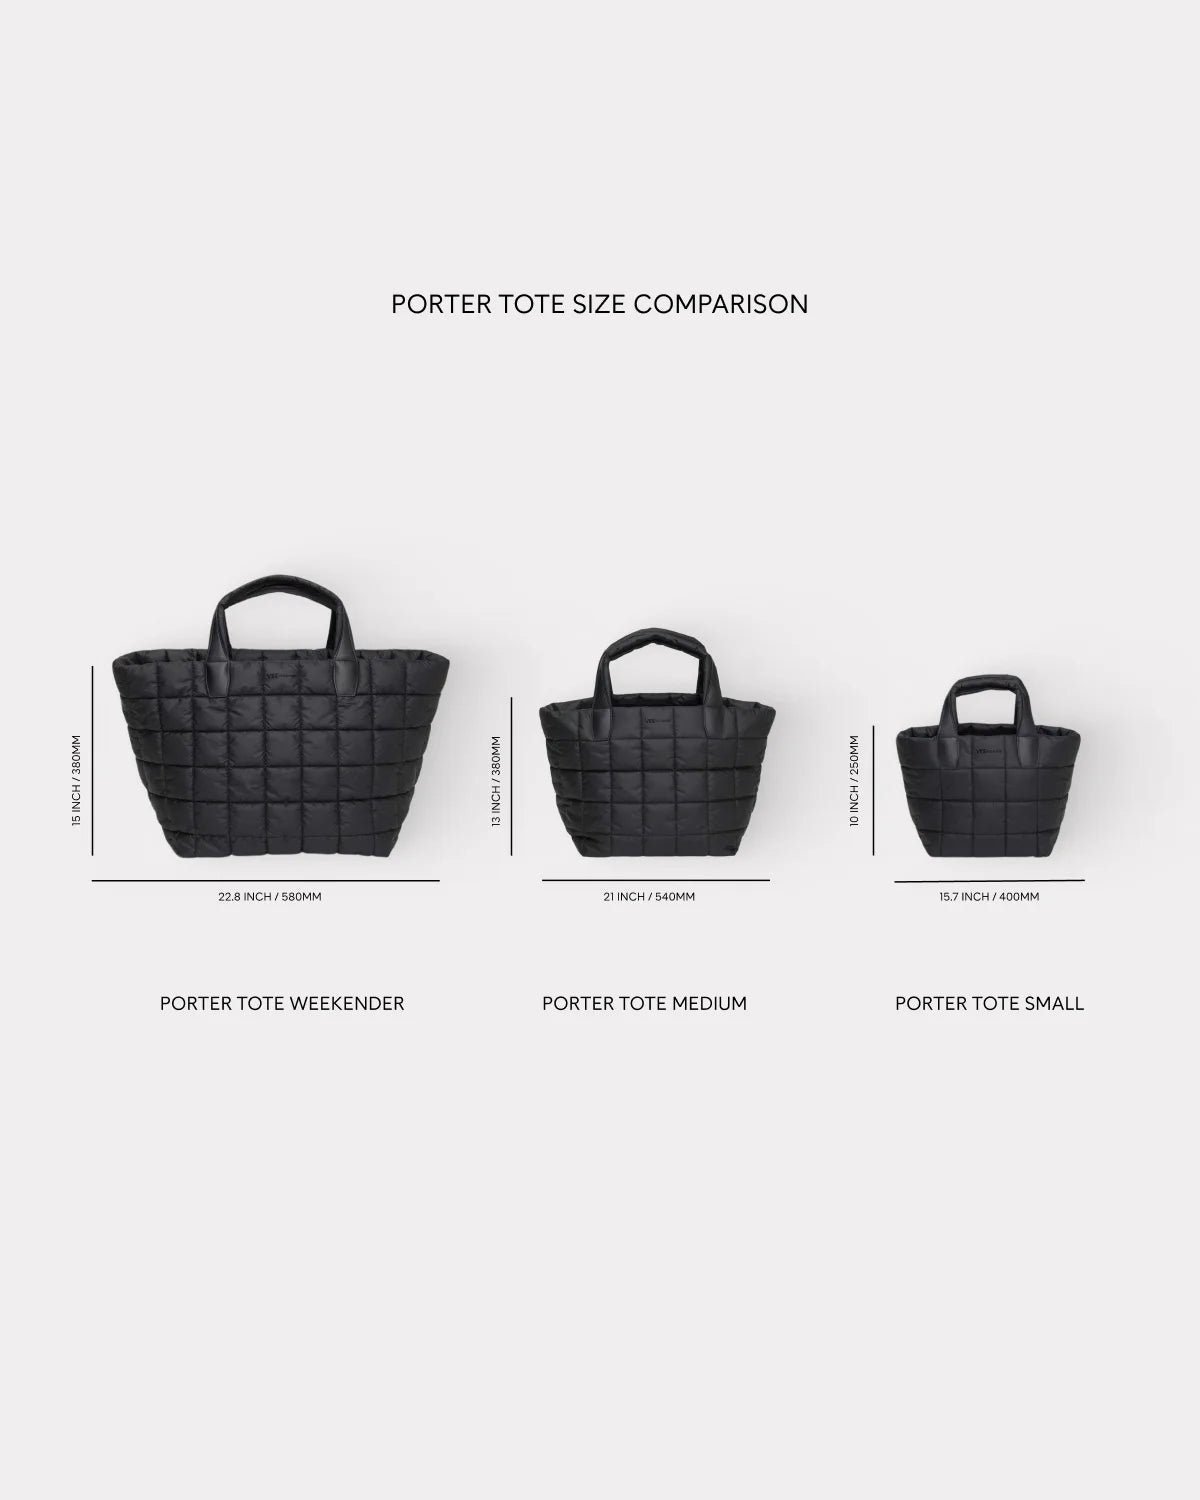
Standard Medium vs. Large Capacity Options
Most quilt tote bags fall into two practical categories. A medium bag with 13″ x 13″ x 4″ finished dimensions works beautifully for daily errands, library trips, or market hauls. To hit this size, cut your exterior and lining panels at 16 ½” square to allow room for seam allowances and boxed corner depth.
For a roomier tote that handles beach towels or farmers market finds, scale up significantly. Some sewists build bags reaching 26″ tall by adding a separate bottom panel in denim or canvas. This extension protects the quilted portion from ground wear, which matters most when upcycling delicate vintage fabric.
Boxed Corners for a Structured Bottom
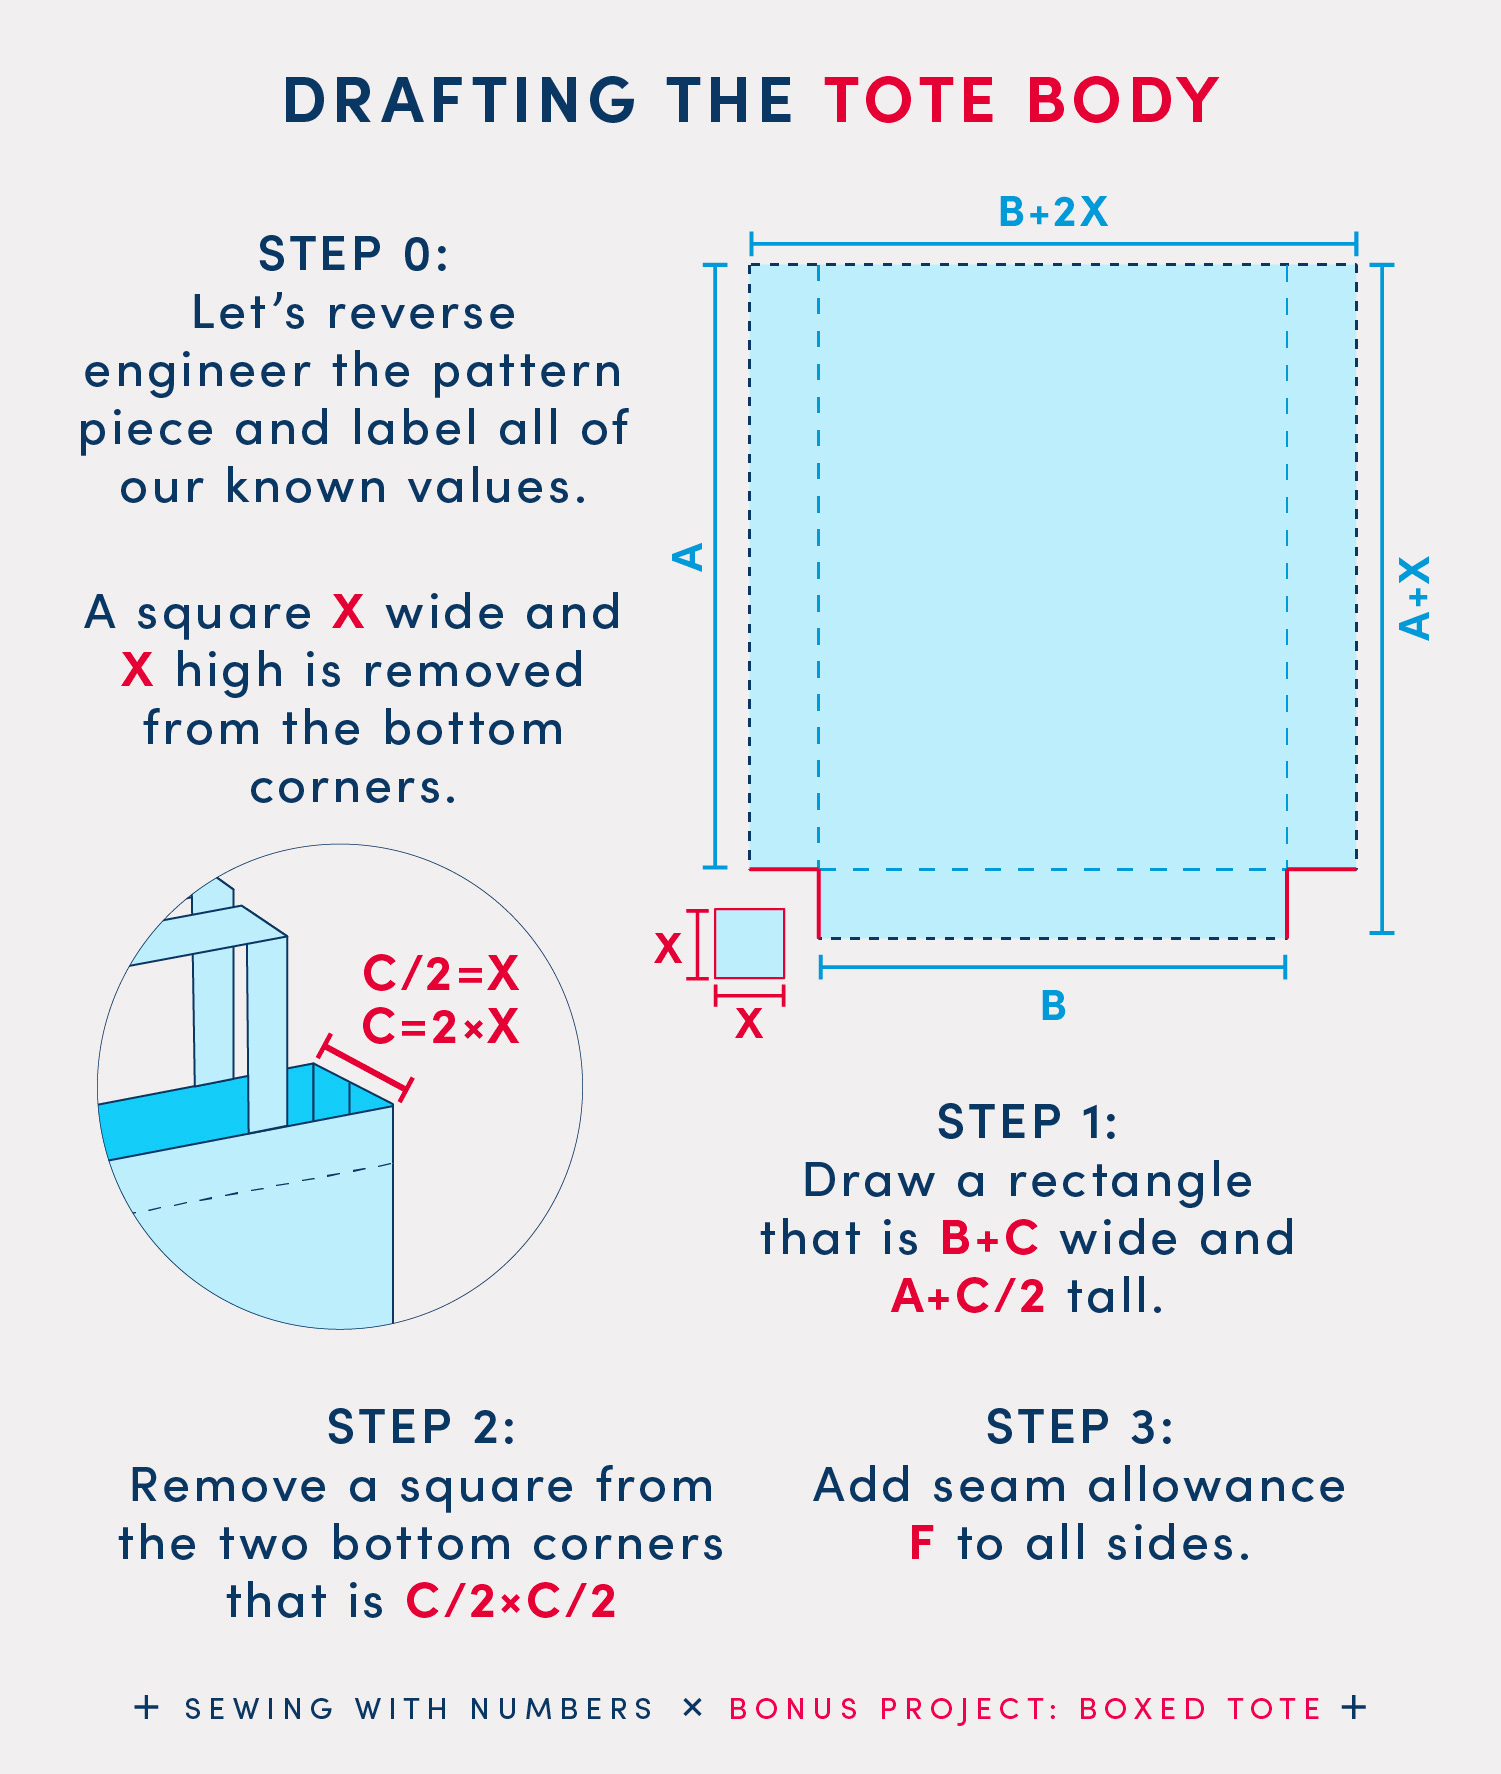
Every dimensional tote relies on boxed corners to create that flat, stable base. To produce a 4″ deep bag, cut 2″ squares from the bottom corners of both exterior and lining pieces before sewing them shut. Larger designs may use 4″ cutouts for extra volume.
Mark each corner clearly with a Hera marker before sewing. Misalignment here causes wobbly bottoms and uneven sides. This single technique transforms flat panels into a 3D bag that sits upright on countertops and tables.
Gather Materials and Tools
Fabric Requirements by Layer
A well-built quilt tote bag needs four core components working together.
- Exterior Panels (2): Source quilt blocks at least 16 ½” square, repurpose vintage sections, or assemble patchwork from scratch.
- Lining Panels (2): Choose coordinating cotton or durable poplin, cut to match your finished exterior dimensions exactly.
- Batting (2 to 4 pieces): Cut 2″ larger than fabric panels (such as 18 ½” for a 16 ½” project) to absorb shrinkage. Low-loft cotton or cotton blends offer the best structure.
- Bottom Reinforcement (Optional): For heavy-duty bags, attach 26″ x 7″ denim or canvas strips beneath the quilted panels.
Strap Options: Webbing vs. Self-Fabric
Pick your strap style based on strength needs and aesthetic goals.
- Webbing Straps: Cut two 28″ lengths of 1 ½” wide poly webbing. These offer industrial strength and beginner-friendly installation.
- Self-Fabric Straps: Cut two 2″ x 24″ strips from your main fabric. Fold, sew, turn, and press for a seamless, integrated look.
A walking foot prevents layer shifting when sewing through thick straps. Always backstitch at stress points where straps meet the bag body.
Essential Sewing Tools
- Rotary cutter and mat: Delivers clean, precise cuts every time.
- Walking foot: Stops fabric layers from shifting during quilting.
- Size 24 Chenille needle: Handles hand quilting through multiple layers.
- Fabric clips: Hold bulky seams without distorting fabric like pins can.
- Hera marker or chalk: Marks quilting lines and center placement points.
- Iron: Press after every single step for accuracy and crisp edges.
Fabric clips outperform pins for thick quilted sections. They grip better and won’t bend needles.
Prepare Quilt Blocks for Your Tote Panels
Assess Vintage Quilt Sections Carefully
Before cutting into a vintage quilt, inspect the fabric thoroughly. Look for stains, thinning areas, and weak seams. Choose the most intact, visually striking section for your bag’s front panel. Vintage cotton often holds up well, but always test for colorfastness before any washing.
Pre-wash only if absolutely necessary. Gentle hand-washing protects fragile historic fibers. Always air dry flat to prevent warping or distortion.
Size Up Small Quilt Blocks
Got a favorite 13 ½” block but need a 16 ½” panel? Add fabric strips to expand it.
- Sew 1 ¾” x 13 ½” strips to the left and right edges of the block.
- Attach a 3 ½” high horizontal strip to the bottom.
- Press seams toward the added fabric to reduce bulk.
- Trim the final assembly to exact size using a rotary cutter and ruler.
Repeat this process for the back panel so both sides match. This method preserves the original block’s character while adapting it to modern tote proportions.
Assemble Patchwork Panels from Scratch
Want to design your own pattern? Try the classic pinwheel.
- Pair 5″ squares (one contrast, one neutral), sew ¼” on both sides of a diagonal line, cut apart, and press open to create Half-Square Triangles.
- Trim each HST to 4″ using a square ruler aligned with the seam.
- Arrange four trimmed HSTs into a pinwheel formation. Sew top two together, bottom two together, then join the rows.
- Add sashing by sewing 9″ strips of Main Color between blocks. Press seams away from the pinwheels.
- Attach Contrast Color strips to the center block sides, then connect all pinwheel sections.
Your final panel should measure roughly 12.5″ x 8.25″ before final trimming to fit your chosen tote size.
Quilt the Exterior Panels
Build the Quilt Sandwich
Stack your layers in this exact order from bottom to top.
- Backing fabric placed right side down
- Batting
- Exterior fabric placed right side up
Smooth each layer carefully to eliminate wrinkles. Use basting spray or safety pins every 3 to 4 inches to hold everything secure. Skip permanent sewing at this stage; basting is temporary.
Quilt with Dense, Even Stitches
Durability depends on quilting density. Keep stitches no more than 1″ apart throughout the panel.
- Hand Quilting: Use Aurifil Floss and a size 24 Chenille needle. Small, even running stitches add heirloom quality.
- Machine Quilting: Install a walking foot. Stitch in the ditch around blocks or quilt straight lines across the entire panel.
Dense quilting prevents batting migration and gives the tote body that holds shape under heavy loads.
Secure and Trim the Panels
After quilting, complete these final steps.
- Stitch around the entire perimeter with a 1/8″ seam to lock all threads.
- Trim the front panel to exact size (16 ½”) using a rotary cutter and ruler.
- Use the trimmed front as a template to cut the back exterior, front lining, and back lining to identical dimensions.
If adding denim reinforcement, attach 26″ x 7″ pieces to the bottom of quilted panels with a ½” seam, press toward the patchwork, then mark and trim 6″ below the seam for final length.
Attach Straps Securely

Install Webbing Straps
Webbing offers speed and serious strength for beginners.
- Find the center of the top edge on both exterior panels.
- Mark 3″ left and 3″ right of center for strap inner edges.
- Position webbing so it extends ½” above the raw edge.
- Clip in place, checking that no twists exist.
- Sew with a 1/8″ seam, backstitching 3 to 4 times at start and end.
The exposed ½” at the top gets enclosed in the final seam, anchoring the strap deep into the bag structure.
Make and Attach Self-Fabric Straps
For a seamless, traditional look, build your own straps.
- Cut two 2″ x 24″ strips from your main fabric.
- Fold lengthwise with right sides together, sew the long edge using a ½” seam.
- Turn right side out using a safety pin or turning tool.
- Press flat, then topstitch both long edges.
To attach, mark 2″ from each side on the top edge. Pin raw ends to the inside of the exterior panel, aligning with raw edges. Sew in a U-shape: down one side, across the top, up the other side. Pivot at corners and backstitch heavily at the base. Curving the strap slightly at the top improves shoulder comfort.
Assemble the Quilt Tote Bag Body
.jpg)
Sew the Exterior and Lining Shells
Work on each shell separately before joining them.
Exterior Shell:
– Place front and back panels with right sides together.
– Sew sides and bottom using a ½” seam.
– Trim side and bottom seams to ¼” to reduce bulk.
Lining Shell:
– Sew side seams starting at ½” at the top and easing to ⅝” at the bottom.
– Sew the bottom seam with ⅝”.
– Leave a 4″ to 7″ gap in the bottom seam for turning later.
– Trim only side seams to ¼”; leave the bottom untrimmed for strength.
Box the Corners for Depth
Transform flat panels into a 3D bag with these steps.
Exterior Corners:
1. Push out one bottom corner into a triangle shape.
2. Align side and bottom seams perfectly.
3. Draw a line 2″ from the point (or across the pre-cut square).
4. Sew across with a ½” seam.
5. Trim excess fabric to ¼”.
6. Repeat on the second corner.
Lining Corners:
– Follow the same process, but use a ⅝” seam allowance.
– This creates ease so the lining fits smoothly inside without pulling.
Trim both exterior and lining corners to ¼” before moving forward.
Join Exterior and Lining
Insert and Align for the Top Seam
- Turn the exterior shell right side out.
- Keep the lining shell wrong side out.
- Place the exterior inside the lining, so right sides face each other.
- Match side seams and align top raw edges perfectly.
- Clip every few inches to prevent shifting during sewing.
Sew and Turn the Bag
- Sew around the entire top edge with a ¼” seam.
- Backstitch over strap attachments multiple times for strength.
- Reach through the gap in the lining bottom.
- Grab the exterior and pull the entire bag through the opening.
- The bag now sits right side out with the lining hidden inside.
Close the Lining Gap
- Fold raw edges of the lining opening inward by ⅝”.
- Press to create a clean, crisp edge.
- Clip in place.
- Sew closed with a 1/16″ seam using either a ladder stitch by hand or careful edge-stitching by machine.
This step hides all construction work and delivers a polished, professional finish.
Add Professional Finishing Details
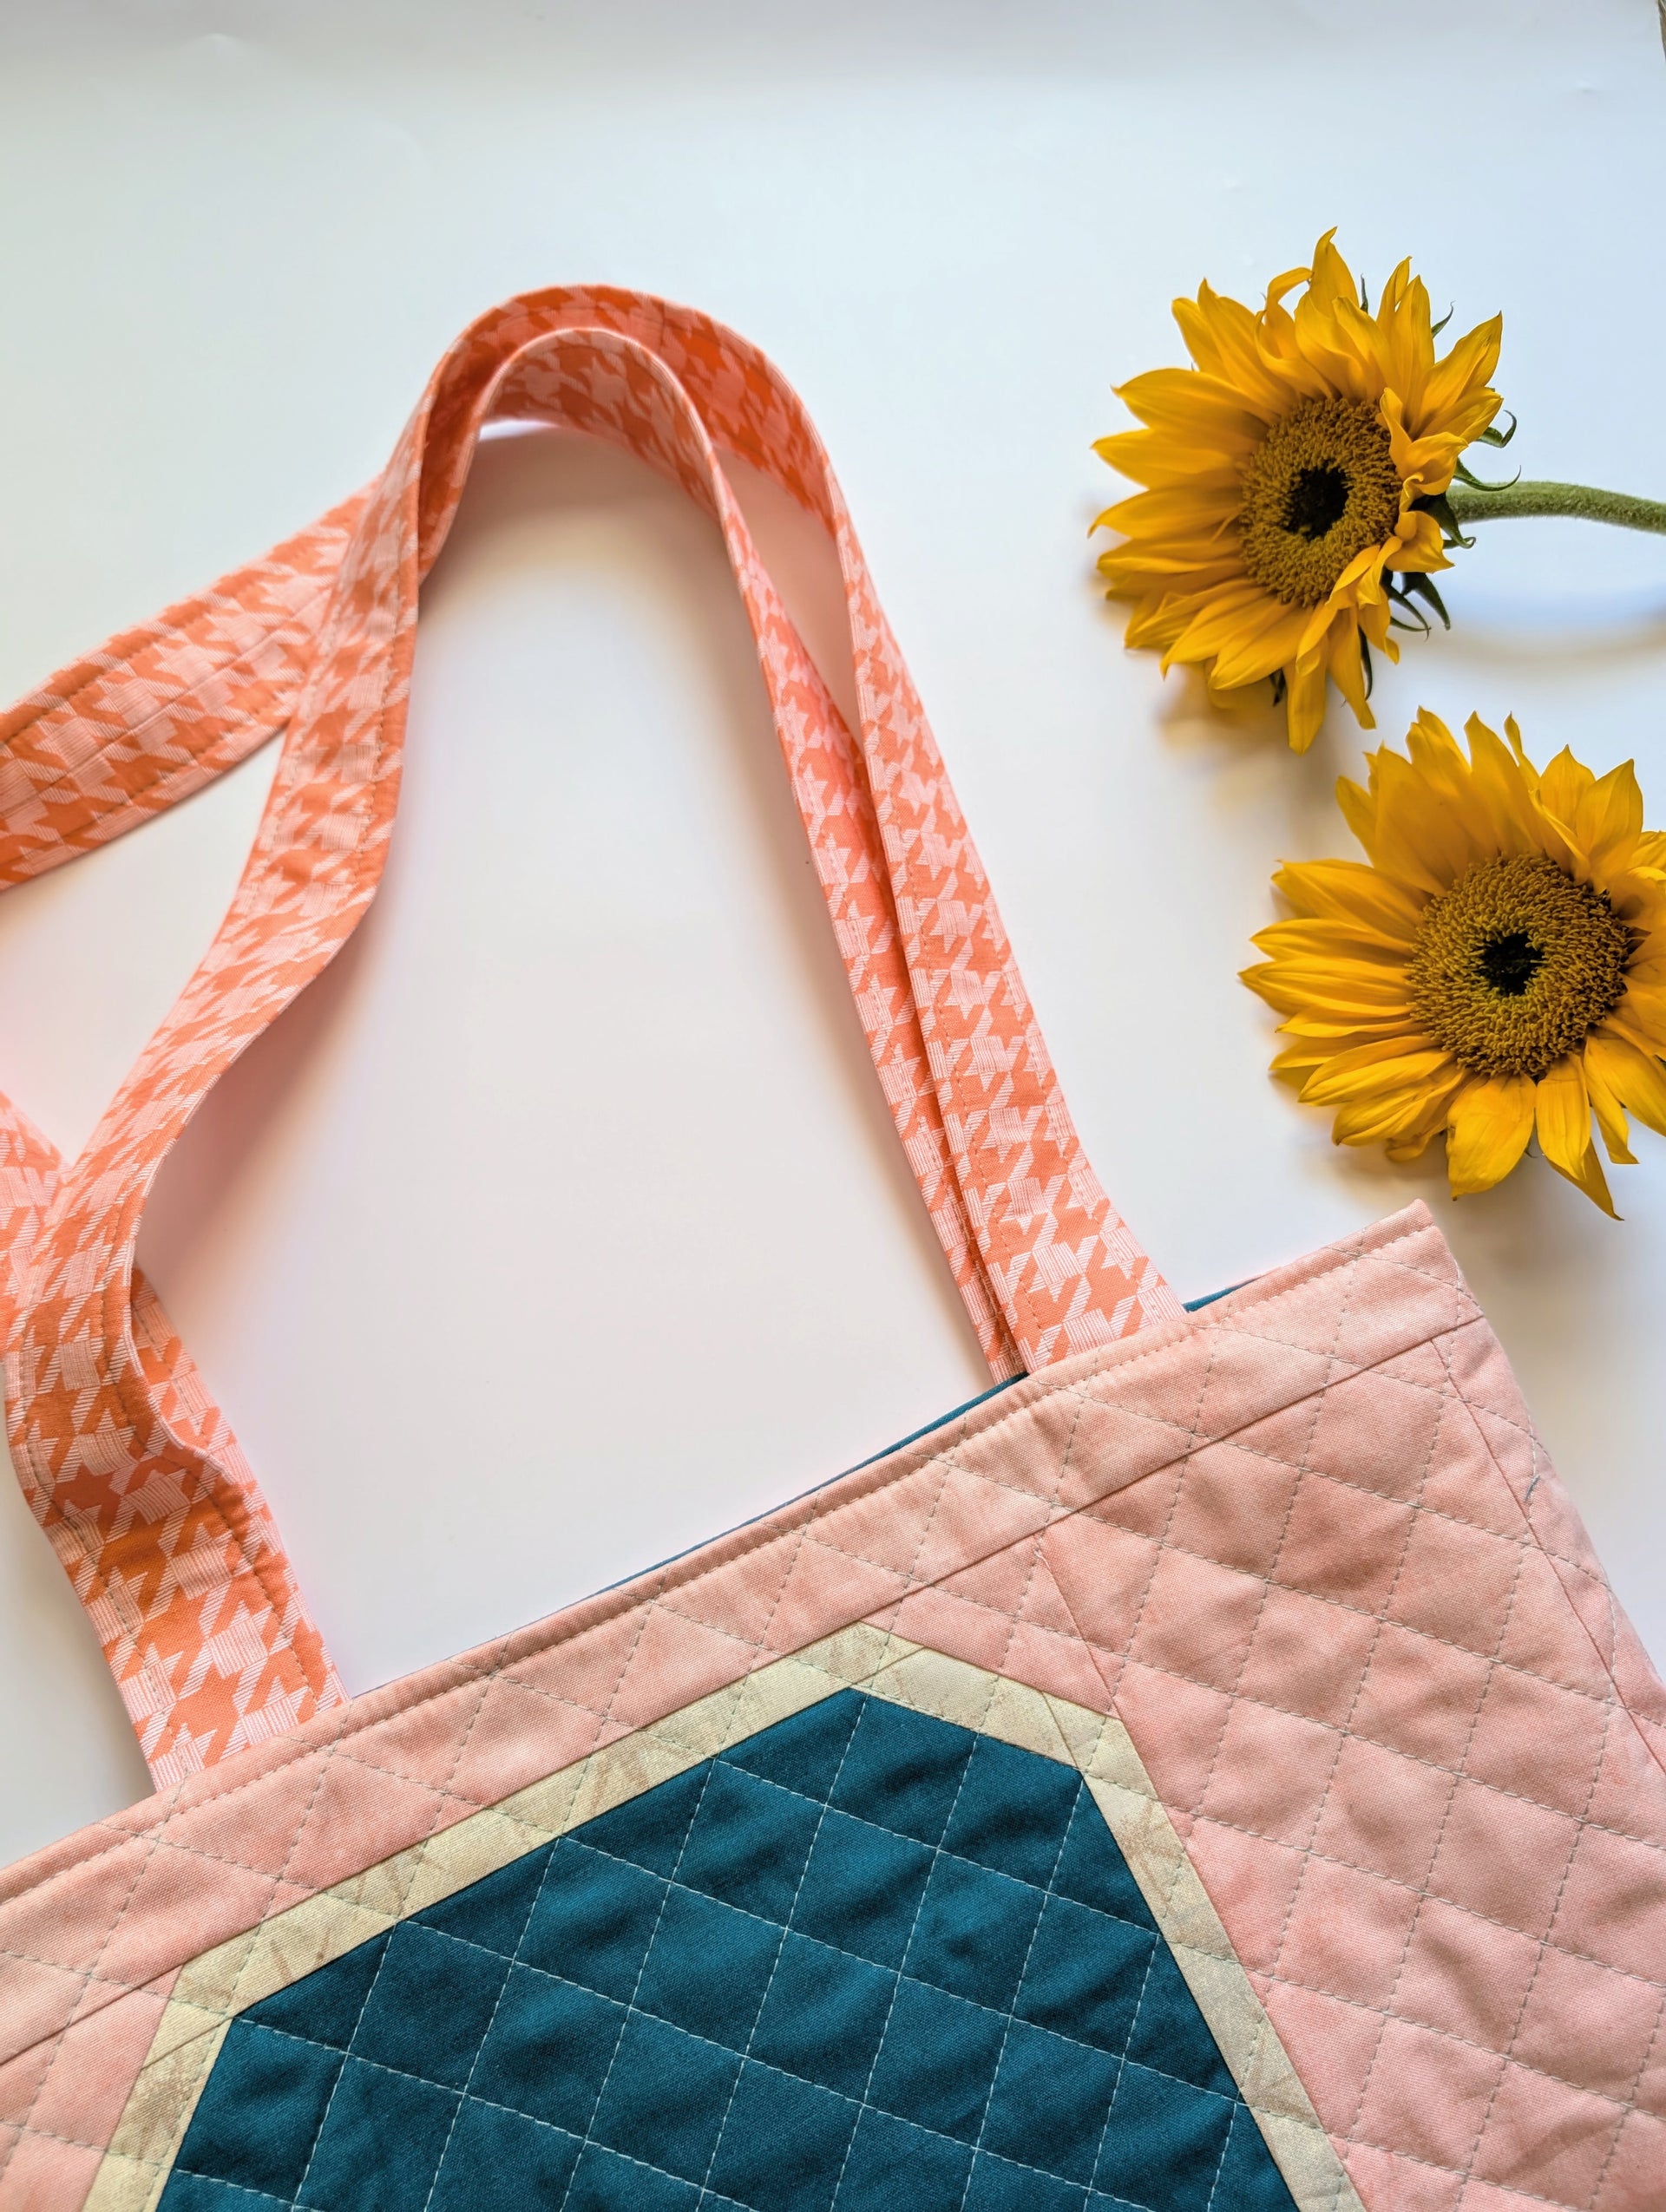
Press and Shape the Bag
A hot iron works magic at this stage.
- Flatten the top edge completely.
- Smooth out all corners.
- Push the lining down evenly inside the exterior.
Pressing transforms a lumpy sewn bag into a crisp, structured tote ready for daily use.
Topstitch for Durability
Topstitching prevents the lining from peeking out and reinforces the opening.
- Sew two lines around the top: first at 1/8″, second at ¼”.
- Or use a single ¼” topstitch for a cleaner look.
Contrasting thread creates a designer touch that highlights your craftsmanship.
Final Inspection and Reinforcement
Check these critical points before declaring your quilt tote bag complete.
- Strap attachments: Confirm double or triple stitching at every connection.
- Bottom corners: Verify seams are tight and trimmed properly.
- Lining: Ensure it lies flat without bunching or pulling.
Trim all loose threads and store your finished tote flat or hanging. Folding can permanently crease the batting inside.
Maintain and Extend Your Tote’s Lifespan
Clean with Gentle Care
Quilted totes absorb water because of the batting layer. Soaking causes problems.
- Spot clean with a damp cloth and mild soap for everyday stains.
- If machine washing becomes necessary, use a gentle cycle and air dry flat. Never tumble dry, as heat causes batting clumping.
Monitor Wear Points
High-stress areas degrade before the rest of the bag.
- Bottom corners: Consider adding leather patches if the tote drags on rough surfaces.
- Strap bases: Re-stitch immediately if fabric begins to pucker.
- Seams: Tighten loose stitches early before they unravel.
Small repairs done promptly can double your bag’s functional life.
Store Properly Between Uses
- Hang on a hook or lay flat to preserve the boxed corner shape.
- Avoid damp storage areas to prevent mildew growth.
- Use for light to medium loads unless reinforced with webbing and denim panels.
Frequently Asked Questions About Making a Quilt Tote Bag
What size quilt block works best for a tote bag?
A minimum 16 ½” square block works best for standard tote dimensions. Smaller blocks can be sized up using fabric strips on the sides and bottom to reach the target panel size.
How dense should the quilting be for a durable tote?
Quilt densely with stitches no more than 1″ apart throughout the panel. This prevents batting migration and adds structural strength that holds up under heavy loads like groceries or books.
Can I machine wash a quilted tote bag?
Spot cleaning is the safest option for routine care. If machine washing becomes necessary, use a gentle cycle and always air dry flat. Tumble drying causes batting to clump and shift permanently.
What is the purpose of boxed corners in a tote bag?
Boxed corners create a flat, stable bottom that adds depth and volume. Cutting 2″ squares from bottom corners and sewing them shut produces a 4″ deep bag that stands upright on its own.
Should I use webbing or self-fabric straps?
Webbing straps offer industrial strength and faster installation, making them ideal for heavy loads. Self-fabric straps provide a seamless, traditional aesthetic but require more sewing time and offer moderate strength.
How do I prevent the lining from showing at the top?
Topstitch around the top edge at 1/8″ and ¼” (or a single ¼” line). This secures the lining inside and creates a clean, professional finish that hides all raw edges.
Key Takeaways for Crafting Your Own Quilt Tote Bag
Building a quilt tote bag rewards patience with a functional heirloom. Start by selecting the right size for your needs, then prepare your quilt blocks with care, especially when working with vintage fabric. Dense quilting with stitches under 1″ apart creates the structural foundation that prevents sagging and batting shift over time.
Secure strap attachments matter more than any other detail. Whether you choose webbing for strength or self-fabric for aesthetics, heavy backstitching at stress points ensures your bag carries weight without failure. Finish with careful pressing and topstitching to elevate your project from homemade to professional.
Your next step is simple: gather your materials, choose your favorite quilt block or fabric combination, and start cutting. Within a few hours, you’ll hold a quilt tote bag that carries more than just your belongings. It carries your story, your skill, and your creativity into every room you enter.

