The winding ways quilt pattern is a stunning, timeless design that mimics flowing curves using precise geometric piecing. Known also as “Wheel of Mystery,” this quilt dazzles with interlocking circles that appear to spiral across the fabric, yet it is built entirely from straight and gently curved seams. Despite its intricate look, the pattern offers quilters a rewarding challenge, blending artistry with technical skill.
You will learn how to cut, piece, and assemble the blocks with confidence, choose between traditional piecing and modern die-cutting methods, and avoid common pitfalls like puckered seams. With options for all skill levels, including appliqué alternatives, this deep dive ensures success no matter your experience.
Decode the Winding Ways Design
Why It Is Called “Wheel of Mystery”
“Winding Ways” and “Wheel of Mystery” are used interchangeably, both referring to the same mesmerizing circular motif. The name reflects the puzzle-like construction: four identical curved units come together to form a full circle, creating the illusion of continuous motion. Historically linked to Amish and Mennonite quiltmakers in Lancaster, Pennsylvania, the design dates back to the 19th century and often appeared in bold, high-contrast palettes like black-and-white or indigo-and-cream.
How the Illusion Works
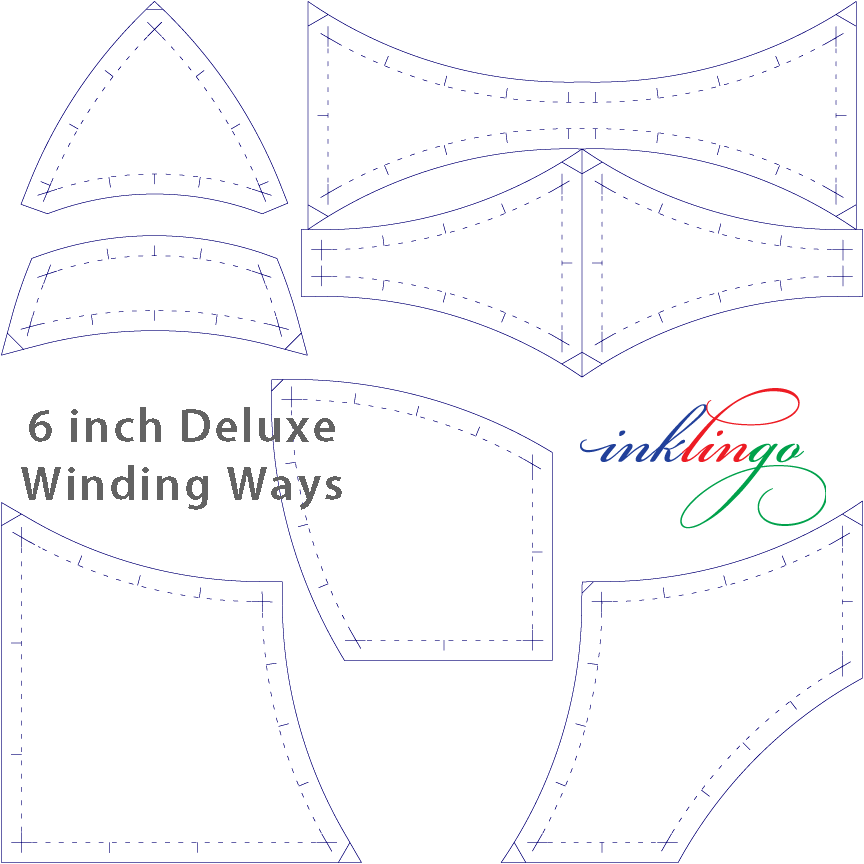
Though the quilt appears to be made of perfect circles, the design is constructed using four mirrored quarter-blocks, each composed of three curved pieces typically labeled A, B, and C. When assembled and rotated, these quarters create the seamless loop effect. No templates are needed if you use digital cutting systems, but traditional quilters rely on acrylic or paper templates to maintain accuracy.
Color Flow Strategies
Color placement dramatically changes the quilt’s impact. Use these proven approaches to maximize visual interest:
- Radiating: Colors shift from light to dark or warm to cool, moving outward from the center.
- Checkerboard: Alternate tan and blue backgrounds to enhance the winding path.
- Scrappy: Mix assorted prints within one color family for lively texture.
- Monochrome: Use varying shades of one hue for a modern, sophisticated look.
- Holiday Themes: Reds and greens create festive Christmas quilts.
Use printable coloring sheets included in many digital patterns to test layouts before cutting.
Choose Your Construction Method
Traditional Curved Piecing
Best for intermediate quilters comfortable with precision sewing.
Tools Needed:
– Acrylic templates (John Flynn or From Marti Michell)
– Fine pins or curved safety pins
– 1/4″ presser foot
– Fabric marking pen
Key Tips:
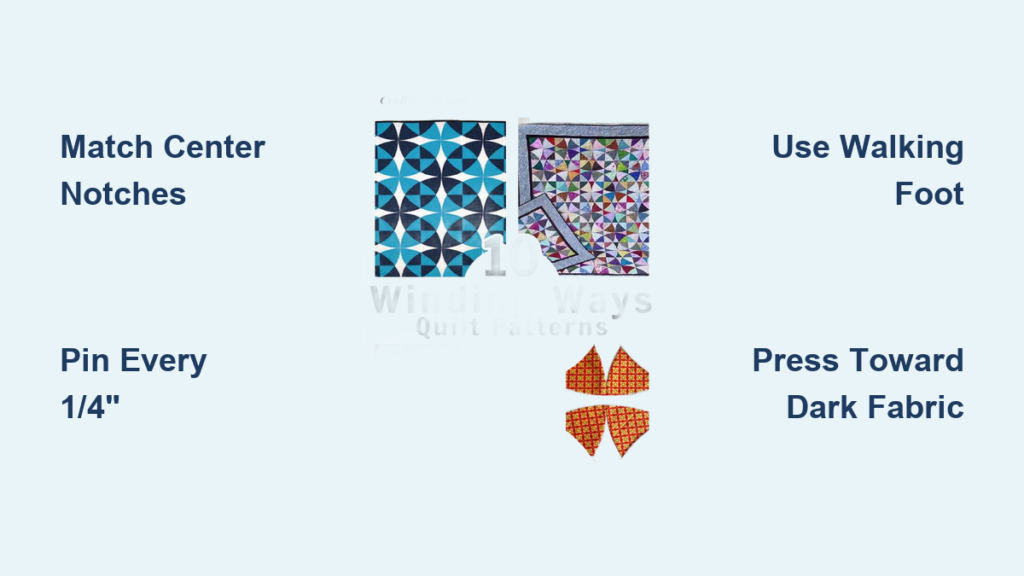
– Always match center notches first when joining curves.
– Pin generously, every 1/4 inch, to prevent stretching.
– Sew slowly, easing the fabric together without pulling.
– Press seams toward the darker or smaller piece to reduce bulk.
This method gives full control over fabric selection and layout but demands patience and steady hands.
Appliqué Alternative
Ideal for beginners or those who dislike curved seams.
Steps:
1. Trace the full Winding Ways shape onto freezer paper.
2. Iron the shiny side to the wrong side of lightweight fabric with fusible interfacing.
3. Cut out the shape, leaving a 1/4″ seam allowance.
4. Place on a solid background square.
5. Stitch around edges using a tight zig-zag or blind hem stitch.
6. Trim excess background fabric behind the appliqué to reduce thickness.
Appliqué simplifies construction and allows for creative fabric placement, though it results in a slightly different texture than pieced versions.
Die-Cut Efficiency with AccuQuilt GO!
Best for accuracy and speed, especially for large projects.
Required Dies:
– GO! Winding Ways, 8″ Finished (#55069)
– GO! Square, 6.5″ (#55000) for sashing
– GO! Strip Cutter, 3.5″ (#55032) for borders
Benefits:
– Cuts 10 to 16 layers at once
– Eliminates hand-tracing and template errors
– Ensures perfect symmetry across all blocks
While the initial investment is high (die sets start at $79.99), the time saved and precision gained make it ideal for complex patterns like Winding Ways.
Cut Fabric Like a Pro
Yardage by Project Size
| Quilt Type | Finished Size | Blue Prints | Tan Prints | Backing | Batting |
|---|---|---|---|---|---|
| Standard Scrappy | 55″ x 72″ | 3.5 yd | 2.5 yd | 3.5 yd | 61″ x 78″ |
| Large Format | 82″ x 82″ | Custom | Custom | 4.5 yd | 88″ x 88″ |
| Table Runner | 20″ x 14″ | 1/2 yd scraps | 1/2 yd scraps | 1 yd | 26″ x 20″ |
Assumes 44″ to 45″ wide 100% cotton fabric and 1/4″ seam allowance.
Cutting Instructions for Standard 55×72″ Quilt
Blue Prints (3.5 yd total):
– Cut 2.5″-wide strips for borders (2 pieces at 68.5″, 2 at 55.5″)
– Cut binding strips 2.5″ x WOF, joined to about 270″ total
Tan Prints (2.5 yd total):
– Cut using templates or die: 96 Piece B and 96 Piece C (48 blocks × 2 pieces each)
Backing:
– Piece two 3.5 yd lengths or use one 80″-wide backing fabric cut to 78″.
Pro Tip: Pre-wash fabrics to prevent shrinkage, especially when mixing solids and prints.
Assemble Blocks Step by Step
Prepare Your Pieces
Label all cut pieces clearly:
– A: Background arc (largest piece)
– B: Inner curve (medium)
– C: Outer curve (smallest)
Use a fabric marker to mark seam allowances and center points on curved edges.
Sew A + B Sub-Units
- Place B on top of A, right sides together.
- Pinch and pin the center notch first.
- Add pins at both ends, then every 1/4″ along the curve.
- Sew with a consistent 1/4″ seam, removing pins just before the needle hits them.
- Press seam toward B (usually the darker or smaller piece).
Repeat to make 4 A+B sub-units per block.
⚠️ Avoid Puckering: Do not stretch the concave piece (A). Let the convex (B) ease into it naturally.
Attach Piece C
- Align C with the outer edge of the A+B unit.
- Pin and sew with right sides together.
- Press seam toward the A+B unit.
Now you have one completed quarter-block. Make four per full block.
Complete the Full Block
- Arrange the four units in a pinwheel formation.
- Sew into two pairs, pressing seams toward the C pieces.
- Join the pairs, matching intersection points carefully.
- Press final seam in one direction.
✅ Check Measurement: Finished block should be 9″ square (includes seam allowances) for an 8.5″ finished size.
✅ Pro Tip: Chain-piece identical steps to save time.
Assemble the Quilt Top
Layout for Maximum Impact
For the 55×72″ quilt (48 blocks), arrange in 8 rows of 6 blocks each. Alternate tan and blue background blocks in a checkerboard pattern to emphasize the winding path. Lay out on a design wall or floor to preview color flow.
Sew Rows and Join
- Sew blocks into rows, pressing seams consistently in one direction.
- Nest seams by pressing alternate rows in opposite directions.
- Join rows carefully, pinning at intersections.
- Press all seams toward the blue-print background blocks for consistency.
✅ Final quilt center: 51.5″ x 68.5″ (before borders).
Add Borders and Finish Strong
Cut and Apply Borders
Border Strips (Blue Prints):
– Long borders: 2 at 2.5″ x 68.5″
– Short borders: 2 at 2.5″ x 55.5″
Steps:
1. Sew long borders to the sides of the quilt center.
2. Measure across the center (do not stretch) and cut short borders to match.
3. Sew to top and bottom.
4. Press all seam allowances toward the border.
✅ Tip: Trim selvages and press seams flat before border attachment to avoid ripples.
Quilt and Bind
Quilting Ideas:
– In-the-ditch: Stitch along block seams to highlight geometry.
– Continuous curve: Echo the circular motif in tan areas.
– Hand quilt: Use invisible stitches for heirloom quality.
Binding:
– Cut 2.5″-wide strips, total about 270″
– Join at diagonals to minimize bulk
– Miter corners for clean edges
– Hand-stitch or machine-bind using your preferred method
Troubleshoot Common Issues

Why Curves Pucker
Cause: Uneven feed between concave and convex pieces.
Fix:
– Pin more frequently (every 1/4″)
– Use a walking foot to feed both layers evenly
– Do not pull fabric; let the machine guide it
Misaligned Centers
Cause: Center notch not matched precisely.
Fix:
– Mark center with a pin or thread
– Sew from center outward
– Trim dog ears after pressing
Gaps at Intersections
Cause: Inaccurate cutting or seam allowance inconsistency.
Fix:
– Use laser-cut acrylic templates or AccuQuilt dies
– Check 1/4″ foot calibration regularly
– Press seams flat before joining blocks
Upgrade with Smart Tools

Best Templates and Dies
| Tool | Size | Use | Price |
|---|---|---|---|
| From Marti Michell Set | 6″, 8.5″, 11″ | Reusable acrylic templates | $6.99 to $9.98 |
| John Flynn 3-Piece | Custom | Classic curved piecing | ~$9 + shipping |
| AccuQuilt GO! #55069 | 8″ finished | Fast, precise die-cutting | $79.99 (sale) |
| Inklingo Digital Printing | Any size | Print lines directly on fabric | Varies |
Pro Advice: Start with Marti Michell templates if you are new to curves. Upgrade to AccuQuilt for large projects.
Design Variations to Try

Small Projects: Table Runner
- Use 15 pre-cut 3.5″ Winding Ways blocks
- Arrange in 3×5 grid
- Finish as a 20″ x 14″ runner
- Bind with contrasting strip
Great for using hexagon scraps from “Grandmother’s Garden” projects.
Wall Hanging
- Make a single oversized block (11″ or 18″ finished)
- Frame with wide border
- Quilt densely around the circle
Perfect for showcasing intricate quilting.
Seasonal Twist
- Use red, green, and gold for Christmas
- Pastels for Easter
- Neutrals for modern farmhouse decor
Care and Longevity Tips
- Wash gently in cold water with mild detergent
- Tumble dry low or air dry to preserve shape
- Store flat or rolled; avoid tight folding
- Retie or repair loose stitches promptly
Well-made Winding Ways quilts become family heirlooms, lasting generations.
Frequently Asked Questions About the Winding Ways Quilt Pattern
What is the difference between Winding Ways and Wheel of Mystery?
There is no difference. The names are interchangeable and refer to the same circular quilt design with interlocking arcs. Both terms appear in historical and modern pattern catalogs.
Is the Winding Ways quilt pattern beginner-friendly?
The traditional curved piecing method is rated intermediate to advanced due to precision requirements. Beginners can start with the appliqué version or use die-cutting systems like AccuQuilt GO! for easier handling.
How many fabric pieces are in one Winding Ways block?
A standard block contains 16 individual pieces when using traditional 3-piece templates (4 of each shape type per quadrant). Four identical units are then rotated and joined to form the complete block.
What tools make Winding Ways easier to piece?
Acrylic templates from John Flynn or From Marti Michell improve accuracy. For faster cutting, the AccuQuilt GO! Winding Ways die (#55069) cuts 10 to 16 layers at once with perfect symmetry.
Can I make a Winding Ways quilt in different sizes?
Yes. The pattern scales from 20″ x 14″ table runners to 82″ x 82″ bed quilts. Template sets come in 6″, 8.5″, and 11″ finished block sizes to accommodate various projects.
How do I prevent puckering when sewing curved seams?
Pin every 1/4″ along the curve, match center notches first, and use a walking foot for even feed. Avoid stretching the concave piece and let the convex piece ease into place naturally.
Key Takeaways for Mastering the Winding Ways Quilt Pattern
The winding ways quilt pattern rewards patience with one of quilting’s most striking optical illusions. Start by selecting a construction method that matches your skill level: traditional curved piecing for intermediates, appliqué for beginners, or die-cutting for speed and precision. Always match center notches first, pin generously, and press seams toward darker fabrics to avoid bulk.
Choose your color strategy early, whether radiating, scrappy, or monochromatic, and test layouts with coloring sheets before cutting. With the right tools and careful attention to seam allowances, your finished quilt will showcase the timeless “Wheel of Mystery” motif for generations. Grab your templates, pick your fabrics, and begin piecing your heirloom today.