
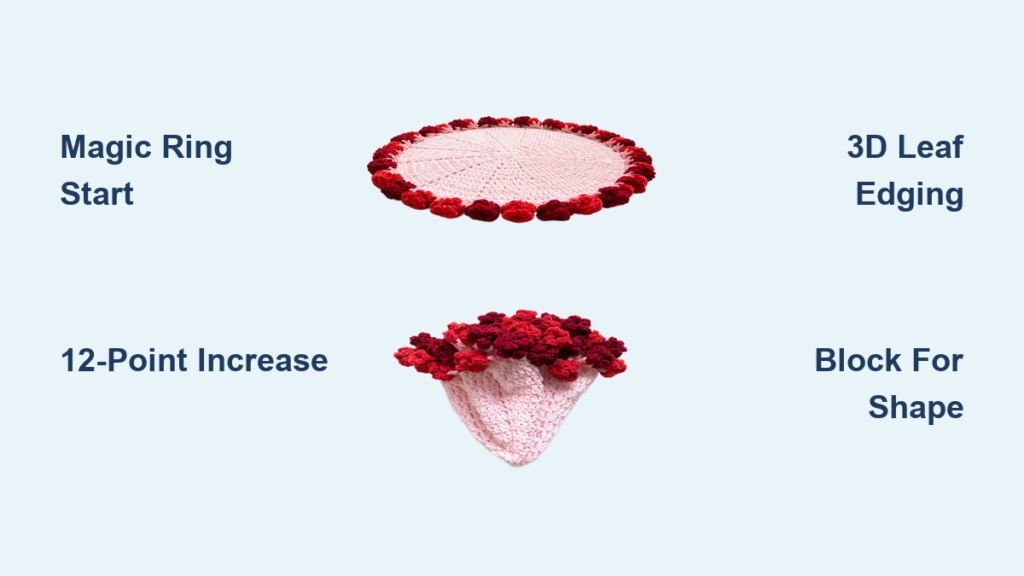
Imagine unfolding a soft, hand-crocheted circle into a stunning 3D floral bouquet. This is the magic of the rose bouquet blanket, a viral crochet sensation that blends functionality and artistry. More than just a cozy throw, this project transforms into a lifelike flower arrangement when folded, making it a showstopper for gifting or home decor. If you have ever searched for a how to crochet rose bouquet blanket guide that is clear, complete, and packed with pro tips, you are in the right place.
In this step-by-step walkthrough, you will learn how to create your own from center ring to final bloom, using accessible stitches and smart construction techniques. Whether you are a beginner with basic double crochet skills or an intermediate crocheter ready to tackle 3D flowers, this guide covers every detail from yarn choices to blocking so you can craft a blanket that wows.
Gather Materials for Your Rose Bouquet Blanket
Before starting, gather all materials. The right supplies make the difference between a frustrating experience and a smooth, enjoyable project.
Choose the Right Yarn
The foundation of a successful rose bouquet blanket starts with worsted weight (Category 4) yarn, which offers the ideal balance of drape, stitch definition, and durability. You can also use sport weight (#2) for a lighter, more delicate version, just adjust your hook size accordingly.
Recommended yarn types include:
- Acrylic — Best for baby blankets or everyday use. It is affordable, soft, and machine washable.
- Cotton — Offers crisp texture and excellent stitch clarity. Perfect for wall hangings or table displays.
- Cotton milk blend — Provides luxurious sheen and silky drape. Ideal for shawls or gifts.
Popular yarn choices include WeCrochet Brava, Premier Everyday, and Lion Brand 24/7 Cotton. Stick to medium-weight yarns compatible with 3.0 to 6.0 mm hooks.
Select Colors for Maximum Impact
Use a three-color palette to mimic a real floral arrangement:
- White or neutral — Forms the base blanket. You will need approximately 500g for a 100cm throw.
- Green — For leaves and edging. Plan for 80 to 150g (2 skeins recommended).
- Floral shades — Reds, pinks, yellows, or corals for roses. You will need 120 to 300g total, with 1 skein per color.
Optional: Add a brown or dark contrast (20 to 50g) for sunflower centers. Always buy +30g extra per color to account for mistakes or customization.
Gather Essential Tools
Beyond yarn and hook, you will need:
- 6 mm (J-10) crochet hook — Most common for worsted weight
- Tapestry needle — For weaving in ends and attaching flowers
- Stitch markers — To mark round starts and increase points
- Scissors and measuring tape
- Blocking mat and pins — Especially important if using cotton
- Bobby pins — To hold leaf shapes while crocheting
Hook size tip: Match your hook to the yarn label. Use 5 mm or 4.5 mm for tighter tension, 3.5 to 4.0 mm for sport weight.
Start with a Magic Ring Foundation
Begin with a magic ring (MR). This technique creates a tight, hole-free center that professional crocheters prefer over chain rings.
How to Create the Magic Ring
- Wrap yarn around two fingers to form a loop.
- Insert hook, yarn over, and pull up a loop.
- Chain 1 (does not count as a stitch).
- Work 12 double crochets (dc) into the ring.
- Slip stitch to join (optional).
- Pull the tail to close the ring tightly.
- Place a stitch marker to mark the first stitch of each round.
Why not use a chain ring? While some patterns use a chain 5 and join, the magic ring is preferred for a clean, professional center. It allows you to pull the yarn tail tight after finishing, eliminating the gap that sometimes appears in chain-started circles.
Build the Blanket Using the Increase Formula

The secret to a flat circle is even radial increases. Most rose bouquet blankets use 12 increase points per round, adding +12 stitches each time. This prevents ruffling and keeps the shape circular.
Follow the Standard Increase Pattern
Here is the increase pattern most patterns follow:
| Round | Instruction (US Terms) | Total Stitches |
|---|---|---|
| 1 | MR, ch 1, 12 dc | 12 |
| 2 | 2 dc in each st around | 24 |
| 3 | (1 dc, 2 dc) repeat 12 times | 36 |
| 4 | (1 dc in 2 sts, 2 dc) repeat 12 times | 48 |
| 5 | (1 dc in 3 sts, 2 dc) repeat 12 times | 60 |
The pattern rule is simple. Each round, increase the number of regular dc before the 2 dc (increase) by 1. The general formula is (1 dc in N sts, 2 dc) repeated 12 times, where N increases by 1 each round.
Example rounds:
- Round 6: (1 dc in 4 sts, 2 dc) = 72 sts
- Round 39: (1 dc in 38 sts, 2 dc) = 480 sts
Pro tip: Place stitch markers every 12 stitches to mark each repeat. It makes counting easier and significantly reduces errors.
Stop at the Right Diameter
Continue increasing until the blanket reaches your desired size:
- Baby blanket — Approximately 60 cm (24 inches). This is roughly Round 33.
- Throw — Approximately 100 cm (39 inches). This is roughly Round 45.
- Standard bouquet size — 108 to 110 cm (42 to 43 inches). This is ideal for folding.
- Bedspread — Approximately 150 cm (59 inches). This goes up to Round 65.
Measure through the center with a tape measure. When it hits 108 cm, stop. You are ready for the border.
Add Beautiful Leaves to the Edge
Before attaching leaves, build a scalloped edge with chain spaces. This is typically done around Round 28, though timing varies by pattern.
Create the Chain-Space Foundation
Round 28 (Scalloped Base):
- Chain 1, single crochet (sc) into the same stitch.
- Repeat around: sc, ch 4, skip next 4 stitches, sc in next stitch.
- Slip stitch to close.
- Result: 12 evenly spaced ch-4 loops around the edge.
Why skip 4 stitches? This spacing matches the 12-segment increase pattern, ensuring symmetry throughout your blanket.
Crochet 3D Leaves in Each Space
Now work leaves into each ch-4 loop using green yarn.
For each leaf:
- Join green yarn with a slip stitch into the ch-4 space.
- Chain 1, then work: sc, hdc, dc, tr (treble crochet: yarn over twice, pull up loop, pull through two loops three times).
- Chain 3.
- Picket stitch: Insert hook into the base stitch (where tr was made), pick up both loops on the side of the tr, then slip stitch to secure.
- Work: tr, dc, hdc, sc.
- Slip stitch into the base sc to close.
Repeat in every ch-4 space. The picket stitch creates a central spine, giving the leaf dimension and realism.
Create and Attach 3D Roses
You have two main approaches: detached roses (sewn on) or integrated roses (crocheted in place). Both create beautiful results.
Make Detached Roses (Beginner-Friendly)
This method lets you crochet roses separately and sew them on, perfect for customization.
Step 1: Start the Rose
- Insert hook into front loop of two consecutive rows between leaf sections.
- Pull up a loop, make a slip stitch, and leave a 4 to 6 inch tail.
Step 2: Chain and Crochet
- Chain 14.
- From 3rd chain: 1 dc.
- 4th chain: 2 dc.
- Each remaining chain: 3 dc.
- At base: 3 dc into the starting chain loop.
Step 3: Close and Shape
- Slip stitch into the legs of the first dc, chain 1, cut yarn.
- Wrap the chain tightly into a spiral to form a rose.
- Thread tail through all layers, pull tight, and knot with starting tail.
- Weave in ends.
Color tip: Use assorted pinks and reds for a natural, varied bouquet look.
Use Integrated Roses (Advanced Look)
For a seamless finish, crochet roses directly onto the blanket.
Round 43 (Red Roses):
- Attach red yarn between leaves.
- Chain 15.
- From 2nd chain: 3 dc per chain.
- Wrap into swirl.
- Pull loop of first dc through all layers.
- Return to attachment point, pull up loop (3 loops), yarn over, pull through all 3 (slip stitch).
- Add 1 sc, finish with slip stitch and knot.
Repeat for Round 45 using pink gradient yarns. Total flowers can reach 48 (24 red + 24 pink). Integrated roses are more secure and eliminate sewing entirely.
Finish with Professional Details
The final details separate a homemade project from a professional-looking creation.
Weave in All Ends Securely
Use a tapestry needle to weave in every tail:
- Run yarn through multiple stitches of the same color.
- Pass under stitch backs or through flower centers.
- Knot tails together (2 to 4 times) before trimming.
- Trim excess close to fabric.
Critical: Reinforce flower attachment points. They endure stress when the blanket is folded and displayed.
Block the Blanket for a Polished Look
Blocking transforms your blanket from handmade to high-end.
Wet Blocking (Recommended for Cotton):
- Soak blanket in lukewarm water with gentle wool wash.
- Gently squeeze out water (do not wring).
- Lay flat on a blocking mat.
- Shape into a perfect circle.
- Pin edges every 6 inches.
- Let dry completely (8 to 12 hours).
Steam Blocking (Acrylic):
- Hold steamer 2 to 3 inches above fabric.
- Gently press with a blocking tool.
- Do not touch hot iron to acrylic.
Why block? It evens out stitches, opens up the drape, and ensures a smooth fold.
Fold Into a Stunning Bouquet Display
Now comes the magical transformation that makes this project so special.
Roll, Twist, and Secure
- Loosely fold the blanket toward the center.
- Roll or twist the edges inward, bringing the 3D roses to the top.
- Let the leaves fan out like a real bouquet.
- Tie with a ribbon, yarn, or fabric band to hold shape.
Display ideas include placing it in a vase for a long-lasting floral centerpiece, wrapping it as a gift (it unfolds into a blanket), or hanging it on a dowel as textile wall art.
Troubleshoot Common Crochet Issues
Even experienced crocheters encounter problems. Here is how to fix them.
Prevent Ruffling
Ruffling happens when too many stitches are added in a round. The fix is simple: stick to the +12 stitches per round rule. Use stitch markers every 12 stitches to track increases, and count stitches every 5 rounds to stay on track.
Fix Miscounted Stitches
Missed an increase? Add an extra 2 dc in the next section. Too many stitches? Work a decrease:
- Yarn over, pull up loop.
- Yarn over, pull through 2.
- Yarn over, pull through 2.
- Yarn over, pull through all 3.
This creates a single crochet decrease that pulls stitches together cleanly.
Customize Your Rose Bouquet Blanket
Make the project your own with these modification options.
Adjust Size for Any Use
- Baby blanket — Stop at 30 inches (Round 25 to 30).
- Lap throw — 44 inches (112 cm).
- Bedspread — Continue to 60+ inches.
Try Different Color Schemes
- Monochromatic — All white or soft pastels.
- Gradient — Light pink to deep rose.
- Themed — Baby blue + white, mint + blush.
- Bold — Red, yellow, coral.
Modify Leaf Style
- Short leaves — Chain 5, work (1 sc, 2 hdc, 2 dc, 2 hdc, 1 sc).
- Long leaves — Chain 9, work slip stitch, hdc, dc, 2 tr, dc, hdc, slip stitch, then slip stitch into side.
Frequently Asked Questions About Crocheting a Rose Bouquet Blanket
How long does it take to crochet a rose bouquet blanket?
The completion time ranges from 20 to 40 hours depending on your experience level, chosen size, and how detailed your pattern is. A baby blanket takes less time, while a full-size throw with integrated roses requires more hours.
Can a beginner successfully make a rose bouquet blanket?
Yes. The project relies on basic double crochet stitches with strategic increases. The most challenging elements are the 3D leaves and roses, but these can be made separately and sewn on (detached method), making it accessible to beginners.
What is the best yarn for a rose bouquet blanket?
Worsted weight acrylic (like WeCrochet Brava or Premier Everyday) is best for most uses because it is affordable, soft, and machine washable. Cotton or cotton milk blends work well for decorative pieces but require more careful blocking.
How do I stop my blanket from ruffling?
Ruffling occurs when you add too many stitches in a round. Stick strictly to the +12 stitches per round formula, use stitch markers every 12 stitches, and count your stitches regularly to catch mistakes early.
Can I use a different size hook than recommended?
Yes, but adjust accordingly. A smaller hook creates tighter tension and a denser fabric. A larger hook creates looser drape. Always check your gauge by making a test swatch before starting the full project.
Key Takeaways for Crocheting Your Rose Bouquet Blanket
The rose bouquet blanket is more than a project. It is a conversation starter, a gift that surprises, and a testament to how simple stitches can create something extraordinary. With basic double crochet, a clear increase pattern, and a few 3D embellishments, you can craft a piece that is both cozy and artistic.
Remember these essential points as you work: use stitch markers to track your 12-segment increase pattern, measure diameter regularly rather than guessing, and block your finished blanket for a professional polish. Whether you follow a free YouTube tutorial or a paid PDF pattern, this guide gives you the confidence to make it your own.
Now grab your hook, pick your yarn, and start crocheting a blanket that blooms.

