
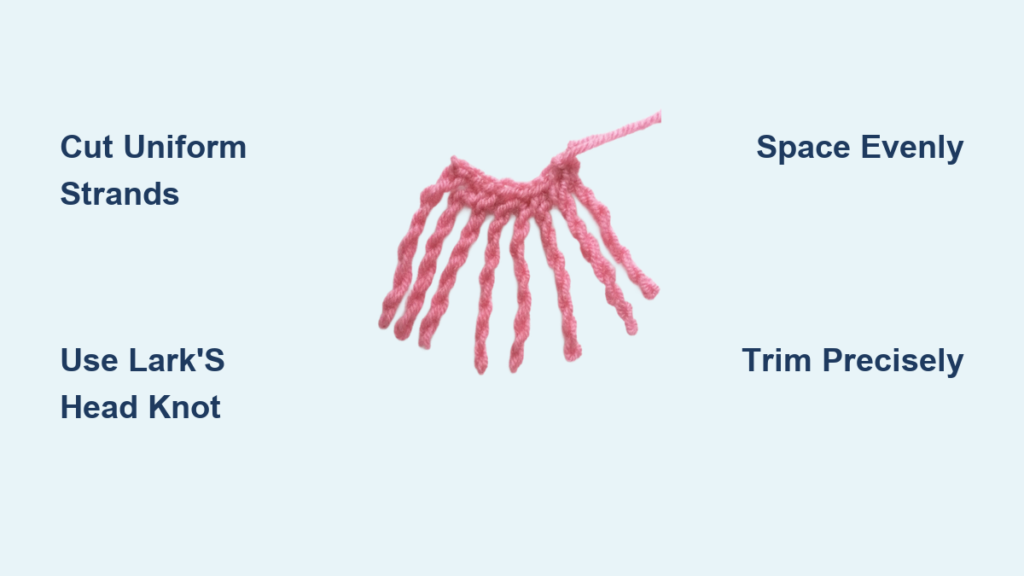
Adding fringe to a crochet blanket instantly elevates its look, transforming a simple project into something that feels handmade with intention. Whether you’re finishing your first afghan or upgrading a store-bought throw, how to crochet fringe on a blanket is a must-know skill for any crocheter. The right fringe adds movement, texture, and polish, turning functional warmth into a design statement.
Fringe is not just decorative. It cleverly uses up leftover yarn, hides uneven edges, and incorporates color transitions. Most blankets take under an hour to fringe once you have got the rhythm down. This guide walks you through choosing materials, calculating lengths, attaching with precision, and customizing your fringe for a professional boutique finish.
Choose the Right Materials
Match Yarn to Your Blanket
Select yarn that complements your blanket in weight and texture. Smooth, low-fuzz fibers like acrylic or cotton work best because they knot cleanly and show definition. Avoid highly textured, fuzzy, or slippery yarns such as mohair or silk blends, as they can obscure the fringe shape or loosen over time.
You can match the blanket color for a seamless finish or contrast it for bold visual interest. Gradient, ombre, or variegated yarns create dynamic movement along the edge. For most throws, worsted, DK, or bulky weight yarns are ideal. Thicker yarns need fewer strands per tassel, while thinner ones may require more to achieve fullness.
Gather Essential Tools
You only need a few basic tools to get started.
- Sharp fabric shears for clean, even trimming
- A crochet hook sized to match your blanket gauge, typically F/3.75mm to P/10mm
- A book, ruler, or cardboard piece to use as a measuring template
- Optional but helpful items include stitch markers, a yarn needle, and a wide-tooth comb
Cut Fringe Strands Uniformly

Determine Finished Length
Most crochet blanket fringe ranges from 6 to 8 inches long, long enough to drape beautifully but short enough to avoid snagging. For baby blankets, keep fringe under 6 inches for safety.
To calculate cut length, double the desired finished length and add 1 to 2 inches for knotting. For example, for 7-inch fringe, cut strands 15 to 16 inches long. For a 4.5-inch fringe like in the Coastal Stripe Throw, cut 9-inch strands. Use a book or cardboard as a winding template to ensure consistent cutting.
Batch-Cut for Efficiency
Instead of cutting one strand at a time, wrap yarn around your template multiple times, such as 10 wraps equals 10 fringe units. Slide the bundle off carefully and cut along one edge to release identical strands. Label or group them to avoid tangling. This method saves time and ensures uniformity across all tassels.
Attach Fringe with Lark’s Head Knot
Fold and Pull Through
The lark’s head knot is the most common and reliable method, producing a clean, secure, and professional-looking finish. Fold 3 to 5 strands in half to form a loop at the top. Insert your crochet hook from front to back through the desired stitch, such as the top of a chain, HDC, or border bar. Hook the folded loop and pull it halfway through the stitch, just enough to create a loop on the front.
Secure the Knot
Grab the loose ends of the fringe and pull them through the loop you just created. Gently tug downward to tighten the knot flush against the edge. Do not pull too hard, as excessive tension can pucker the blanket. Aim for snug but flexible.
For reversible blankets, work from the wrong side so the knot base hides neatly on the back.
Space Fringe Evenly
Consistent spacing prevents clumping or gaps. Every 2nd or 3rd stitch is standard for worsted or bulky yarn. Use stitch markers every 3 to 5 stitches to maintain rhythm. For large blankets, divide the edge into sections and calculate spacing. For example, 120 stitches divided by 40 fringe groups equals one fringe every 3 stitches.
At corners, insert the hook 1 to 2 stitches inward from the corner stitch to prevent outward splaying.
Use Alternative Attachment Methods
Cardboard-Wrapped Tassel Method
The cardboard-wrapped method is ideal for bulky yarn or high-volume decorative fringe. Cut a piece of cardboard slightly longer than your desired fringe, such as 9 inches for 7-inch fringe. Wrap yarn around it 4 or more times to build thickness. Cut the bottom loops to open the strands while keeping the top loop intact. Insert hook from back to front through an edge stitch, hook the top loop, pull through, then thread the loose ends through and tighten.
Pre-Tied Fringe Bundles
Pre-tied bundles work best for slippery or variegated yarns that shift during attachment. Wrap yarn around a notebook and cut into strands. Tie a 4-inch waste yarn around the top 1 to 2 inches to hold the bundle. Fold the bundle in half and attach using the lark’s head method. Once secured, snip and remove the temporary knot. This keeps colors aligned and strands from slipping apart mid-knot.
Customize Fringe Style and Texture
Try Twisted or Braided Fringe
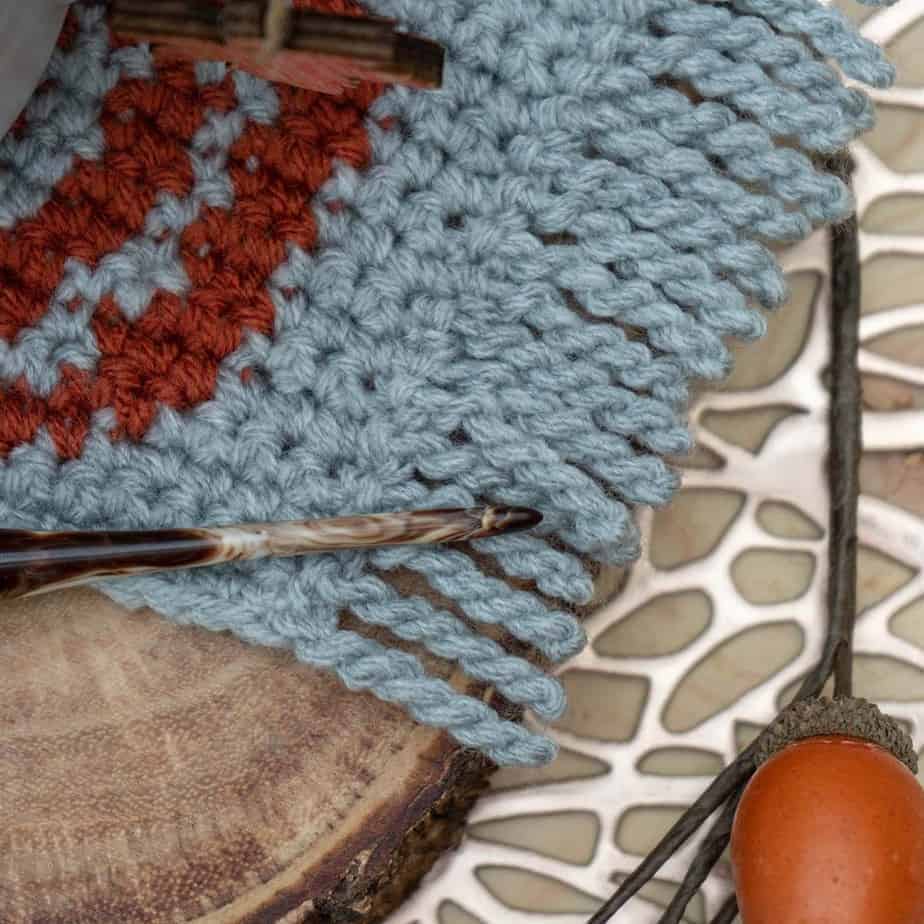
Twisted fringe adds boho flair. Twist strands tightly before folding and attach as usual. Optionally, secure the base with a slip stitch to prevent unraveling. Braided fringe works well for heirloom pieces. Divide fringe into 3 sections, braid tightly, and knot at the end. You can braid before or after attachment, with pre-braiding giving more control.
Add Beads or Metallic Yarn
Slide wooden, glass, or metal beads onto strands before knotting for elegance. Each tassel can hold 1 to 3 beads depending on size. For holiday or formal blankets, mix in metallic thread or sparkle yarn for subtle shimmer.
Create Gradient or Ombre Fringe
Rotate through multiple shades of the same yarn weight to create a soft color transition. This technique works great for CALs like the Rainbow Blanket where fringe ties together colorful sections. Use a neutral-colored fringe like gray or cream between bold color blocks to add visual separation and depth.
Optimize for Speed and Consistency
Prepare Fringe in Batches
Speed up the process by prepping 8 to 10 fringe units at once. Lay them out in order so you do not lose count. After all knots are tied, trim all ends together. Lay the blanket flat, gather all fringe ends in one hand, and use a ruler and sharp scissors to cut straight across. You can also angle-cut for a chic detail. Trimming last ensures even length even if knots settled unevenly during attachment.
Prevent Tangles and Static
Work gently and do not over-handle strands. Use a wide-tooth comb to detangle after attachment. Store finished blankets rolled or flat, never folded. When washing, place the blanket in a pillowcase to protect fringe from snagging.
Troubleshoot Common Fringe Issues
Fix Uneven or Splaying Fringe
If fringe looks lopsided, gently pull individual strands to align them. Trim only after all knots are secure. Fringe flaring at corners means you attached directly at the corner. Next time, offset the insertion point by 1 to 2 stitches inward.
Stop Knots from Loosening
Ensure each knot is pulled snug. For high-use items like baby blankets, consider double-knotting or using a tighter twist yarn. Loose knots often come from low-twist or slippery fibers, so opt for standard acrylic or cotton blends for better grip.
Avoid Edge Puckering
Tying knots too tightly pulls the fabric inward. Maintain moderate, consistent tension and test on a swatch first if working with delicate or open-stitch borders. Too many fringes can also weigh down the edge, so stick to every 2nd or 3rd stitch unless using very fine yarn.
Maintain and Care for Fringed Blankets
Wash and Dry Safely
Hand wash in cool water with mild detergent, or use a gentle machine cycle. Place in a pillowcase or mesh bag to protect fringe. Lay flat to dry, as hanging can stretch the fringe over time. Never wring or twist the blanket.
Store Without Damage
Roll or loosely fold the blanket. Avoid tight creases that can leave permanent marks in the fringe. For long-term storage, place in a breathable cotton bag with cedar blocks to deter moths. Avoid plastic bins, which trap moisture.
Design Fringe for Different Blanket Styles
Modern Minimalist Look
Achieve a modern minimalist aesthetic with thin fringe using 1 to 2 strands per tassel. Space them widely, every 4th or 5th stitch. Use a monochrome palette with subtle contrast or an exact match. Finish with straight trim for a clean, architectural look.
Boho Chic Vibe
Create boho chic with thick, twisted fringe using 5 or more strands that are tightly wound. Mix layered lengths, such as 6-inch and 8-inch tassels. Incorporate multiple colors like rainbow, earth tones, or variegated yarns. Add beaded accents with wooden or ceramic beads.
Classic Elegance
For classic elegance, use even, straight-cut fringe with 3 to 5 strands and uniform spacing. Stick to neutral tones like cream, gray, or soft white. Finish with a polished look by combing and trimming meticulously.
Add Fringe to Non-Crocheted Blankets
You can fringe store-bought or knitted throws. Use a crochet hook to pull loops through existing fabric weaves. If no loops are accessible, use a yarn needle to sew the fringe on securely. Knot tightly and trim ends evenly. Many crafters upgrade plain blankets this way, adding fringe can make a $20 throw look custom-made.
Final Touches for a Boutique Finish
Trim with Precision
Use a ruler or straight edge when cutting. A rotary cutter on a cutting mat gives ultra-clean lines for multiple tassels. Cut straight for classic style or angle-cut for a tailored look.
Fluff and Style the Fringe
Run your fingers or a wide-tooth comb through the strands to separate and soften them. This adds volume and prevents matting. For a polished look, steam lightly from a distance. Do not press directly to avoid flattening the fringe.
Frequently Asked Questions About Crocheting Fringe on a Blanket
How long does it take to add fringe to a blanket?
Most full-sized throws take under one hour once you have the technique down. Batch preparation of fringe strands beforehand significantly speeds up the process.
What type of yarn is best for blanket fringe?
Smooth, low-fuzz yarns like acrylic or cotton work best. They knot cleanly and show definition. Avoid highly textured or slippery yarns that can obscure the fringe shape or loosen over time.
How do I prevent fringe from tangling?
Gently comb or finger-separate strands after attachment. Store the blanket flat or rolled, never folded. When machine washing, place the blanket in a pillowcase to protect the fringe from snagging.
Can I add fringe to a knitted blanket?
Yes. Use a crochet hook to pull fringe through existing knit loops. If no loops are accessible, use a yarn needle to sew the fringe on securely.
How do I fix fringe that is splaying at corners?
The issue occurs when you insert the hook directly at the corner. Next time, offset the insertion point by 1 to 2 stitches inward from the corner to prevent outward flaring.
What is the best spacing between fringe tassels?
Every 2nd or 3rd stitch is standard for worsted or bulky yarn. For a more modern look, space fringe every 4th or 5th stitch. Use stitch markers to maintain consistent spacing.
Key Takeaways for Adding Fringe to Your Crochet Blanket
Adding fringe is the easiest way to make your crochet blanket look intentional, high-end, and complete. With just yarn, scissors, and a hook, you can achieve a finish that rivals Pottery Barn or West Elm. The key is consistency in three areas: uniform strand length, even spacing between tassels, and secure knots that are snug but not too tight.
Whether you are going minimalist, boho, or classic, choose yarn that matches your blanket in weight and texture. Prepare fringe in batches using a book or cardboard template for efficiency. Work from the wrong side for reversible blankets and offset corner insertions to prevent splaying.
Once you master how to crochet fringe on a blanket, you will want to add it to scarves, shawls, bags, and more. Grab your hook, prepare your strands, and start knotting. Your blanket is moments away from that boutique-quality finish.

