
You’ve spent hours crocheting a cozy blanket, only to realize it’s too short, too narrow, or just not big enough. Before you unravel rows or start over, there’s good news: you can extend a crochet blanket in any direction without frogging a single stitch. Whether you’re fixing a sizing mistake, working around yarn shortages, or upgrading a baby blanket into a throw, modern crochet techniques make expansion seamless, secure, and even stylish.
This guide reveals proven methods to extend your blanket lengthwise, widthwise, or all around using your existing work as a foundation. From invisible foundation chain joins to bold border additions and panel insertions, you’ll learn how to add inches with confidence. Every technique preserves stitch integrity, matches tension, and blends or intentionally contrasts with your original piece.
Extend Width Using Foundation Chain Loops
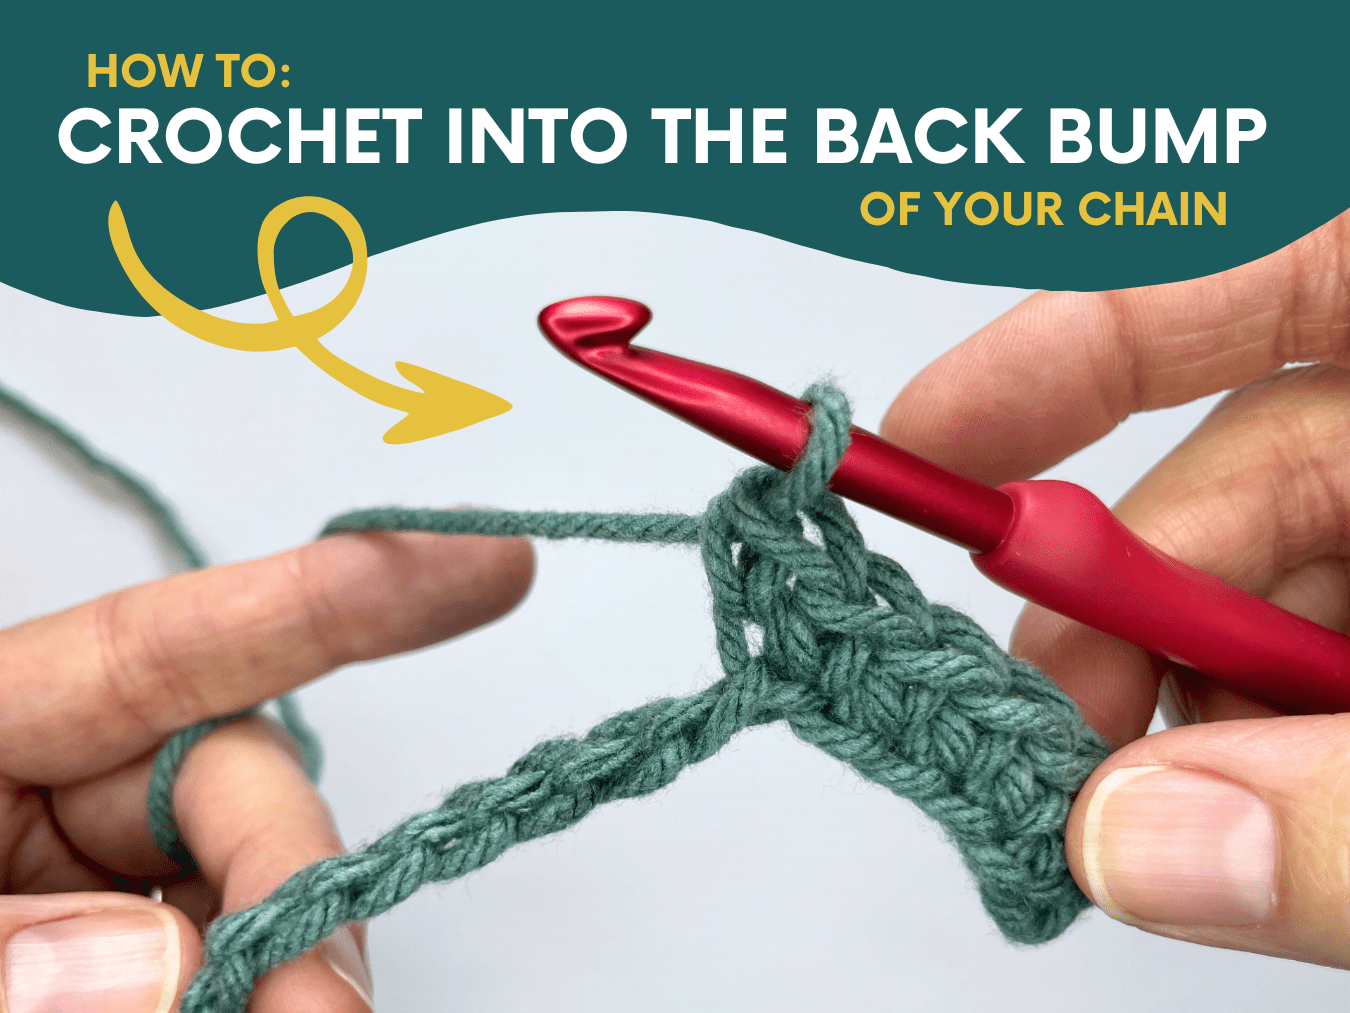
When your blanket feels too narrow, you can add width by working new stitches vertically along the side edges without cutting or crocheting into live stitches.
Use Back Bumps for Seamless Join
The secret lies in the unused loops at the base of the foundation chain, often called back bumps. These loops mirror the top of a regular row and allow perfect stitch replication.
- Flip the blanket to the wrong side.
- Locate the back bumps along the first row’s foundation edge.
- Insert your hook into the first bump from front to back.
- Use the naked hook method: yarn over with new yarn and pull through to create a loop.
- Chain 3 for DC or 4 for SC plus turning chain.
- Work one stitch into each back bump across.
- Slip stitch into the last original stitch on that row to anchor the new section.
Turn and Continue Row by Row
After completing the first vertical row, chain your turning height and slip stitch into the last original stitch again. Crochet across the newly added stitches. Repeat until desired width is achieved.
Pro Tip: Place stitch markers at the boundary between original and new stitches to avoid accidental increases or decreases.
Add Length to the Top Edge
If your blanket is complete but too short, you can add rows to the final edge just like continuing the project.
Attach Yarn at the Last Row
- Count stitches in the last row to maintain even width.
- At the corner, use the naked hook method: insert empty hook into the first stitch and pull up a loop with new yarn.
- Chain appropriate turning chain: SC requires ch 1, HDC requires ch 2, DC requires ch 3.
- Work one stitch per existing stitch across.
- Turn, chain, and repeat for each additional row.
Match Tension to Prevent Rippling
Uneven tension causes ripples. To avoid this, use the same hook size and hold yarn with consistent finger pressure. Practice a few test rows on scrap fabric if tension feels off.
Design Option: Add an odd number of rows to keep the original center visually balanced. Or use contrasting color as a bold design statement.
Extend from the Bottom Using Foundation Loops
You can also lengthen from the starting edge by working into the foundation chain back bumps, effectively adding rows before your first row.
Flip and Work Into Base Loops
- Turn the blanket upside down.
- Identify the back bumps of the foundation chain; they should match your row stitch count.
- Attach new yarn using the naked hook method.
- Chain turning chain such as ch 3 for DC.
- Single crochet or double crochet into each back bump.
- Turn and continue adding rows upward.
This method treats the original blanket as a mid-section panel, ideal for centering within a larger design.
Pro Tip: After extension, block the entire piece to blend textures and align drape.
Combine Top and Bottom Extensions
To center your original blanket in a larger throw, add rows to both ends.
Create a Centered Panel Design
- Extend the bottom by 10 to 15 rows using foundation back bumps.
- Extend the top by the same number of rows.
- Use matching yarn and stitch pattern for symmetry.
Result: Your original work becomes the heart of the blanket, surrounded by new growth.
Design Flexibility
You can use same color for subtle expansion or contrasting bands to frame the original piece. Add border rounds after extension for a unified finish.
Use Foundation Single Crochet (FSC)
For a seamless, stretchy edge ideal for borders or side panels, use Foundation Single Crochet.
Build Stitches Without a Chain
FSC creates both the foundation and the stitch in one motion:
- With active loop on hook, insert hook into the base of the last stitch.
- Yarn over and pull up a loop; this forms the chain base.
- Yarn over and pull through two loops; this completes the SC.
- Repeat across.
Each FSC replaces a chain plus SC combo, eliminating bulk and improving elasticity.
Ideal for Elastic Edges
FSC maintains even gauge and eliminates the chain gap common in traditional foundation rows. Use a slightly larger hook if the edge feels tight.
Add Stitches Directly to Fabric Edges
For quick length or width increases, work new rows directly into the side, top, or bottom edge.
Step-by-Step Edge Crocheting
- Attach new yarn by inserting hook into the first stitch along the edge.
- Pull new yarn through to form a loop.
- Chain 2 for DC; this counts as the first stitch.
- Complete first DC in the same stitch.
- Continue placing one stitch per base stitch along the edge.
- Turn and repeat for multiple rows.
Choose the Right Stitch
• SC provides firm, stable edges.
• HDC offers warmth with speed.
• DC gives fast coverage with light drape.
• TR creates a lacy, decorative effect.
Success Tip: Block the extended section to align with original fabric, especially important for acrylic or cotton.
Add a Border for All-Around Growth
Instead of extending edges individually, add a border to increase both length and width simultaneously.
Benefits of Border Extension
A border adds 1 to 4 inches uniformly, hides curling or uneven edges, and enhances visual appeal with texture or color.
Popular Border Types
• Single Crochet gives a neat, compact edge.
• Shell Stitch creates an elegant, dimensional look.
• V-Stitch provides an open, airy appearance.
• Multiple Rounds offer major size increase.
Handle Corners Correctly
To prevent curling, work 3 SC or SC, CH 1, SC in the corner stitch at each corner. Repeat for each round and mark corners with stitch markers.
Insert Side Panels for Major Width Gain
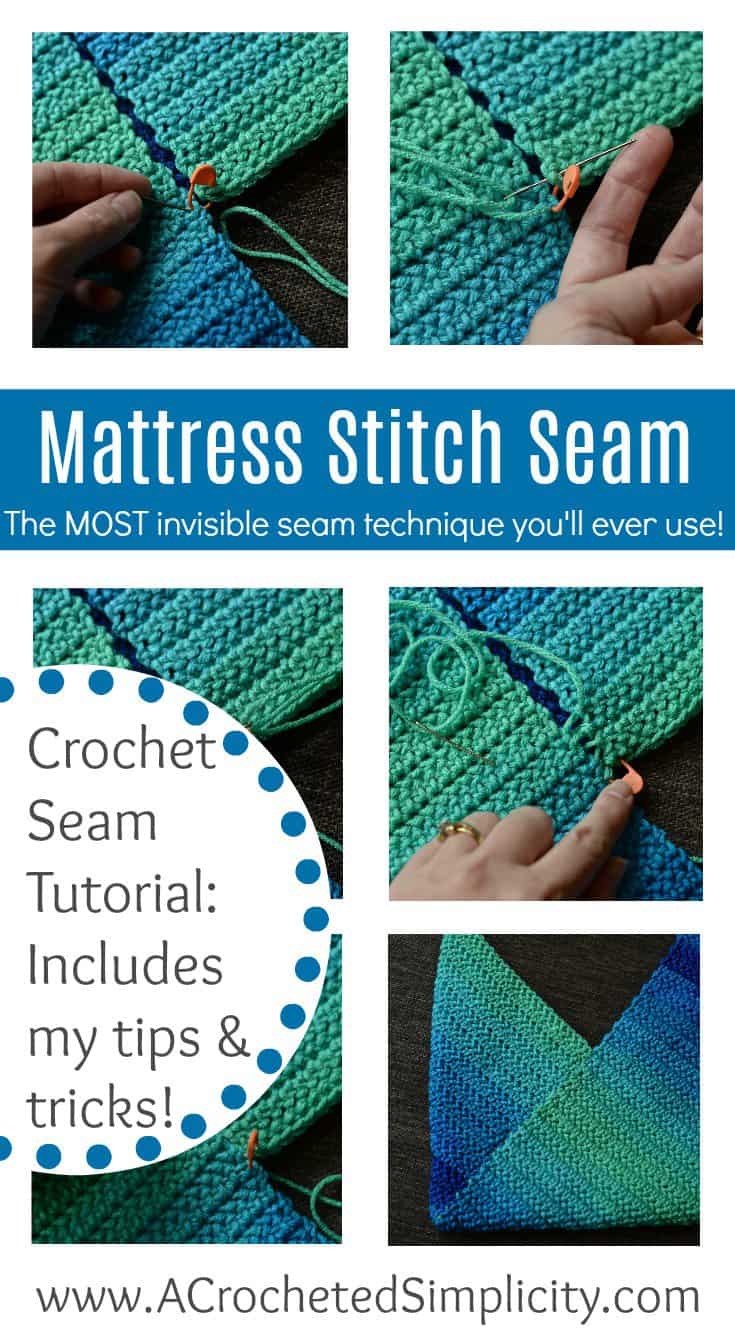
When 5 to 10 rows aren’t enough, crochet separate panels and attach them to the sides.
Crochet Matching Panels
- Measure the length of your blanket.
- Crochet a panel using same yarn, hook, and stitch pattern.
- Test identical gauge with a swatch first.
- Block both panel and blanket before joining.
Join With Invisible Seam
Use mattress stitch for nearly invisible seams. Slip stitch join creates a slight ridge. Single crochet join is durable but visible. Join-as-you-go provides seamless integration during crocheting.
Block to Recover Lost Width
If your blanket curled or tightened due to tension, wet or steam blocking can recover up to 10 percent in width.
Wet Blocking Process
- Soak in lukewarm water for 20 to 30 minutes.
- Gently squeeze; do not wring.
- Lay flat on a blocking mat and pin edges outward to target width.
- Let dry completely, which takes 12 to 24 hours.
Steam Blocking Use Caution
- Hold steam iron 1 inch above fabric.
- Gently stretch and shape with hands.
- Pin into place and cool.
Warning: Acrylic can melt. Never touch with an iron. Use low heat or steam-only setting.
Handle Missing Original Yarn
Cannot find the same yarn? You are not stuck.
Substitute Smartly
Match yarn weight such as bulky to bulky. Match fiber content such as acrylic to acrylic. Test drape and texture with a swatch. Hold new yarn next to finished work in natural light.
Embrace Color Contrast
If exact match is not possible, use the difference as a design feature. Add a bold border or panel in the new color. Choose a complementary shade such as navy with cream.
Join Yarn Cleanly at Edges
Use naked hook join for invisible edge starts. Use slip knot on hook for secure, slightly visible starts. Avoid magic knots in high-stress areas.
Match Gauge for Seamless Results
The key to invisible extension is gauge matching.
Test Before You Start
- Crochet a 4 by 4 inch swatch using same yarn and hook.
- Count stitches per inch.
- Compare to original blanket.
- Adjust hook size if needed. Too few stitches means go up a hook size. Too many means go down.
Pro Tip: Use an ergonomic hook to reduce hand fatigue and maintain even tension over long sessions.
Final Thoughts on Extending Your Crochet Blanket
Extending a crochet blanket is simpler than you might think. The back bumps of your foundation chain, the last row of your work, and even simple borders all offer accessible entry points for adding width or length. Choose your method based on how much extra size you need and whether you want the extension to blend seamlessly or stand out as a design feature. Always test your gauge before committing, block the entire piece after finishing, and do not stress if you cannot find the original yarn. A contrasting border or panel often becomes your favorite part of the finished blanket.
Frequently Asked Questions About Extending a Crochet Blanket
Can you add to a finished crochet blanket without unraveling it?
Yes. You can extend from the top, bottom, or sides using techniques like working into foundation chain back bumps, adding rows to the final edge, or attaching side panels. No frogging is required.
What is the naked hook method for extending crochet?
The naked hook method involves inserting an empty hook into a stitch, pulling up a loop with new yarn, and then proceeding with your stitch. This creates a knot-free, low-bulk join perfect for extending edges invisibly.
How do I match gauge when extending my blanket?
Crochet a 4 by 4 inch swatch using the same yarn and hook you used for the original blanket. Count stitches per inch and compare. Adjust your hook size up or down until the gauge matches before beginning your extension.
What should I do if I cannot find the original yarn?
Match yarn weight and fiber content as closely as possible. Test with a small swatch and hold it next to your blanket in natural light. Consider embracing color contrast as a design feature rather than seeking an exact match.
Does blocking really help extend a blanket?
Blocking recovers minor width loss from tension or curling, typically 5 to 10 percent. It also blends texture differences and unifies drape across original and extended sections. Block after all extensions are complete.
Can I add a border to make my blanket bigger?
Yes. Adding a border increases both length and width simultaneously. Single crochet, shell stitch, and V-stitch borders all work well. This method also hides uneven edges or minor mistakes.

