
You’ve spent hours, maybe even weeks, crocheting a blanket only to step back and realize it leans like the Tower of Pisa. One edge flares out, another curls inward, or the whole piece twists diagonally. Don’t panic. A crooked crochet blanket isn’t a lost cause. With the right techniques, you can fix a crooked crochet blanket and transform an imperfect piece into a flat, polished creation. The key is identifying the cause first: missed stitches, inconsistent tension, turning chain confusion, or uneven edges. Once you diagnose the problem, the appropriate correction method will restore symmetry and give your handmade piece a professional look.
In this guide, you’ll learn exactly how to fix a crooked crochet blanket step by step. We’ll cover diagnostic methods, corrective borders, blocking techniques, and prevention strategies so you can salvage current projects and avoid this issue in future work.
Diagnose the Distortion First
Before grabbing your hook or steamer, assess what’s really causing the crooked shape. Different issues need different solutions, so proper diagnosis saves time and frustration.
Check for Missed or Extra Stitches
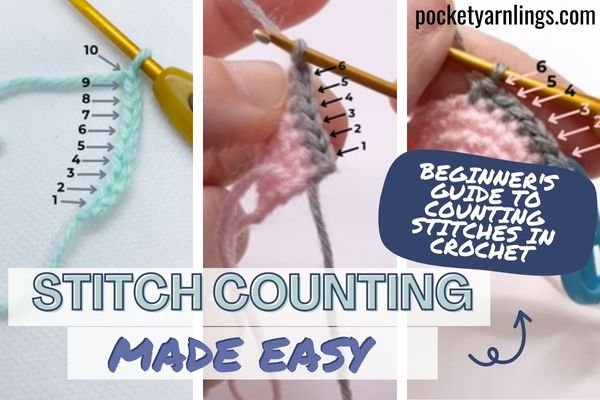
Count your stitches across several rows, especially near the top and bottom. If the count decreases row by row, you’re missing stitches, likely at the start or end of rows. If it increases, you’re adding extra stitches, often by working into the turning chain incorrectly. Even one stitch off per row creates visible tapering over time. Use stitch markers in the first and last stitch of each row to prevent future errors.
Evaluate Your Tension
Lay the blanket flat and run your fingers across the surface. Tight, puckered areas pull inward and are common with high tension. Loose, sagging sections spread outward and indicate inconsistent or relaxed tension. Tension often shifts due to fatigue, stress, or changing hand positions over long projects.
Inspect Turning Chain Usage
Misusing the turning chain is a top cause of slanted edges. For double crochet, chain 3 at the start, which counts as the first stitch. You should skip the first stitch at the end of the previous row and work into the second. If you’re working into the turning chain or not skipping correctly, your edge will drift.
Observe Edge Behavior
Lift opposite corners gently. Wavy edges typically indicate tension or stitch count issues. Curling or cupping often stems from a tight foundation chain or small hook size. Diagonal twist points to consistent stitch errors on one side. Knowing the pattern helps you choose the best fix.
Fix It With a Corrective Border
The most effective solution for a finished blanket is adding a border that actively corrects distortion. This method works for nearly all types of uneven edges.
Use Taller Stitches to Lift Dipping Edges
If one side caves inward or dips, work double crochet or treble crochet along the low areas. Place these taller stitches as close to the outer edge as possible to stretch and lift the fabric. For example, insert 1 double crochet every row end down a short side to extend its length.
Tighten Flared Sections With Single Crochet
For edges that flare outward, use single crochet to contract the area. Single crochet is denser and pulls fabric in, counteracting looseness. Apply consistently across bulging zones for balanced correction.
Blend Corrections With Transition Stitches
Avoid harsh lines between stitch types. In transition zones, alternate single crochet and double crochet every 2 to 3 stitches. This creates a smooth visual and structural shift from tight to loose areas. For instance, after 5 single crochet stitches on a flared edge, switch to double crochet over 5 dipped stitches.
Shape Corners for a Square Finish
Maintain clean corners by working specific stitch combinations. For single crochet borders, work single crochet, chain 1, single crochet all in the corner stitch. For double crochet borders, use 3 double crochet, chain 1, 3 double crochet in the same corner stitch. This preserves sharp angles and prevents rounding.
Apply Multiple Rounds for Full Correction
One round may not be enough for severe distortion. Round one uses single crochet to stabilize and even out edges. Round two switches to half double crochet or double crochet for drape and lift. Additional rounds add decorative elements like shells or picots to mask imperfections. Each round adds about 1 inch of width and improves alignment.
Pro Tip: Use a slightly smaller hook for borders to prevent flaring and maintain structure.
Block to Reshape the Fabric
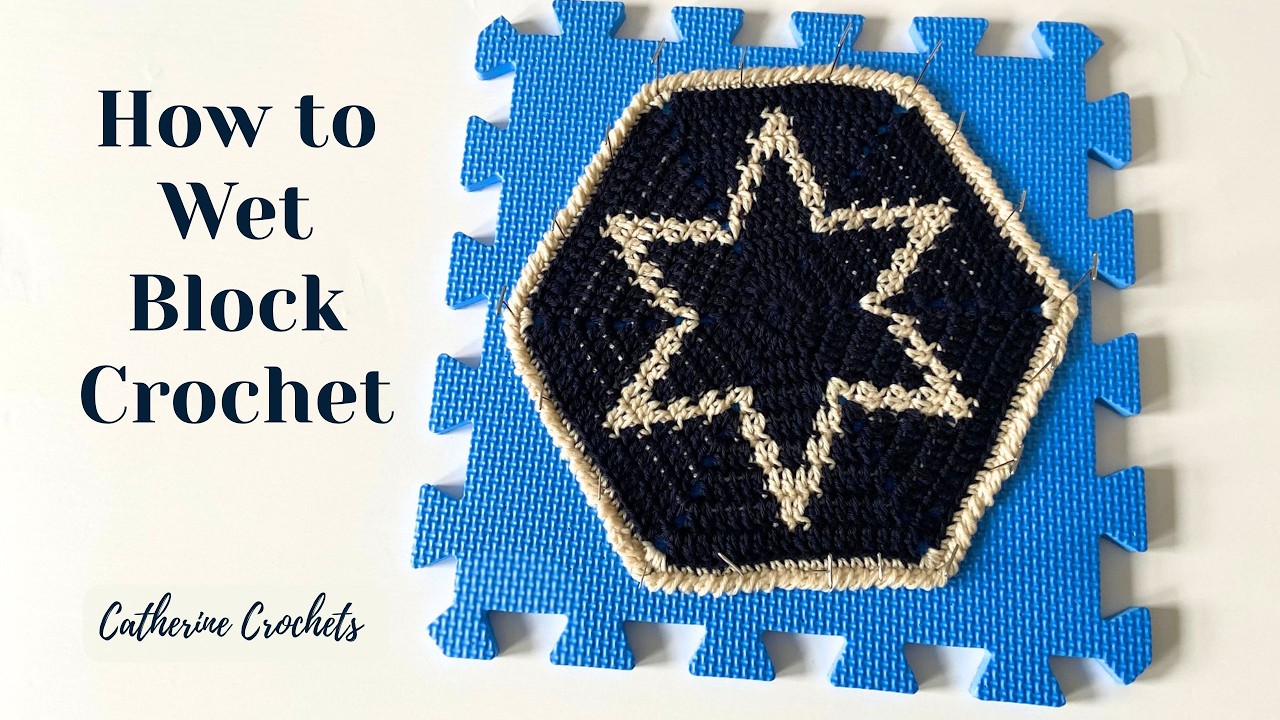
Blocking uses moisture and tension to reset the fibers, making it ideal for tension-related waviness. This method works best when the distortion stems from inconsistent tension rather than stitch count errors.
Wet Block Natural Fibers
Wet blocking is best for wool, cotton, or alpaca. Soak the blanket in lukewarm water with mild detergent for 15 to 30 minutes. Gently press out water, never wring. Roll in a towel to remove excess moisture. Lay flat on a blocking board or clean surface. Pin into a perfect rectangle using T-pins or blocking wires. Stretch slightly at dipping corners and ease tension on flared areas. Let dry completely, which takes 12 to 48 hours depending on thickness.
Steam Block Synthetic Yarns
Steam blocking is safe for acrylic, polyester, or large blankets. Lay the blanket on a heat-safe surface. Hold a garment steamer or iron 1 to 2 inches above the fabric. Steam evenly, focusing on distorted edges. Gently shape with your hands while warm. Let cool completely before moving.
Caution: Never let the iron touch acrylic directly, as heat can melt the fibers.
Refresh With a Dryer for Acrylic
For slight waviness in acrylic blankets, tumble dry on air fluff or low heat for 5 to 10 minutes. Remove while slightly warm and lay flat to cool. This method resets the drape without water. Always test on a swatch first.
Frog It and Re-Crochet If Needed
If the distortion started recently and you haven’t finished the blanket, unraveling may be the cleanest fix. This approach works best for in-progress pieces with structural stitch errors.
Unravel Back to the Error Point
Carefully pull out rows until you reach where the counting or tension went wrong. Wind the yarn into a ball to prevent tangles. This method gives you a fresh start with correct stitch counts.
Re-Crochet With Better Habits
Use stitch markers in the first and last stitch of every row. Count stitches every 5 to 10 rows. Consider foundation stitches like foundation single crochet instead of a chain to avoid tight foundation issues. These eliminate the turning chain problem entirely and ensure even tension from the start.
Note: Frogging is emotionally difficult, but often necessary for a flawless, even blanket.
Creative Fixes for Severe Cases
When the blanket is too far gone, redesign it instead of abandoning the project entirely.
Turn It Into a Shawl or Wrap
If the blanket is triangular or heavily slanted, embrace the shape. Add long fringe or decorative edging. Wear it as an asymmetrical shawl, and what was a flaw becomes a fashion feature.
Add Appliqués or Motifs
Crochet flowers, stars, or geometric shapes to cover problem areas. Sew them on with a tapestry needle. This draws the eye away from uneven edges and adds visual interest.
Cut and Reimagine the Panel
You can cut crochet if the structure is secure. Examine the stitch structure to ensure it won’t unravel. Cut horizontally to remove a distorted section. Rejoin with a whip stitch or ladder stitch. Sew the finished panel onto a fabric backing for a quilted look.
Prevent Crooked Blankets in Future Projects
Avoid the problem before it starts with these proactive habits. Prevention is always easier than correction.
Count Stitches Every Few Rows
Check your count at the end of every row or every 5 to 10 rows. Use a row counter or app to track progress. For large blankets, segment counts with stitch markers every 25 stitches.
Mark the First and Last Stitches
Place locking stitch markers in the first and last stitch of each row. Remove them as you work through. This prevents accidental skips or additions that compound over time.
Use the Same Hook and Yarn
Mixing hook sizes or yarn lots causes tension shifts. Label your hook and keep it with the project. Note the dye lot number on your yarn label.
Master the Turning Chain
Know your stitch chain height. Single crochet requires chain 1, half double crochet requires chain 2, and double crochet requires chain 3. Skip the correct number at the end of the row to avoid doubling up.
Try Foundation Stitches
Foundation single crochet replaces the chain and first row. It eliminates tight chain issues and ensures even tension from the start. This technique works the same for half double crochet and double crochet.
Frequently Asked Questions About Fixing Crooked Crochet Blankets
Can I fix a crooked blanket without blocking or adding a border?
For minor tension issues, washing and laying the blanket flat to dry may help. However, for stitch count errors or significant distortion, blocking alone won’t fix the underlying problem. Borders and strategic corrections are usually necessary for noticeable improvement.
Will steam blocking damage my acrylic blanket?
Steam blocking is safe for acrylic when you keep the iron or steamer 1 to 2 inches above the fabric. Never let direct heat touch the yarn. Test on a swatch first to ensure the yarn can handle the heat without melting or becoming shiny.
How do I know if I need to frog my blanket?
Frog if you notice consistent stitch count errors that create tapering or flaring. If the blanket is nearly finished and the distortion is severe, frogging may be worth the time investment. For finished blankets, borders are the better option.
Can I fix just one side of a crooked blanket?
Yes. A corrective border allows you to address specific problem areas. Use taller stitches on the short side and tighter stitches on the flared side. Work strategically around the entire perimeter for balanced correction.
What’s the easiest fix for a wavy crochet blanket?
A single round of single crochet often fixes minor waviness. This dense stitch stabilizes edges and creates a polished finish. For best results, block the blanket first, then add the border with a slightly smaller hook.
Key Takeaways for Fixing Your Crooked Crochet Blanket
A crooked crochet blanket doesn’t mean failure. It means you’re learning. The most effective fixes are adding a corrective border with taller stitches on dipping edges and tighter stitches on flared areas. Blocking resets tension-related waviness, while frogging corrects structural stitch errors. For future projects, count stitches regularly, use stitch markers, and master the turning chain to prevent distortion from happening in the first place. Whether you choose a simple steam fix or a full border rebuild, your blanket can still become a beautiful, flat, finished piece. Keep crocheting, and every stitch will make you better.

