
Have you ever looked at a pile of old wool sweaters and imagined something warmer, more meaningful? Turning reclaimed wool into a handmade blanket is not only a creative way to repurpose fabric—it is a sustainable, cost-effective, and deeply satisfying craft. Whether you are making a cozy throw for your couch or a heartfelt gift, learning how to make a blanket out of wool opens the door to a world of texture, warmth, and personal expression. This guide walks you step by step through sourcing materials, preparing fabric, designing your layout, and assembling a durable, beautiful wool blanket.
From thrift-store finds to forgotten sweaters in your closet, wool is surprisingly accessible. Once felted and cut, it becomes a stable, fray-resistant fabric perfect for sewing. You will learn how to maximize every inch of material, arrange a balanced design, and choose between quick patchwork or elegant quilted construction.
Source Wool from Old Sweaters
Finding wool for your blanket does not require expensive purchases. With some effort, you can gather all the material needed for free or at very low cost.
Use 100% Wool for Best Results
Start with pure wool garments. Sweaters, coats, and suits work best because their natural fibers shrink and tighten when washed in hot water, creating a dense, non-fraying fabric ideal for blankets. Avoid 100% synthetic fabrics like acrylic or polyester, which do not felt and offer poor insulation. Wool-blend garments can work but may felt less evenly.
Find Free or Low-Cost Wool
Thrift stores like Goodwill or Salvation Army are goldmines for affordable wool sweaters. Look for gently used mens wool garments, as they are often larger and yield more fabric. Ask friends and family to donate old wool clothing, or check with tailors who may discard leftover fabric from alterations.
Cut Open Garments Efficiently
To flatten a sweater, cut up the side seams and across the shoulders. Remove sleeves by slicing along the armhole curves. This gives you large, flat panels to work with. Focus on the torso sections first, as they provide the most usable area. Sleeves can be sliced open and used for narrower strips or smaller squares.
Prepare Wool by Felting and Washing
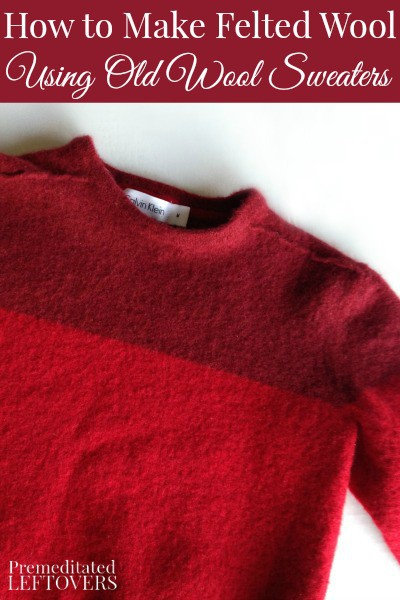
Felting is essential for creating stable, fray-resistant fabric that handles well during sewing and lasts for years.
Wash and Dry to Felt Wool
Wash each wool item in cold water using a wool-safe detergent, then dry on high heat in the dryer. Repeat the cycle if needed, as some sweaters require two or three washes to fully felt. Test readiness by tugging the fabric. Felted wool should resist stretching and show no loose fibers along cut edges.
Inspect for Damage Before Cutting
Hold each panel up to a light source to spot moth holes, thinning areas, or weak spots. Mark damaged zones with chalk and cut around them. Even slightly worn fabric can be repurposed for hidden backing sections or internal patches.
Press Fabric for Clean Cuts
Iron all wool panels before cutting. Use a steam iron or a damp pressing cloth to avoid scorching. Press seams flat after each sewing stage to ensure crisp alignment. Wool responds well to heat, so take time to smooth every piece.
Plan Your Blanket Design and Layout
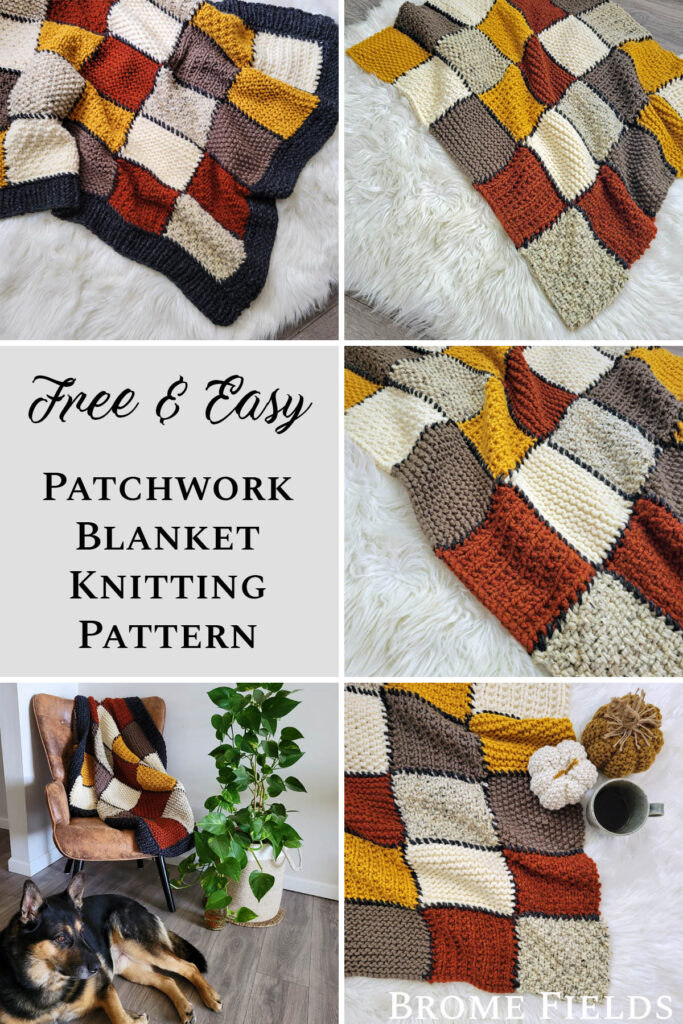
Choosing your blanket size and design early prevents wasted materials and ensures a balanced final product.
Choose Size Based on Use
Decide the blanket purpose early. A baby blanket typically measures 36 inches by 36 inches using 12 squares of 3 inches each. A throw blanket works well at 42 inches by 60 inches using a 7×10 grid of 6-inch squares. Adjust grid size accordingly for larger bed blankets.
Pick a Square Size
Stick to 6-inch squares for throws or 3-inch squares for baby blankets. Larger squares mean fewer seams and faster assembly. Smaller squares allow intricate designs but require more precision. Using a consistent size ensures even alignment.
Arrange Colors and Textures
Lay all cut squares on the floor to test arrangements before sewing. Distribute dominant colors evenly and avoid clustering similar tones. Mix solids, stripes, and patterns for visual interest. Include unique elements like pockets or textured knits as focal points.
Cut Wool Squares with Precision
Accurate cutting directly affects how well your blanket comes together.
Use a Rotary Cutter and Mat
For clean, repeatable cuts, use a rotary cutter, self-healing cutting mat, and quilters ruler. Place the wool panel on the mat, align the ruler, and slice with the rotary tool. This method is faster and more accurate than scissors.
Maximize Fabric Yield
From a single sweater, cut one 6-inch by 12-inch rectangle, which becomes two 6-inch squares. Additional squares can be cut from side panels and sleeves. An average sweater yields 6 to 10 six-inch squares. Save every usable piece, as even narrow strips can border the final blanket.
Sew Columns First, Then Join Rows
Building your blanket column by column keeps everything organized and easier to manage.
Organize Squares by Column
After finalizing your layout, group squares into vertical columns. Stack each column from bottom to top, with the top square on top. Label piles with masking tape to keep order during sewing.
Sew Squares into Vertical Columns
For each column, place the top two squares right sides together and sew along the right edge with a zigzag stitch using a quarter-inch seam allowance. Backstitch at start and end, then cut the thread and press the seam to one side. Add the next square to the bottom and repeat until the column is complete.
Join Columns Left to Right
Lay columns in order on a flat surface. Sew them together side by side, matching seams carefully. Use long, continuous stitching and backstitch at beginning and end of each join. Press seams in one direction for a flat finish.
Attach Backing for Durability
Adding a backing layer increases warmth, softness, and the blankets lifespan.
Choose a Soft Backing Fabric
Use cotton flannel, fleece, or another wool fabric for backing. Cut it to match the patchwork top exactly. This layer is optional but recommended for best results.
Use the Quick Binding Method
Place patchwork and backing right sides together and sew along three sides with a half-inch seam allowance. Turn right side out and press edges flat. Fold in the raw edge of the open side and hand-stitch or topstitch closed to enclose all raw edges neatly.
Add a Border for a Polished Finish
A border hides uneven edges and gives your blanket a professional look.
Cut and Prepare Border Strips
Use leftover wool from sleeves or scraps. Cut 2-inch-wide strips and join shorter pieces with diagonal seams to reach required lengths.
Calculate Border Lengths
For a 7×10 grid of 6-inch squares, the top and bottom borders need 42 inches each. Side borders need 62 inches each, accounting for the overlap. Add extra length for mitered corners.
Sew and Miter Corners
Pin the border to the front edge with right sides together and sew with a half-inch seam. At corners, fold fabric diagonally and press. Sew across the fold to create a clean 45-degree angle. Fold over, tuck raw edges, and hand-stitch in place.
Reinforce with Tufting or Quilting
Securing the layers together prevents shifting and extends your blankets life.
Prevent Layer Shifting
Even with backing, layers can shift over time. Secure them with tufting using thread through both layers and tying knots every 6 to 8 inches. Alternatively, sew straight lines or decorative stitches across the blanket in a quilting pattern.
Use a Simple Running Stitch for Tufting
Thread a large needle with doubled yarn and poke through front and back layers. Tie a secure knot on the back and repeat in a grid pattern. Choose contrasting or matching yarn based on desired effect.
Finish with Final Touches
Small details make a big difference in your finished blanket.
Trim All Loose Threads
After sewing, inspect every seam. Knot and clip any loose threads to prevent tangling in future washes. Do a final pass across the entire blanket.
Check for Gaps or Holes
Hold the blanket up to light and look for missed stitches, small holes, or uneven seams. Repair with matching thread using a small backstitch.
Remove Labels and Press Final Product
Peel off all masking tape labels. Give the blanket a final press with a warm iron using a pressing cloth to flatten seams and give a finished appearance.
Care for Longevity and Softness
Proper care keeps your blanket warm and beautiful for years.
Wash Cold, Dry Flat
Hand wash or use a gentle machine cycle with wool-safe detergent. Rinse in cold water and dry flat or tumble dry on low heat. Avoid high heat, which can cause further shrinking.
Repair and Refresh Over Time
Small holes can be mended with invisible stitches. Add decorative patches for character. If fibers pill, gently shave with a fabric shaver.
Customize for Gifting or Pets
A handmade wool blanket makes a thoughtful, personalized gift.
Make Personalized Gifts
Customize with the recipients favorite colors, monogrammed patches, or seasonal themes. The low material cost contrasts with the high emotional value of a handmade gift.
Create Pet-Friendly Throws
Cats and dogs love the warmth of wool. Use durable felted fabric and avoid loose threads that could be chewed. A smaller 36-inch by 36-inch size works well for pet beds.
Save Money and Reduce Waste
This project is as economical as it is eco-friendly.
Spend Almost Nothing on Materials
Many crafters spend hardly a cent on wool by using donations or thrift finds. Backing fabric may cost 10 to 15 dollars on sale, but even that can be repurposed from old bedding.
Support Sustainable Fashion
By reusing wool garments, you keep textiles out of landfills. One blanket can rescue 5 to 10 sweaters from waste. This project turns clutter into comfort and style into sustainability.
Frequently Asked Questions About Making a Wool Blanket
Can I use wool-blend sweaters for this project?
Wool-blend garments containing 70% wool and 30% synthetic fibers can work, but they may felt less evenly than 100% pure wool. The resulting fabric may not be as warm or durable, and cut edges might fray more easily.
How many sweaters do I need for one blanket?
One average sweater yields approximately 6 to 10 six-inch squares. A throw blanket using a 7×10 grid requires 70 squares, so you would need roughly 7 to 12 sweaters depending on their size and style.
Do I need a sewing machine to make a wool blanket?
A sewing machine makes the project faster, but hand-sewing is entirely possible. Use a strong needle and wool-friendly thread. Hand-stitching takes longer but works well for smaller projects like baby blankets.
What happens if my wool does not felt completely?
If wool has not fully felted, repeat the hot wash and dry cycle. Some sweaters require 2 to 3 cycles. Test by tugging the fabric. It should resist stretching and show no loose fibers along cut edges.
Can I wash my finished wool blanket in the washing machine?
Yes, but use cold water and a gentle cycle with wool-safe detergent. For best results, hand wash or lay flat to dry. High heat can cause additional shrinking and damage the felted fabric.
How do I fix a hole in my wool blanket after it is finished?
Small holes can be repaired with invisible stitches using matching thread. For a decorative fix, sew a patch over the hole using a contrasting wool scrap. Both methods maintain the blankets warmth and extend its life.
Key Takeaways for Making Your Own Wool Blanket
Making a wool blanket is more than a craft. It is a mindful act of reuse, warmth, and care. With simple tools, thoughtful planning, and steady hands, you can create something truly one-of-a-kind. Whether you choose a fast patchwork method or a detailed quilted finish, the result is a durable, cozy blanket that tells a story.
Start by sourcing 100% wool sweaters from thrift stores or donations. Felt them properly through repeated hot washes and dry cycles. Cut consistent squares using a rotary cutter for precision, then organize your layout before sewing. Build columns first, join them together, and finish with a border and tufting for stability.
The process rewards patience. Every square represents rescued material and creative expression. Wrap yourself in something you made, square by square, stitch by stitch.

