
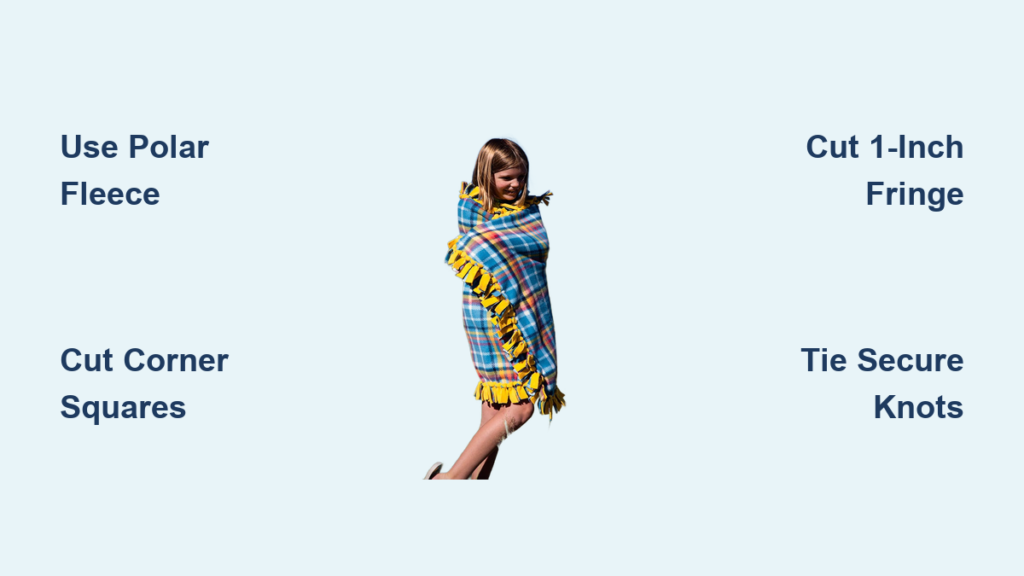
Tying a soft, cozy blanket by hand without sewing is easier than you think, and the result is a warm, personalized creation anyone can enjoy. How to make a blanket with knots is a beginner-friendly DIY project that transforms two pieces of fleece fabric into a durable, no-sew masterpiece using nothing more than scissors and your hands. Whether you’re crafting with kids, making a heartfelt present, or contributing to a charity drive, this method delivers professional-looking results in under two hours. With fleece’s non-fraying edges and endless fabric options, you can customize size, color, and theme to suit any occasion. In this guide, you’ll learn every step, from choosing the right materials to tying secure knots, and discover expert tips for flawless finishes.
Choose the Right Fleece for Your Knotted Blanket
Selecting proper fabric is the foundation of a successful project. Not all fabrics work for this no-sew method, so understanding your options prevents wasted time and money.
Fleece Types That Work Best
True polar fleece is the only fabric that reliably holds knots without fraying. Standard polar fleece offers affordability and durability for everyday use. Blizzard fleece provides extra thickness and softness for winter warmth. Cuddle fleece (also called Minky) delivers ultra-plush luxury perfect for baby blankets and gifts. Avoid cotton, wool, or stretchy knits because these materials unravel and require sewing.
How Much Fabric You Need
Purchase two identical pieces of fleece, one for each layer. A baby blanket (30″ × 40″) requires 1 yard per layer. A toddler blanket (40″ × 50″) needs 1.25 yards per layer. A throw or adult blanket (50″ × 60″) takes 2 yards per layer. Fleece typically comes in 54 to 60-inch widths, so yardage calculations are straightforward.
Prepare Your Fleece Layers Correctly
Proper fabric prep ensures your blanket lies flat and looks polished. Taking time here prevents problems later when you’re cutting and tying.
Trim Selvage Edges First
Fleece comes with tightly woven selvage edges along the roll’s sides. These denser strips can curl or cause misalignment, so cut them off using sharp fabric scissors. Remove about half an inch from both sides of each piece to create clean, straight borders.
Layer With Wrong Sides Together
Place the two fleece pieces wrong sides (dull sides) together, so the right (printed or fuzzy) sides face outward. This configuration keeps the attractive surfaces visible on both sides of the finished blanket. Lay them on a large, flat surface like a table, floor, or cutting mat. Smooth out wrinkles, bubbles, and curls with your hands.
Secure Layers Before Cutting
Use quilting clips or pins at corners and midpoints to prevent shifting during cutting. Apply masking tape along the edges as a visual guide. For extra precision, cut both layers at once using a rotary cutter and ruler. Double-check measurements to confirm both pieces are perfectly aligned.
Cut Corners to Prevent Bulk

Leaving full corners creates thick, lumpy edges that are hard to knot neatly. Removing squares from each corner reduces bulk and allows the fringe to lie flat after tying.
Remove Proper-Sized Corner Squares
At all four corners, measure 5 to 7 inches in from the edge along both sides. Make a small snip at each mark. Connect the cuts to remove a square. Use 5-inch squares for baby or toddler blankets and 7-inch squares for throws and adult sizes. Cut through both layers simultaneously to maintain alignment.
Use a Template for Consistency
Create a reusable cardboard or manila folder template (7×7 inch square) to trace or guide each cut. This speeds up the process and ensures uniform results, especially when making multiple blankets. Cutting larger squares gives a cleaner finish on bigger blankets and reduces strain when tying near corners.
Cut Uniform Fringe Strips
The fringe forms the knotted border, so consistent width and depth are key to a professional look. Each strip should be long and wide enough to tie securely without breaking.
Set Fringe Dimensions Correctly
Cut strips 1 inch apart around the entire perimeter. Slice 5 to 7 inches deep, stopping just before the inner edge of the removed corner square. Stick to 5-inch depth for smaller blankets and 7-inch depth for larger ones. Longer strips are easier to handle and tie tightly.
Choose Your Cutting Method
Sharp fabric scissors work well for small projects or beginners. Cut one slit at a time every inch. A rotary cutter with a clear acrylic quilting ruler offers speed and precision for larger blankets. Place the ruler vertically every inch and run the rotary cutter along the edge. Create a stiff paper strip with 1-inch by 5 to 7-inch notches as a reusable template for guided cutting.
Never cut strips narrower than three-quarters of an inch or shorter than 4 inches because they’re too fragile to knot reliably.
Tie Secure Double Layer Knots
Now comes the fun part: tying the knots. Each pair consists of one top strip and one bottom strip pulled together and knotted at the edge.
Match and Pull Fringe Pairs
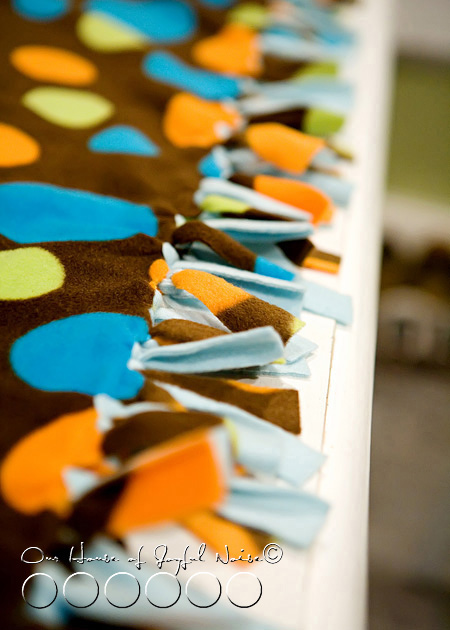
Start at one corner and work clockwise or counterclockwise around the entire blanket. Pick a fringe pair (one from the top layer and one from the bottom layer directly beneath). Lift both strips and tie them into a knot close to the blanket’s edge. Pull tight against the base to eliminate gaps. Repeat all the way around, checking for skipped pairs.
Choose the Best Knot Type
A square knot (also called a reef knot) provides durability and a flat finish. Cross the top strip over the bottom, loop under, then reverse and repeat. This knot resists unraveling even after washing. A double granny knot offers extra security by tying two overhand knots in the same direction. A balloon knot works well for kids and speed but is looser over time. Use the loop-and-pull (finger method) by wrapping strips around your finger, pulling the end over and through for consistent results.
Try Two-Tone Alternating Edge (Optional)
For a blanket with different colors on each side, tie every other pair on the front. Flip the blanket over and tie the remaining pairs on the back. Each side shows a different color in the fringe, creating visual interest.
Tie with the fabric’s grain (usually across the width) first because strips stretch easier and knot smoother.
Final Inspection and Touch-Ups
A quick review ensures your blanket is complete, safe, and polished.
Check for Missing Knots
Walk around all four sides and verify every strip is tied with no gaps or loose ends remaining. Gently tug each knot to test tightness. Retie any that feel loose. Ensure corners lie flat.
Smooth and Fluff Your Blanket
Shake the blanket vigorously or tumble dry on low heat for 10 minutes to set the fibers, soften the texture, and remove static. Trim any stray threads (rare with fleece).
Add a Personal Label (Optional)
Attach a small tag with the recipient’s name, date made, and a short message like “Handmade with love.” This adds sentimental value, perfect for baby showers, holidays, or charity donations.
Customize Size and Design
One of the biggest advantages of DIY knotted blankets is total control over appearance and fit.
Pick the Right Size for Your Needs
A mini blanket (24″ × 24″) works for stuffed animal blankets or small gifts. A baby blanket (30″ × 40″) fits cribs and strollers. A toddler blanket (40″ × 50″) suits nap time and car seats. A child blanket (45″ × 60″) is ideal for beds and sleepovers. A throw blanket (50″ × 60″) fits couches and chairs. An adult blanket (60″ × 80″) provides full coverage.
Mix and Match Fabrics Creatively
Create visual interest with smart pairings. Solid plus pattern combinations like navy with star print or gray with dinosaurs stand out beautifully. Themed sets work well for superheroes, unicorns, or seasonal designs. Use high-contrast colors so knots stand out clearly on both sides.
Select Fleece Type by Use
Standard polar fleece works for everyday use and beginners. Blizzard fleece provides winter warmth and premium gifts. Cuddle or Minky fleece delivers baby blanket luxury with a silky, ultra-plush feel.
Wash and Care Properly
Your knotted blanket can last 3 to 7 years with proper maintenance.
Machine Wash Safely
Wash in cold water on a gentle or delicate cycle using mild detergent. Avoid bleach because it degrades color and texture. Skip fabric softener because it coats fibers and reduces softness. Wash alone or with similar colors.
Dry Without Damage
Tumble dry on low heat only. Air drying is best for longevity—lay flat indoors. Never hang dry because it stretches edges. Never iron because fleece melts under high heat.
Repair and Refresh Over Time
If knots loosen over time, untie and retie securely. Keep leftover fabric scraps to patch tears. With care, your blanket stays soft, warm, and knot-tight for years.
Troubleshoot Common Problems
Even experienced crafters face issues. Here’s how to fix them fast.
Fix Uneven Fringe
Inconsistent spacing or depth causes uneven fringe. Use a ruler, masking tape line, or paper template to guide cuts for uniform results.
Stop Loose Knots
Weak knot types or loose tension cause knots to come undone. Switch to a square knot or double granny knot and pull tight to the base.
Prevent Misaligned Layers
Fabric shifting during cutting causes misalignment. Pin or clip layers before cutting and cut both at once.
Flatten Bulky Corners
Forgetting to cut out corner squares creates bulky corners. Always remove 5 to 7-inch squares before fringe cutting.
Avoid Skipped Strips
Losing count while tying causes missed strips. Work in sections and place a safety pin at each quarter mark as a visual tracker.
Handle Curling Edges
Low-quality fleece or storage memory causes curling. Trim curled ends during prep and press flat before cutting.
Save Time and Money on Your Project
DIY knotted blankets cost far less than store-bought versions, and you can make them faster with smart planning.
Cut Fabric in Bulk
Prepare multiple blankets at once by stacking and cutting layers together. Use a rotary cutter and ruler for speed. Store cut pieces until ready to tie. This approach is ideal for craft groups or donation events.
Shop Sales for Best Prices
Watch for Buy One, Get One 50% Off deals at JoAnn Fabrics, Hobby Lobby, and Michaels. Walmart and Amazon offer affordable solid-color fleece by the yard. With sales, a full blanket (4 yards total) costs $20 to $30, which is up to 70% cheaper than Etsy or department store versions ($45 to $80).
Involve Kids and Families
Assign small sections to children age 6 and up with supervision. This develops fine motor skills and creativity while turning into a fun weekend activity or holiday tradition. Use bright task lighting and play music to keep energy high during long knotting sessions.
Frequently Asked Questions About Making Knotted Blankets
What is the best fabric for a no-sew knotted blanket?
True polar fleece is the only fabric that reliably works for knotted blankets without sewing. It doesn’t fray, holds knots securely, and washes well. Avoid cotton, wool, or stretchy knits.
How long does it take to make a knotted fleece blanket?
Most people complete a standard throw-size blanket in 1.5 to 2 hours. Baby blankets take about an hour. Larger adult blankets may require 2 to 2.5 hours.
Are knotted blankets safe for babies?
Knotted fleece blankets are not recommended for infants under 12 months due to potential choking hazards from loose fibers. For older babies and toddlers, they make excellent gifts.
How do I keep my knots from coming loose?
Use a square knot or double granny knot for security. Pull each knot tight against the base of the blanket. Check and retighten any loose knots after the first wash.
Can I use matching colors for my blanket?
You can use matching colors, but high-contrast color combinations make the knot pattern more visible and visually appealing. Many crafters prefer solid plus pattern or contrasting solids.
How do I wash a knotted fleece blanket?
Machine wash cold on gentle cycle with mild detergent. Tumble dry low or air dry flat. Avoid bleach, fabric softener, and high heat.
Key Takeaways for Making Your First Knotted Blanket
Making a blanket with knots is more than a craft. It’s a way to give warmth, comfort, and care with your own hands. From prep to final fluff, every step is simple, satisfying, and scalable. Remember to use true polar fleece that doesn’t fray, cut 5 to 7-inch squares from corners to prevent bulk, cut fringe 1 inch wide and 5 to 7 inches deep, tie secure square knots or double granny knots, and pull each knot tight against the base. Whether you’re making one for a friend or a hundred for a shelter, this guide gives you the tools to succeed. Now grab some fleece, sharpen your scissors, and start tying. Your first knotted blanket is just two hours away.

