
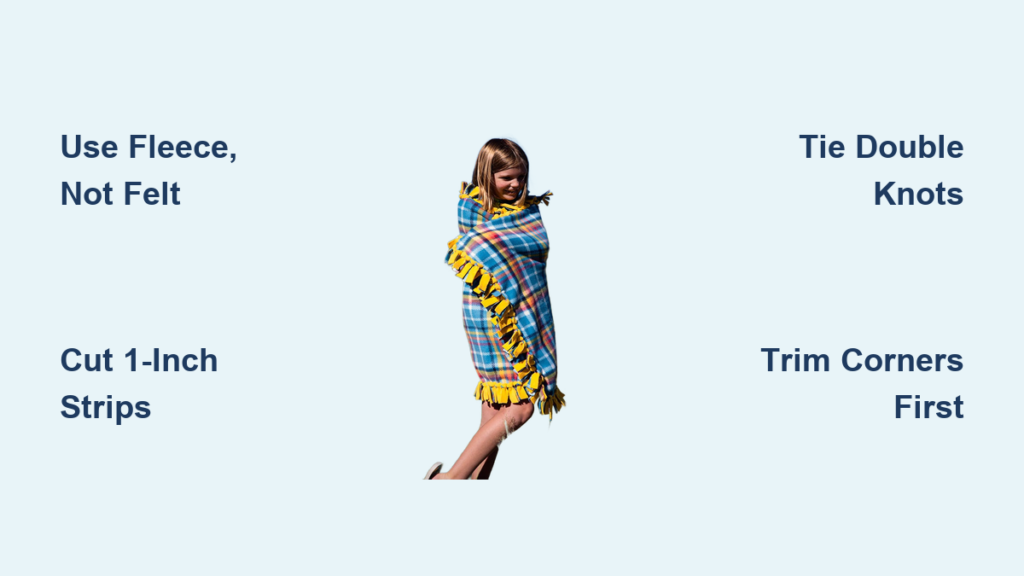
You’ve seen the soft, cozy blankets with knotted edges at craft fairs, baby showers, and in dorm rooms. You might be searching for “how to make a felt tie blanket,” but here’s the important clarification: true felt fabric won’t work for this project. Felt frays easily, lacks the strength to hold knots, and falls apart after washing. The material that actually works beautifully is 100% polyester fleece—soft, durable, and perfect for knotting.
This no-sew project is beginner-friendly and takes just a few hours to complete. With only two fabric pieces, scissors, and a ruler, you can create a reversible, machine-washable throw that’s perfect for gifts, charity donations, or cozy movie nights. This guide covers every step, from selecting the right fabric to tying secure knots that last for years.
Prepare Your Fleece Fabric
Trim and Square the Edges
Before cutting any fringe, your fabric must be properly aligned. Lay both pieces of fleece flat with wrong sides together—meaning the colored or patterned sides face outward. This orientation ensures your finished blanket shows both fabrics on opposite sides.
Start by trimming the selvage edges, which are the tightly woven borders along the fabric roll. These edges are denser than the rest of the fabric and can cause uneven fringes or puckering if left on. Use sharp scissors or a rotary cutter to remove them completely.
Next, square up all four sides using a rigid ruler and sharp scissors. Cut in whole inches only—like 40 inches or 60 inches—to make spacing easier later. Avoid half-inch measurements because they complicate the math and lead to misaligned strips. Cut both layers at the same time so they stay perfectly identical. This step matters because uneven edges result in lopsided knots that ruin the final look.
Secure Layers to Prevent Shifting
Once your fabric is squared, smooth out any wrinkles and align the edges precisely. Use binder clips, pins, or heavy weights to hold the layers together before you start cutting. Skipping this step allows the fabric to shift, which ruins the symmetry of your fringe and creates messy knots.
If you’re working with children, label one corner with a pin marked “front” so you don’t get confused about which side is which. This simple step saves frustration later. Your blanket base is now ready for cutting.
Cut Clean Corners
Remove Corner Squares
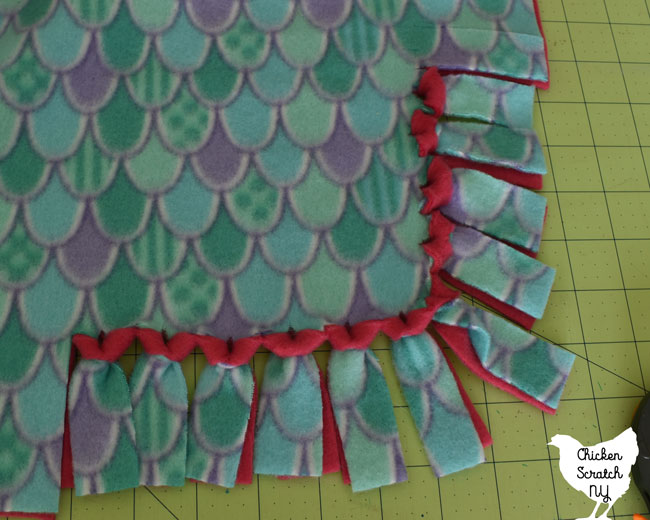
Cutting out the corners reduces bulk and creates a neat, professional edge. Use a 5×5 inch square as your standard—this matches the typical fringe depth and gives a balanced, attractive appearance. Some crafters use 7×7 inch squares for longer fringe, but that choice eats into your usable blanket space.
Place your ruler in each corner and mark a square of the same size on all four corners. Use a rotary cutter with a self-healing mat for precision, or sharp scissors if you prefer. Cut through both layers at once to maintain perfect symmetry.
Pro Tip: A 5-inch corner cut means your fringe will be 5 inches deep. Fringe shorter than 4 inches makes tying difficult. Fringe longer than 7 inches creates loose, floppy edges that look untidy.
Create Even Fringe Strips
Mark and Cut 1-Inch Strips
Now it’s time to cut the fringe along all four sides, excluding the corners you already removed. Make vertical cuts every 1 inch apart, going 5 inches deep into the fabric. Use the grid lines on a cutting mat as your guide, or tape a yardstick to the fabric to create a straight cutting line.
Cut both layers together—this ensures every top strip matches its corresponding bottom strip perfectly. Work in sections: cut 10 to 15 strips, then tie them before moving on to the next section. This approach prevents losing track of which strips you’ve already processed. Never skip strips because missing knots create weak edges that unravel over time.
Avoid These Mistakes:
• Using plush or velvet fleece, which sheds excessively and knots slip out
• Cutting uneven fringe depths, which creates lopsided edges
• Skipping strips to save time, which weakens the entire border
• Using dull scissors, which causes jagged, uneven cuts
Tie Secure, Long-Lasting Knots
Use the Double Granny Knot
The double overhand knot is the most secure method for fleece tie blankets. Here’s how to tie it:
- Take one pair of strips, with one from the top layer and one from the bottom layer
- Tie a basic overhand knot by crossing the ends and pulling one through the loop
- Repeat the knot a second time to lock it in place
- Pull tight and slide the knot close to the blanket edge
This double-knot technique prevents unraveling even after dozens of machine washes. It’s the preferred method for charity blankets and items that will receive heavy daily use.
Try the Loop-and-Pull Method
For a neater, more compact knot that resembles tying a necktie:
- Lift both fringe strips together
- Wrap them around your finger to form a loop
- Pull one end up and over, then push it through the loop
- Slide the knot tight against the blanket edge
This method produces a tidy finish that’s ideal for gift blankets and photo-worthy projects.
Alternate Knotting for Color Contrast
Want both sides of your blanket to show both colors in an alternating pattern? Use this pro technique:
- Tie every other fringe strip around the entire perimeter
- Flip the blanket over completely
- Return and tie the remaining strips that you skipped the first time
This method creates a reversible design where each side displays alternating colors from both fabric pieces.
Choose the Right Materials
Pick 100% Polyester Fleece
Not all fleece works for this project. Use regular 100% polyester fleece—avoid plush, velvet, or “heavenly” types that shed excessively. Test any fleece before buying by rubbing your fingers along the cut edge. If fibers flake off or shed, do not use it. Quality fleece stays intact when handled.
Avoid felt fabric entirely, whether wool-blend or craft felt. Felt has these critical flaws:
- It frays badly when cut
- It breaks under knot tension
- It shrinks when washed
- It feels stiff and thin
- It cannot hold knots securely
Stick with fleece—it’s soft, stretchy, and specifically designed to hold knots through years of use.
Pair Patterns and Colors Creatively
Choose combinations that match your intended purpose:
- Solid plus pattern: Pink with unicorns, navy with dinosaurs
- Holiday themes: Red with white snowflakes, green with gold stars
- Gender-neutral options: Gray with teal, black with white geometric prints
This is where your blanket becomes truly personal. A child’s favorite characters, a couple’s favorite colors, or a family tradition can all be incorporated into your design.
Work Efficiently and Avoid Mistakes
Save Time with Smart Techniques
These strategies help you complete your blanket faster:
- Use a rotary cutter with a cutting mat for faster, cleaner cuts than scissors provide
- Cut both layers at once to ensure perfectly matched fringes
- Work in batches: cut 10 to 15 strips, tie them, then move to the next section
- Involve kids in knotting because the tying is easy and satisfying for small hands
- Use a large table where you can spread the entire blanket out flat
Common Errors to Avoid
| Mistake | Why It Matters | Fix |
|---|---|---|
| Using felt or plush fleece | Fabrics fray, shed, and knots fail | Use 100% polyester regular fleece |
| Uneven cutting | Creates lopsided, crooked appearance | Measure and mark before cutting every cut |
| Loose knots | Unravel after only a few washes | Double-knot and pull firmly tight |
| Skipping fringe strips | Creates weak edges that fall apart | Tie every single pair of strips |
| Using fractional measurements | Leads to misaligned spacing | Use whole inches only for all measurements |
Finish and Maintain Your Blanket
Care for Longevity
Your fleece tie blanket is machine-washable and built to last for years with proper care:
- Wash in cold water with mild detergent
- Tumble dry on low heat or air dry flat
- Never use bleach because it breaks down fibers
- Avoid fabric softener because it coats fibers and reduces softness
- Do not iron because fleece melts under high heat
With proper care, your blanket can last 5 years or more even with daily use. The knots stay secure and colors remain bright through countless wash cycles.
Repair and Store Properly
If a knot ever loosens, simply re-tie it without undoing the surrounding knots. Store your blanket flat or folded—no special handling required. Unlike sewn blankets, there are no seams to fray and no stitching to unravel.
Customize for Any Occasion
Make It a Gift or Charity Project
Fleece tie blankets work perfectly for many occasions:
- Baby showers: Soft, safe, and machine-washable for busy parents
- Hospital stays: Comforting for patients recovering
- Shelters and troop donations: Lightweight yet warm
- Birthdays and holidays: Personalized with recipient’s favorite themes
- Dorm rooms: Compact and cozy for small spaces
- Movie nights: Perfect for family bonding
One blanket takes 1 to 3 hours depending on size, and materials cost around $15 to $20 when you catch a sale at fabric stores.
Try a Braided Edge for Variety
Want a sleeker, more polished look? Skip the knots and braid the fringe instead. Use three or more strips woven together in a simple braid pattern. This technique creates a tighter, more refined edge but requires more time and skill. It’s a great advanced option for crafters who want to try something different.
Know the Final Dimensions
Size Before and After Tying
Both cutting the corners and tying the fringe reduce your blanket’s final size. Plan accordingly when purchasing fabric:
| Original Fabric Size | Finished Size After Tying |
|---|---|
| 40 × 60 inches | Approximately 30 × 50 inches |
| 50 × 60 inches | Approximately 40 × 50 inches |
| 60 × 72 inches | Approximately 50 × 60 inches |
The 10 to 12 inch reduction comes from the 5-inch fringe on each side. When buying fabric, always purchase larger than your target finished size to account for this reduction.
Frequently Asked Questions About Felt Tie Blankets
Can I use real felt instead of fleece for a tie blanket?
No, real felt should not be used for tie blankets. Felt frays easily when cut, lacks the tensile strength to hold knots securely, and shrinks or deforms when washed. The correct material is 100% polyester fleece, which is soft, durable, and holds knots through years of use.
How long does it take to make a fleece tie blanket?
A small to medium-sized blanket typically takes 1 to 2 hours to complete. Larger blankets or intricate designs may take 2 to 3 hours. The time depends on your experience level, the size of the blanket, and whether you’re working with helpers.
What size fleece pieces do I need for a throw blanket?
For a standard throw blanket, purchase 1.5 to 2 yards of 60-inch-wide fleece. This gives you a finished size of approximately 40 × 50 inches after cutting and tying. Always buy slightly larger fabric than your target size to account for the fringe reduction.
How do I keep the knots from coming undone?
Use the double overhand knot technique: tie a basic knot, then repeat it a second time before pulling tight. This locks the knot in place and prevents unraveling even after repeated machine washing.
Can kids help make a fleece tie blanket?
Yes, children can participate in this project. Kids can handle the knot-tying portion easily, which makes it a fun family activity. Just handle the cutting yourself and supervise younger children with scissors.
Key Takeaways for Making Your Own Tie Blanket
Remember that fleece is the only fabric that works for tie blankets—true felt will fray, break, and fail. Start with two coordinating pieces of 100% polyester regular fleece, square up your edges, and cut in whole-inch measurements only. Remove 5×5 inch corner squares, cut 1-inch wide fringe 5 inches deep, and tie every single strip using the double-knot method for durability.
With sharp tools, proper preparation, and attention to detail, you’ll create a soft, durable, and beautiful blanket in just a few hours. Whether it’s for a child, a gift, or a charity drive, this no-sew project delivers professional-looking results every time. Gather your materials, follow these steps, and enjoy the cozy reward of your handmade creation.

