
If you’ve ever struggled with anxiety, insomnia, or restless sleep, a heavy blanket might be the solution you’re looking for. These therapeutic covers use deep-pressure stimulation to calm your nervous system, helping you fall asleep faster and stay relaxed longer. While store-bought models can cost $150 or more, making a heavy blanket at home saves money and lets you customize size, weight, fabric, and design exactly to your needs.
This guide walks you through how to make a heavy blanket safely and effectively, using only high-quality, washable materials and proven construction methods. You’ll discover the science-backed ideal weight, best filling materials, foolproof sewing techniques, and smart design upgrades.
Choose the Right Weight for Your Heavy Blanket
Calculate Based on Body Weight
The ideal weight for a heavy blanket is 10% of your body weight, with a safe range of 7 to 12%. This ensures enough pressure to soothe the nervous system without restricting movement or breathing.
• Adult example: A 150-lb person should use a 15-lb blanket (150 × 0.10)
• Child example: For a 60-lb child, aim for 6 to 8 lbs (10% plus 1 to 2 lbs)
• Elderly or frail users: Stick to 7% for safety and comfort
Important: Always subtract the base fabric weight from your target fill. If your fabric weighs 1 lb, a 15-lb blanket needs 14 lbs of filling.
Match Size to User and Bed
Blanket size affects both comfort and safety:
• Adult full-size: 60″ × 80″ (fits twin or twin XL bed)
• Personal or shoulder-to-toe: 48″ × 72″
• Lap blanket: 30″ × 40″ (ideal for elderly or office use)
• Child size: 36″ × 48″ to 48″ × 60″
Never use a weighted blanket for infants under 2 years old due to suffocation risk.
Pick Safe, High-Quality Materials
Use Breathable, Durable Fabrics
Your fabric choice impacts comfort, temperature, and ease of sewing.
| Fabric | Best For | Notes |
|---|---|---|
| Cotton | Hot sleepers, all-season use | Pre-wash to prevent shrinkage |
| Flannel | Cool climates | Soft but retains heat |
| Micro-fleece | Kids, sensory-friendly designs | Warm and cozy; slippery to sew |
| Minky | Ultra-soft feel | Luxurious but challenging for beginners |
| Microfiber | Daily use, durability | Resists pilling, machine-washable |
Pro Tip: Use dual-layer construction, cotton on one side and flannel or fleece on the other, for climate adaptability.
Fill with Non-Toxic, Washable Pellets
Only certain fillers are safe and long-lasting.
Recommended Fillings:
• Poly pellets: Industry standard, non-toxic, washable, heat-resistant
• Glass microbeads: Slightly denser, cooler feel, eco-friendly
• Hybrid fill: Combine pellets with poly-fil for softer texture
Avoid These Fillers:
• Rice, beans, sand: Rot, attract pests, clump when washed
• Steel shot: Rusts, leaks, too heavy
• Buckwheat, lavender seeds: Not washable, mold risk
Expert Rule: Use ASTM F963-certified plastic beads, safe for toys and textiles.
Gather Essential Tools and Supplies
Prepare All Equipment Before Starting
Having the right tools ensures clean seams, even weight, and professional results.
Must-Have Supplies:
• Heavy-duty sewing machine (walking foot recommended)
• Size 90/14 or 100/16 needle (denim or universal)
• Polyester thread (stronger than cotton)
• Digital kitchen scale (accurate to 0.1 oz)
• Fabric marker or chalk pencil
• Ruler and measuring tape
• Funnel or scoop for filling
• Clips or pins (clips better for thick layers)
• Iron and ironing board
Bonus Hack: Attach a bent wire hanger to your sewing foot to maintain perfect 3″ column spacing.
Build a Precision Pocket Grid Blanket

Cut and Sew the Outer Shell
This method offers the most even weight distribution.
- Cut two identical fabric panels (e.g., 48″ × 60″)
- Pre-wash and press both pieces flat
- With right sides together, sew left, right, and bottom edges
- Leave the top open for filling
- Fold and stitch a ½” hem on the top edge for a clean finish
Reinforce seams with a second pass to prevent leaks under pressure.
Mark a Consistent Grid Pattern
Even spacing stops pellets from shifting.
- Use a ruler and disappearing ink pen to mark lines every 3 to 5 inches
- Create a grid: e.g., 6 columns × 7 rows = 42 pockets
- Mark from the wrong side if possible to hide traces
Small pockets (3 to 4″) reduce clumping and improve pressure control.
Fill and Seal Each Row
Accuracy here ensures balanced weight.
-
Calculate weight per pocket: Total fill ÷ number of pockets
Example: 15 lbs = 240 oz ÷ 42 pockets = 5.7 oz per pocket
-
Fill one row at a time:
• Use a funnel or scoop
• Place pins just above the fill line
• Sew slowly along the marked line -
Flip and shake after each row to check for gaps
-
After all rows are sealed:
• Fold the top hem shut
• Sew two parallel lines (¼” and ½” from edge) for a leak-proof seal
Time Estimate: Filling takes about 60 minutes with proper prep.
Try the Quilted Grid Method (For Quilters)
Repurpose a Finished Quilt Top
Ideal if you already have a patchwork quilt.
- Layer backing (wrong side down), batting, then quilt top (right side up)
- Baste layers every 4 to 6 inches with safety pins
- Sew horizontal lines across the entire blanket
- Sew vertical lines on left, right, and one edge only; leave one side open
Fill Columns One at a Time
- Divide total weight by number of columns
- Pour pellets into the open edge, shaking gently to settle
- Insert safety pins above fill level, then sew closed
- Repeat until all columns are sealed
- Trim excess backing and bind edges with bias tape
Pro Advantage: Existing quilt squares naturally guide your grid.
Make a No-Sew Tie Blanket for Kids
Create Removable Weight Pouches
Perfect for growing children or adaptive use.
- Cut fabric into 4″ × 4″ squares
- Sew three sides, turn right side out
- Fill with about 8 oz beads (about 1 cup)
- Sew shut securely
Each pouch holds weight independently, easy to remove or replace.
Assemble the Tied Blanket
- Lay one fleece piece flat (wrong side down)
- Arrange pouches in a grid (e.g., 5 × 6 = 30)
- Tack each in place with hand stitches
- Place second fleece layer on top (right side up)
- Cut 1 to 2″ strips every 2 to 3 inches around edges
- Tie top and bottom strips into double knots
Benefits: Fully washable, adjustable, great for sensory needs.
Customize for Comfort and Safety
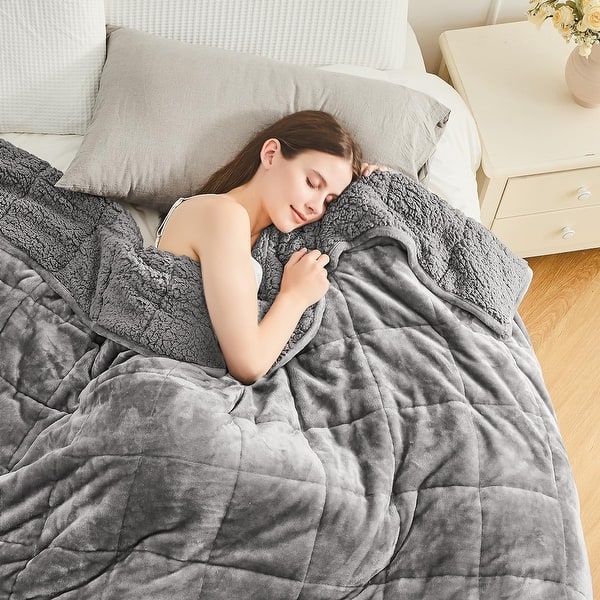
Add a Removable Cover
Keep your blanket clean and fresh.
• Use zippers, envelope backs, or snap buttons
• Choose machine-washable cotton or microfiber
• Label with weight, user name, and care instructions
Prevent Overheating
Choose fabrics based on climate:
• Hot sleepers: Use 100% cotton, no batting
• Cold climates: Add thin polyester batting
• Dual-sided design: Cotton on one side, flannel on the other
Design for Sensory Needs
• Calming colors: Blue, gray, lavender
• Fun prints: Stars, animals, favorite characters (great for kids)
• Dual textures: Smooth one side, plush the other
Neurodivergent users benefit from predictable, consistent pressure.
Reinforce for Durability and Safety
Double-Stitch All Seams
Single seams can burst under pressure.
• Backstitch at start and end
• Use a walking foot for thick layers
• Reinforce corners with X-shaped stitching
Block Edge Weight
Fill side columns with poly-fil only, no pellets.
• Creates soft, flexible edges
• Prevents discomfort when tucked in
Pass the Shake Test
Final quality check:
- Flip blanket upside down
- Shake vigorously
- No shifting or noise equals success
If beads move, re-stitch weak seams.
Maintain and Clean Properly
Wash Carefully to Protect Fill
• Machine wash cold, gentle cycle
• Use mild detergent, no bleach
• Air dry preferred
• If machine drying: low or no heat only
Never dry clean if filled with non-washable materials.
Clean Frequency
| Part | How Often |
|---|---|
| Removable cover | Weekly |
| Outer blanket | Every 1 to 2 months |
| Spot clean spills | Immediately |
Store Correctly
• Keep in a cool, dry place
• Avoid folding under heavy objects (compresses fill)
• Use a breathable storage bag
Follow Critical Safety Rules
Know Who Should Avoid Weighted Blankets
Do not use for:
• Infants or toddlers under 2 years
• People with COPD, sleep apnea, or heart conditions
• Those with limited mobility or inability to remove blanket
• Individuals with osteoporosis or joint fragility
Supervise First-Time Users
• Watch for signs of overheating or discomfort
• Ensure the user can breathe and move freely
• Explain how to push it off if needed
Label every blanket with weight and user name to prevent misuse.
Save Money vs. Store-Bought
DIY Cuts Cost by 50 to 75%
| Blanket Type | DIY Cost | Retail Price | Savings |
|---|---|---|---|
| 15-lb adult | $35 to $60 | $120 to $250 | Save $85+ |
| 7-lb child | $20 to $35 | $80 to $150 | Save $60+ |
| Tie-blanket | $15 to $25 | $50 to $90 | Save 60%+ |
Customize What Stores Cannot Offer
• Exact weight and size
• Hypoallergenic, non-toxic materials
• Personalized colors, prints, textures
• Adaptive features for special needs
Final Checklist Before Use
✅ Fabric pre-washed and pressed
✅ Weight calculated at 10% body weight
✅ Grid marked with 3 to 5″ spacing
✅ Pellets pre-weighed per pocket
✅ All seams double-stitched and reinforced
✅ Top edge securely closed with double stitching
✅ No loose threads or weak spots
✅ Passed the shake test (no shifting)
✅ Removable cover attached (if used)
✅ Label with weight, name, and care
Frequently Asked Questions About Making a Heavy Blanket
What is the ideal weight for a heavy blanket?
The ideal weight is 10% of your body weight, with a safe range of 7 to 12%. For example, a 150-lb adult would use a 15-lb blanket. Always account for fabric weight when calculating fill.
What materials are safe for filling a weighted blanket?
Use poly pellets (ASTM F963-certified), glass microbeads, or a hybrid fill combining pellets with poly-fil. Avoid rice, beans, sand, steel shot, or buckwheat hulls because they can rot, rust, or develop mold.
How do I prevent pellets from shifting or clumping?
Use small pockets (3 to 5 inches), double-stitch all seams, and pre-weigh pellets for each pocket using a digital kitchen scale. Always perform a shake test before use.
Can I wash a DIY heavy blanket?
Yes, if using poly pellets or glass microbeads. Machine wash cold on gentle cycle with mild detergent. Air dry preferred or use low heat. Never dry clean blankets with non-washable fillings.
How much money can I save by making a heavy blanket at home?
DIY costs range from $20 to $60 compared to $80 to $250 for retail versions, saving 50 to 75% depending on size and materials chosen.
Key Takeaways for Making Your Own Heavy Blanket
Heavy blankets are therapeutic tools that support deeper sleep, calmer nerves, and better emotional regulation. By making your own, you gain full control over safety, comfort, and effectiveness. Choose non-toxic poly pellets, breathable fabrics, and reinforced seams to ensure your blanket lasts for years.
Whether you prefer the precision pocket grid method, the quilted approach, or the kid-friendly tie design, each delivers a high-quality result when done correctly. Prioritize even weight distribution, easy maintenance, and user safety above all else.
Start sewing today, and experience the comforting power of deep pressure without the high price tag. Your personalized heavy blanket awaits.

