
There’s something magical about crawling into a cozy blanket tent, whether you’re six or sixty. A simple DIY blanket fort transforms your living room into a secret hideout, movie theater, reading nook, or imaginative play space. The best part? You don’t need special tools or expensive supplies. With just a few household items like chairs, sheets, and clothespins, you can build a personalized retreat in under 30 minutes.
This guide covers every method for how to make a blanket tent, from quick solo caves to multi-room sofa fortresses. You’ll learn which furniture works best, how to secure fabrics safely, and clever upgrades like string lights and floor cushions that turn a basic drape into a dreamy hideaway.
Gather Essential Materials for Your Blanket Tent
Before starting, collect the right supplies. The best blanket tent materials are things you already have at home.
Structural supports include sofas, chairs, tables, bookshelves, clothes racks, or broomsticks. These create the frame your fabric drapes over.
Fabrics and coverings consist of lightweight sheets for walls and ceilings, throw blankets for side flaps, and heavier blankets for insulation and light blocking.
Fasteners and connectors you need are clothespins, binder clips, spring clamps, rubber bands, and clothesline or rope.
Weighting materials like books, pillows, sandbags, or shoes anchor loose edges and prevent shifting.
Pro Tip: Keep a “fort kit” bin with 2-3 sheets, 10 clothespins, a small roll of masking tape, mini string lights, and a foldable floor pillow for quick builds.
Choose the Best Support Structure for Indoor Forts
The strength of your blanket tent depends heavily on what supports it. Pick your structure based on available furniture and space.
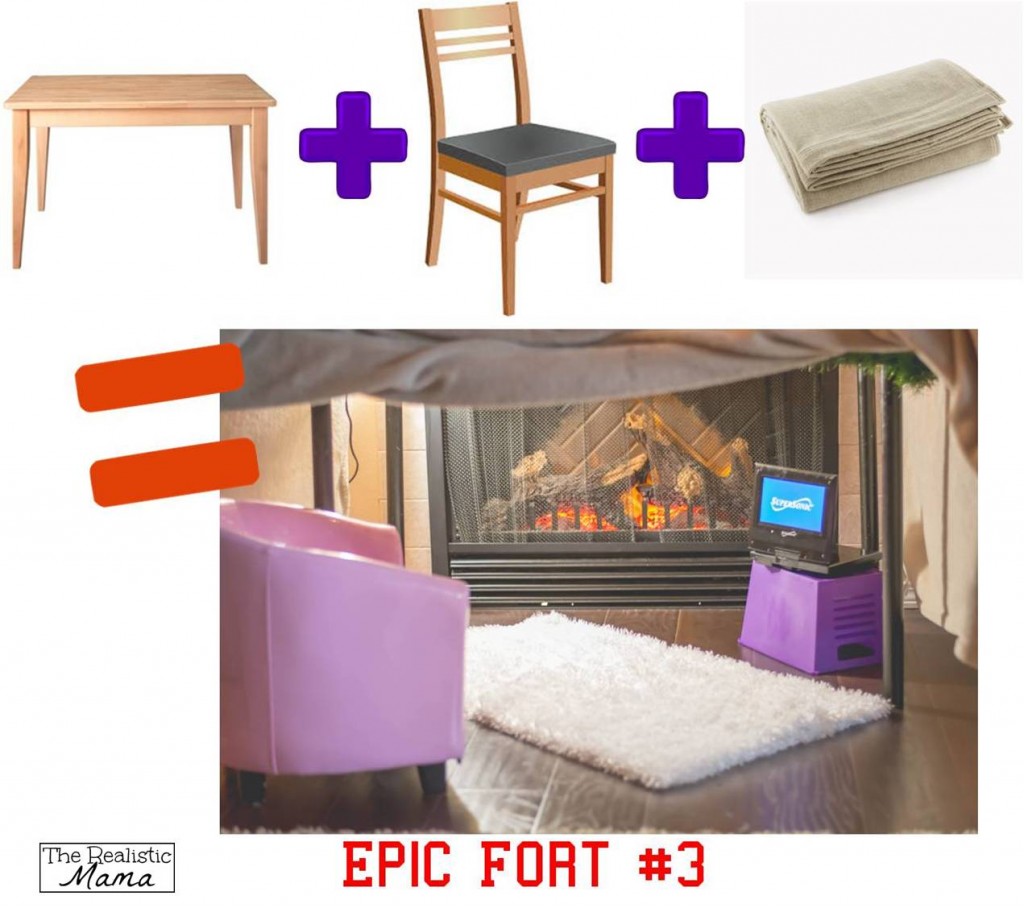
Stable furniture anchors work best for permanent-feeling forts. Ideal options include sectional sofas, L-shaped couches, dining tables, armchairs, and bookshelves. Avoid wobbly side tables or lightweight plastic chairs unless you weigh them down heavily.
Freestanding poles offer portability when furniture isn’t available. Broomsticks, mop handles, adjustable photo booth stands, and clothing drying racks all work well. Place poles in corners or center them under a ridge line, then secure tops with clothespins and weight bases with sandbags or heavy books.
Visual Cue: If furniture shifts when lightly pushed, it’s not stable enough for a blanket tent.
Six Reliable Methods to Build a Blanket Tent
Classic Furniture-Drape Fort
This method works well for beginners and families.
Steps:
1. Arrange two chairs back-to-back, or place a table facing a couch.
2. Drape a large sheet over the top to form a peaked roof.
3. Clip edges with clothespins to chair backs or table corners.
4. Cover open sides with additional blankets, weighted at the base.
5. Leave one side open or create a flap by folding a blanket in half.
Movie Night Hack: Face the entrance toward the TV and dim overhead lights.
Clothes Rack Tent
Ideal for kids’ solo play or small spaces.
Steps:
1. Extend a freestanding clothes rack fully.
2. Clip twin sheets over the top bar using 4-6 clothespins.
3. Pull fabric taut and secure both ends.
4. Push walls outward slightly with cushions inside.
5. Add a rug or mat underneath.
L-Shaped Sofa Fort
Best for large, stable hideouts with room for multiple people.
Steps:
1. Use the two walls of an L-shaped sofa as natural barriers.
2. Place a stool or chair at the open corner.
3. Drape a sheet diagonally from one armrest to the other.
4. Tuck edges under cushions or clip with binder clips.
5. Add a fourth wall with a throw blanket and foldable entrance.
Stability Upgrade: Insert a broomstick vertically in the corner and clip the peak to it.
Ceiling Suspension Fort
Great for central room forts with dramatic height.
Steps:
1. String a clothesline from wall to wall using doorframes, curtain rods, or hooks.
2. Test anchor strength by pulling firmly before adding weight.
3. Drape 2-3 sheets over the line to create a canopy.
4. Attach vertical walls using clothespins or tape on safe surfaces.
5. Weight bottom edges with books, pillows, or shoes.
Warning: Never tie ropes to ceiling light fixtures unless confirmed load-bearing.
Armchair Cave
Fastest build for quiet time or sensory breaks.
Steps:
1. Drape a sheet over the back of an armchair.
2. Let it fall forward to enclose the front.
3. Anchor front corners with books or cushions.
4. Place a pillow inside and tuck sides in for snugness.
Two-Room Sofa Fortress
For immersive play or sleepovers.
Steps:
1. Stand sofa seat cushions upright along the front edge.
2. Drape throws over them to form walls and ceiling.
3. Use a central sheet divider to create two rooms.
4. Access through front or side openings.
5. Line base with sleeping bags or floor pillows.
Secure Your Fort Structure Properly

A well-built blanket tent stays standing even when bumped. Use these fastening techniques for stability.
Use clothespins and clamps appropriately. Clothespins attach sheets to rods, racks, or furniture edges. Binder clips grip thick blanket layers. Spring clamps secure table edges tightly.
Avoid duct tape on wood or paint as it can peel finishes. Use masking tape only on baseboards if necessary.
Weight down loose edges to prevent shifting. Place books, pillows, sandbags, or shoes every 12-18 inches along the base.
Stabilize freestanding frames by weighing down base feet with sandbags, tying bungee cords from pole tops to furniture legs, and placing frames away from high-traffic areas.
Test Stability: Gently shake the frame. No wobbling means it’s ready.
Add Warm Lighting Inside Your Hideaway

The right lighting transforms a basic drape into a magical retreat. Battery-powered options are safest for enclosed spaces.
String lights create instant ambiance. LED fairy lights are safe, cool to the touch, and come in various colors. Drape lights along the ceiling line or roof peak and clip them to clothespins or tuck under fabric folds.
Pro Tip: White lights feel airy while warm yellow mimics candlelight.
Reading lights attach to fort walls for books or tablets. Small LED floor lamps provide even glow without cords.
Glow-in-the-dark effects appeal to kids. Paint sheets with non-toxic glow paint, hang glow sticks from the peak, or cover flashlights with colorful cellophane for stained-glass effects.
Make the Interior Extra Comfortable
A blanket tent isn’t complete without a cozy interior. Layer the floor for warmth and cushioning.
Start with a rug or yoga mat as the base layer. Add a sleeping bag or air mattress for cushioning, then top with a throw blanket for softness.
Add cozy seating using floor pillows, bean bags, stacked cushions, or cardboard box stools decorated with fabric.
Comfort Fix: Add a yoga mat under sleeping bags if the sofa frame is hard.
Control temperature by adding extra blankets and closing sides when cold, or leaving one wall partially open or using a battery fan when hot.
Safety Note: Never seal all sides. Always allow airflow.
Fun Upgrades for Your Blanket Fort
Take your blanket tent from basic to special with these enhancements.
Install a snack tray table like a breakfast tray or laptop stand inside to hold drinks, popcorn, books, and tablets.
Hang personal decor including photos or drawings clipped to a mini clothesline, hand-drawn “No Adults Allowed” signs, or small stuffed animals from the roof.
Add sound and entertainment with a Bluetooth speaker for soft music, audiobooks or podcasts for listening, or story-telling sessions in the dark.
Important Safety Tips for Blanket Tent Building
Safety should never be overlooked when building blanket tents.
Never build in homes with crawling babies or toddlers. Risks include pulling down furniture, getting trapped under fabric, and tripping on cords or weights.
Expert Warning: Even low forts can collapse if climbed on.
Supervise all builds. Children should never tie ropes to ceilings, move heavy furniture alone, or use tape on walls without permission.
Ensure easy exit by never fully sealing the tent. Leave one side open or use foldable flaps instead of taped shut doors. Keep the path to exit clear of obstacles.
Rule of Thumb: You should be able to crawl out in under 5 seconds.
Quick Clean-Up and Storage Tips
Taking down your blanket tent properly ensures it stays in good condition for next time.
Remove lights and decor first, then unclip fabrics gently. Fold or shake out wrinkles before storing, and return furniture to original positions.
Etiquette Tip: Ask before using someone else’s blankets or space.
Store supplies together in a bin so the next build happens faster.
Frequently Asked Questions About Making Blanket Tents
What is the easiest way to make a blanket tent?
The classic furniture-drape method is the easiest. Arrange two chairs back-to-back, drape a sheet over them, and secure with clothespins. This takes about 10 minutes and requires minimal materials.
How do I keep my blanket tent from falling down?
Use stable furniture as anchors, weight down loose edges with books or pillows every 12-18 inches, and test stability by gently shaking the frame before entering.
Can I build a blanket tent without furniture?
Yes. Use freestanding supports like broomsticks, clothing drying racks, or photo booth stands. String a clothesline between walls and drape sheets over it for a central structure.
What materials work best for a blanket tent?
Lightweight cotton sheets work best for walls and ceilings because they drape easily. Combine with heavier blankets for insulation and light blocking. Avoid heavy quilts unless secured with clamps.
Is it safe to use string lights inside a blanket tent?
Yes, if you use battery-operated LED fairy lights. They’re cool to the touch and won’t overheat. Avoid extension cords inside enclosed spaces.
How do I make my blanket tent more comfortable?
Layer the floor with a rug, sleeping bag, and throw blanket. Add floor pillows or bean bags for seating. Use battery-powered string lights for ambiance, and keep a snack tray inside for movie nights.
Key Takeaways for Building the Perfect Blanket Tent
Building a blanket tent is simpler than you might think. Start with lightweight sheets and stable furniture like sofas or chairs. Use clothespins, binder clips, and weights to secure all edges. For quick builds, the chair-and-sheet method takes under 10 minutes.
Make your fort special with battery-powered string lights, layered floor cushions, and personal decorations. Always prioritize safety by supervising children, avoiding unstable supports, and ensuring easy exits.
Whether you’re escaping for five minutes or hosting a sleepover, your blanket tent doesn’t have to be perfect. It just needs to be cozy, safe, and made with intention. Now go grab a sheet, find a chair, and start building. The best hideout is the one you make yourself.

