
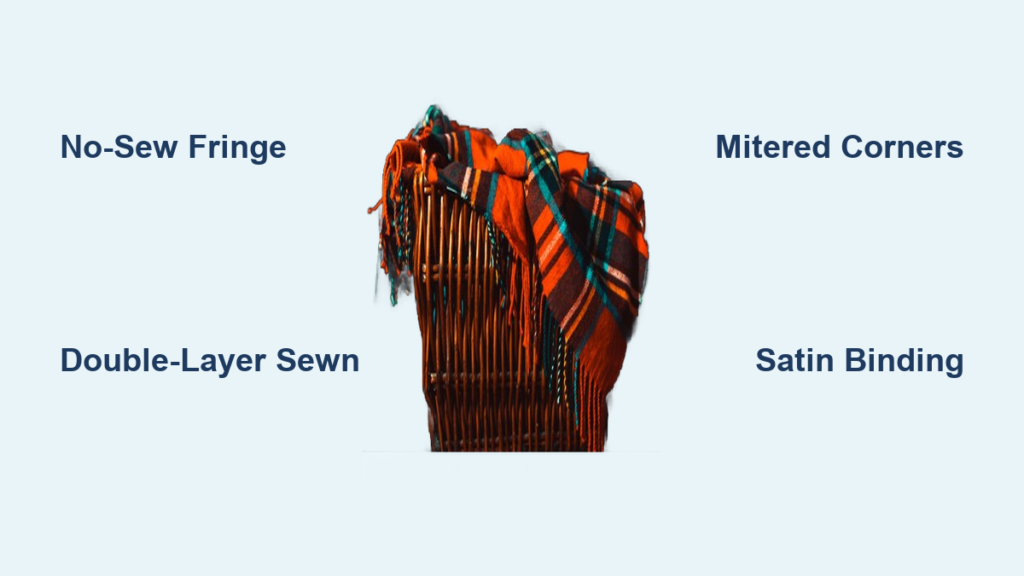
There’s nothing quite like wrapping yourself in a soft, cozy flannel blanket, especially when you’ve made it yourself. Learning how to make a flannel blanket is easier than you think, and with just a few yards of fabric and basic tools, you can create a handmade throw that rivals store-bought versions in comfort and style. Whether you’re a beginner looking for a no-sew option or an intermediate crafter aiming for a polished mitered corner, there’s a method perfect for your skill level and time.
This guide covers every technique you need, from quick 30-minute fringe blankets to quilted insulated throws. You’ll discover which method suits your goals, what materials to gather, and step-by-step instructions for each construction style. By the end, you’ll have the knowledge to create flannel blankets that make perfect gifts or cozy additions to your own home.
Choose Your Blanket Type for Your Skill Level
Not all flannel blankets are constructed the same way. The method you choose affects your time commitment, required tools, and final appearance.
Blanket Methods Compared
The six main construction techniques offer different benefits. No-sew fringe blankets work perfectly for beginners and require only fabric and scissors. Double-layer sewn versions create reversible, durable throws ideal for everyday use. Self-bound blankets with mitered corners provide a professional finish without needing separate binding. Satin-bound options add elegant trim suitable for baby gifts. Sherpa-lined varieties deliver ultra-plush warmth on one side. Insulated blankets with batting create thicker, quilt-like structures for long-term durability.
All methods use 100% cotton flannel for softness and washability. Plaid fabrics help guide cutting and knotting in no-sew versions, while solids or themed prints add personality to sewn throws.
Gather Materials and Tools
You don’t need a fully stocked craft room to make a flannel blanket. Most required tools are common in home sewing kits.
Essential Supplies by Method
Core materials include:
• 100% cotton flannel (1 to 2 yards per side for most methods)
• Matching thread for sewn versions
• Satin binding tape (2 to 3 yards) for satin-bound blankets
• Polyester batting (slightly smaller than fabric) for insulated blankets
• Sherpa-backed flannel for lined versions
Must-have tools:
• Rotary cutter, mat, and quilting ruler for precise cuts
• Fabric scissors for trimming edges
• Sewing machine required for all sewn methods
• Walking foot (optional but recommended) for thick fabrics
• Iron and ironing board for pressing seams
• Pins or clips to hold layers in place
• Blunt tool like a chopstick to push out corners
Pro Tip: Buy half a yard extra to account for shrinkage or cutting adjustments. Pre-wash flannel for sewn blankets to prevent post-project shrinking.
Cut Fabric Accurately

Precision in cutting determines the quality of your finished blanket. Even small misalignments can lead to uneven edges or lopsided fringe.
Square Up for Clean Edges
Begin by laying your fabric flat on a hard surface. Trim away the selvages, which are the tightly woven edges that don’t fray properly. Use a rotary cutter and ruler to square one corner, then measure and cut to your desired size. Standard throw size is 54 inches by 72 inches, requiring 1.5 to 2 yards of fabric. Baby blankets typically measure 36 inches by 36 inches for the inner square or 43 inches by 43 inches for the outer edge when using self-bound methods.
If using patterned fabric, align grain lines to keep the design straight throughout your blanket.
For no-sew blankets: Do NOT pre-wash the fabric. Unwashed flannel frays more easily, making knotting simpler and more effective.
Make a No-Sew Fringe Blanket
This method creates the fastest, most beginner-friendly flannel blanket. No sewing machine is required, and you can complete the project in under an hour.
Knotted Edge Technique
Place two identical flannel pieces together on a flat surface, both right sides facing up. Align the edges perfectly and secure with binder clips. Trim all sides straight using a ruler and rotary cutter.
Cut fringe strips along all four edges. Make them 1 inch wide and 4 to 5 inches deep. Use plaid lines as guides for even spacing if using patterned fabric. Leave selvages intact on two opposite sides, as they stabilize the blanket and prevent premature unraveling.
Tie double knots by taking one strip from the top layer and one from the bottom layer. Knot them together and pull tight. Repeat around all edges. For additional softness, wash gently after completion to encourage slight fraying.
Time: 30 to 60 minutes
Best for: Rustic throws, last-minute gifts, children’s crafts
Sew a Double-Layer Blanket
This classic method produces a simple, reversible, and durable blanket ideal for beginners with basic sewing skills.
Assembly and Stitching Steps
Pre-wash and dry both flannel pieces before beginning. Place them right sides together and align all edges. Pin every 4 to 6 inches around the perimeter to prevent shifting during sewing.
Sew around all four sides using a quarter-inch to half-inch seam allowance. Leave a 4 to 6 inch opening on one side for turning the blanket right-side out. Backstitch at the start and end of the opening for security.
Snip the corners diagonally, being careful not to cut through the stitches. Turn the blanket right-side out through the opening. Push out the corners using a chopstick or similar blunt tool. Press the entire blanket flat.
Fold the seam allowance at the opening inward and pin closed. Topstitch around the entire perimeter approximately a quarter inch from the edge to close the opening and secure both layers.
Optional: Quilt with straight lines through the center to prevent the layers from shifting during use.
Create a Self-Bound Blanket with Mitered Corners
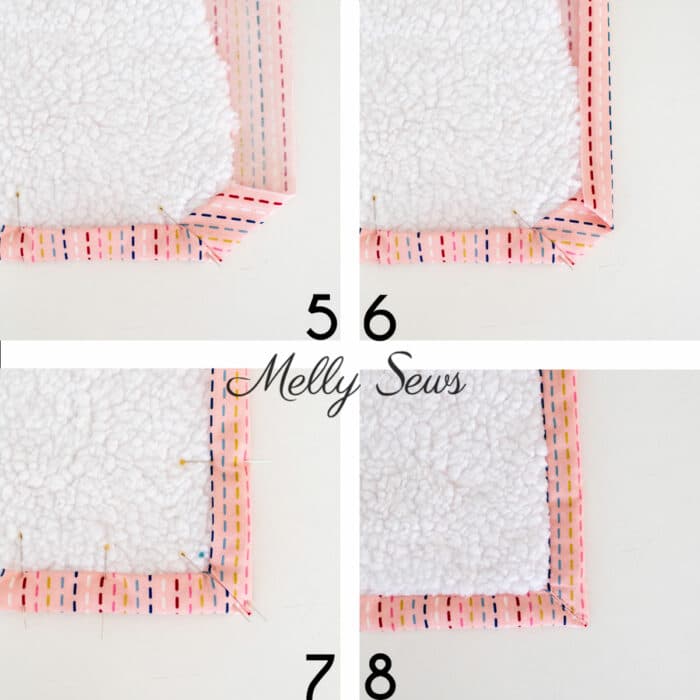
This technique uses the outer fabric to create a clean, folded border without requiring separate binding. The result looks professional and polished.
Building the Self-Bound Structure
Cut your outer (border) fabric at 43 inches square, which requires approximately 1 and one-third yards. Cut the inner (center) fabric at 36 inches square, requiring about 1 yard.
Square both pieces precisely using your rotary cutter and ruler. Mark center points on all four sides of both squares. Place the pieces right sides together, aligning the center marks. Pin thoroughly around the perimeter.
Sew with a quarter-inch seam allowance, leaving a 4 to 5 inch turning hole on one side (not at a corner). Trim corner bulk, turn right-side out, and press flat. Hand-stitch the turning hole closed using a ladder stitch.
To finish the mitered corners, fold the border diagonally at each corner to meet the inner square’s corner. Press to create a crease. Mark a 45-degree line from the inner corner to the outer edge. Stitch directly on the line, trim the seam to a quarter-inch, and press open.
Result: A polished blanket with a 3.5-inch border and professional corner finish.
Apply Satin Binding
Satin binding adds a soft, elegant edge perfect for baby blankets and heirloom gifts.
Attaching Binding Steps
Cut your flannel to the desired size, such as 36 inches by 36 inches for a baby blanket. Place wrong sides together with right sides facing outward. Start attaching the binding at the center of a long edge.
Open the satin tape and center it over the edge, with half on top and half underneath. Pin every few inches. At corners, fold the binding diagonally, tuck excess to lie flat, and pin securely. Overlap the end by 1 to 2 inches over the starting point, tucking the raw edge underneath.
Sew using a zig-zag stitch along the edge, with one side of the stitch on the flannel and one on the binding. Backstitch at the beginning and end for security.
Pro Tip: Use coordinating thread for a seamless look, or choose contrast thread for design flair.
Build a Sherpa-Lined Blanket
One piece of sherpa-backed flannel gives you two textures in one finished blanket. This method creates plush warmth perfect for winter.
Fabric Preparation and Hemming
Trim edges straight and remove all selvages. Brush away loose fibers (called fuzzies) from the sherpa side.
Fold each edge 1.5 inches toward the wrong side (flannel side facing up). At corners, open the folds and diagonally fold the corner to form a 45-degree angle. Refold the edges over the diagonal to create a miter. Pin securely.
Sew a quarter inch from the inner fold around the entire perimeter. Brush sherpa fibers away from the seam line before sewing to prevent them from getting caught in the stitches.
Care Instructions for Sherpa
Wash in cold water on a gentle cycle. Use white vinegar instead of fabric softener to maintain softness. Dry on low heat and remove immediately to prevent matting.
Final size: Approximately 50 inches by 64 inches from 2 yards of 55-inch wide fabric.
Add Insulation with Batting

For a heavier, long-lasting blanket, add a middle layer of polyester batting. This creates a quilt-like structure with extra warmth.
Assembling the Insulated Blanket
Pre-wash your flannel fabric. With right sides together, pin and sew around the perimeter using a straight stitch. Leave an 8 to 10 inch opening for turning. Snip corners diagonally, turn right-side out, and press flat.
Trim batting slightly smaller than the outer fabric. Insert slowly, smoothing flat. Pin corners and midpoints to hold in place. Fold opening edges in and pin closed. Sew straight stitch to close the opening.
Topstitch in your preferred pattern, such as grids, zig-zags, or free-motion designs. Alternatively, stabilize with hand-tied knots using embroidery floss every 4 to 6 inches.
Time: 2 to 3 hours
Best for: Cold climates, durable everyday use
Customize Your Design
Personalization turns a simple blanket into a cherished gift. Consider fabric pairings and embellishments that reflect the recipient’s taste.
Fabric Pairing Ideas
Combine a sushi print with solid navy for a fun, quirky throw. Pair cherry blossom fabric with black and white geometric for elegant contrast. Mix wine-themed fabric with grey plaid for a sophisticated adult gift. Use plaid paired with solid for a classic, gender-neutral baby blanket.
Adding Personal Touches
Embroider initials in a corner for a custom look. Use contrast thread for topstitching, such as red on green plaid. Sew a fabric label with the maker’s name and date for heirloom value. Adjust sizing based on the recipient’s height, such as using 2 yards for taller individuals.
Prevent Common Mistakes
Even small errors can affect your final result. Learn to troubleshoot like a pro.
Common Issues and Solutions
Uneven edges result from jagged cuts or misaligned layers. Use a rotary cutter and ruler, and trim before sewing.
Bulky corners come from excess fabric at seams. Snip diagonally before turning (for sewn methods) or trim seam allowance (for self-bound methods).
Fringe too tight or loose happens with inconsistent knotting. Practice on scrap fabric and use uniform 1-inch wide fringe with double knots.
Mitered corners not crisp stem from poor 45-degree folding. Use a quilting ruler and press the crease with an iron before stitching.
Batting bunching occurs when insertion is crumpled. Insert slowly and pin corners and midpoints.
Care for Longevity
How you care for your blanket affects its softness and lifespan. Follow specific guidelines based on your blanket type.
Washing Tips by Type
Plain flannel blankets benefit from hot water and high heat drying, which enhances softness and creates a pleasant crinkled texture. Sherpa-lined blankets require cold water and low heat to prevent matting. Blankets with batting work best with warm or cold water and medium heat, avoiding high temperatures that can damage the batting layer.
Always wash separately for the first few times to reduce lint transfer to other laundry. Avoid bleach and harsh detergents.
Durability Boosters
Pre-wash fabric before construction to prevent shrinkage. Backstitch at stress points like corners and openings. Pin or tie batting securely to prevent shifting during washing. Store folded rather than hung to prevent stretching.
Frequently Asked Questions About Making Flannel Blankets
What is the easiest way to make a flannel blanket?
The no-sew fringe blanket is the easiest method. It requires only fabric, scissors, and about 30 to 60 minutes of time. You cut two identical pieces, align them, and tie the edges together using double knots.
How much fabric do I need for a flannel blanket?
For a standard throw size (54 by 72 inches), you need 1.5 to 2 yards of flannel per side. Baby blankets require about 1 yard per side. Always buy half a yard extra for shrinkage and cutting adjustments.
Do I need to pre-wash flannel before making a blanket?
For sewn blankets, always pre-wash to prevent post-completion shrinkage. However, for no-sew fringe blankets, do NOT pre-wash. Unwashed flannel has looser threads that make fringe pulling and knotting much easier.
Can I use flannel for a warm winter blanket?
Yes. For extra warmth, use the sherpa-lined method or add polyester batting between two layers. Both options create thick, insulating blankets suitable for cold weather.
How do I keep my flannel blanket soft after washing?
Wash in appropriate water temperature for your blanket type. Avoid fabric softener on sherpa (use white vinegar instead). Remove from the dryer promptly to prevent matting. For plain flannel, high heat actually enhances softness.
Key Takeaways for Making Flannel Blankets
Making a flannel blanket is a fast, affordable, and deeply satisfying project. Whether you choose a no-sew fringe version for simplicity, a self-bound masterpiece for professional polish, or a quilted insulated throw for maximum warmth, you create more than just warmth. You craft comfort, memories, and love with your own hands.
Start with the method matching your skill level. Gather quality 100% cotton flannel and the necessary tools. Measure twice and cut once for the best results. Pre-wash sewn projects but skip pre-washing for fringe blankets. Personalize with fabric choices, contrast stitching, or embroidered initials to make each blanket truly special.

