You’ve got a bin full of leftover fabric scraps—tiny charm squares, narrow binding strips, fat quarters from past projects—and you’re not sure what to do with them. A scrappy star quilt pattern is the perfect answer. These vibrant, dynamic quilts turn leftover bits into eye-catching stars that sparkle across the quilt top. Whether you’re a beginner looking for a low-stress project or an experienced quilter wanting to clear stash, scrappy star patterns offer flexibility, speed, and stunning results.
The beauty of a scrappy star quilt lies in its forgiving nature. No two stars look exactly alike, and that is the whole point. With no need to match seams or buy yardage, you can dive in immediately. From Keith’s Star to Quilty Stars and Constellation Crumb, multiple patterns let you choose your level of scrappiness, color control, and layout style. In this guide, you’ll learn how to pick the right pattern, sort your scraps like a pro, build star blocks step by step, and finish with a modern, dramatic look that belies its humble origins.
Choose Your Scrappy Star Pattern
Pick Based on Your Scrap Stash
Not all scrappy star quilt patterns demand the same approach. Some require precision, others thrive on creative chaos. If you’re bursting with 2.5″ charm square leftovers, Keith’s Star is ideal. It uses exactly twelve 2.5″ scraps per block and works beautifully with binding strip remnants. For total freedom, try TheSewingShedByNikki’s Star Scrappy Quilt, which requires no seam matching and scales easily from baby size to king. Love structure but want magic? Brown Bird Design’s Constellation Crumb gives you starry precision with full scrap flexibility.
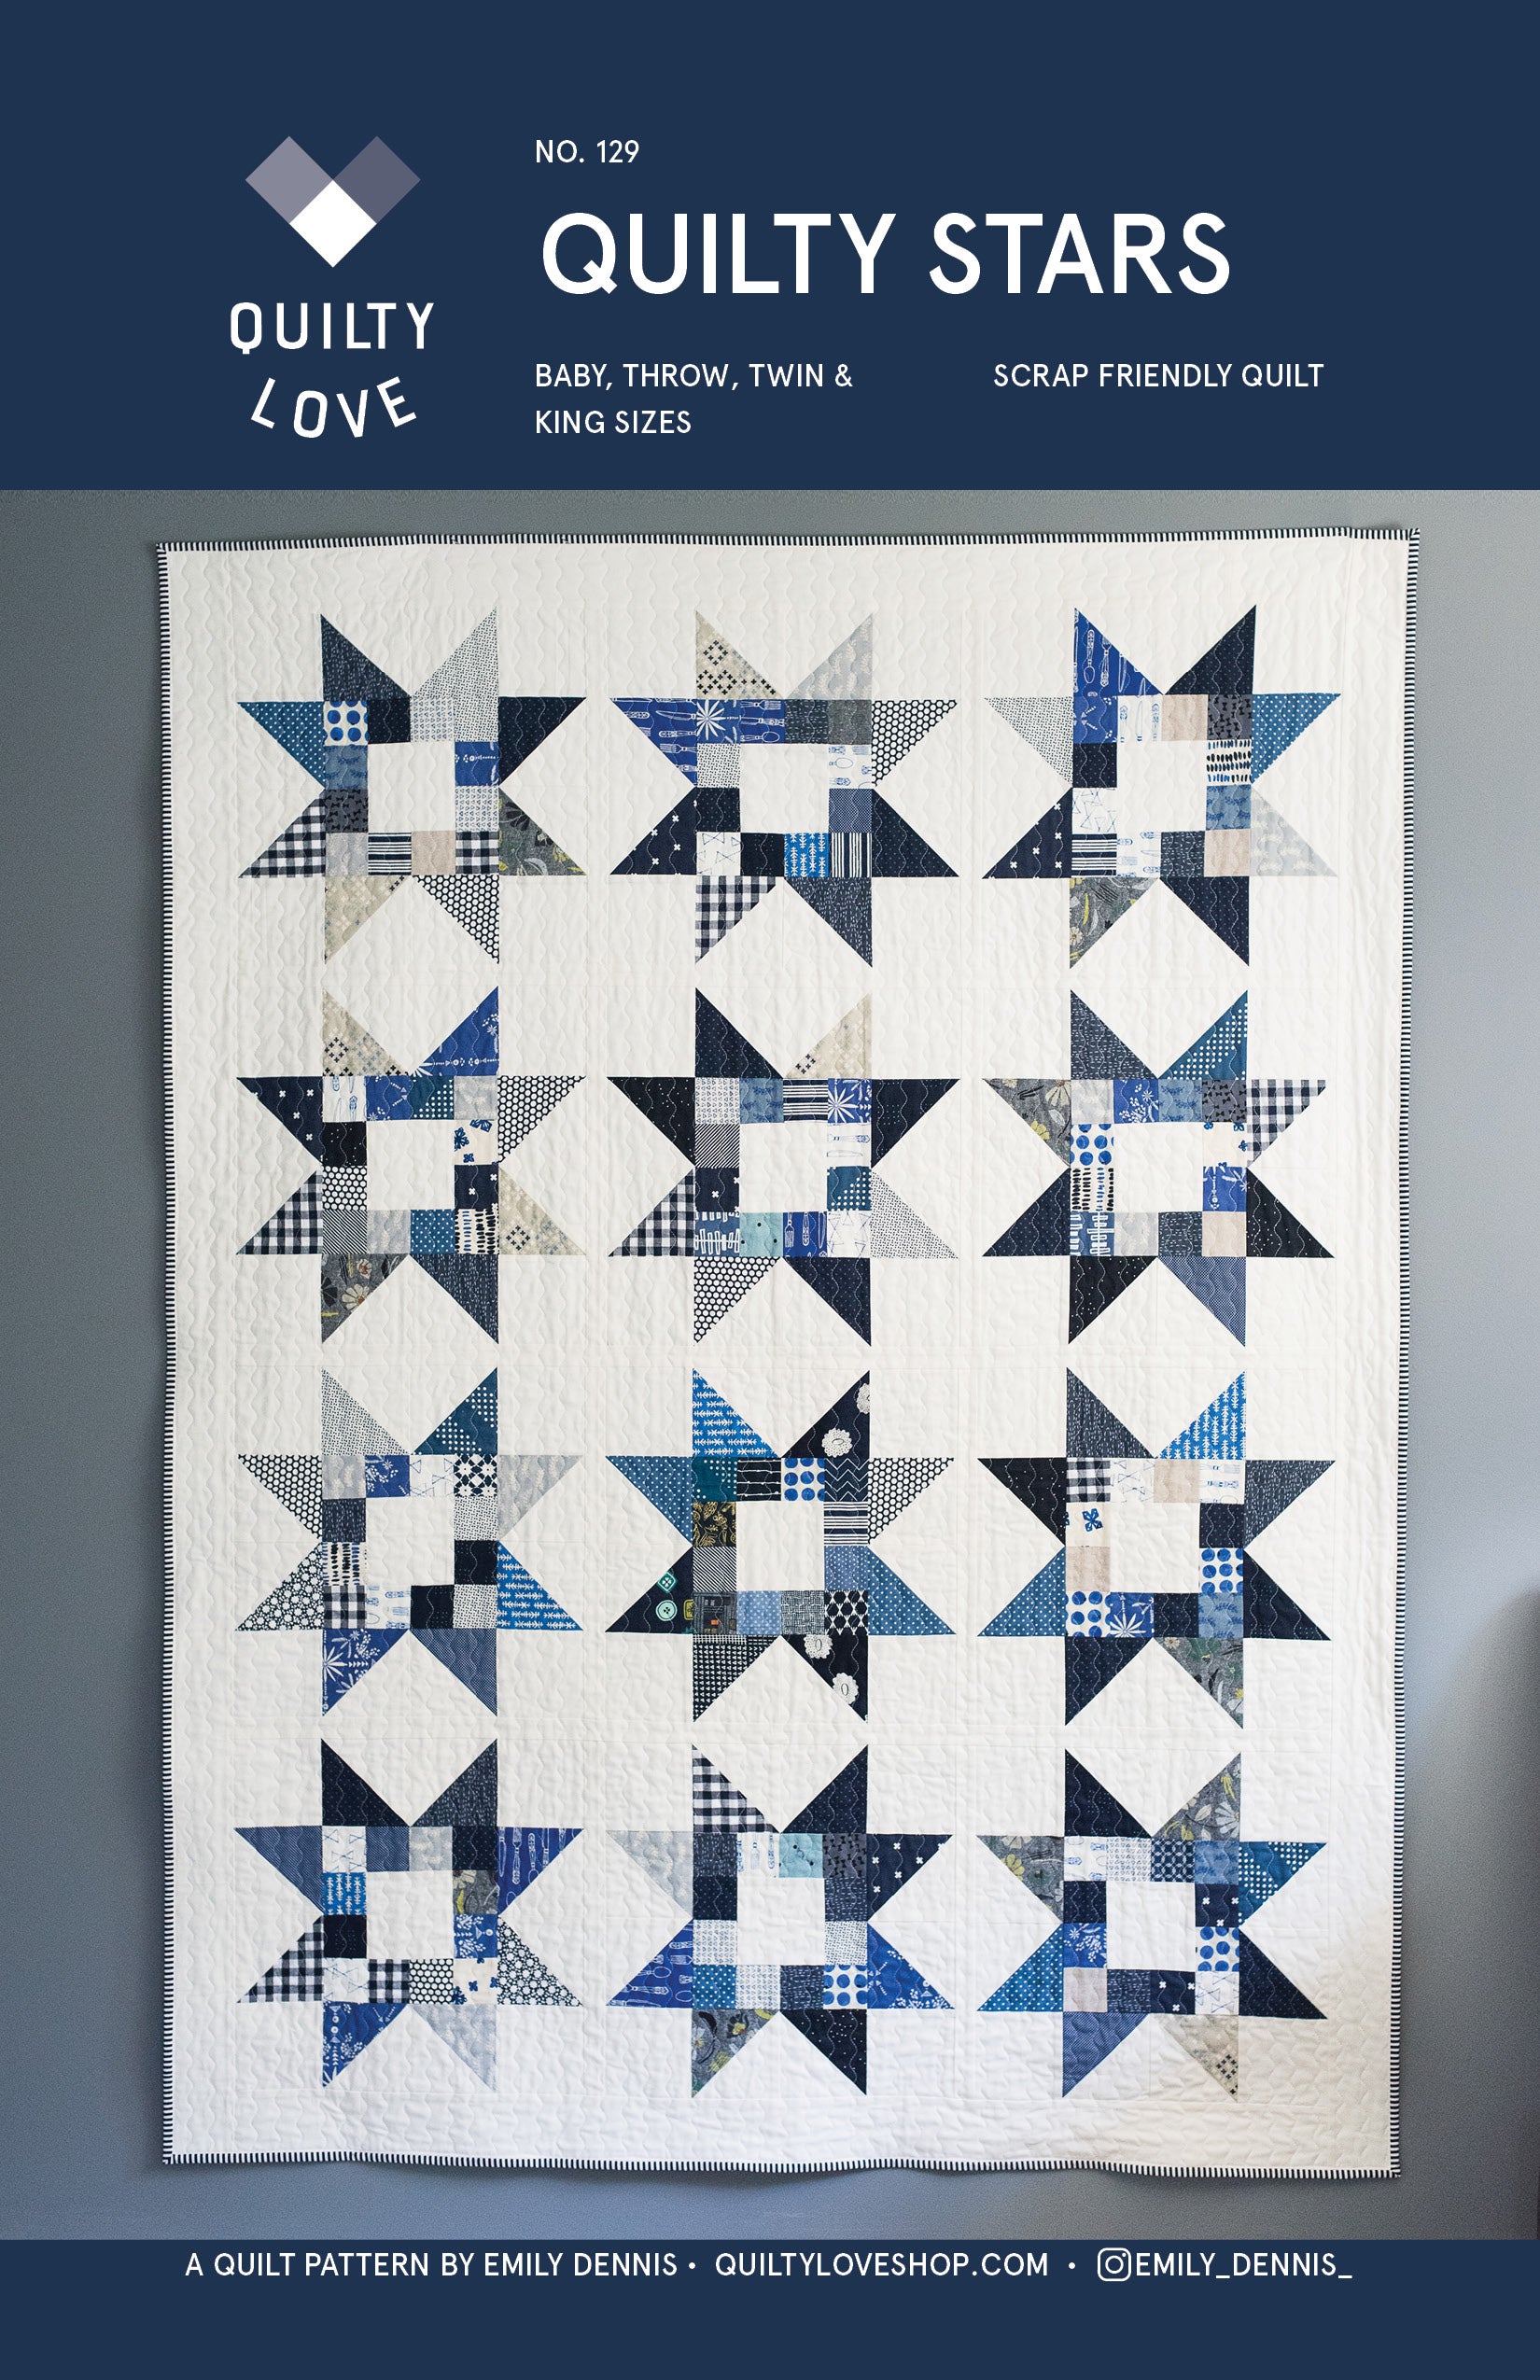
If you prefer a cohesive yet scrappy look, Quilty Stars offers a balanced approach. It allows for either solid or scrappy low-volume backgrounds, letting you control contrast while still using up small prints. All patterns work with fat quarters, but only some, like Quilty Stars, are written specifically for them.
Match Skill Level to Design
Beginners should start with Keith’s Star or TheSewingShedByNikki’s PDF pattern. Both avoid complex techniques and protect star points during construction. Keith’s Star uses modified flying geese and snowball corners, but the method ensures crisp points every time. TheSewingShedByNikki’s version eliminates matching seams entirely, perfect for stress-free sewing.
Intermediate quilters can explore layout variations like sashing, cornerstones, or on-point settings. Advanced makers will enjoy playing with color gradients, alternating blocks, or combining different star types across one quilt.
Compare Final Sizes and Scalability
Need a baby quilt fast? The Quilty Stars baby size at 39″ square is ready in hours. Keith’s Star finishes at 9″ per block and fits neatly into a 4×4 grid for a 36″ throw, or expand to 6×7 for a twin. Constellation Crumb scales from wall hangings to full quilts depending on how many stars you make.
Want total control? TheSewingShedByNikki’s design lets you add or remove blocks freely. More stars equal a bigger quilt. No math needed.
Sort and Prep Your Scraps
Organize by Value and Color
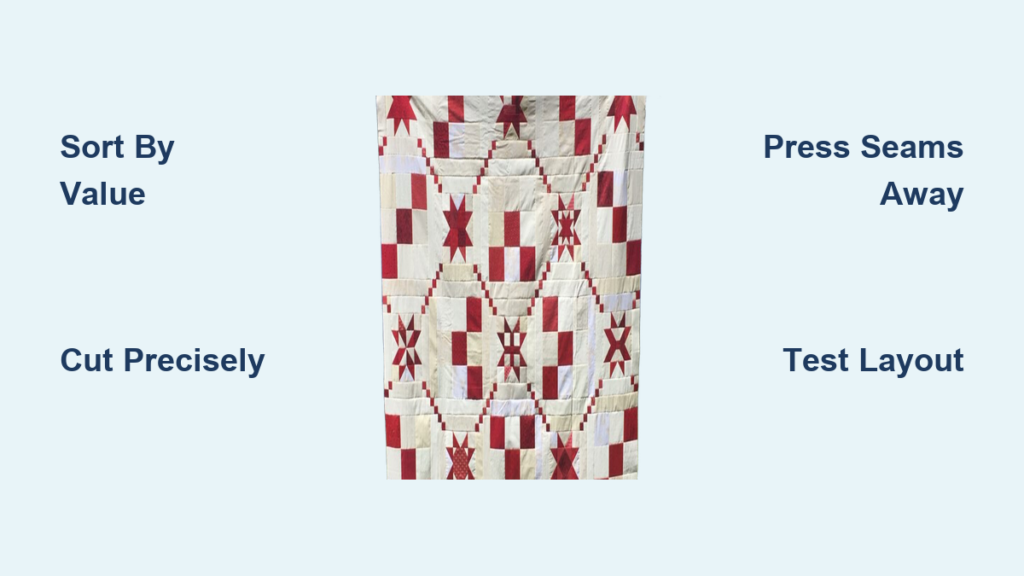
Before cutting, sort scraps into lights, mediums, and darks. For scrappy star quilt patterns, low-volume prints are crucial. These are light fabrics with small patterns that read as white from a distance. Avoid creams or greys unless they mimic brightness. True low-volume scraps add texture without weighing down the design.
Use large bins to group scraps by color family: pinks, teals, oranges, and beyond. A limited palette, such as pink and purple with orange accents, creates cohesion even in high-variety quilts.
Cut Efficiently from Pre-Cuts
No time to cut from yardage? Use what you already have on hand:
- Charm squares (5″): Cut into four 2.5″ pieces for corner units
- Binding leftovers (2.5″ strips): Ideal for snowball corners and small star sections
- Fat quarters: Yield multiple 3″ and 4.5″ pieces for background and center squares
For Keith’s Star specifically, you’ll need:
- Light fabric: Four 3″ x 4.5″ rectangles plus four 3″ squares per block
- Assorted prints: One 4.5″ square for the center plus twelve 2.5″ squares for corners and geese
Use a rotary cutter, ruler, and mat for accuracy. Always cut with the grain when possible to prevent stretching.
Test Layout Before Sewing
Lay out blocks on a design wall or bed before stitching. Try different arrangements to see what speaks to you:
- Random mix: Maximize scrappiness
- Color gradients: Soft transitions from light to dark
- Themed clusters: Group similar prints such as florals or geometrics
This preview prevents a chaotic mess and helps balance visual weight across the quilt top.
Build the Star Block Step-by-Step

Sew the Corner Snowball Units
Each corner of Keith’s Star uses a snowball technique. Follow these steps:
- Take one 3″ light square and one 2.5″ assorted print
- Draw a diagonal line on the back of the 2.5″ square
- Place it face-down on the corner of the 3″ square, aligning edges
- Sew along the line
- Trim 1/4″ past the seam and press outward
Repeat for all four corners. These units form the outer diamond points of your scrappy star quilt pattern.
Assemble the Modified Flying Geese
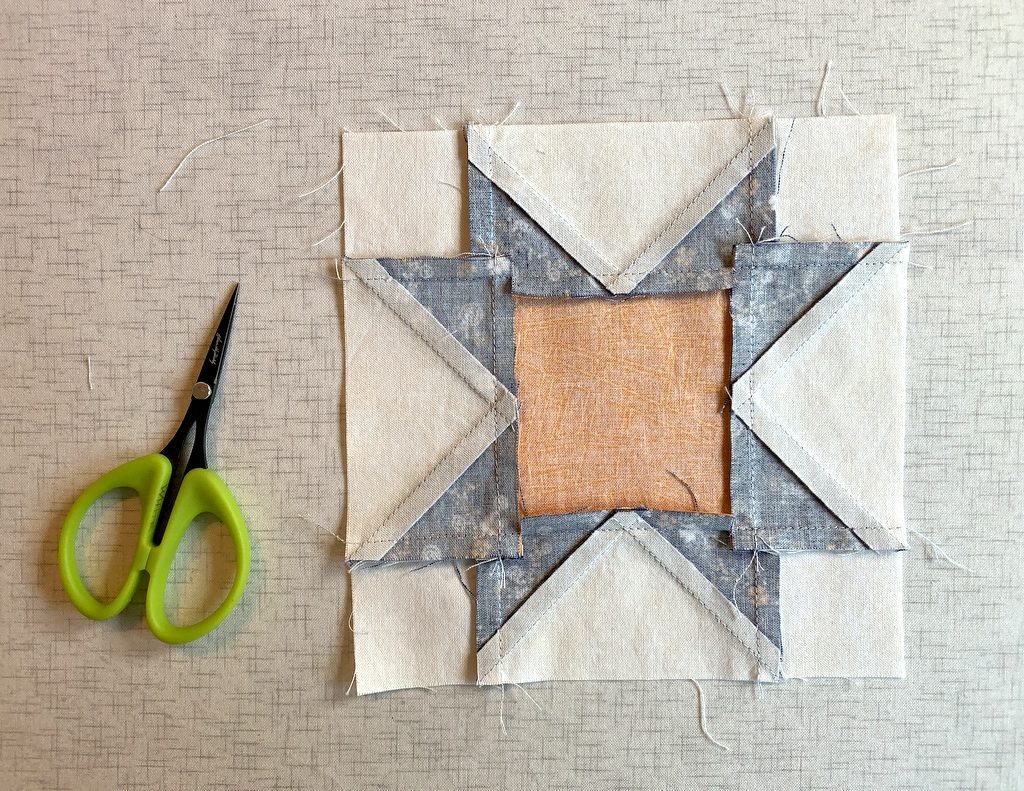
The star arms use modified flying geese units. Instead of a standard 2:1 ratio, the center rectangle is 1/2″ wider at 3″ x 4.5″. This creates a slightly broader goose that fills the block better.
To make:
- Place two 2.5″ assorted squares on opposite ends of the 3″ x 4.5″ light rectangle
- Draw diagonal lines on the backs of the small squares
- Sew along both lines
- Flip, press, and trim dog ears
Make four flying geese units per block. Press seams away from the geese to reduce bulk.
Join Rows into an Uneven Nine Patch
Keith’s Star is an uneven nine-patch layout. The top and bottom rows contain light rectangles and flying geese, while the center row holds corner snowball units and the center square.
Sew row by row:
- Join left flying goose, center 4.5″ print square, and right flying goose for the center row
- Join top and bottom rows with light rectangles and corner units
- Press row seams toward the center block
- Match and sew rows together
The result is a crisp 9″ star with floating diamonds and no lost points.
Customize Your Star Design
Swap the Center Block
Don’t settle for a plain square in the middle. Replace the 4.5″ center with one of these options:
- Four Patch
- Pinwheel
- Snowball corner
- Square-in-a-Square
This small change adds personality and complexity without extra effort.
Add Sashing and Cornerstones
Separate stars with sashing strips 2.5″ wide. Insert cornerstones using 2.5″ squares at intersections to create a Shoo Fly secondary pattern. This layout works especially well with high-contrast fabrics.
For a modern look, use white or low-volume sashing. For drama, try black or navy.
Set Blocks On-Point
Rotate stars 45 degrees for a dynamic diagonal layout. You’ll need setting triangles cut from yardage or large scraps, plus corner triangles to finish edges. This setting makes stars appear to float and adds visual movement to your scrappy star quilt pattern.
Alternate Block Types
Mix star blocks with other units to create rhythm:
- Solid squares
- Four Patch blocks
- Half-square triangles
Alternating gives your eyes a place to rest amid the scrappiness.
Finish with Impact

Choose the Right Backing
Balance the busy front with a neutral tone-on-tone print. Ruby Star Society’s Caves in Saddle from the Linear line is a popular choice, offering subtle texture without competing. Avoid loud prints that distract from the stars.
For baby quilts, use soft flannel or minky for extra coziness.
Bind with Personality
Use scrappy binding or a standout solid. In one Quilty Stars example, Speckled in Daisy by Ruby Star Society added cheerful speckles. Pre-made binding from leftover strips saves time and reduces waste.
Apply double-fold bias binding for durability, especially on edges that will be washed often.
Quilt for a Modern Look
Skip dense quilting designs. A flower pantograph on a long-arm machine keeps the design fresh and complements happy colors. For home machines, stitch in the ditch around stars or echo quilt the points.
Embellish pillows or wall hangings with embroidery on the back. Names, dates, or tiny motifs add sentimental value.
Troubleshoot Common Issues
Why Do My Star Points Look Blunt?
Blunt points usually come from inaccurate 1/4″ seam allowance or pressing seams toward the point instead of away. Fix this by using a scant 1/4″ seam and pressing flying geese seams away from the triangle tip.
How Do I Hide Imperfect Seams?
The beauty of scrappy star quilt patterns is that imperfections disappear. For extra security, eliminate corner triangles and use only light background fabric at intersections. Let seams fall where they may. The scrappy background blends them in beautifully.
This hack works perfectly in TheSewingShedByNikki’s no-match design.
My Quilt Looks Too Busy—Now What?
Overwhelmed by prints? Rebalance with these strategies:
- More low-volume background pieces
- A consistent color thread such as Aurifil 50wt in light grey
- Wider sashing to separate blocks
Step back and photograph the layout. Sometimes the eye needs distance to see harmony.
Use Your Quilt Wisely
Make Baby or Therapy Quilts
Scrappy stars are ideal for charity projects. Their bright colors comfort children, and the fast assembly lets you make more quilts in less time. One quilter created Keith’s Star for a cancer fundraiser, proof that scraps can carry deep meaning.
For therapy quilts, focus on soft cottons and washable fabrics. Keep seams tight at 1/4″ for durability.
Create Wall Art or Pillows
Turn one star into a framed wall hanging. Use a floating canvas or quilt sleeve. Add embroidery like a name, date, or “You Are Loved” message.
For pillows, pair a star front with a solid or embroidered back. Use zipper or envelope closure for easy removal.
Care for Longevity
Wash in cool water with mild detergent. Tumble dry on low heat. Pre-wash bright reds and purples if unsure of bleed, since scraps often come from different dye lots.
Store flat or rolled. Avoid plastic bins that trap moisture.
Frequently Asked Questions About Scrappy Star Quilt Patterns
What is the easiest scrappy star quilt pattern for beginners?
Keith’s Star by Elaine Huff is widely considered beginner-friendly because star points cannot be lost during construction. TheSewingShedByNikki’s Star Scrappy Quilt is another excellent option since it requires no seam matching at all.
How many scraps do I need to make a scrappy star quilt?
For Keith’s Star, you need twelve 2.5″ squares plus one 4.5″ square per block. A small throw using 16 blocks requires roughly 192 small scraps. Quilty Stars and Constellation Crumb scale based on how many stars you choose to make.
Can I use fat quarters for a scrappy star quilt pattern?
Yes. Fat quarters work with Quilty Stars and most other scrappy star patterns. They yield multiple 3″ and 4.5″ pieces suitable for backgrounds and center squares.
What is a low-volume fabric and why does it matter?
Low-volume fabrics are prints on white or near-white backgrounds that read as light colors from a distance. They add texture to scrappy backgrounds without the heaviness of solid creams or greys. They are essential for keeping your scrappy star quilt pattern looking fresh and modern.
How do I prevent my scrappy star quilt from looking too busy?
Balance busy prints with low-volume background pieces, wider sashing, and a limited color palette. Photograph your layout from a distance to evaluate harmony before sewing rows together.
Is a scrappy star quilt pattern good for charity projects?
Absolutely. These quilts are perfect for charity because they use leftover fabric, assemble quickly, and offer forgiving construction. Keith’s Star was originally created for a cancer fundraiser, making it a meaningful choice for similar causes.
Key Takeaways for Your Scrappy Star Quilt Pattern Journey
A scrappy star quilt pattern transforms forgotten fabric into something magical. Choose Keith’s Star for beginner-friendly construction, Quilty Stars for fat quarter flexibility, or Constellation Crumb for starry precision. Sort your scraps by value and color, cut with precision, and test layouts before sewing.
The snowball technique and modified flying geese create crisp points without stress. Customize your design with sashing, cornerstones, or on-point settings. Finish with neutral backing, personality-filled binding, and modern pantograph quilting.
Your next step is simple. Pull out your scrap bin, pick a pattern that matches your skill level, and cut your first block today. The stars are waiting to shine.