Looking for a festive quilting project that works for beginners and seasoned stitchers alike? A shamrock quilt pattern delivers seasonal charm for St. Patrick’s Day decor, spring refreshes, or year-round green-themed accents. From no-download patchwork blocks to downloadable appliqué wall hangings, this guide covers the best options with dimensions, techniques, and pro tips.
You’ll learn how to make everything from a single 6.5″ block in under 30 minutes to a full 52″ baby quilt in one afternoon. Discover which patterns use scraps, which create modern visual effects, and how to avoid common mistakes like off-center stems or misaligned strips. Let’s dive into the luckiest quilting projects of the season.
Choose Your Shamrock Style
Patchwork vs. Appliqué vs. Strip Piecing
Not all shamrock quilts look the same. The style you pick affects difficulty, time, and fabric needs.
- Patchwork: Uses precise geometric shapes like squares and rectangles to form the clover. Best for crisp, traditional looks.
- Appliqué-Inspired: Involves layering fabric shapes with templates. Ideal for soft, textured shamrocks with stitched outlines.
- Strip Piecing (Split Rail): Builds movement using strips of light-to-dark green. Called “Shamrock Shake” for its earthquake-like visual effect.
Each method offers unique benefits. Patchwork is fastest for beginners. Appliqué allows artistic flair. Strip piecing maximizes scrap use and visual impact with minimal effort.
Match Pattern to Your Goal
Use this quick decision guide:
| Goal | Best Pattern |
|---|---|
| Finish in under 2 hours | Lynn Woll Patchwork Block or Shamrock Shake |
| Use up green scraps | Lucky Shamrock or Shamrock Shake |
| Make a modern wall hanging | Shamrock Bite Size Quilt |
| Teach basic quilting skills | Lynn Woll Block or Split Rail |
| Create a traditional table runner | Lucky Shamrock |
Build a Classic Patchwork Shamrock

Make a 6.5″ Block in 30 Minutes
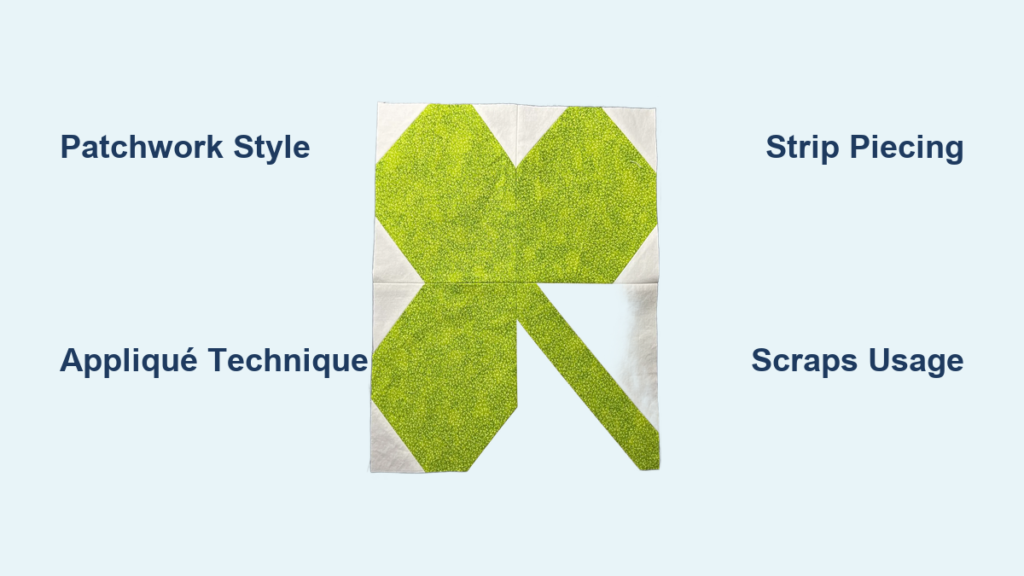
This beginner-friendly method by Lynn Woll requires no PDF download and uses a simple square-in-a-corner technique. It’s ideal for pot holders, pillows, or quilt blocks.
Materials Needed:
– Green fabric (fat quarter): For leaves
– Background fabric (white or cream): For block base and stem
– Rotary cutter, ruler, mat, removable marker
Cutting List:
– (3) 6.5″ green squares (leaf bases)
– (3) 3″ background squares (for leaves)
– (1) 7″ background square (cut diagonally for stem triangles)
– (1) 2.5″ x 9″ green strip (stem)
Sew the Three Leaves
- Mark a diagonal line on the wrong side of each 3″ background square.
- Place one marked square on the top-left corner of a 6.5″ green square, right sides together.
- Repeat for top-right and bottom-left corners (leave bottom-right open).
- Sew along the marked lines.
- Trim 1/4″ beyond the stitching line using your ruler.
- Press seams toward the background fabric.
This creates the three-leaf clover effect with clean corners.
Assemble and Center the Stem
- Cut the 7″ background square in half diagonally.
- Sew the 2.5″ x 9″ green strip to the long edge of one triangle.
- Attach the second triangle to the other side of the strip.
- Press seams flat.
- Trim the unit to exactly 6.5″ square.
Pro Tip: To keep the stem centered, place the 3.25″ mark on your ruler at the center of the unit before trimming all four sides.
Final Block Assembly
- Arrange the three leaf units and stem unit into a 2×2 grid.
- Sew into two rows.
- Join rows, matching seam intersections.
- Press final block.
Use one for a mug rug, four for a pillow, or 16 for a mini quilt.
Craft the Lucky Shamrock Table Runner
Assemble Rectangles and Cornerstones
Designed by Joanna Figueroa of Fig Tree Quilts, this free downloadable pattern uses strip-style piecing with contrasting cornerstones for a fresh, modern look.
Finished Size: 18.5″ x 46.5″
Skill Level: Beginner+
Best For: Stash busting, spring table decor
Fabric Requirements:
– Assorted green prints (scraps encouraged)
– Light green solid for cornerstones: (21) 1.5″ squares
– (32) 1.5″ x 6.5″ green rectangles
– 2.25″ border strips (scrappy or solid)
Step-by-Step Strip Assembly
- Lay out rectangles in 4 rows of 8.
- Place a 1.5″ cornerstone square between each rectangle in a row.
- Sew units together in each row.
- Press seams in one direction.
- Join rows, nesting seams for alignment.
Add Borders for Polish
- Cut side borders: 2.25″ x 15.5″
- Cut top/bottom borders: 2.25″ x 47″
- Attach side borders first, then top and bottom.
- Press outward.
Design Tip: Use a scrappy mix of greens for high visual interest. The more variety, the better the result.
Customize for a Table Topper
Switch to the 25.5″ square version:
– Use (24) 1.5″ x 6.5″ rectangles
– (16) 1.5″ cornerstone squares
– Borders: 2.25″ width, cut to fit
This version works well as a wall hanging or centerpiece.
Try the Shamrock Shake Strip Quilt
Create Movement with Gradient Greens
This split-rail style quilt uses strip piecing to generate a dynamic “shaken” effect. It’s fast, scrap-friendly, and perfect for baby quilts or charity projects.
Finished Size: ~52″ square
Time Required: One afternoon
Technique: Strip piecing
Materials:
– 6+ green fabrics (light to dark)
– Cut 11 strips (2″ x WOF) from each fabric
Build Strip Units
- Arrange one strip from each fabric in light-to-dark order.
- Sew together lengthwise.
- Press all seams in one direction.
- Repeat to make 11 total strip sets.
Check Width: Each unit should measure 6.5″ after sewing. Trim if needed.
Cut and Arrange 6.5″ Squares
- Sub-cut each strip set into 6.5″ squares.
- You’ll get about 6 squares per set (64 total needed).
- Mix and rotate squares to enhance the “shake” effect.
Assemble the Quilt Top
- Sew squares into 4×4 blocks (4 squares each).
- You’ll have 16 large blocks.
- Arrange in 4 rows of 4.
- Sew rows together.
Visual Tip: Randomize light/dark placement for maximum movement. Avoid symmetrical layouts.
Add 2.5″ Borders
- Sew 5 WOF strips together with diagonal seams for continuity.
- Cut side borders: 2.5″ x 48.5″
- Cut top/bottom borders: 2.5″ x 52.5″
- Attach in order: sides, then top/bottom.
Quilt as desired and bind for a polished finish.
Make the Bite Size Appliqué Wall Hanging
Layer Templates for Texture
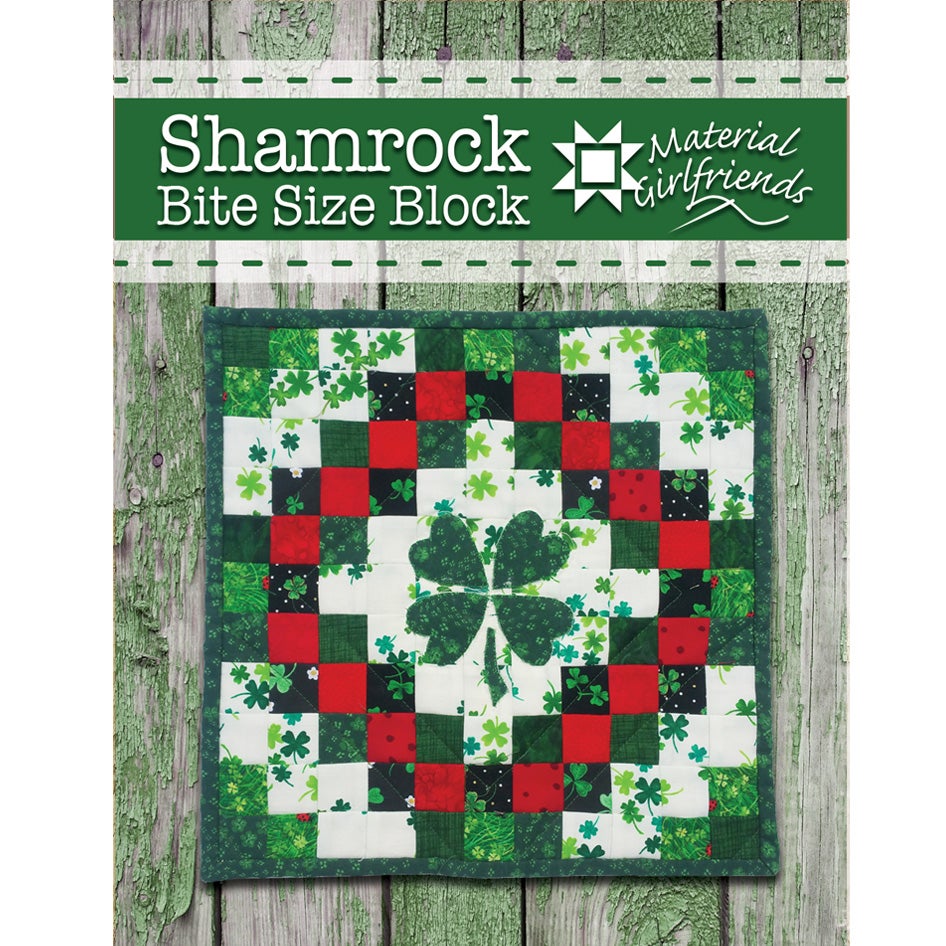
This modern design by Material Girlfriends Patterns combines patchwork with appliqué techniques for a clean, graphic look.
Finished Size: 18″ x 22″
Skill Level: Beginner to Intermediate
Best For: Wall art, baby quilts, seasonal decor
Materials:
– 1/2 yard green fabric
– 1/4 yard white or cream (stems and outlines)
– Printable templates (1.5″ and 2″ shamrock shapes)
– Stabilizer (optional, for crisp edges)
Prepare and Appliqué Shamrocks
- Print and cut templates.
- Trace onto green fabric; cut 16 shamrock shapes.
- Use a stabilizer if fabric frays easily.
- Place shamrocks on background fabric in a 4×4 grid.
- Pin or glue in place.
Stitch with Layered Detail
- Use a straight or blanket stitch to secure edges.
- Add a thin white stem from base to center.
- For dimension, stitch a second row inside the edge.
Pro Tip: Press seams open to reduce bulk, especially where stems overlap.
Finish as a Mini Quilt
- Layer with batting and backing.
- Quilt around each shamrock for definition.
- Bind with 1/4 yard fabric.
- Hang with a sleeve or ribbon.
Color Twist: Try navy with gold or teal with coral for a non-traditional feel.
Compare Top Shamrock Patterns

Quick Reference Chart
| Pattern | Size | Technique | Time | Best For |
|---|---|---|---|---|
| Lucky Shamrock | 18.5″ x 46.5″ | Patchwork | 2 to 3 hrs | Table runners, scrap use |
| Shamrock Shake | 52″ sq | Strip Piecing | 4 to 6 hrs | Baby quilts, visual impact |
| Bite Size Quilt | 18″ x 22″ | Appliqué | 3 to 5 hrs | Wall hangings, modern look |
| Lynn Woll Block | 6.5″ | Patchwork | 30 min | Beginners, multi-use blocks |
| Trellis & Thyme PDF | 6″ or 12″ | Patchwork | 1 to 2 hrs | Custom scaling, personal projects |
All patterns use 1/4″ seam allowances unless specified.
Avoid Common Mistakes
Misaligned Seams and Off-Center Stems
- Problem: Stem drifts to one side during trimming.
- Fix: Use the 3.25″ ruler mark to find the center before squaring up the block.
Uneven Strip Widths
- Problem: Strip units don’t measure 6.5″, causing misalignment.
- Fix: Trim selvedges and verify width after sewing each set.
Dull Visual Impact
- Problem: Quilt looks flat despite green variety.
- Fix: Focus on value placement by mixing light, medium, and dark greens intentionally.
Bulk at Seam Intersections
- Problem: Thick seams pucker during quilting.
- Fix: Press seams open, especially in appliqué and multi-seam blocks.
Maximize Scraps and Save Time
Stash-Busting Tips
- Raid your green scrap bin since any shade works.
- Use fat quarters, jelly roll strips, or even old clothing.
- For the Lucky Shamrock pattern, more print variety creates better visual pop.
Speed-Sewing Strategies
- Chain-piece small units.
- Pre-cut all pieces before sewing.
- Use a walking foot for consistent feed on strips and appliqué.
Multi-Use Block Ideas
Turn one 6.5″ shamrock block into:
– Mug rug: Add backing and binding.
– Pillow: Combine 4 blocks with sashing.
– Lap quilt: Pair with Irish Chain blocks.
– Ornament: Miniaturize and add a hanger.
Where to Find Shamrock Quilt Patterns
Free vs. Paid Options
- Free Downloads:
- Lucky Shamrock (Fig Tree Quilts/Moda): No payment needed; register to download.
- Lynn Woll Tutorial: Text-and-photo guide online (no PDF).
- Paid PDFs:
- Shamrock Bite Size Quilt ($8 to $12): Available via pattern retailers.
- Trellis & Thyme Block (Etsy): 6″ and 12″ versions with border bonus.
Kits and Pre-Cuts
- Shabby Fabrics offers a Patchwork Shamrock Table Runner Kit.
- Jelly & Jam fabric collections work well for Lucky Shamrock projects.
Frequently Asked Questions About Shamrock Quilt Patterns
What is the easiest shamrock quilt pattern for beginners?
The Lynn Woll patchwork block is the easiest option. It uses simple square-in-a-corner techniques, requires no PDF download, and finishes one 6.5″ block in about 30 minutes. It’s perfect for learning basic piecing skills.
How much fabric do I need for a shamrock quilt?
Fabric needs vary by pattern. The Bite Size Quilt requires 1/2 yard of green and 1/4 yard of white. The Lucky Shamrock table runner uses 32 rectangles and 21 cornerstone squares from your scrap stash. The Shamrock Shake needs 6+ green fabrics with 11 strips cut from each.
Can I make a shamrock quilt without buying a pattern?
Yes. The Lynn Woll tutorial is free and text-based with photos, so no PDF download is required. It walks you through each step of creating a single 6.5″ patchwork block using basic cutting and sewing techniques.
What is the Shamrock Shake quilt?
The Shamrock Shake is a split-rail strip-pieced quilt that uses light-to-dark green strips to create a dynamic, earthquake-like visual effect. It finishes at approximately 52″ square and can be completed in one afternoon, making it ideal for baby quilts or charity projects.
How do I keep the stem centered on a patchwork shamrock block?
Use the 3.25″ mark on your quilter’s ruler. Place it at the center of the stem unit, then trim all four sides to maintain symmetry. This prevents the stem from drifting off-center during the squaring process.
Are shamrock quilt patterns good for using up fabric scraps?
Absolutely. The Lucky Shamrock runner and Shamrock Shake are both excellent stash busters. The Lucky Shamrock specifically encourages using a wide variety of green prints since more variety creates better visual interest in the finished project.
Key Takeaways for Your Shamrock Quilt Pattern Project
A shamrock quilt pattern offers something for every skill level and timeline. Beginners can start with the 30-minute Lynn Woll block, while experienced quilters can tackle the 52″ Shamrock Shake in a single afternoon. The Lucky Shamrock runner is ideal for stash busting, and the Bite Size Quilt delivers modern wall art with appliqué texture.
The most important success factors are value placement for visual depth, precise seam allowances, and centering techniques for symmetrical blocks. Choose your pattern based on your time, fabric supply, and desired aesthetic, then gather materials and start cutting. Your luckiest quilt is just a few seams away.