
You’ve spent weeks on your crochet blanket, counting stitches, choosing colors, working row after row, only to find it won’t lie flat. Edges curl up like a taco. Sides flare like a ruffled skirt. Corners slant. It’s frustrating, but a crocheted blanket not flat is a common issue, not a craft-ending disaster.
The good news is most curling, ruffling, and warping can be fixed or even prevented. Whether your blanket is mid-project or complete, the solution lies in understanding tension, stitch counts, hook size, and structure. In this guide, you’ll learn how to diagnose what’s going wrong, apply quick fixes, and use pro techniques to ensure every future blanket lies perfectly flat.
Diagnose the Curl: What’s Causing the Problem?
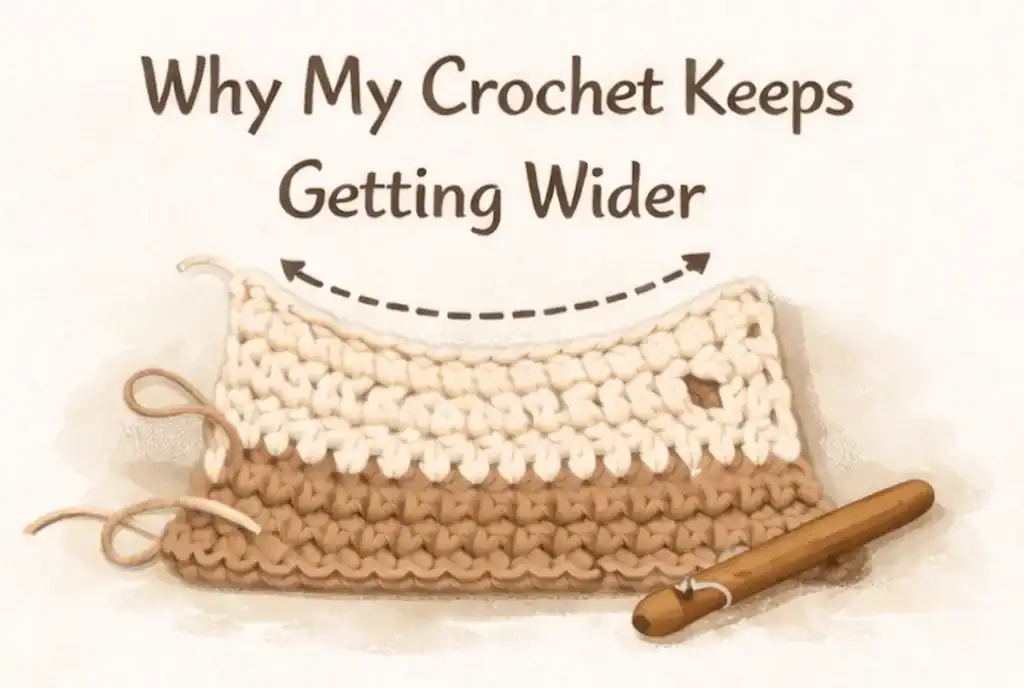
Before fixing a crocheted blanket not flat, you need to identify the root cause. Five main factors create distortion, and they often work together.
Tension Changes Over Time
Tight or loose tension warps fabric, even with correct stitch counts. Tension isn’t just skill; it’s physical and emotional. Stress, fatigue, or excitement can tighten your grip, while relaxation may loosen it. Over a large blanket, these shifts compound.
Tight tension pulls fabric inward, causing curling edges. Loose tension spreads fabric out, creating ruffling or flaring. Progressive tightening, common as you get into the groove, leads to narrowing of the blanket.
One crocheter reported their blanket shrank from 37 inches to 31 inches over four months, not from miscounting, but from tightening stitches due to stress and hand fatigue.
Pro Tip: Treat tension like driving. Tense hands create tight stitches. Take breaks every 15 minutes. Stretch your hands. Check your grip regularly.
Stitch Count Errors Add Up
One missed or extra stitch per row may seem minor. But over 100 rows, that’s a 100-stitch discrepancy, enough to turn a rectangle into a trapezoid.
Common mistakes include skipping the first or last stitch due to confusion about the turning chain, working into the turning chain incorrectly and adding an extra stitch, and miscounting at row ends, especially when distracted.
Even if you think you’re counting, inconsistent turning chain use can silently alter your stitch count.
Turning Chain Misuse Distorts Edges
The turning chain lifts your work to the next row, but how you treat it determines edge stability. For single crochet, the chain does not count as a stitch, so the first SC goes into the first stitch after the chain. For double crochet, the chain often counts as a stitch, so the first DC goes into the second stitch from the hook.
Mistake: Skipping the last stitch when the chain counts loses one stitch per row and causes tapering. Mistake: Working into the chain when it doesn’t count adds one stitch per row and causes flaring.
Always turn your work and look at the chain to confirm where to place the first and last stitch.
Hook Size Too Small or Mismatched
A hook that’s too small creates dense, stiff fabric that curls at the edges. This is especially common with single crochet, which is naturally tight.
Hook too small leads to tight fabric that curls inward. Hook too large creates loose fabric that ruffles or sags. Foundation chain too tight pulls the starting edge and causes puckering.
Fix: Use a hook 1 to 2 sizes larger for the foundation chain only. Switch back to your regular hook for Row 2.
Yarn and Fiber Affect Drape
Not all yarns behave the same. Your choice impacts how flat your blanket lies.
Acrylic is less responsive to blocking unless steamed. Wool blocks beautifully and slight felting stabilizes stitches. Cotton is heavy and inelastic, which can stretch or sag. Textured yarns like boucle and roving hide stitch definition, making it harder to keep tension even. Slippery yarns like silk blends are hard to control grip, leading to inconsistent tension. Dye lot changes can cause subtle thickness shifts, creating rippling at joins.
Best for beginners: Choose smooth, medium-weight acrylic or wool blend in a solid color.
Stop the Curl: Immediate Fixes Mid-Project
Catching distortion early saves hours of frogging. Here’s how to correct it before it’s too late.
Check Every Few Rows
Lay your blanket flat every 10 to 12 rows. Look for curling at edges, narrowing or widening, and slanting corners.
If you spot curling, examine the direction. Inward curl means your tension is too tight. Try loosening your grip or switching to a larger hook. Outward ruffle means stitches are too loose or you’re adding extras. Check your turning chain use.
Pro Tip: Gently tug the blanket diagonally every few rows. This helps relax early tension and can reduce curling as you go.
Count Stitches Every Single Row
Don’t assume you’re on track. Count at the end of every row.
Use stitch markers every 25 or 50 stitches to catch errors early. Place a marker at the first and last stitch of each row to avoid skipping.
If you’re off by one stitch, fix it immediately. Don’t let it go.
Use a Larger Hook for Foundation Chain
This one trick prevents 90% of starting-edge curl.
Make your foundation chain with a hook 1 to 2 sizes larger. Switch to your regular hook for Row 1. The looser chain gives the base more give, matching the drape of the body.
Example: If using a 5.0mm hook for double crochet, use a 6.0mm or 6.5mm for the chain.
Switch to Foundation Stitches
Replace the foundation chain with foundation single crochet or foundation double crochet.
Benefits include more elasticity than chain, matching row height and tension, and eliminating the tight chain problem.
Learning curve: Slightly harder than chaining, but worth it for large projects.
Fix It Now: Solutions for Finished Blankets
Even if your blanket is complete, all is not lost. These fixes can rescue a warped project.
Add a Border: The Number One Fix
A border is the most effective way to flatten a crocheted blanket not flat. It stabilizes edges, squares corners, and hides minor imperfections.
Step-by-Step: Single Crochet Border
Join yarn in any corner with a slip stitch. Work SC evenly around all sides. For top and bottom edges, work 1 SC per stitch. For sides, work approximately 3 SC per 2 rows to avoid puckering. For corners, work SC, chain 1, SC in the same stitch to create a clean 90-degree turn. Join to first SC with a slip stitch.
Tip: Use a contrasting color to make the border pop and add visual weight that pulls edges flat.
Adjust for Severe Curling
Curling inward? Use HDC or DC in the first border round to push the edge outward. Ruffling? Use SC to tighten and stabilize. Still uneven? Add a second or third round, switching between SC and DC to balance tension.
Pro Move: One crocheter fixed chronic curling with a scallop border, functional and decorative.
Block It: Reshape with Steam or Water
Blocking relaxes fibers and reshapes fabric. Results depend on yarn type.
Wet Blocking: Best for Wool and Cotton
Soak blanket in lukewarm water for 15 to 30 minutes. Gently press out water, don’t wring. Lay flat on a towel or blocking board. Pin edges straight and square with rust-proof pins. Let dry completely, which takes 12 to 24 hours.
Steam Blocking: Best for Acrylic and Blends
Lay blanket on a heat-safe surface. Hold a steamer or steam iron 1 to 2 inches above fabric. Do not touch the fabric directly. Steam evenly, focusing on curled areas. Reshape by hand and pin if needed. Let cool and dry completely.
Warning: Never wet-block yarns that can’t handle water. Always test on a swatch first.
Limitation: Blocking won’t fix a blanket that’s 6 inches narrower. That’s a tension or stitch count issue.
Wash and Dry for Natural Relaxation
Sometimes, washing alone can relax tight stitches.
Hand wash in mild soap and lukewarm water. Press out water, lay flat to dry. Some report slight texture changes and less softness after washing.
Not ideal for gifts if softness is a priority.
When to Frog: Unraveling as a Last Resort
Frogging is emotional, but sometimes it’s the only way to fix a severely distorted blanket.
When to Consider Frogging
Blanket is triangular or drastically tapered. Tension is too tight to block out. You’re using expensive or special yarn worth saving.
Frogging Options
Frog the entire blanket and restart with better tension. Frog back to the last even row and rework from there. Repurpose frogged yarn into smaller items like scarves or squares.
Pro Tip: Reuse frogged yarn only if it’s not stretched or frayed. Wool tends to bounce back. Acrylic may kink.
Prevent Flatness Issues: Pro Tips for Next Time
Don’t repeat the same mistake. Build habits that guarantee flat results.
Make a Gauge Swatch and Block It
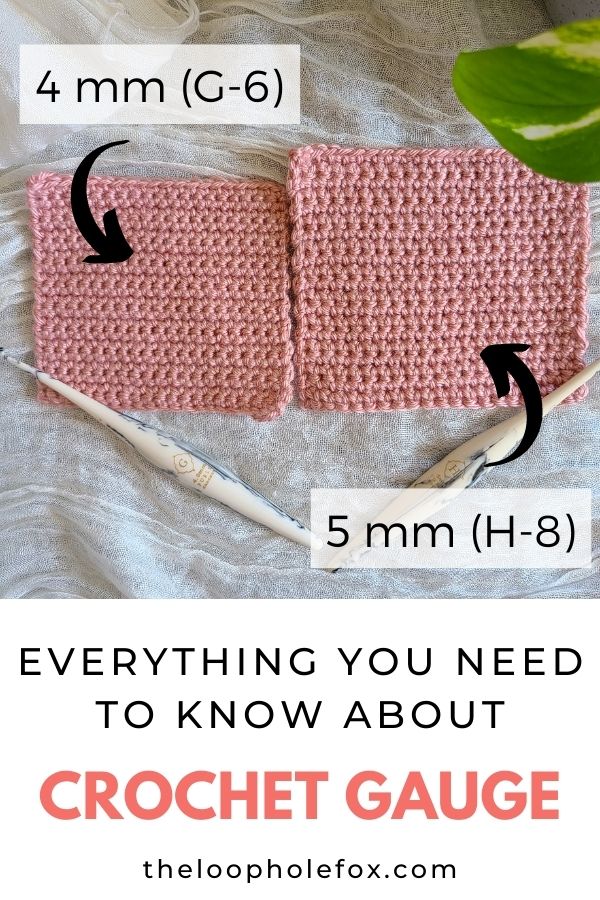
Crochet a 6-inch by 6-inch swatch in your pattern stitch. Block it the same way you’ll block the blanket. Measure to see if it shrank or curled. Adjust hook size accordingly.
Golden Rule: If the swatch doesn’t lie flat, the blanket won’t either.
Work in Motifs Instead of One Piece
Crochet granny squares, hexagons, or panels separately.
Benefits include each piece can be blocked individually before joining, easier to maintain consistent tension, and mistakes are isolated rather than project-wide.
Join-as-you-go methods reduce finishing work and keep edges aligned.
Use Stitch Markers Religiously
Place a marker at the start and end of every row. Use color-coded markers for pattern repeats. This helps with turning chain placement and stitch counts.
Take Care of Your Hands
Tension is physical. Prevent fatigue with ergonomic hooks, hand stretches every 20 to 30 minutes, and good posture.
Try switching hands if you’re ambidextrous. It can reset muscle memory.
Plan for a Border from the Start
Design your blanket with 1 to 3 border rounds built into the pattern.
Even a plain SC border adds stability. Use contrasting color for visual balance. This helps mask minor imperfections.
Creative Fixes: Turn Flaws into Features
Not every fix is technical. Sometimes, imperfections become design elements.
Add Appliqués or Embellishments
Crochet flowers, leaves, or stars to cover problem corners. Use freeform crochet to fill gaps. This turns mistakes into art.
Attach a Fabric Backing
Cut cotton or fleece to size. Sew or crochet it to the back. This adds weight, stability, and softness.
Great for lapghans or baby blankets.
Repurpose Into a Smaller Item
Cut and seam into a pillow cover. Trim edges and turn into a lapghan. Slice into strips for a rag rug.
One crocheter turned a misshapen blanket into a quilted wall hanging. Now it’s their favorite piece.
Key Takeaways for Fixing Your Crochet Blanket Not Flat
A crochet blanket not flat isn’t a failure. It’s feedback. The fabric is telling you about your tension, technique, and materials.
Perfect flatness comes from balance. You need even tension, accurate stitch counts, correct turning chain use, and proper hook and yarn choices.
Most issues can be fixed with a border or block. But the real win is learning how to prevent them next time.
With these strategies, your next blanket won’t just lie flat. It’ll be a point of pride. And if it curls? You’ll know exactly what to do.
Frequently Asked Questions About Crochet Blanket Not Flat
Why does my crochet blanket curl at the edges?
Curling at edges is usually caused by tight tension pulling fabric inward. It can also result from a foundation chain that’s too tight or a hook size that’s too small for your yarn. Check these factors first when diagnosing edge curl.
Can I fix a crochet blanket that’s already finished?
Yes. Adding a border is the most effective fix for completed blankets. A single crochet border stabilizes edges and squares corners. Blocking can also help reshape the fabric, depending on yarn type.
Does blocking work for all yarn types?
Blocking works best for natural fibers like wool. Acrylic responds to steam blocking but not wet blocking. Always test on a swatch first and check your yarn care label before blocking.
How do I prevent my next blanket from curling?
Use a larger hook for the foundation chain, count stitches every row, take breaks to prevent tension drift, and make a gauge swatch before starting. Planning a border from the beginning also helps.
When should I frog my crochet blanket?
Frog if your blanket is triangular or severely tapered, if tension is too tight to block out, or if you’re using expensive yarn worth saving. Sometimes starting fresh gives better results than trying to fix major distortion.
What’s the best stitch for a flat crochet blanket?
Openwork stitches like shells, fans, and lace patterns tend to drape naturally and resist curling. Dense stitches like single crochet are more prone to curling but can be stabilized with a border.

