
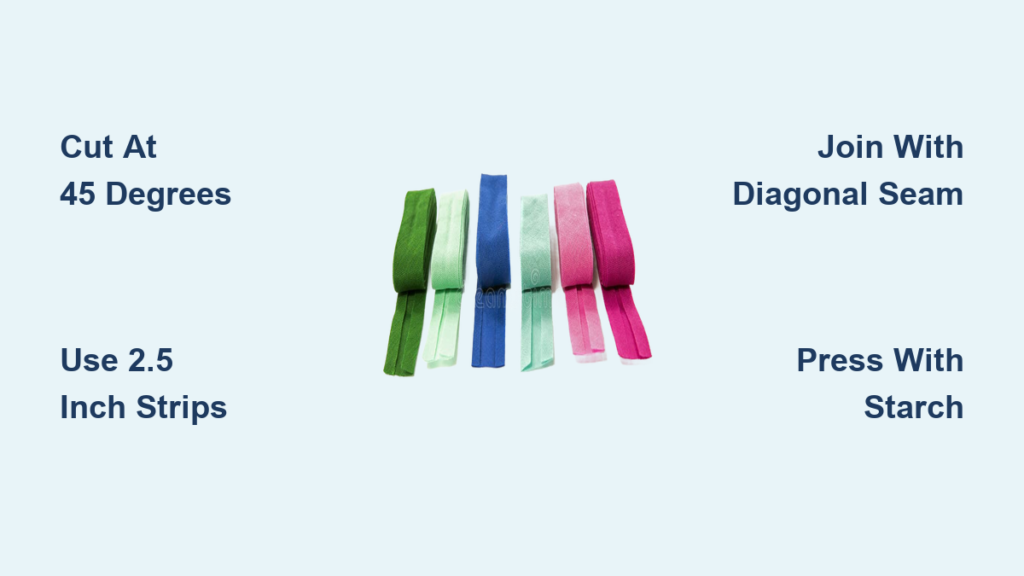
A wavy, puckered edge can ruin an otherwise beautiful quilt. Bias binding solves this problem by using strips cut at a 45-degree angle to the fabric grain, giving the binding natural stretch to hug curves and miter corners cleanly. This technique also distributes wear across multiple threads, making your quilt edge stronger and longer-lasting than straight-grain binding.
In this guide, you’ll learn how to make bias binding from start to finish. We cover how to calculate yardage, which tools work best, and four proven cutting methods including the efficient rotary continuous technique. You’ll also discover how to fold, press, and store your binding for flawless application. By the end, you’ll have everything needed to create professional-quality binding that enhances both the look and longevity of your quilt.
Calculate Binding Length and Fabric Requirements

Before cutting a single strip, you need to know exactly how much binding your quilt requires. Accurate math prevents mid-project shortages and minimizes fabric waste.
Measure Your Quilt Perimeter
Start by adding all four sides of your quilt together. For a 60″ x 74″ quilt, the calculation looks like this:
Formula:
Top + Bottom + Left Side + Right Side = Perimeter
Example:
$60 + 60 + 74 + 74 = 268″$
Now add 10 to 15 extra inches to account for mitering corners, joining ends, and handling errors. Your final target length becomes 280″.
Choose the Right Strip Width
Strip width depends on your seam allowance and batting thickness. Use this quick-reference guide to pick the right size:
| Seam Allowance | Cut Strip Width | Best For |
|---|---|---|
| ¼” | 2″ to 2¼” | Low-loft batting, cotton quilts |
| ⅜” | 2¼” to 2½” | Medium loft, flannel layers |
| ½” | 2½” to 3¼” | High-loft batting, thick fabrics |
Pro Tip: Beginners should use 2½” strips with a ¼” seam for easier handling. A wider strip gives more margin for error when wrapping the quilt edge.
Cut Fabric to Size
Once you know your required length and width, it’s time to prepare your fabric. Two main approaches work well: the square method for continuous strips and the off-the-bolt method for yardage.
Cut a Fabric Square for the Spiral Method
This approach minimizes waste and creates one long continuous strip, making it ideal for large quilts.
Step 1: Calculate Square Size
Use this formula:
$\sqrt{\text{Total Inches} \times \text{Strip Width}}$, then round up and add 3″.
Example:
$\sqrt{280 \times 2.5} = \sqrt{700} \approx 26.45 \rightarrow 27″$
Add 3″ for seams: 30″ x 30″ square
Cut a perfect 30″ square after removing selvages.
Cut Strips Off the Bolt
This standard method works best when using yardage or rectangular fabric scraps.
- Divide total binding length by usable fabric width (typically 42″):
$280″ \div 42″ = 6.66 \rightarrow \text{Round up to 7 strips}$ - Multiply by strip width:
$7 \times 2.5″ = 17.5″$
You’ll need 17½” (about ½ yard) of 42″-wide fabric.
Prepare Your Fabric for Cutting
Proper preparation ensures accurate bias strips with consistent stretch and no distortion.
Remove Selvages Completely
Trim about 1″ off each selvage edge. Selvages are tightly woven and lack the stretch of true bias. Leaving them in causes rippling and binding failure.
Square Up the Corners
Use a large quilting ruler to align with the grain lines. Trim edges to form perfect 90-degree corners. This step ensures your first 45-degree cut is accurate, which is critical for consistent bias strips.
Cut Bias Strips at 45 Degrees

The 45-degree angle gives bias binding its signature flexibility. A rotary cutter, mat, and ruler deliver the best precision.
Make the First Diagonal Cut
Align the 45-degree line on your ruler with a straight edge of the fabric. Cut from corner to corner to create two large triangles.
Mark and Cut Parallel Strips
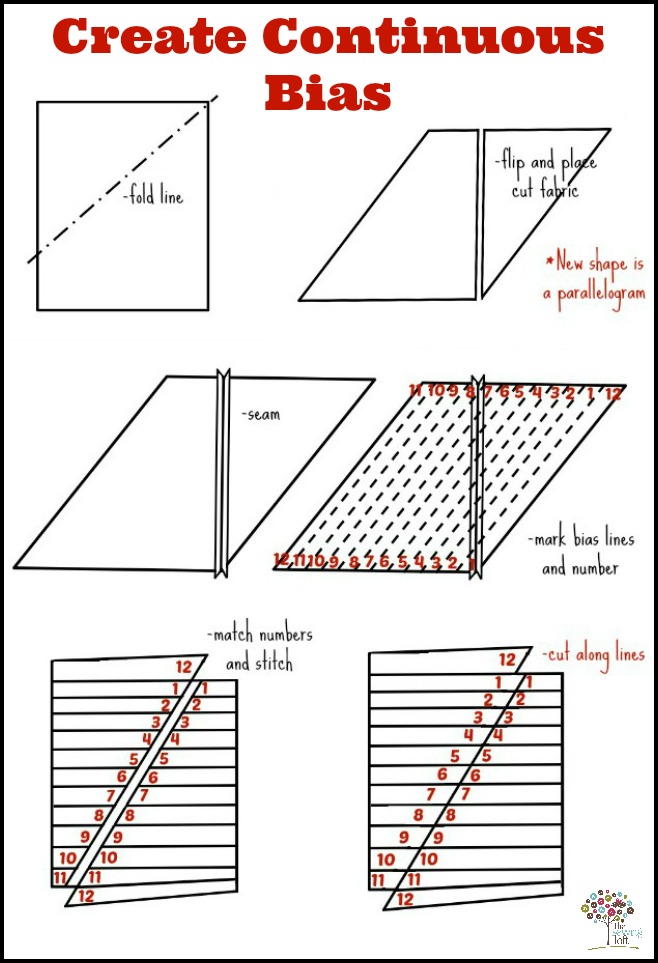
Flip one triangle and place it on top of the other, aligning straight edges. Use the ruler to mark lines parallel to the long bias edge at your chosen width (every 2½” works well). Cut along these lines to produce long, uniform bias strips.
Join Strips Using Diagonal Seams
For traditional methods, you’ll need to sew strips end-to-end to reach the required length.
Align Ends at Right Angles
Place two strip ends right sides together, forming a 90-degree angle. Offset them so the corners create a small square at the intersection.
Sew and Trim Seams
Sew diagonally from one outer corner to the opposite. This creates a strong, flat seam. Trim the excess “dog ears” (triangular fabric bits) to reduce bulk, then press seams open.
Create Continuous Bias Binding (Spiral Method)
Skip dozens of diagonal seams with this efficient technique that yields one long, unbroken strip.
Sew Triangles into a Parallelogram
Take your two large bias-cut triangles. Place them right sides together, aligning the short straight edges. Sew with a ¼” seam and press open. You now have a parallelogram.
Mark Parallel Lines
On the wrong side, draw lines parallel to the long bias edges at your strip width (every 2½”).
Form and Sew the Tube
Bring the two long straight edges together to form a loop. Crucial step: Offset the edges so each line on one side aligns with the next line on the opposite side (shifted by one strip width). Pin carefully, then sew with a ¼” seam. Press open.
Cut the Spiral
Start cutting along one marked line. Continue in a continuous spiral around the tube. The offset seam ensures the cut flows seamlessly from one ring to the next.
Use the Rotary Continuous Method (Hula Skirt)
This hybrid method combines precision with efficiency, making it ideal for modern quilters who want speed without sacrificing accuracy.
Make Partial Cuts First
After forming the parallelogram, mark only the first few inches of bias edge at your strip width. Cut the first strip width deep, but stop ½” short of the opposite edge. Repeat down the length, creating a stair-step of partial cuts.
Offset and Sew the Hula Skirt Seam
Fold the fabric so the bottom edge meets the top, offset by one strip width. Pin matching marks, then sew with a ¼” seam. This creates the continuous loop without blind spiral cutting.
Cut the Final Strip
Open the seam slightly at the join. Now cut continuously along the marked lines. The offset ensures the cut transitions smoothly to the next layer.
Fold and Press the Binding
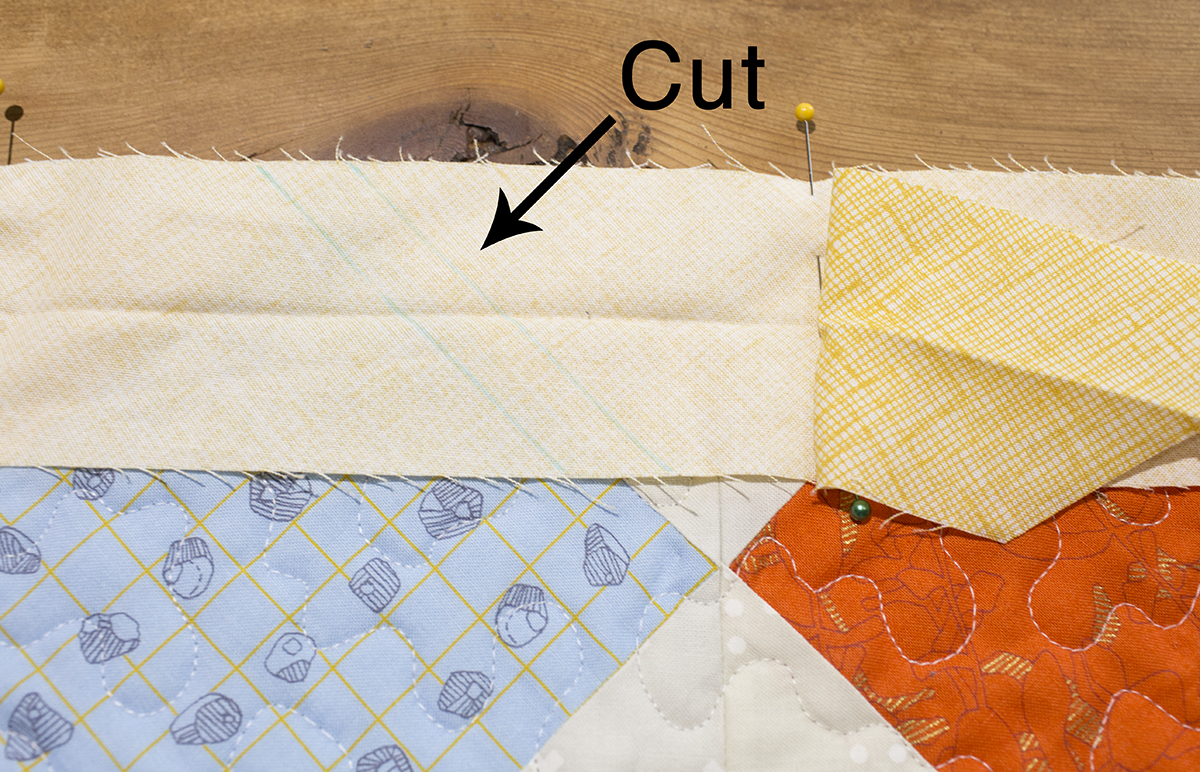
A crisp fold makes binding easier to sew and ensures a clean finish on your quilt.
Fold in Half Lengthwise
Lay the strip wrong side up. Fold it in half lengthwise with raw edges together. Use a hot iron to press the entire length firmly.
Apply Starch for Stability
Spray the binding with a starch alternative like Best Press. This prevents stretching during handling and sewing. Re-press the strip so it feels firm and holds its fold.
Use a Bias Tape Maker for Uniform Folds
For perfectly uniform folds, a bias tape maker saves time and ensures consistency.
Feed Strip Through the Tool
Insert the raw end of the strip into the wide end of the tool. Use a pin to guide it through if needed.
Iron as You Pull
Hold the tool and pull the fabric slowly through while running a hot iron over the emerging tape. The tool folds the edges inward automatically. For double-fold binding, fold the resulting single-fold tape in half and press again.
Store Binding Properly
Keep your long strip tangle-free and ready to use whenever you need it.
Wind on a Cardboard Bobbin
Cut a rectangle of cardboard (about 4″ x 6″). Wrap the binding around it loosely.
Secure with a Pin
Tuck the end under or use a safety pin to hold it in place. This prevents twisting and makes it easy to unroll during sewing.
Avoid Common Bias Binding Mistakes
Even experienced quilters make errors. Here’s how to dodge the most frequent pitfalls.
Prevent Stretching
Bias fabric stretches easily. Never pull on the ends while cutting or sewing. Handle gently. If a section stretches, steam it lightly and let it cool under tension to relax it back into shape.
Never Include Selvages
Selvages don’t stretch like bias fabric. Including them creates weak spots and distortion. Always trim them off before cutting.
Cut Accurate 45-Degree Lines
An incorrect angle reduces stretch and causes binding to pucker. Use the 45-degree line on your quilting ruler and double-check alignment before each cut.
Trim Dog Ears
After joining strips, always trim the excess fabric at the seam. Dog ears add bulk and can show through on the quilt front.
Frequently Asked Questions About Bias Binding for Quilts
What Is the Difference Between Bias Binding and Straight-Grain Binding?
Bias binding is cut at a 45-degree angle to the fabric grain, giving it natural stretch and flexibility. Straight-grain binding runs parallel to the fabric’s lengthwise or crosswise threads. Bias binding works better for curved edges, scalloped borders, and irregular shapes because it hugs contours without puckering.
How Much Extra Binding Should I Add for Corners?
Add 10 to 15 extra inches to your total perimeter calculation. This buffer accounts for mitering corners, joining the two ends of the binding, and handling errors during sewing. Skipping this step often results in running short at the final join.
Can I Make Bias Binding Without a Rotary Cutter?
Yes, though a rotary cutter delivers the cleanest, most accurate results. You can use sharp fabric scissors instead, especially for spiral cutting. A large acrylic quilting ruler with a visible 45-degree line is essential regardless of which cutting tool you choose.
What Strip Width Should Beginners Use?
Beginners should start with 2½” strips paired with a ¼” seam allowance. This wider strip gives more margin for error when wrapping the quilt edge and folding the binding over the back. Once you gain confidence, you can experiment with narrower widths.
Why Does My Bias Binding Stretch Out of Shape?
Bias fabric naturally stretches more than straight-grain fabric. Avoid pulling on the ends while cutting, marking, or sewing. Applying starch alternative like Best Press after folding adds body and stability. If strips distort, light steaming can often relax them back into shape.
How Do I Join Bias Binding Ends Together?
Leave about 10″ of unsewn binding when you reach the starting point. Lay both ends flat, fold each end back about 2½”, and press to create a crease. Open the folds, overlap the ends at a 90-degree angle, sew diagonally, trim the seam, and finish pressing. This creates a clean, flat join.
Key Takeaways for Making Bias Binding

Learning how to make bias binding for a quilt transforms your finishing work from amateur to professional. Start by calculating your perimeter accurately and adding a 10 to 15 inch buffer for corners and joins. Choose strip width based on your seam allowance and batting thickness, with 2½” strips being a beginner-friendly choice.
The continuous methods save significant time and fabric compared to traditional strip cutting. The spiral method creates one unbroken strip, while the rotary continuous method adds precision for modern quilters. Whichever technique you choose, remember to remove selvages, cut accurate 45-degree angles, and starch your finished binding for stability.
Your next step is to gather your tools, calculate your fabric needs, and try the method that best matches your project size. With practice, you’ll create bias binding that gives every quilt a crisp, durable, and beautiful edge.

